How to Finish Tile Edges With Caulk: Seamless Tips
To finish tile edges with caulk, first, clean the area thoroughly and ensure it’s dry. Next, apply a bead of caulk along the edge and smooth it with a caulk tool or your finger.
Finishing tile edges with caulk enhances both aesthetics and functionality. It prevents water from seeping behind tiles, which can lead to mold or damage. Choosing the right caulk is crucial; select a type that suits your tile material and the environment, such as silicone for wet areas.
Proper preparation ensures a clean finish, so remove any old grout or debris before application. Smoothly applied caulk not only seals gaps but also gives your tiled area a polished look. This process is essential for maintaining the durability and beauty of your tiled surfaces.
Introduction To Tile Edging
Tile edging is a crucial step in any tiling project. It enhances the appearance of your tiles and protects their edges. Using caulk to finish tile edges provides a clean look and prevents moisture damage. This guide will help you understand why proper finishing matters and how caulk serves as an excellent solution.
The Importance Of Proper Finishing
Proper finishing of tile edges is vital for several reasons:
- Protects tile edges from chipping and cracking.
- Prevents moisture from seeping behind tiles.
- Improves the aesthetic appeal of the tiled area.
- Enhances durability and longevity of the installation.
Neglecting tile edges can lead to costly repairs. A well-finished edge creates a professional look. It adds value to your home.
Caulk As A Finishing Solution
Caulk is an ideal material for finishing tile edges. It is flexible and easy to apply. Here are some benefits of using caulk:
| Benefit | Description |
|---|---|
| Water Resistant | Prevents water from penetrating behind tiles. |
| Flexible | Allows for movement without cracking. |
| Variety | Available in different colors to match tiles. |
| Easy to Clean | Simple to wipe down and maintain. |
Using caulk simplifies the finishing process. It provides a seamless transition between tiles and walls. Choose a caulk color that complements your tiles for the best effect.

Selecting The Right Caulk
Choosing the right caulk is crucial for finishing tile edges. The correct type ensures a long-lasting seal and enhances appearance. Two main types of caulk are common: silicone and acrylic. Each has unique properties, making them suitable for different applications.
Silicone Vs. Acrylic Caulk
Understanding the differences between silicone and acrylic caulk is important. Here’s a quick comparison:
| Feature | Silicone Caulk | Acrylic Caulk |
|---|---|---|
| Flexibility | Highly flexible | Less flexible |
| Water Resistance | Excellent | Good |
| Paintable | No | Yes |
| Durability | Very durable | Less durable |
| Best For | Wet areas | Dry areas |
Choose silicone caulk for areas exposed to moisture. It works well in kitchens and bathrooms. Acrylic caulk is better for indoor, dry spaces. It accepts paint easily.
Color Matching Your Caulk
Color matching caulk to your tiles is essential. A well-matched color enhances the overall look. Here are some tips for selecting the right shade:
- Bring a tile sample to the store.
- Use a color matching tool if available.
- Consider the grout color as well.
- Test small amounts on a hidden area.
Choose a caulk that blends seamlessly with your tiles. A perfect match hides edges and creates a clean finish. Pay attention to the tile color and texture for the best results.
Preparation Before Caulking
Preparing before caulking is essential for a clean finish. Proper preparation ensures the caulk adheres well. Follow these steps to get started.
Cleaning The Tile Surface
Clean the tile surface thoroughly. Dirt and grime can prevent the caulk from sticking. Use these steps to clean effectively:
- Gather your cleaning supplies: soap, water, and a scrub brush.
- Mix soap and water in a bucket.
- Scrub the tile edges gently. Focus on corners and joints.
- Rinse with clean water.
- Dry the surface with a lint-free cloth.
Ensure the surface is completely dry before proceeding.
Tape For Precision
Using tape helps achieve clean lines. It prevents caulk from spreading onto unwanted areas. Here’s how to tape effectively:
- Choose painter’s tape for easy removal.
- Apply tape along the edges of the tile. Leave a small gap for caulk.
- Press down the tape firmly to avoid leaks.
This simple step will enhance your project’s appearance. It makes cleanup easier.
Caulking Techniques For Tile Edges
Finishing tile edges with caulk can enhance any project. Proper techniques ensure a clean and professional look. Master these methods for perfect results.
Applying Caulk Evenly
Even application of caulk is crucial for a neat edge. Follow these steps:
- Gather your tools: Use a caulking gun and quality caulk.
- Cut the tip: Make a small, angled cut. This controls the flow.
- Load the caulk gun: Insert the tube and secure it.
- Start at one end: Hold the gun at a 45-degree angle.
- Apply consistent pressure: Move the gun along the edge.
- Fill gaps: Ensure no spaces are left unfilled.
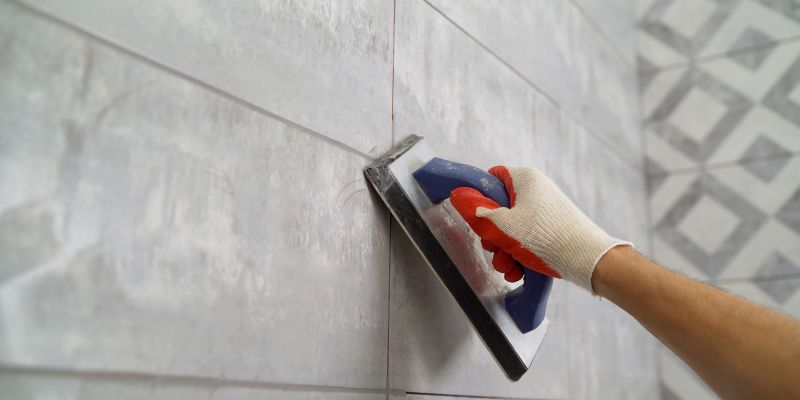
Smoothing Caulk For A Professional Finish
Smoothing the caulk creates a polished appearance. Use these methods:
- Wet your finger: Dampen your finger with water.
- Run your finger along the edge: This smooths the caulk.
- Use a caulk smoothing tool: This gives a uniform finish.
- Remove excess caulk: Wipe away any excess with a damp cloth.
For best results, allow the caulk to cure fully. Follow the manufacturer’s instructions for drying time. A well-finished edge enhances the beauty of your tiles.
Addressing Inside Corners
Finishing tile edges with caulk can be tricky. Inside corners often pose unique challenges. Proper techniques ensure a smooth, clean finish. Let’s explore how to tackle these corners effectively.
Inside corners require careful attention. Follow these steps for a neat finish:
- Cut the Caulk Tube: Use a sharp utility knife. Cut at a 45-degree angle.
- Apply Caulk: Start at one corner. Use steady pressure on the caulk gun.
- Angle the Gun: Keep the gun at a slight angle. This helps fill the gap.
- Use a Caulking Tool: Smooth the caulk with a tool. This creates a uniform line.
- Wipe Excess: Use a damp cloth. Clean any extra caulk immediately.
Avoiding Caulk Buildup
Too much caulk can ruin the finish. Follow these tips to avoid buildup:
- Control the Flow: Apply caulk slowly. This prevents excess material.
- Keep a Steady Hand: Maintain even pressure on the gun. This helps with consistency.
- Use a Smaller Nozzle: A smaller nozzle can help control the amount of caulk.
- Check Regularly: Inspect the area as you work. Remove any buildup right away.
Properly addressing inside corners makes a difference. Take your time for the best results.
Working With Outside Corners
Finishing tile edges at outside corners can be tricky. Proper caulking gives a clean look. It also prevents moisture from seeping in. This section guides you through two key aspects: creating sharp lines and sealing gaps efficiently.
Creating Sharp Lines
Sharp lines make your tile edges look professional. Follow these steps to achieve them:
- Clean the Surface: Ensure the area is free of dust and debris.
- Use Painter’s Tape: Apply tape on both sides of the joint.
- Apply Caulk: Use a caulking gun to apply a steady bead.
- Tool the Caulk: Smooth the caulk with a finger or tool.
- Remove Tape: Peel off the tape before the caulk dries.
This method keeps the caulk neat and tidy, enhancing your tile’s appearance.
Sealing Gaps Efficiently
Sealing gaps at corners is essential. Gaps can allow moisture to penetrate. Here are tips for effective sealing:
- Choose the Right Caulk: Use silicone or latex caulk for flexibility.
- Cut the Tip Correctly: Keep the opening small for precision.
- Apply in Sections: Work on one corner at a time for control.
- Check for Gaps: Inspect the area after applying caulk.
- Clean Up Excess: Wipe away any extra caulk immediately.
By following these tips, you can seal gaps effectively. This helps maintain the beauty and durability of your tile work.
Curing And Drying Time
Understanding the curing and drying time of caulk is crucial. Proper curing ensures a strong bond and a neat finish. Each type of caulk has its own drying times. Knowing these helps you plan your project effectively.
Understanding Caulk Drying Phases
Caulk dries in two main phases: skin formation and full cure.
- Skin Formation: This occurs quickly. A thin layer forms on top.
- Full Cure: This takes longer. The caulk hardens completely.
Here’s a quick overview of common caulk types:
| Type of Caulk | Skin Formation Time | Full Cure Time |
|---|---|---|
| Silicone | 30 minutes | 24 hours |
| Acrylic | 15-30 minutes | 1-2 hours |
| Latex | 30 minutes | 24 hours |
Tips To Speed Up The Process
Follow these tips to speed up caulk drying:
- Use a fan: Circulate air in the area.
- Increase temperature: Warmer temperatures help caulk dry faster.
- Choose fast-drying caulk: Look for quick-dry options.
- Minimize humidity: Low humidity speeds up drying.
Always check the manufacturer’s instructions for specific drying times. Rushing may lead to mistakes. Allow adequate time for a flawless finish.
Maintenance And Upkeep
Maintaining caulked tile edges is crucial for long-lasting results. Proper care prevents damage and keeps your tiles looking fresh. Regular inspections and cleanings will help preserve the integrity of your caulk.
Regular Cleaning Practices
Keep your tile edges clean with simple practices. Use gentle cleaners to avoid damaging the caulk. Here are some effective cleaning tips:
- Use a soft cloth or sponge.
- Mix warm water with a mild detergent.
- Wipe down caulked areas weekly.
- Rinse thoroughly with clean water.
Regular cleaning prevents mold and mildew buildup. Check for any discoloration. Clean promptly to maintain appearance.
When To Reapply Caulk
Caulk can wear out over time. Look for signs that indicate it’s time to reapply:
- Cracks or gaps in the caulk.
- Peeling or lifting edges.
- Visible mold or mildew.
- Water leaks around the tiles.
Reapply caulk immediately when you notice these signs. This will protect your tile edges. Always choose a high-quality caulk for best results.
Common Mistakes To Avoid
Finishing tile edges with caulk can be tricky. Many people make common mistakes. Avoid these errors to ensure a neat finish.
Overapplying Caulk
Applying too much caulk can lead to messy results. It may create unsightly blobs that are hard to clean.
- Use a steady hand when applying.
- Focus on a thin, even bead.
- Wipe off excess immediately for a clean edge.
Too much caulk can also trap moisture. This can lead to mold growth. A thin layer allows for proper drying.
Ignoring Manufacturer Instructions
Every caulk product has specific instructions. Ignoring these can lead to poor adhesion and durability.
| Caulk Type | Key Instructions |
|---|---|
| Silicone | Must be applied to clean, dry surfaces. |
| Acrylic | Can be painted over, but needs drying time. |
| Polyurethane | Requires specific temperature conditions. |
Read the label carefully. Follow the instructions for the best results. Ignoring them can ruin your hard work.
Advanced Tips For Flawless Results
Achieving perfect tile edges with caulk requires skill and precision. Use these advanced tips to enhance your finish.
Using Caulk Tools
The right tools can make a big difference. Here are essential tools:
- Caulking Gun: Ensures even application of caulk.
- Caulk Smoothing Tool: Helps create smooth edges.
- Utility Knife: Useful for cutting caulk tubes.
- Masking Tape: Protects surrounding areas from mess.
Follow these steps for effective use:
- Load the caulk into the gun.
- Cut the tip at a 45-degree angle.
- Apply caulk steadily along the joint.
- Use the smoothing tool for a clean finish.
Professional Tricks Of The Trade
Learn tricks that professionals use for flawless results:
| Tip | Description |
|---|---|
| Keep it Wet | Use water to keep the smoothing tool clean. |
| Work in Sections | Do small areas to prevent drying. |
| Remove Excess Caulk | Wipe away extra caulk for a neat finish. |
| Use Painter’s Tape | Apply tape for straight, clean edges. |
These tips will elevate your caulking game. With practice, you’ll achieve professional-looking results every time.
Frequently Asked Questions
How Do I Prepare Tile Edges For Caulking?
Before applying caulk, ensure the tile edges are clean and dry. Remove any dust or debris using a damp cloth. If there’s old caulk, use a caulk remover tool to eliminate it completely. This preparation step is crucial for a smooth and lasting caulk application.
What Type Of Caulk Is Best For Tile Edges?
For tile edges, a flexible, paintable silicone or acrylic caulk is ideal. Silicone caulk is waterproof and mold-resistant, making it perfect for bathrooms and kitchens. Acrylic caulk, on the other hand, is easier to paint over. Choose based on your specific project needs and environment.
Can I Caulk Over Existing Caulk?
It’s generally not recommended to caulk over existing caulk. Doing so may prevent proper adhesion and lead to future peeling. Instead, remove the old caulk completely for the best results. This ensures the new caulk adheres well and provides a clean, professional finish.
How Long Does Caulk Take To Dry?
Most caulks require 24 hours to dry completely. However, drying time can vary based on the type of caulk used. Always check the manufacturer’s instructions for specific drying times. Ensure the area remains undisturbed during this period for optimal results and durability.
Conclusion
Finishing tile edges with caulk enhances both appearance and durability. Proper application prevents moisture damage and gives a clean look. Remember to choose the right caulk for your tiles. With these tips, you’ll achieve professional results. Take pride in your work and enjoy your beautifully finished tiles for years to come.