How to Secure a Glass Table Top on a Wooden Table (Without Cracking It)
A glass table top stays secure on a wooden table with removable rubber bumpers or a flexible silicone bead — not rigid epoxy, which can crack under wood movement. Wood shifts as indoor humidity swings between roughly 40% and 60% RH, and a rigid bond fights that movement until the glass gives way. This guide covers permanent vs. removable attachment methods, the right glass thickness for your table, and how to fix a cracked or sliding top.
Quick Answer
Use clear rubber bumpers or museum wax if you want to remove the glass later — they let the wood move without stressing the glass. Use a flexible silicone bead (never epoxy) only if you want a permanent bond. On a dining table, choose at least 3/8″ tempered glass; for a small coffee table, 1/4″ is enough if the base fully supports the edges.
Choosing Glass for a Wooden Table
Best Glass Table Top Attachment Pick
LINOUPOWER510 Clear Non-Adhesive Rubber Bumper Pads (20-Count, 3mm)
Non-adhesive polyurethane spacers that hold a glass top in place by friction alone — no glue touches the wood or the glass.
- Best for: Anyone who wants to remove or reposition the glass later
- Why we picked it: Zero adhesive residue on wood, and 3mm spacing lets air circulate under the glass
- Main drawback: Not enough grip alone on a table that gets bumped or shifted often
Compare more glass table top attachment options
 Option 1 Quakehold! Museum Wax, Clear & Removable
|
 Option 2 DAP 100% Silicone Adhesive Sealant, Clear
|
 Option 3 Furnigear Self-Adhesive Glass Table Top Bumpers, 3/4″ (36-Pack)
|
As an Amazon Associate we earn from qualifying purchases.
Tempered glass is the safe default for any table top — it resists heat and impact, and it breaks into small, dull pieces instead of sharp shards if it ever fails. Annealed (regular) glass costs less but chips and cracks more easily and shatters into dangerous shards, so it’s a poor choice for a surface you eat or set drinks on. Low-iron glass costs more but removes the faint green tint ordinary glass has along its edges — worth it on light-colored wood where that tint is visible.
| Table Type | Recommended Thickness | Why |
|---|---|---|
| Coffee table (under 36″, solid edge support) | 1/4″ | Base fully supports the glass edges |
| Coffee table (open base or 36″+) | 3/8″ | Extra span needs extra rigidity |
| Dining table (seats up to 6) | 3/8″ | Standard load for daily use |
| Dining table (seats 6+) | 1/2″ minimum | Wider span, heavier daily load |
| Nightstand or side table | 3/16″–1/4″ | Small surface, light use |
| Protective topper over existing wood | 1/4″ (6mm) | Just needs to resist scratches, not carry structural load |
Permanent vs. Removable: Which Attachment Should You Use?
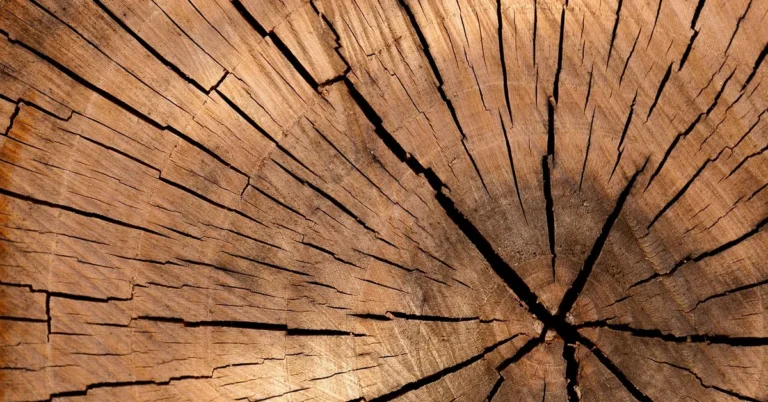
This is the decision that matters most, and most guides skip it. Solid wood absorbs and releases moisture as the seasons change — it swells when humidity climbs and shrinks when the air dries out. Glass doesn’t expand or contract at all. If you glue the glass down rigidly with epoxy or a hard-set adhesive, the wood has nowhere to go: the bond either tears loose or, worse, puts enough uneven pressure on the glass to crack it months later. A removable or flexible attachment lets the wood move underneath the glass without stressing it.
📊 Keeping indoor relative humidity between 40% and 60% dramatically reduces the risk of wood cracking or warping — the same humidity swings responsible for most glass-top failures on rigidly glued wood bases.
| Method | Permanent? | Best For |
|---|---|---|
| Clear rubber bumpers / spacers | No — fully removable | Any wood base; easiest to redo if the glass needs replacing |
| Museum wax / putty | No — removable, holds firmer than bumpers | Bases with an uneven or textured contact edge |
| Velcro adhesive tape | Semi — removable with effort | Tables that get moved or disassembled occasionally |
| Flexible silicone sealant | Semi-permanent, stays flexible | Wood bases where you want a firmer bond but still need give |
| Rigid epoxy | Yes — permanent, no give | Not recommended on wood; better suited to metal or stone bases |
What You’ll Need
- Removable rubber bumpers, museum wax, or flexible silicone sealant (see comparison above)
- Cleaning cloth and isopropyl alcohol
- Measuring tape
- Protective gloves and safety glasses
- Soft cloth for polishing the glass afterward
Before attaching anything, check the wooden table itself for cracks, splinters, or water damage, and make sure the legs and joints are solid — a glass top adds weight and won’t fix an unstable base. Clean the surface with a mild cleaner, avoiding harsh solvents that can damage the wood finish, and let it dry completely.

How to Attach a Glass Top With Removable Bumpers
- Clean both surfaces: Wipe the wood contact points and the underside of the glass with isopropyl alcohol to remove dust, grease, and old adhesive residue.
- Mark the contact points: Set the glass in place once to see exactly where it rests on the wood, then mark those spots lightly in pencil.
- Place the bumpers: Stick or set a bumper at each marked point — corners first, then every 8–12 inches along any edge that’s fully supported by the base.
- Let self-adhesive bumpers bond: If you’re using self-adhesive pads, press firmly and give them a few hours before setting the glass down, so the adhesive backing fully grips the wood.
- Lower the glass into place: Set it down evenly with a helper if the top is large — never slide it into position, which can scratch both the glass and the wood.
- Check for rock or wobble: Press each corner gently. If one corner rocks, add or swap a thicker bumper at that point rather than forcing the glass down.
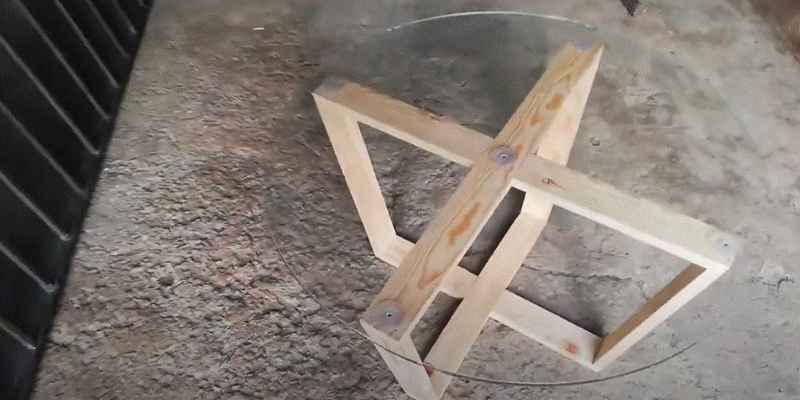
If you’ve decided a semi-permanent bond is what you actually want, apply a thin, continuous bead of flexible silicone sealant to the wood contact points instead of the bumpers, press the glass down evenly, and let it cure fully per the product’s label — typically 24 hours — before using the table. Skip epoxy and other rigid, non-flexible adhesives on a wood base for the reason covered above: they don’t allow for wood movement.
Maintenance Tips
Clean the glass regularly with a soft cloth and a mix of equal parts water and vinegar — it cuts smudges without the streaking some commercial glass cleaners leave. Always lift items instead of sliding them across the surface, and use coasters under drinks and plates to prevent scratches. Check bumpers or wax every few months — dust and debris can work their way underneath and reduce their grip over time.
Fixing a Cracked, Chipped, or Sliding Glass Top
For small chips or hairline cracks, a clear epoxy resin repair kit made specifically for glass can stabilize the damage — clean the area first, apply the resin per the kit’s instructions in a well-ventilated space, and smooth any excess with a razor blade before it cures. This is a cosmetic and stabilizing fix, not a structural one: a crack that runs across more than a third of the glass, or reaches an edge, means the top should be replaced rather than repaired, since a compromised glass top can fail without warning under normal use.
If the top keeps sliding, the usual cause is worn-out or missing bumpers rather than the wrong adhesive — replace them before reaching for a stronger glue. If old adhesive has failed and left residue, remove it carefully with a plastic scraper (never metal, which can scratch the wood), clean both surfaces with alcohol, and switch to a removable bumper or wax system instead of re-gluing with the same rigid adhesive that failed the first time.
“I never let a glass top rest directly on bare, finished wood in my own shop — bumpers go under it every time, even on a table I built myself. Glass telegraphs every high spot in the wood grain within days, and once it’s rocking on one corner, that’s the corner that eventually cracks.”
Frequently Asked Questions
How do I secure a glass top to a wooden table?
Clean both surfaces with alcohol, then place clear rubber bumpers or museum wax at each contact point where the glass rests on the wood. This holds the glass in place without a rigid bond, so the wood can still move with humidity changes without cracking the glass.
Should I glue a glass table top permanently or use removable pads?
Use removable pads or wax unless you have a specific reason not to. Wood expands and contracts with humidity while glass doesn’t, so a rigid permanent glue like epoxy can crack the glass months or years later. Reserve permanent adhesives for glass on metal or stone bases, which don’t move the way wood does.
What type of glass is best for table tops?
Tempered glass is the best choice for nearly every table — it’s stronger and more resistant to heat than annealed glass, and it breaks into small, dull pieces instead of sharp shards. Match the thickness to the table type: 1/4″ for a small coffee table, 3/8″ for most dining tables, and 1/2″ minimum for a table that seats six or more.
How do I fix a cracked glass top?
For a small chip or hairline crack, a glass repair kit with epoxy resin can stabilize it — clean the area, apply the resin, and smooth it with a razor blade before it cures. A crack that spans more than a third of the top or reaches an edge means the glass should be replaced, since it can fail unexpectedly under normal use.
How do I remove a glass top that’s glued to a wooden table?
Slide a thin plastic scraper or old gift card gently under the glass edge to break the adhesive’s grip, working around the perimeter rather than prying from one spot. For stubborn adhesive, a hairdryer on low heat softens most silicone and wax-based bonds within a few minutes. Avoid metal tools and avoid twisting the glass, which can crack it under uneven pressure.
Can I replace a glass top on my wooden table?
Yes. Measure the existing glass or the table’s contact points precisely, and choose a thickness that matches or exceeds the original using the table-type guide above. Remove the old glass and any adhesive residue completely before setting the new top in place.
Securing a glass top on a wooden table comes down to one choice: removable bumpers or flexible silicone for a bond that moves with the wood, never a rigid glue that fights it. Match the glass thickness to how the table gets used, check the attachment points every few months, and a glass top will protect the wood underneath for years without ever cracking from the inside out.
Sponsored / affiliate links. As an Amazon Associate I earn from qualifying purchases. I may earn additional commission from eligible campaigns.