How to Remove Water Marks From Wood Furniture (By Finish Type)
White water marks on wood furniture are moisture trapped in the finish, so gentle heat usually removes them; dark marks have reached the wood and need bleaching or refinishing. Using an iron on a wax, painted, or antique surface can turn a faint ring into real damage. This guide gives a finish-by-finish fix order, explains heat rings versus moisture rings, and shows when to refinish instead.
Understanding Water Marks on Wood Furniture
Best Finish Restorer Pick
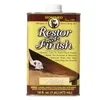 |
Howard Restor-A-Finish, 16 oz, Neutral – $7.49 This is step 2 in the fix order below: Howard says its wipe-on, wipe-off formula restores a finish without removing any of it, which is why it comes before abrasives and refinishing.
|
As an Amazon Associate we earn from qualifying purchases.
Water marks show up in two layers. Which one you have decides every step that follows, so identify it before you reach for any home remedy.
White Rings
White rings and cloudy haze are moisture trapped in the top layer of the wood finish. The wood underneath is usually untouched, which makes these the easiest marks to fix at home.
Dark Spots
Dark spots mean water got past the finish, often through a worn or damaged patch, and stained the wood itself. Surface fixes do not reach them, and on bare wood the same dark-versus-white logic applies, as covered in our guide to removing water stains from wood.
What Causes Water Marks on Wood Furniture?
A wet glass, a damp vase, or a spill sits on the finish long enough for moisture to work in. Finishes such as lacquer and varnish are not perfectly waterproof, so the water mixes into the finish layer and turns it cloudy.
Why heat works: refinishers describe a white ring as water emulsified into the oils and lacquers of the finish, and heating the surface evaporates that water and restores the finish’s original clarity. Source: Finishing.com refinisher Q&A
| Mark type | Color | What happened | Typical fix |
|---|---|---|---|
| White ring or haze | Milky white, cloudy | Moisture trapped in the finish layer | Low heat, finish restorer, oil rub |
| Dark spot or ring | Brown, gray, or black | Water reached the wood; iron and tannins can darken it | Sanding, oxalic acid bleach, refinishing |
| Ring that keeps returning | White | Finish is worn or crazed and keeps absorbing moisture | Refinish the top |
Woods rich in tannins, such as oak, cherry, walnut, and mahogany, are especially prone to black stains when iron from metal feet, nails, or tap water is involved, and that is the case oxalic acid is made for.
Heat Rings vs Moisture Rings: Same Look, Different Risk
A hot mug and a sweating glass both leave a milky ring, and refinishers note that heat rings and water rings often appear in the same spot where hot dishes and cold drinks sit. The difference is the risk: heat can soften the finish and let moisture work deeper. That is why you treat any ring with the gentlest heat first, keep passes short, and stop the moment the finish feels tacky.
Special Considerations for Different Wood Finishes
The finish on the piece decides which fixes are safe. Check how old the piece is, whether it feels like a hard clear coat, a waxy surface, or paint, and test any method in a hidden spot first.
| Finish or surface | Heat (iron or hair dryer) | Safest first move | Avoid |
|---|---|---|---|
| Lacquer or varnish | Works well, low heat only | Heat, then finish restorer | Alcohol, acetone, hard scrubbing |
| Polyurethane | Usually fine on low heat | Heat, then finish restorer; blush removers will not work on it | Aggressive abrasives |
| Wax finish | Skip the iron | Gentle oil rub or rewax on a test spot | Heat, solvents |
| Painted furniture | Skip the iron | Test a hidden spot, expect to touch up paint | Heat, abrasive pastes |
| Antique or veneered | Skip the iron | Call a restorer before you try anything | Heat, wet methods |
These heat cautions come from refinishing guidance: an iron works particularly well on lacquer or varnish but is warned against on painted, wax-finished, and antique pieces, and blush removers are for lacquer, not wax or polyurethane. Oiled finishes behave differently again, since water soaks in quickly and the mark is usually in the wood, so treat those like a dark mark.
Gathering Your Cleaning Arsenal
Most white marks need only things you own. Gather these before you start:
- Soft, lint-free cloths (microfiber works well)
- An iron and a thin cotton cloth, or a hair dryer
- A furniture finish restorer such as Howard Restor-A-Finish
- Petroleum jelly or full-fat mayonnaise for the slow oil method
- Non-gel toothpaste or baking soda for a mild abrasive paste
- 0000 steel wool and furniture polish for last-resort buffing
- Wood polish or furniture wax to finish the repair
Proven Methods to Remove White Water Marks
Work from the gentlest fix to the most aggressive, and stop as soon as the mark fades. This is the order refinishers and restoration guides generally follow:
- Test a hidden spot: Dab a hidden area first so you know how the finish reacts before you touch the mark.
- Apply low heat: With the steam off, press a warm iron through a thin cotton cloth in short bursts, or use a hair dryer, until the white haze fades.
- Wipe on a finish restorer: If heat fails, wipe on a restorer such as Howard Restor-A-Finish, then wipe off.
- Try an oil rub or a mild abrasive: Leave petroleum jelly or mayonnaise on the ring for hours, or buff gently with toothpaste or baking soda paste.
- Refinish if the mark is dark: If the stain is dark or black, it is in the wood: sand, bleach with oxalic acid, and refinish.
Step 1: Low Heat With an Iron or Hair Dryer
Heat is the first move on lacquer and varnish. Per refinisher advice, use a hot iron on a smooth, lint-free cloth, press for seconds, lift, and repeat, keeping the steam off so you do not force more moisture in. Another restoration guide advises starting at the lowest setting, working in 10 to 15 second bursts, keeping the surface warm to the touch rather than hot, and quitting if nothing improves after two to three minutes.
- Empty the iron and turn the steam off, set it to low.
- Lay a thin, clean cotton cloth flat over the ring.
- Press the iron on the cloth for a few seconds, then lift and check.
- Repeat in short bursts, moving the iron slightly each time.
- Wipe, let the wood cool, and buff.
A hair dryer on low, held a few inches away and kept moving, does the same job with less contact. Lint left on the surface and cloth sticking to a softened finish are the documented failure modes, so use a smooth cloth and lift often.
Step 2: Restore the Finish With a Finish Restorer
If heat leaves a faint haze, a wipe-on restorer is the next step before anything abrasive. Howard Products says Restor-A-Finish is wiped on and off to restore the finish without removing any of it, can be applied with extra-fine steel wool for stubborn blemishes, and recommends testing with a soft cloth first and following with Feed-N-Wax to protect the result. Source: Howard Products FAQ. Our pick for this step is in the box above.
Step 3: The Oil Rub (Petroleum Jelly or Mayonnaise)
Oil is a folk remedy: the idea is that it displaces moisture in the finish. Rub a thin layer of petroleum jelly or full-fat mayonnaise onto the ring, leave it for several hours or overnight, then wipe clean and buff. It is slow and results vary, which is why it sits behind heat and a restorer here. We have not run our own test of it.
Step 4: Mild Abrasives (Toothpaste or Baking Soda)
Non-gel toothpaste or a baking soda and water paste buffs the surface. Because these work by abrading, they can leave a dull patch, so rub with the grain, use light pressure, and wipe with a damp cloth. Treat them as a late step, not an early one.
Step 5: 0000 Steel Wool With Polish
Dampen a pad of 0000 steel wool with furniture polish or mineral spirits and rub very lightly with the grain. This removes a thin layer of finish, so check often, stop as soon as the mark lifts, and rewax the spot after.
| Method | Best for | Time | Main risk |
|---|---|---|---|
| Iron and cloth | Fresh white rings on lacquer or varnish | Seconds per pass, stop after 2-3 minutes without change | Softening or marking the finish |
| Hair dryer | Light, recent rings | A few minutes | Slower than an iron |
| Finish restorer | Haze left after heat, faded finish | A few minutes, per the maker | Shade mismatch on dark woods |
| Oil rub | Light rings, no-heat option | Hours to overnight | Slow and inconsistent |
| Toothpaste or baking soda | Stubborn surface haze | Minutes | Dulling the sheen |
| 0000 steel wool | Last step before refinishing | Minutes | Removes finish |
Tackling Dark Water Stains on Wood Furniture
Dark stains mean the wood fibers are discolored, not just the finish. Furniture repair companies state that dark rings almost always require sanding, bleaching, or refinishing, and that a faint shadow may remain even after a good repair. Baking soda pastes and polish will not reach that depth, so do not waste hours on repeated scrubbing. Move on to the bleaching steps below.
How to Remove Dark Water Marks with Oxalic Acid
Oxalic acid is a wood bleach sold in crystal form. It is the standard fix for black and dark brown marks on bare wood, and it needs the finish out of the way. If you want to learn more about the product, see our guide on how to use wood bleach.
- Strip the finish from the stained area with a chemical stripper or sandpaper so the acid can reach the wood.
- Mix the oxalic acid in water exactly as the product label directs.
- Apply with a brush or cloth and leave it for the time on the label, reapplying if the stain has only lightened.
- Rinse thoroughly with clean water and let the wood dry completely.
- Neutralize the residue as the label directs (a baking soda and water wipe is the usual step) and rinse again.
- Sand lightly, then refinish the repaired area to match the surrounding finish.
Safety: oxalic acid is toxic. Wear nitrile gloves and eye protection, work in a well-ventilated space, avoid breathing the crystals, and follow the manufacturer’s directions on the label.
Spot Repair or Refinish the Whole Top?
Once a mark needs sanding, you face a choice. Spot repairs on a deep stain often leave a visible difference in sheen or color, and refinishing the entire surface creates a consistent finish, according to a furniture repair company. Refinish the whole top when the mark is dark, when the finish is crazed or worn so rings keep coming back, or when you have already tried several fixes without success.
Pricing varies widely. One refinishing guide cites professional refinishing at roughly several hundred to several thousand dollars, so a cheap, solid-wood table may be worth refinishing yourself, while a valuable piece is worth a restorer. For the full process, see our guide to repairing furniture finish.
When to Call a Professional
- The piece is an antique or has sentimental or monetary value.
- The veneer is lifting, the joints are loose, or the wood is warped or moldy, which repair companies treat as structural damage.
- The mark is large or deep and DIY steps have not improved it.
- You do not want to refinish the entire piece yourself.
Local antique dealers and furniture restoration shops can usually quote a repair from a photo.
Preventing Future Water Marks
- Use coasters under every glass, cup, and vase.
- Put trivets or mats under hot dishes, since heat softens the finish and invites moisture.
- Wipe spills right away with a soft, dry cloth.
- Keep a maintained coat of wax or polish on the surface as a moisture barrier.
- Ventilate humid rooms so condensation does not form on the surface.
Frequently Asked Questions (FAQs)
Can you remove water marks from wood furniture without refinishing?
Yes, if the mark is white. White marks are moisture trapped in the finish, so low heat or a finish restorer often removes them without touching the wood. Dark or black marks have reached the wood and usually need sanding, bleaching, and refinishing.
Does mayonnaise really remove water marks from wood?
It sometimes helps with light white rings, because oil is thought to displace moisture in the finish, but it is slow, taking hours or overnight, and results vary. We have not tested it ourselves, so we rank heat and a finish restorer ahead of it.
Is it safe to use an iron on wood furniture?
On a lacquer or varnish finish, yes, with care: steam off, a thin lint-free cloth, low heat, and a few seconds at a time. Do not use it on painted furniture, wax finishes, or antiques, and stop if the finish softens or sticks to the cloth.
What is the difference between a white mark and a dark mark?
A white mark is moisture trapped in the finish layer, and the wood underneath is usually untouched. A dark mark means water got past the finish and stained the wood itself, which is why surface fixes do not reach it.
Can I use alcohol or acetone on a water mark?
No. Denatured alcohol and acetone can dissolve many furniture finishes within seconds, turning a small ring into a large damaged patch. Stick to heat, a finish restorer, or oil first.
Should I wax or polish after fixing a water mark?
Yes. Heat, restorers, and abrasives can thin or disturb the surface layer, so finish with a furniture wax or polish to restore sheen and add a moisture barrier.
Conclusion
Match the fix to the mark: white means moisture in the finish, so start with low heat and work up through a restorer, oil, and mild abrasives. Dark means stained wood, so plan on bleaching and refinishing. Check the finish type before you begin, test in a hidden spot, and rewax afterward.
Sponsored / affiliate links. As an Amazon Associate I earn from qualifying purchases. I may earn additional commission from eligible campaigns.