How to Fix Mdf Panel on Wall: Quick & Easy Guide
To fix an MDF panel on a wall, first measure and cut the panel. Then, secure it using adhesive or screws.
MDF (Medium Density Fiberboard) panels are popular for home improvements due to their affordability and smooth finish. Installing MDF panels can transform a room’s aesthetic, adding a modern and polished look. Proper installation ensures durability and a professional appearance. Before you start, gather essential tools like a measuring tape, level, adhesive, screws, and a saw.
Accurate measurements are crucial for a seamless fit. Whether renovating a living space or adding a decorative touch, MDF panels offer a versatile solution. With the right approach, you can achieve a flawless and long-lasting finish, enhancing the overall appeal of your home.
Introduction To Mdf Panels
MDF panels offer a sleek and modern look to any room. To fix MDF panels on a wall, ensure proper alignment and use strong adhesive or screws for secure installation.
Benefits Of Using Mdf
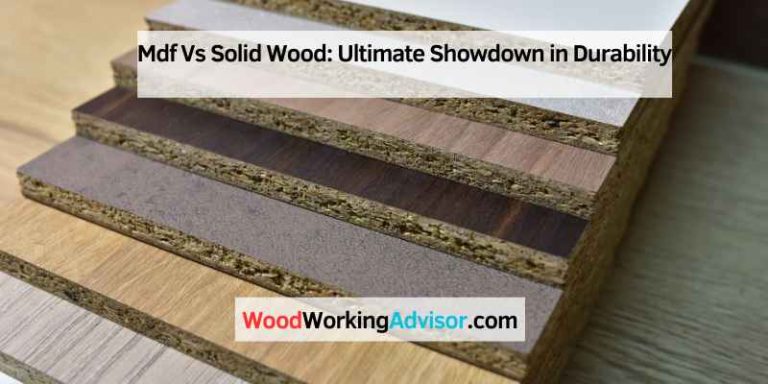
MDF panels are very popular in home design. They are strong and smooth. They are also easy to cut and shape. This makes them great for many projects. MDF is cheaper than real wood. It also holds paint well. This gives a nice finish to any room.
Common Uses In Interior Design
MDF panels are often used for making shelves. They are also used for cabinets and doors. Many people use them for wall panels. These panels add a stylish look to rooms. Some use MDF for making furniture. It is very versatile and useful.
Tools And Materials Needed
You will need a measuring tape. A pencil is also essential. A saw is needed to cut the MDF panel. Use a drill to make holes. Screws and a screwdriver will fix the panel. Level helps to keep the panel straight. Sandpaper smooths the edges. Safety glasses protect your eyes.
Choose an MDF panel that fits your wall. Measure the height and width of your wall. Pick a panel that is moisture resistant. Ensure the panel has a smooth surface. Thicker panels are stronger and last longer.
Preparation Steps
Gather necessary tools and materials for fixing the MDF panel on the wall. Ensure the wall surface is clean and dry. Measure and mark the panel placement accurately before beginning installation.
Measuring The Wall
First, get a measuring tape. Measure the height and width of the wall. Write down the measurements in a notebook. Always measure twice to be sure. Make sure the wall is flat and clean. This will help the MDF panel stick better.
Cutting The Mdf To Size
Use a pencil to mark the measurements on the MDF panel. Take a saw and cut along the lines. Be careful while cutting the MDF panel. Wear safety glasses to protect your eyes. Check the edges to make sure they are smooth. If not, use sandpaper to smooth the edges.
Surface Preparation
Proper surface preparation ensures a smooth installation of MDF panels on walls. Clean, sand, and prime the wall surface thoroughly for best results.
Cleaning The Wall
The first step is to clean the wall. Use a damp cloth to wipe away any dust or dirt. Make sure the wall is completely dry before proceeding. This helps the adhesive to stick better. You can also use a mild detergent for stubborn stains. After cleaning, let the wall air dry for an hour.
Dealing With Uneven Surfaces
Check the wall for any bumps or dips. Use a level tool to see if the wall is straight. If there are any uneven areas, sand them down. Use a spackle to fill any holes or cracks. Once done, sand the spackled area to make it smooth. This will help the MDF panel to fit better on the wall.
Fixing Techniques
Adhesive is great for fixing MDF panels to walls. Clean the wall surface first. Make sure it’s dry. Apply adhesive to the back of the MDF panel. Use a zigzag pattern. Press the panel to the wall. Hold it for a few minutes. This helps the adhesive stick.
Fasteners can secure MDF panels well. Use screws or nails. Pre-drill holes in the MDF panel. This stops the panel from cracking. Place the panel on the wall. Align it properly. Drive screws or nails into the holes. Use a level to make sure it’s straight. This method adds extra strength.
Finishing Touches
Use sandpaper to smooth the edges of the MDF panel. Make sure the edges are even and clean. This helps in getting a neat finish. You can use a sanding block for better control. Ensure the surface is dust-free after sanding. This makes the next steps easier.
Apply a coat of primer to the MDF panel. This prepares the surface for painting. Let the primer dry completely. Once dry, you can start painting. Use paint suitable for MDF surfaces. Apply thin, even coats for the best result. Let each coat dry before applying the next. This ensures a smooth and professional finish.
Maintenance Tips
Use a soft cloth for cleaning MDF panels. Avoid using too much water as it can damage the panels. A mild detergent mixed with water works well. Wipe the panels gently to remove dust and dirt. A dry cloth can be used for drying the panels. Always clean spills immediately to prevent stains.
Minor scratches can be fixed with a touch-up marker. Fill small holes with wood filler and sand it smooth. A matching paint can be used to cover the repaired area. Always ensure the surface is clean and dry before repairs. Regular inspection helps in early detection of damages.
Safety Precautions
Always wear safety goggles to protect your eyes. Use gloves to prevent cuts and scrapes. Dust masks keep harmful particles out of your lungs. Ear protection is necessary if using loud tools. Keep your work area well-ventilated.
Use a level to ensure straight lines. Measuring tape helps get accurate dimensions. Use screws and a screwdriver to secure the panel. Sandpaper smooths rough edges. Keep tools organized to avoid accidents.
Troubleshooting Common Issues
Fixing an MDF panel on a wall involves preparing the surface, using the right adhesive, and ensuring proper alignment. Start by cleaning the wall, applying a strong adhesive, and pressing the panel firmly into place.
Resolving Adhesion Problems
Ensure the wall surface is clean and dry. Dirt and moisture can affect adhesion. Use a level to confirm the wall is straight. Apply a high-quality adhesive on the back of the MDF panel. Press the panel firmly against the wall. Hold it in place for a few minutes. Use clamps if necessary. Allow the adhesive to set before removing the clamps.
Fixing Gaps And Seams
Use wood filler to fill gaps and seams. Apply the filler with a putty knife. Smooth it out to blend with the panel. Allow it to dry completely. Sand the area to ensure a smooth finish. Repaint the panel if needed. This will make the seams invisible.
Design Ideas
MDF panels can make your home look modern. Use them to create accent walls in your living room. They come in many styles and colors. You can match them with your furniture. MDF panels also work well in bedrooms. They give a cozy feel. Try using them behind your bed for a nice effect. Kitchens look great with MDF panels too. They can be used on the walls or cabinets.
MDF panels are fun for DIY projects. You can make a headboard for your bed. Cut the panels into shapes. Paint them in bright colors. Another idea is to use MDF panels to make shelves. They are strong and easy to work with. You can also create a kids’ play area. Use MDF panels to build a small house or castle. Paint it with fun designs.

Frequently Asked Questions
What Is The Best Adhesive For Mdf Wall Panels?
The best adhesive for MDF wall panels is a high-quality construction adhesive like Liquid Nails or Gorilla Glue. These adhesives offer strong bonding and durability. Ensure the surface is clean and dry before application for optimal results.
How Do You Secure Mdf To A Wall?
Secure MDF to a wall using screws and wall plugs. Drill pilot holes, insert wall plugs, then screw the MDF into place.
How To Hang Mdf Board On A Wall?
To hang an MDF board, first, locate wall studs. Mark spots, drill holes, insert anchors, and screw the board securely.
Conclusion
Fixing MDF panels on a wall can be a rewarding DIY project. With the right tools and steps, the process becomes straightforward. Follow our guide to enhance your room’s aesthetics efficiently. Remember, patience and precision are key. Happy decorating!