How to Install Engineered Hardwood Click Flooring: Step-by-Step Guide
Engineered hardwood click flooring installs faster than solid wood because the planks float and lock together, but most of the failures we see — buckling, gapping, hollow-sounding joints — trace back to two steps people rush: acclimation and subfloor moisture control. Get those right, along with the correct expansion gap, and the actual clicking-together part is straightforward. This guide walks through the full process for both wood subfloors and concrete slabs, including the moisture test most DIY guides skip.
Tools and Materials You’ll Need
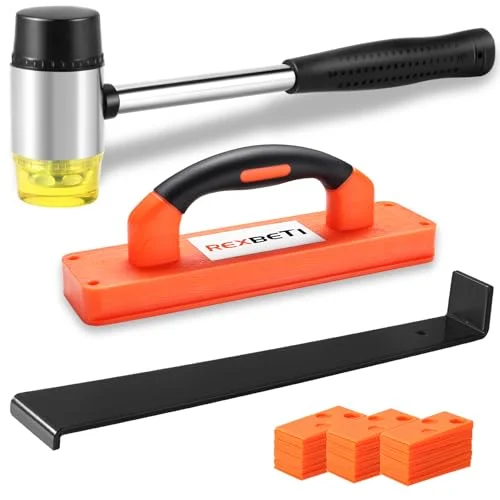
Beyond the flooring itself, you’ll need a tapping block, pull bar, and rubber mallet to close the joints without denting the plank edges — a bare hammer against the locking tongue is the single most common way to crack it. Add spacers for the expansion gap, a flush-cut saw for door jambs, a jigsaw for cutting around pipes and obstructions, a utility knife, a pencil, and a tape measure. For the subfloor, have a broom or shop vacuum, a leveling compound if you find low spots, and 6-mil polyethylene sheeting plus underlayment if you’re working over concrete.
Best Click-Lock Installation Kit
|
REXBETI Laminate & Engineered Wood Flooring Installation Kit – $20.99 Covers everything in the tools list above in one box — the tapping block and pull bar are exactly what you need to close click-lock joints without chipping the edge.
|
Check and Prep the Subfloor
Sweep or vacuum the subfloor completely, then set nails or staples that are sticking up and check for high and low spots with a straightedge or level. Most manufacturers want the subfloor flat within 1/8 inch over a 6-foot span; fill low spots with a leveling compound and let it cure fully before continuing.
If you’re installing over a concrete slab, moisture is the real risk, not the flatness. Run a calcium chloride moisture test (or a moisture meter, per the flooring manufacturer’s instructions) and confirm the reading is under 3 lbs of moisture vapor emission per 1,000 sq ft per 24 hours before you cover the slab. A slab that fails this test will eventually push moisture into the planks regardless of how good your vapor barrier is — if it fails, you need a moisture-mitigation product rated for the reading, not just a thicker poly sheet. For the full concrete-specific checklist, see our guide to installing engineered hardwood flooring on concrete. If you’re floating new planks over an existing hardwood floor instead of bare subfloor, the height and transition math is different — check installing engineered hardwood over existing hardwood first.
Acclimate the Flooring First
Leave the planks in their unopened cartons, in the room where they’ll be installed, for at least 48 to 72 hours before you start — some manufacturers ask for longer, so check the box or the product page for the exact spec on your flooring. Keep the room at normal living conditions during that window: stable temperature, no direct sun on the cartons, and humidity in the range you’ll actually be living in once the HVAC is running normally. Skipping this, or acclimating in a garage that doesn’t match the install room’s climate, is why floors gap in winter or cup in summer months after a rushed install. For the reasoning behind the specific timeframe, see does engineered hardwood flooring need to acclimate.
Lay the Vapor Barrier and Underlayment
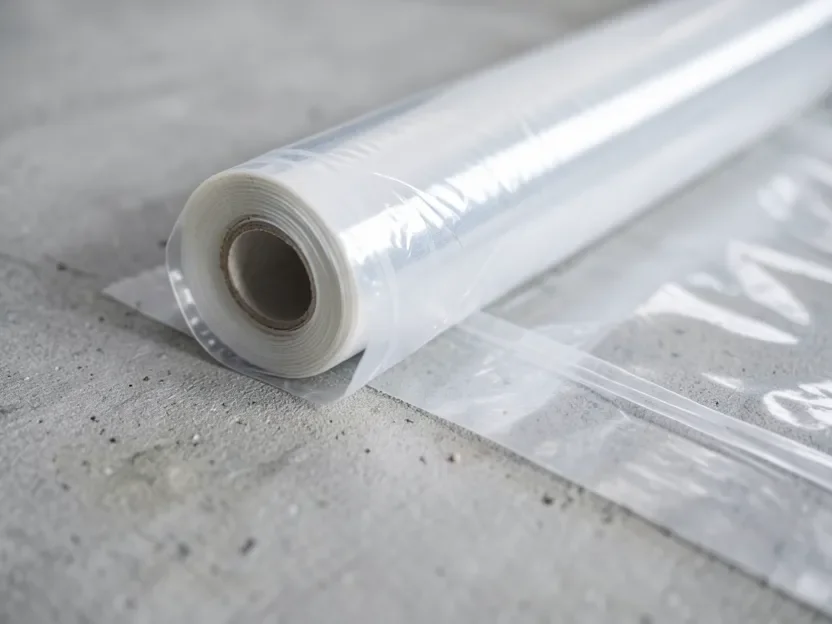
Roll out the underlayment in the direction you’ll be laying planks, butting the edges (don’t overlap) and taping the seams. Over a wood subfloor, a standard foam or cork underlayment is usually enough for sound and cushioning. Over concrete, add a 6-mil polyethylene sheet as a dedicated vapor barrier even if your underlayment claims some moisture resistance — overlap the poly seams by 6 to 8 inches and tape them, and run the sheet up the wall about 2 inches at the perimeter. You’ll trim that excess after the baseboards go back on. Only unroll enough for the next few rows at a time so you’re not walking on loose plastic while you work.
Plan Your Layout and Set the Expansion Gap
Measure the room and pick your starting wall — usually the longest, straightest wall, with planks running parallel to the main light source or the length of a hallway. Snap a chalk line off that wall so your first row stays straight; every plank after it references that line, so a crooked start compounds down the room.
Leave an expansion gap around the entire perimeter, against every wall, pipe, and vertical obstruction: 1/4 to 3/8 inch is the typical range for a floating click-lock floor, but confirm the exact number on your product’s installation sheet, since it varies by manufacturer and by how long a single run of flooring is. Larger open rooms or long runs sometimes need a wider gap or a transition strip partway across. Spacers between the plank edges and the wall keep this consistent as you work; leave them in place until the floor is fully installed.
Install the First Row
Lay the first plank in a corner with the groove side facing the starting wall, and set spacers between the plank and the wall on both sides. Continue the row plank by plank, holding each new piece at a slight angle to the previous one, engaging the tongue into the groove, and pressing down until it clicks flush. Check the row for straightness against your chalk line every few planks — it’s much easier to correct a drift now than after three more rows are locked to it.
Click, Stagger, and Continue the Installation
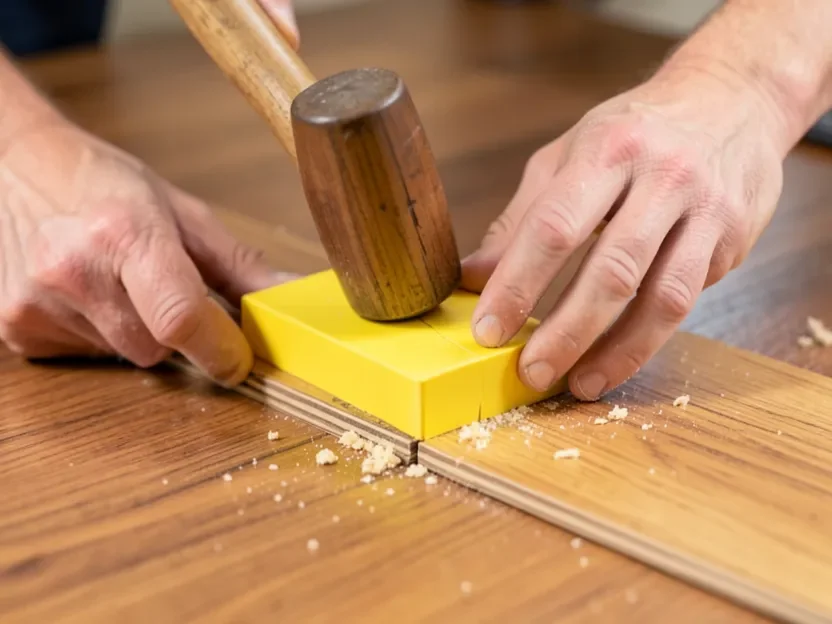
For each new row, start with a plank cut to a different length than the one that started the row before it, so the end joints stagger by at least 6 to 8 inches from row to row (some manufacturers want a minimum 1/3-plank offset — check your spec sheet). Seams that line up in adjacent rows create a weak point where the floor can flex and separate. Click each new plank into the row beside it first, then into the plank before it, using the tapping block against the long edge to seat the joint fully — never strike the locking tongue directly with the mallet, since that’s what cracks it. Use the pull bar to snug the last plank in a row up against the wall, where there’s no room to swing a mallet.
Cut Around Obstacles and Doorways
At door casings and jambs, undercut the trim with a flush-cut or oscillating saw so the plank slides underneath instead of being notched around it — it looks cleaner and it’s faster than scribing an exact cutout. For pipes, vents, and other fixed obstructions, measure and mark the plank, drill or jigsaw the opening slightly oversized to preserve the expansion gap around the obstruction too, and slide the plank into place. Keep a square and a sharp jigsaw blade handy; splintered cuts on a prefinished edge are hard to hide.
Add Transitions and Baseboards, Then Finish
Once the field is fully installed, pull the spacers from the perimeter. Install T-moldings at doorways between rooms where the flooring continues, and reducers where it meets a different flooring height. Reattach or install baseboards and quarter-round to cover the expansion gap — nail these into the wall or existing baseboard, never down through the flooring planks themselves, since a fastener through the floor defeats the whole point of a floating installation and will cause a squeak or crack as the floor moves seasonally. Vacuum the new floor and wipe it down with a barely damp cloth; skip wet mopping until you’ve confirmed the manufacturer’s cleaning guidance, since standing water at the seams is the fastest way to void a warranty.
Maintenance Tips for Long-Lasting Floors
Sweep or vacuum regularly with a soft-bristle or hard-floor attachment, and wipe spills up immediately rather than letting them sit at a seam. Use felt pads under furniture legs and door mats at exterior entries to cut down on grit that scratches the finish. Keep indoor humidity reasonably stable year-round if you can — a whole-home humidifier in winter reduces the gapping that shows up when forced-air heat dries the room out. Avoid steam mops and standing water; both can work moisture into the seams over time even on a well-sealed floor.
Frequently Asked Questions
How long does engineered hardwood click flooring need to acclimate?
Plan on 48 to 72 hours minimum, left unopened in the room where it will be installed, at normal living temperature and humidity. Check your specific product’s instructions, since some manufacturers specify longer.
Is it better to glue or float an engineered wood floor on concrete?
Floating with a click-lock system over a proper vapor barrier is the standard DIY approach and works well as long as the slab passes a moisture test first. Glue-down can offer a slightly more solid underfoot feel and is sometimes preferred in commercial settings, but it’s less forgiving to install and harder to replace individual planks later.
What do you put under engineered hardwood click flooring?
A foam, cork, or combination underlayment for cushioning and sound control, and over concrete, a 6-mil polyethylene vapor barrier in addition to the underlayment. Some underlayment products already have a vapor layer bonded in — check the packaging before adding a second one unnecessarily.
What expansion gap do you need for click-lock flooring?
1/4 to 3/8 inch around the entire perimeter is typical, held with spacers until the installation is finished. Always confirm the exact figure on your flooring’s installation instructions, since it can vary by manufacturer, plank width, and total run length.
Sponsored / affiliate links. As an Amazon Associate I earn from qualifying purchases. I may earn additional commission from eligible campaigns.
 East West Furniture SP-5HH05 Sango Premier Engineered Hardwood Flooring - European Oak - 1/2 in x 7 in x Random Length Handscraped, 26.24 sqft/box, Shadow Grey
 East West Furniture SP-7HH02 Sango Premier Engineered Hardwood Flooring - European Oak - 1/2 in x 7 in x Random Length Handscraped, 26.24 sqft/box, Special Walnut