How to Install Engineered Hardwood Flooring on Concrete: Step-by-Step Guide
Engineered hardwood is one of the few wood floors rated for installation directly over concrete – but the slab itself is what determines whether that floor lasts 20 years or starts cupping within a season. The single biggest cause of failed installs over concrete isn’t the flooring or the installer’s skill; it’s moisture moving up through the slab that nobody tested for first.
This guide walks through the real moisture-testing standards flooring manufacturers require, how to prep and vapor-barrier a slab correctly, and the step-by-step install process for both floating and glue-down engineered hardwood over concrete – including the parts most tutorials skip.
Why Moisture Is the Real Risk With Concrete Subfloors
NWFA-Rated Vapor Barrier for Concrete
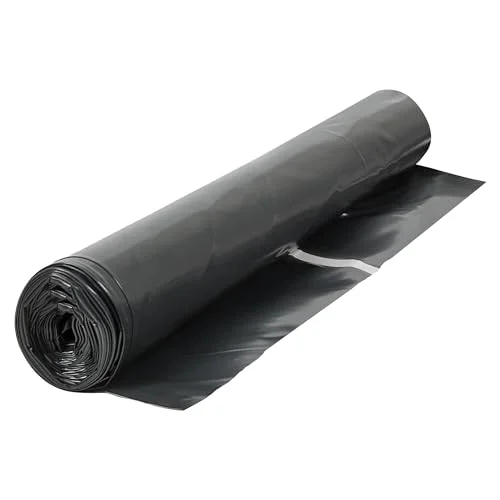 |
Roberts 70-116 Moisture Barricade 6 Mil Vapor Barrier – $56.60 A 300 sq. ft. roll of 6-mil polyethylene film sized for an average bedroom or living room – the exact vapor barrier weight this guide’s install steps assume under a floating or glue-down engineered floor.
|
A concrete slab can feel bone-dry to the touch and still be pushing significant water vapor upward, especially slabs poured within the last 60-90 days, slabs on or below grade, or slabs that were never installed with their own vapor retarder underneath. That moisture doesn’t evaporate through concrete the way it would through open air – it gets trapped against the underside of the wood, where it causes cupping, buckling, or the adhesive bond to fail months after the floor looked perfect. This is exactly why every reputable engineered hardwood manufacturer requires a real moisture test before installation, not a visual check. (If you’re wondering whether engineered hardwood can handle moisture exposure at all, see our guide on whether engineered hardwood floors are waterproof.)
Step 1: Test the Slab’s Moisture Level (Don’t Skip This)
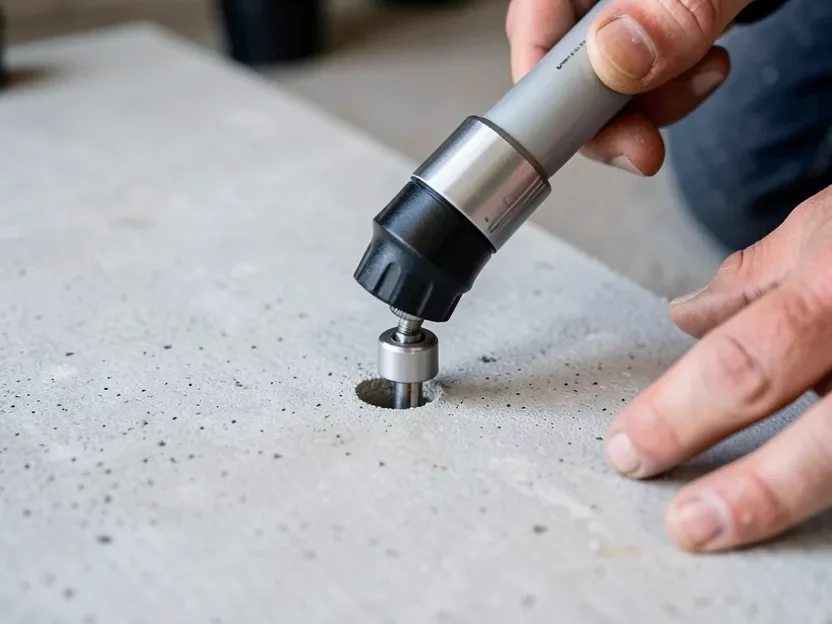
There are two industry-standard concrete moisture tests, and they measure different things:
- ASTM F2170 (in-situ relative humidity probe): Small holes are drilled into the slab and sensors read the humidity from inside the concrete, not just the surface. The standard now requires only a 24-hour wait before an official reading (it was 72 hours under the older version). For the first 1,000 square feet you need at least 3 probes, plus one more for every additional 1,000 square feet.
- ASTM F1869 (calcium chloride / MVER test): An airtight dome containing calcium chloride sits on the slab surface for 60-72 hours, and the weight gain tells you the moisture vapor emission rate in pounds per 1,000 square feet per 24 hours. It’s cheaper and faster to run, but it only reads the top of the slab and is sensitive to ambient humidity and temperature swings during the test.
Most flooring manufacturers and the NWFA now treat the RH probe test as the more reliable of the two, since it reads moisture conditions deeper in the slab instead of just the surface. Either way, don’t guess: check your specific engineered hardwood manufacturer’s installation instructions for the maximum RH percentage or MVER rate they allow, since the acceptable threshold varies by product and by adhesive – there’s no single “safe number” that applies to every floor.
Step 2: Prep and Level the Concrete Subfloor
Once the slab passes its moisture test, clean it thoroughly – sweep or vacuum out all dust, then use a concrete degreaser on any oil, paint overspray, or old adhesive residue and rinse it off completely. Check the whole floor with a long level or a straightedge; any dip deeper than about 3/16 inch over a 10-foot span should be filled with a concrete patching or self-leveling compound, and any high spots should be ground down. A wavy subfloor telegraphs through engineered hardwood over time and stresses the seams between planks, so this step is worth doing carefully rather than quickly.
Step 3: Install the Vapor Barrier
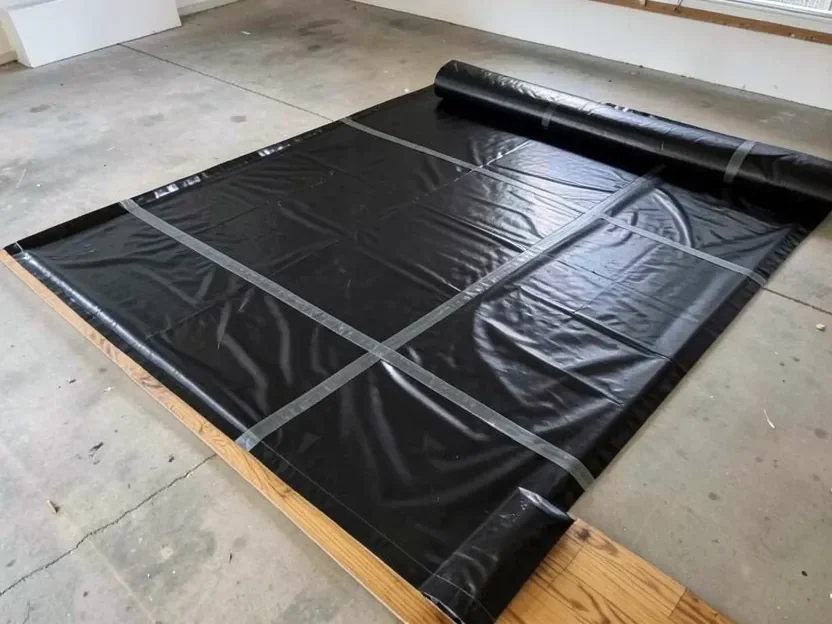
Roll a 6-mil (or thicker) polyethylene sheet, or a purpose-made moisture-mitigation membrane, over the entire slab – this is the NWFA’s Class 1 vapor barrier rating and it’s the standard mitigation even on a slab that passed its moisture test, because conditions under a slab can change with the seasons. Overlap every seam by at least 6-8 inches and tape them down; run the sheet a few inches up the wall so it can be trimmed later. If you’re using a floating floor system, look for an underlayment that already has a vapor barrier laminated to it, which combines this step with cushioning and sound control in one layer.
Step 4: Acclimate the Engineered Hardwood
Leave the flooring in its unopened packaging in the installation room for 48-72 hours before laying it, with the room held at a normal living temperature of roughly 65-75°F and relative humidity between 30-50%. Engineered hardwood moves less than solid hardwood, but it still needs to equalize to the room’s conditions before installation or you risk gaps opening up (or boards crowding) after the floor is down.
Step 5: Choose a Floating or Glue-Down Installation
Over concrete, you’re choosing between two methods – nail-down isn’t an option here since there’s no wood subfloor to drive fasteners into (that method needs a plywood subfloor over sleepers, which is a different project).
- Floating: Planks click together over the underlayment without any adhesive touching the slab. It’s the faster, more forgiving method for a first-time DIYer, allows the floor to be removed later, and tolerates minor subfloor imperfections better. Leave a 1/4-3/8 inch expansion gap around the room’s perimeter, covered later by baseboard or trim.
- Glue-down: Adhesive is trowelled directly onto the vapor barrier or slab and the planks are pressed and rolled into it. It creates a more solid, less hollow-sounding floor and is often required for larger rooms or wide-plank engineered flooring, but it’s less forgiving of mistakes and the floor can’t easily be lifted later.
Step 6: Lay the Flooring
Snap a chalk line from the center of the room, or from the longest, most visible wall, so your first row runs straight regardless of small variations in the room’s actual squareness. Work from several boxes at once so grain and color blend naturally instead of clustering by box. Stagger the end joints between rows by at least 6-8 inches for strength and a more natural look, use spacers to hold your expansion gap consistent, and cut the final row to width with a table saw or track saw. For glue-down installs, work in small sections so the adhesive doesn’t skin over before the planks go down, and check every few rows with a level to make sure you’re staying flat.
Check the Manufacturer’s Rating Before You Buy
Not every engineered hardwood product is actually rated for direct-to-concrete or below-grade installation, even though “engineered” often gets marketed as universally concrete-safe. The core construction matters: a plywood-core engineered board generally tolerates a below-grade, on-concrete install better than an HDF (high-density fiberboard) core, which can be more moisture-sensitive. Check the specific product’s own installation documentation for its concrete and below-grade rating before you buy – not just the general category it’s sold under.
Maintenance Tips
Sweep or vacuum with a hard-floor setting regularly and skip wet mopping – standing water is still the fastest way to damage any wood floor, vapor barrier or not. Wipe up spills immediately with a barely-damp cloth, use a cleaner formulated for hardwood rather than an all-purpose cleaner, and add felt pads under furniture legs to prevent scratches. Keep pets’ nails trimmed and use curtains or UV window film if the room gets strong direct sunlight, since UV exposure fades and can unevenly discolor wood floors over time.
Frequently Asked Questions
Can you install engineered hardwood directly on concrete?
Yes – engineered hardwood is one of the few wood flooring types rated for direct installation over a concrete slab, using either the floating or glue-down method. The slab has to pass a real moisture test (ASTM F2170 or F1869) and be prepped with a proper vapor barrier first, and the specific product you buy needs to carry a concrete or below-grade rating from its manufacturer.
Do you need a moisture test before installing over concrete?
Yes. A slab that looks and feels completely dry can still be emitting enough moisture vapor to ruin an engineered floor within months. An ASTM F2170 relative humidity probe test or an ASTM F1869 calcium chloride test tells you the slab’s actual moisture condition before you spend money on flooring and labor.
What vapor barrier do you need over concrete?
A 6-mil (or thicker) polyethylene sheet, or a dedicated moisture-mitigation membrane, meets the NWFA’s Class 1 vapor barrier standard for concrete subfloors. Seams need to overlap by 6-8 inches and be taped, since a gap in the barrier defeats its purpose.
How long does it take to install engineered hardwood on concrete?
Budget 1-3 days for the installation itself in an average-sized room, plus 48-72 hours beforehand for the flooring to acclimate to the room and however long your chosen moisture test requires (24 hours minimum for an RH probe test, 60-72 hours for a calcium chloride test). Larger rooms, glue-down methods, and slab leveling work all add time.
Conclusion
Engineered hardwood over concrete is a genuinely doable weekend-to-week project, and it holds up well for years when the slab is tested, leveled, and vapor-barriered before a single plank goes down. Skip the moisture test because the concrete “feels dry,” though, and the most common failure – cupped or delaminated boards – usually doesn’t show up until months later, when it’s a much bigger job to fix. Test first, barrier second, then install. For installation over a wood subfloor instead of concrete, see our full engineered hardwood installation guide.
Sponsored / affiliate links. As an Amazon Associate I earn from qualifying purchases. I may earn additional commission from eligible campaigns.
 East West Furniture SP-5HH05 Sango Premier Engineered Hardwood Flooring - European Oak - 1/2 in x 7 in x Random Length Handscraped, 26.24 sqft/box, Shadow Grey
 East West Furniture SP-7HH02 Sango Premier Engineered Hardwood Flooring - European Oak - 1/2 in x 7 in x Random Length Handscraped, 26.24 sqft/box, Special Walnut