How to Install an Irwin Woodworking Vise (Right Way)
Mount an Irwin woodworking vise at the front-left corner of your bench if you’re right-handed (front-right if you’re left-handed), through-bolt it rather than relying on screws alone, and set the jaws so they sit flush with or just slightly proud of the benchtop surface. That combination — correct corner, through-bolts, correct height — is what separates a vise that stays rock-solid for years from one that racks loose after a month of real use.
Why Corner Position and Handedness Matter
Most woodworkers mount a front vise at the corner of the bench closest to their dominant hand, not dead-center along the front edge. A right-handed woodworker typically plants the vise at the front-left corner: your left hand works the vise handle and holds stock steady while your right hand runs the saw, plane, or chisel. Left-handed woodworkers mirror this and mount at the front-right corner instead. Corner placement also gives you a clear side for clamping long boards — material can hang off the end of the bench without a benchtop apron or leg getting in the way, which a mid-span mounting position won’t give you.
Best Budget Irwin Vise for This Install
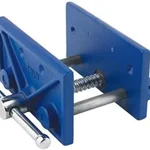 |
IRWIN Tools Woodworker’s Vise, 6-1/2″, 226361 – $25.66 The exact style of vise this guide is written for: a square-body woodworker’s vise built to be through-bolted to a benchtop corner, with a 4-1/2″ jaw capacity that suits hobby and light-duty shop work.
|
Tools and Materials You Actually Need
Beyond the vise itself, gather a power drill with bits sized to your through-bolts, a countersink or spade bit if you’re recessing bolt heads, a combination square or tape measure, a pencil, a 4-in-1 or torpedo level, and a socket wrench or ratchet for tightening nuts from underneath the bench. If you’re through-bolting (recommended below), you’ll need bolts, flat washers, and nuts — reviewers of this exact vise report using two 1/4-inch bolts through the horizontal flange and two more through the vertical flange, which lines up with the four mounting holes cast into most compact woodworker’s vises. Buy bolts long enough to clear your benchtop thickness plus the vise flange, with room left for a washer and nut.
Step 1: Mark and Drill for Through-Bolts, Not Just Screws
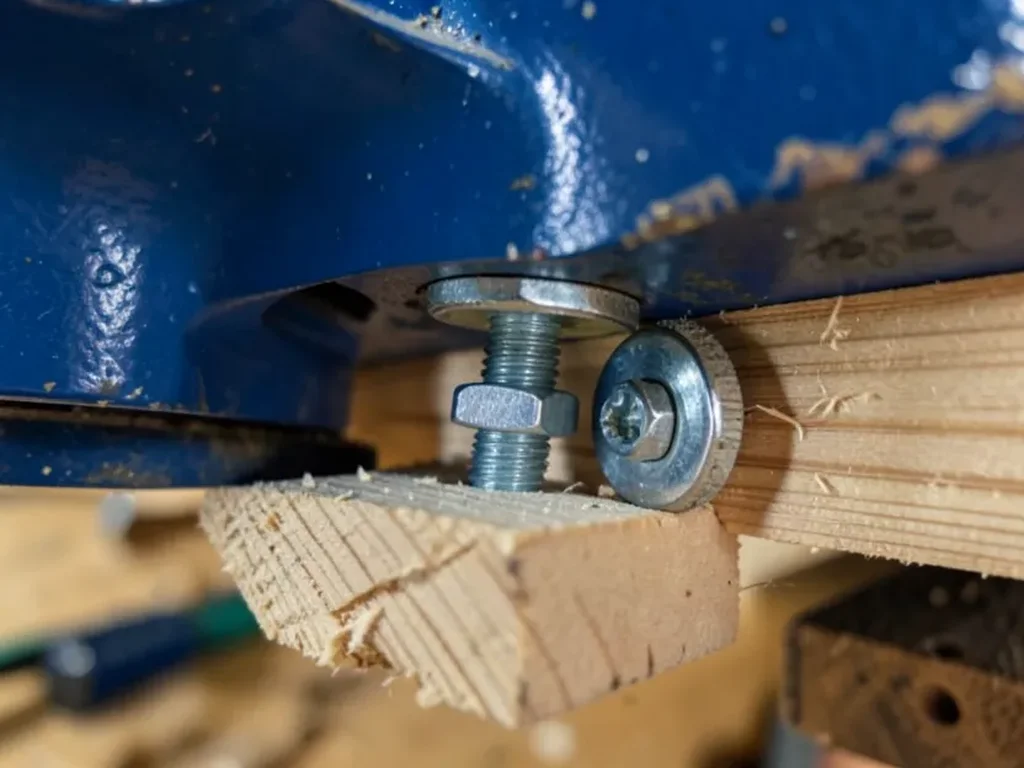
Set the vise in its final corner position, jaws facing out, and trace the mounting holes onto the benchtop with a pencil. This is the point where most installation guides tell you to just drive screws or lag bolts straight down into the benchtop — and that’s the weak version of this job. A screw or lag bolt only has to fail in the wood around its threads to let the vise shift under load. A through-bolt passes completely through the benchtop, clamps the vise flange against a washer and nut on the underside, and relies on compression rather than thread grip — it’s mechanically stronger and it won’t work itself loose the way a screw driven into end-grain-heavy benchtop can. Drill straight down through each marked point all the way through the bench thickness, checking square as you go so the holes come out perpendicular on the underside.
Step 2: Get the Mounting Height Right Before You Bolt Down
Before you tighten anything permanently, dry-fit the vise and check where the top of the closed jaws lines up with your benchtop. The goal is jaws that sit flush with the benchtop surface, or at most a fraction of an inch proud of it. If the jaws sit noticeably below the benchtop, a long board clamped in the vise will bind against the edge of the bench before it can lie flat, which defeats the point of clamping long stock. If the jaws sit too far above the benchtop, you lose stability and leverage on tall or awkward pieces. Most compact woodworker’s vises like this one mount directly under the front edge of the benchtop with their jaws roughly level with it — if your benchtop is unusually thick, you may need to notch the front edge slightly so the vise can seat at the right height, which is worth doing before you drill your final holes.
Step 3: Bolt the Vise Down
With your holes drilled and height confirmed, set the vise back in place and drop a bolt through each hole from the top. Working underneath the bench, slide a flat washer onto each bolt before threading on the nut — the washer spreads clamping force across more wood fiber instead of letting the nut dig into the underside of the benchtop. Snug each nut by hand first, then go around and tighten them the rest of the way with a wrench or socket, alternating between bolts rather than fully tightening one before moving to the next. This keeps the vise pulling down evenly instead of cocking slightly to one side as it seats.
Step 4: Add Wood Jaw Liners Before You Use It
Most sub-$40 woodworker’s vises, including this Irwin model, ship with cast jaw faces that are functional but rough — fine for holding a piece of scrap steady, not ideal against a finished workpiece. Cut two pieces of scrap hardwood or plywood slightly larger than the jaw faces, drill clearance holes matching the threaded holes already provided in the front jaw (this vise has them built in for exactly this purpose), and screw the liners on from the back so no fastener heads are exposed on the clamping face. Wood liners protect your work from marring, add a bit of friction that helps hold odd-shaped pieces, and are cheap to replace once they wear out.
Testing, Alignment, and Lubrication
Open and close the vise through its full range a few times before you trust it with real work. The jaws should meet evenly across their whole width — if one side closes before the other, recheck that your through-bolts are torqued evenly and that the vise wasn’t racked when you tightened it down. A light coat of paste wax or a drop of general-purpose oil on the screw threads and guide bars keeps the action smooth and helps prevent surface rust, especially in an unheated garage shop. If the screw feels gritty or has rough burrs straight out of the box (a common note in owner reviews of budget vises), running it in and out a few times with a little oil on the threads typically smooths it out within the first few uses.
Common Mistakes When Installing a Woodworking Vise
The most common misstep is mounting the vise dead-center on the bench front out of habit, rather than at the corner that actually matches how you work — it costs you the ability to clamp long stock hanging off the end. The second is relying on wood screws alone into a benchtop, especially into end grain, where they can work loose after repeated racking loads. The third is skipping the dry-fit and bolting down before confirming jaw height against the benchtop, which then requires drilling new holes or shimming later. Catching all three before you drill saves a second round of holes in your bench.
Maintenance to Keep It Working for Years
Wipe sawdust and debris off the screw and guide bars after heavy use, since packed dust is the main cause of a vise that starts to stick or bind. Reapply a light oil or paste wax to the moving parts every few months, more often in a humid shop where bare cast iron and steel guide bars are prone to surface rust. Check that your through-bolts haven’t loosened every so often, particularly in the first few weeks after installation while everything is seating in — a quick pass with a wrench underneath the bench takes under a minute and catches the problem before the vise starts to rack under load.
Frequently Asked Questions
Where should I mount a woodworking vise on my workbench?
Mount it at the front corner of the bench that matches your dominant hand — front-left for right-handed woodworkers, front-right for left-handed woodworkers. Corner mounting lets you clamp boards that extend past the end of the workbench top without the bench itself getting in the way, which a center-mounted vise can’t do.
Should I through-bolt the vise or just use screws?
Through-bolt it whenever your benchtop thickness allows. A bolt that passes completely through the bench and clamps against a washer and nut underneath resists the racking and shifting forces of clamping far better than a screw or lag bolt driven only partway into the wood. Screws are only a fallback for benches too thick or too awkward to drill all the way through.
How high should the vise jaws sit compared to the benchtop?
Aim for jaws that sit flush with the benchtop surface, or only slightly proud of it. That height lets you lay a long board flat across the bench and clamp it without the bench edge or an undersized vise height getting in the way of the piece.
Can I install this vise on any workbench?
Most compact woodworker’s vises, including the Irwin 226361, can be through-bolted to any solid wood benchtop thick enough to hold a bolt, washer, and nut without splitting. If your benchtop is unusually thick or thin, check that your bolt length and the vise’s own clamping force needs still line up with the mounting hardware you have before you drill.
Conclusion
Getting an Irwin woodworking vise installed well comes down to three decisions made before you ever pick up a drill: mount it at the corner that matches your dominant hand, through-bolt it instead of relying on screws alone, and set the jaw height flush with your benchtop. Get those right and the rest — adding wood liners, testing the action, keeping it oiled — is routine shop maintenance rather than a fight against a vise that never quite sat right in the first place.
Sponsored / affiliate links. As an Amazon Associate I earn from qualifying purchases. I may earn additional commission from eligible campaigns.