How to Make a Wooden Cigar Humidor (Spanish Cedar + 70% RH Guide)
A wooden cigar humidor holds cigars at roughly 70% relative humidity and 70°F inside an airtight box lined with at least 3-4mm of Spanish cedar – thinner liners lose their moisture-buffering capacity fast. Skipping a real seal test or trusting an uncalibrated hygrometer is the most common reason a finished DIY humidor still dries cigars out. This guide covers sizing the box, lining it correctly, choosing a humidification system, and calibrating a hygrometer with the salt test.
Tools, Materials, and What It Actually Costs
A cigar humidor is just an airtight wooden box with three jobs: hold humidity steady, keep light and pests out, and add a cedar aroma to the cigars. You do not need a cabinet shop to build one – a basic desktop humidor for 25-50 cigars is a manageable weekend project.
Tools: table saw or circular saw with a straightedge, router (for a rabbet or lid lip), drill, random-orbit sander, and at least four clamps. Hardware: a hygrometer, a humidification device (electronic unit or humidification packs), a set of small hinges, and a latch.
Real cost for a first build: $40-70 in cabinet-grade hardwood for the shell (mahogany or walnut), $30-35 for a 12 sq ft pack of Spanish cedar veneer to line the interior, $10-25 for a hygrometer/humidifier combo, and $10-15 for hinges and a latch – roughly $90-145 total, well under what a comparable finished humidor sells for retail.
Best Humidor Lining Pick
 |
Spanish Cedar, 12 Sq. Ft. Veneer Pack – $32.99 Sequence-matched solid veneer sheets, 48 inches long, thick enough to glue in as the interior lining this guide calls for – the actual material that gives a humidor its humidity buffering and cedar aroma.
|
Choosing the Box Wood and Sizing It Right
The outer shell should be a dense, stable hardwood – mahogany, walnut, or oak are the standard picks because they hold their shape as humidity swings inside the box. Spanish cedar is for the interior lining only; it is too soft (around 600 lbf on the Janka scale, versus roughly 800 lbf for mahogany and 1,010 lbf for black walnut – see our full wood hardness scale) to hold hinge screws or take daily handling as an exterior shell.
| Wood | Janka Hardness | Best Use in a Humidor |
|---|---|---|
| Spanish Cedar | ~600 lbf | Interior lining only – too soft for the outer shell |
| Mahogany | ~800 lbf | Outer shell – stable, classic humidor look |
| Black Walnut | ~1,010 lbf | Outer shell – darker grain, very stable |
| Hard Maple | ~1,450 lbf | Outer shell – most dent-resistant, lighter color |
Size the interior around how many cigars you actually keep on hand, not how many you own today. A small humidor holds about 25 cigars in roughly 9x7x4 inches of interior space; a 100-cigar humidor needs closer to 14x10x6 inches. Build slightly larger than you think you need – an underfilled humidor still holds humidity fine, but an overfilled one does not seal.
Building the Box: Step by Step
- Cut the panels: cut the base, four sides, and lid to size, squaring every edge on the table saw – a gap of even 1/16 inch anywhere on the seams will leak humidity.
- Dry-fit before gluing: assemble the box without glue first and check every joint closes with even, all-around contact.
- Glue and clamp the shell: apply wood glue to the base and side joints, clamp the box square, and let it cure fully (see the finishing note below on cure time) before moving on.
- Rout the lid lip: cut a shallow rabbet around the lid’s underside so it seats into the top of the box rather than just resting on it – this is what actually creates the seal.
- Install hinges and latch: mount two or three small hinges on the back edge and a latch on the front, checking the lid closes flush with no visible gap.
- Sand the shell: work through progressively finer grits (120 to 220) until the exterior is smooth and ready to finish.
Lining the Interior with Spanish Cedar
Spanish cedar is what actually makes a humidor work, not just what makes it smell good. It absorbs and releases moisture more evenly than the hardwood shell, which buffers small humidity swings before they reach the cigars, and it naturally repels tobacco beetles.
Line every interior surface – walls, floor, and the underside of the lid – with at least 3-4mm of Spanish cedar; 5-6mm holds humidity even more evenly if your box is larger than about 50 cigars. A thin decorative veneer under 1mm looks the part but does not have enough mass to buffer humidity the way a true lining does.
- Cut the cedar lining pieces to fit each interior panel with as few seams as possible.
- Glue with a thin, even coat of wood glue, then clamp or weight each piece flat until it cures – cedar will cup if it dries unclamped.
- Leave no gaps at the corners; any exposed hardwood shell inside the box is a spot the lining cannot buffer.
Installing the Humidification System
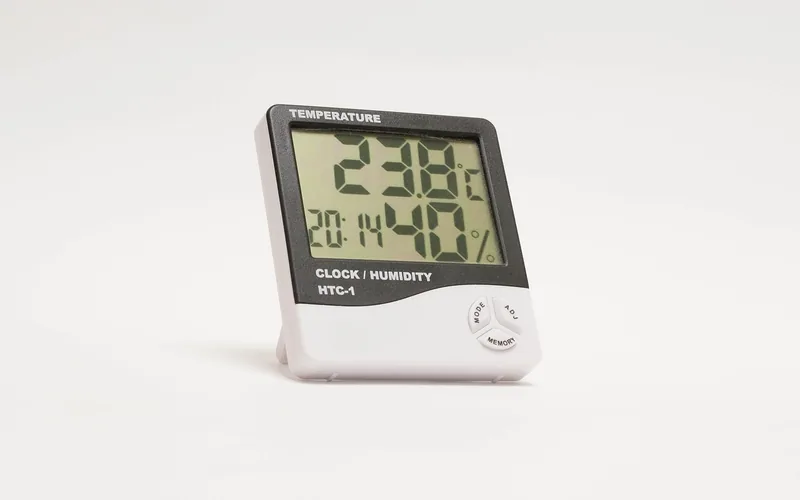
Electronic humidifiers hold a steady level automatically and are the easier option for a first build. Passive humidifiers (gel jars, foam packs, or two-way humidity packs) cost less but need regular refilling or replacement and swing more between refills. Mount the unit on a side wall, away from direct contact with the cigars, so moisture spreads evenly rather than soaking whatever sits closest to it.
Calibrate the Hygrometer Before You Trust It
A hygrometer straight out of the package is often wrong by several points, and an uncalibrated reading is the single most common reason a “finished” humidor still under- or over-humidifies. Run the salt test before the humidor ever holds a real cigar:
- Mix the solution: dissolve about 2 tablespoons of table salt into 1 tablespoon of water until it forms a wet paste, and place it in a small open container (a bottle cap works).
- Seal it with the hygrometer: put both inside a sealed jar or zip bag with the hygrometer face visible but not touching the salt paste.
- Wait 8-24 hours: a longer wait gives a more stable reading.
- Check against 75%: a salt solution stabilizes at 75% RH. If your hygrometer reads 70%, it is reading 5 points low – add 5 points to every future reading, or use the unit’s calibration screw if it has one.
Finishing and Sealing the Shell
Finish only the exterior – lacquer, varnish, or a wipe-on oil all work, and a satin or gloss lacquer is the most common choice on commercial humidors. Never finish the interior cedar lining; a sealed finish blocks the wood’s ability to absorb and release moisture, which defeats the reason you lined the box with cedar in the first place.
Let every coat cure fully – not just dry to the touch – before closing the lid with cigars inside. Solvent-based finishes and wood glue both off-gas for days after they feel dry, and residual fumes trapped in a sealed box will taint cigar flavor. Ventilate the box in a well-aired space for at least 48-72 hours after the final coat before you season it.
Seasoning Your New Humidor
- Wipe the interior cedar with a barely damp, lint-free cloth to remove dust – do not soak it.
- Place a small dish of distilled water inside (never tap water, which leaves mineral deposits that can spot the cedar) and close the lid.
- Wait 24-48 hours, then check the hygrometer against your calibrated baseline from the salt test above.
- If the reading is still low, repeat with a fresh dish of water or a damp sponge until the box holds 65-70% RH on its own for a full day.
- Only then load the humidification device and add cigars.
Long-Term Maintenance
Check humidity and temperature weekly. Hold steady at 68-70% RH and 65-72°F – readings creeping above 75% RH for extended periods create real mold risk on both the cedar lining and the cigars themselves, not just a flavor issue. Refill or replace the humidification device before it runs dry rather than after; letting it empty is what causes the swings that stress the cedar lining and dry out cigars.
Troubleshooting Common Problems
Humidity will not hold steady: check every seam and the lid lip for gaps with a strip of paper – if it slides out easily with the lid latched, the seal is failing there. Reseat the offending joint with wood glue or add a thin foam gasket under the lid lip.
Visible mold or a musty smell: this means humidity has been running too high (above 75% RH) for too long. Remove everything, wipe surfaces with a barely damp cloth, let the box air out fully, recalibrate the hygrometer, and rebuild humidity slowly rather than all at once.
Cedar has cupped or warped: this almost always means it was glued in without clamping while it cured. Re-glue the affected panel clamped flat, or replace it with a fresh piece from your veneer stock.
Frequently Asked Questions
How Do I Choose Wood For A Humidor?
Use a dense, stable hardwood like mahogany or walnut for the outer shell, and line the interior with Spanish cedar. The two woods do different jobs: the shell holds its shape and looks good, while the Spanish cedar lining buffers humidity and repels pests. Do not use Spanish cedar as the outer shell – it is too soft to hold hardware.
What Tools Do I Need To Build A Humidor?
A table saw or circular saw with a straightedge, a router for the lid lip, a drill, clamps, and a random-orbit sander cover the build. You will also need a hygrometer and a humidification device, which are not tools but are just as essential to a working humidor.
How Thick Should Spanish Cedar Lining Be?
At least 3-4mm on every interior surface for a standard desktop humidor, and 5-6mm if the box holds more than about 50 cigars. Thinner decorative veneer under 1mm looks correct but does not have enough mass to meaningfully buffer humidity.
How Do I Calibrate A Hygrometer Before Using It?
Run the salt test: seal the hygrometer in a container with a small dish of dissolved table salt and water for 8-24 hours. A correctly sealed salt solution stabilizes at 75% relative humidity, so any difference between that and your reading tells you exactly how far off the hygrometer is.
How Do I Maintain Humidity In My Humidor?
Check a calibrated hygrometer weekly and hold 68-70% relative humidity. Refill or replace the humidification device before it runs dry, and address any seal gap immediately rather than compensating by adding more water, which just causes bigger swings.
Can I Use A Humidor For Other Items?
Yes. Besides cigars, a Spanish cedar-lined box works for storing pipe tobacco, cigarette holders, or delicate spices that benefit from stable humidity, as long as you adjust the target RH for that specific item.
Conclusion
A wooden cigar humidor comes down to three things done right: a genuinely airtight shell, at least 3-4mm of Spanish cedar lining on every interior surface, and a hygrometer you have actually calibrated with the salt test rather than trusted out of the box. Get those three right and the humidification device does the rest. Related builds worth checking next: our Spanish cedar vs mahogany comparison if you are still choosing shell wood, and electric vs wood humidor if you are deciding whether to build at all.
See our full woodworking projects guide for more step-by-step builds like this one.
Sponsored / affiliate links. As an Amazon Associate I earn from qualifying purchases. I may earn additional commission from eligible campaigns.