How to Make a Wooden Dice: A DIY Guide for Beginners
To make a wooden dice, start with a block of wood and cut it into a cube. Then, carve numbers or dots on each face for identification.
Creating wooden dice can be a fun and rewarding project. It’s perfect for hobbyists and gamers alike. Handmade dice add a personal touch to your board games and can enhance the gaming experience. Choosing the right type of wood, such as maple or oak, ensures durability and aesthetic appeal.
Simple tools like a saw, chisel, and sandpaper are all you need to get started. This DIY project is not only enjoyable but also allows for customization. You can experiment with different sizes, shapes, and finishes to create unique dice that reflect your style. Let’s dive into the steps for making your own wooden dice!
Introduction To DIY Wooden Dice
Making your own wooden dice is a fun project. It combines creativity and craftsmanship. You can customize the design to match your style. Handmade dice add a personal touch to your games. Let’s dive into why crafting your own dice is a great idea.
Why Craft Your Own Dice?
Creating your own dice has many benefits:
- Customization: Choose shapes and colors you love.
- Quality: Use high-quality wood for durability.
- Fun: Enjoy the crafting process and learn new skills.
- Unique Gifts: Handmade dice make special presents.
- Cost-effective: Save money compared to buying premium dice.
Each die can tell a story. Your imagination is the limit.
Tools And Materials Needed
Gather the right tools and materials for this project. Here’s a simple list:
| Tools | Materials |
|---|---|
| Wood saw | Wood block (preferably hardwood) |
| Sandpaper | Wood stain or paint |
| Ruler | Clear sealant (optional) |
| Pencil | Dice template (optional) |
| Drill (optional) |
With these tools and materials, you’re ready to start.
Crafting wooden dice is a rewarding experience. Enjoy making something unique!

Choosing The Right Wood
When making wooden dice, the choice of wood plays a crucial role in the outcome.
Types Of Wood For Dice Making
Various types of wood can be used for crafting wooden dice, each with its unique characteristics.
Pros And Cons Of Different Woods
| Wood Type | Pros | Cons |
|---|---|---|
| Maple | Hard, durable | Expensive |
| Walnut | Rich color, easy to work with | Not as durable |
| Cherry | Beautiful grain pattern | Can darken over time |
Measuring And Cutting The Wood
Making a wooden dice starts with accurate measuring and cutting. This ensures each face is equal. Follow these steps for precise results.
Creating A Cutting Template
Begin by designing a cutting template. This helps guide your cuts. Use the following steps:
- Gather materials: paper, pencil, ruler, and scissors.
- Draw a square, each side measuring 1 inch.
- Mark the center of the square.
- Divide the square into six equal parts for each face.
Cut the template carefully. Ensure all edges are straight. This template will help you cut the wood accurately.
Precision Cutting Techniques
Use precision cutting techniques for the best results. Follow these tips:
- Choose the right saw: a band saw or scroll saw works best.
- Secure the wood in place with clamps.
- Follow the template closely while cutting.
Check your cuts often. Make adjustments as needed. Sand the edges to remove any rough spots. This ensures a smooth finish.
For a better understanding, refer to the table below:
| Tool | Purpose |
|---|---|
| Band Saw | For making curved cuts |
| Scroll Saw | For intricate designs |
| Clamps | To hold wood securely |
| Sandpaper | To smooth edges |
With these techniques, your wooden dice will be perfect.
Sanding And Shaping The Dice
Sanding and shaping your wooden dice is essential. This process makes them smooth and fun to use. It also enhances their appearance. Follow the steps below to achieve the best results.
Sanding Basics
Sanding prepares the surface of your dice. It removes rough spots and imperfections. Start with coarse sandpaper and gradually use finer grades.
- Coarse Sandpaper: Use 80 to 120 grit.
- Medium Sandpaper: Use 150 to 220 grit.
- Fine Sandpaper: Use 320 grit and above.
Sand in the direction of the wood grain. This prevents scratches. Keep the sandpaper flat against the surface. Regularly check your progress.
Achieving Perfect Edges And Corners
Perfect edges and corners improve the look of your dice. Use a sanding block for better control. It helps maintain even pressure.
- Start with coarse sandpaper to shape the edges.
- Switch to medium sandpaper for smoothing.
- Finish with fine sandpaper for a polished look.
Pay attention to the corners. Round them slightly for comfort. This makes rolling easier and more enjoyable.
| Sanding Stage | Grit Level | Purpose |
|---|---|---|
| Initial Shaping | 80 – 120 | Remove rough spots |
| Smoothing | 150 – 220 | Even out surface |
| Final Polishing | 320+ | Achieve a smooth finish |
Test the feel of your dice after sanding. They should feel smooth and comfortable. Enjoy the process and take your time.
Drilling The Dots
Drilling the dots on your wooden dice adds character. This step creates the numbers or symbols on each face. Precision is key to achieve a professional look. Follow these steps to ensure perfect results.
Layout Patterns For Dice Faces
Planning your dot layout is crucial. Use these common patterns for a classic look:
- 1 Dot: Centered on the face.
- 2 Dots: Diagonally placed in opposite corners.
- 3 Dots: Form a triangle pattern.
- 4 Dots: Form a square pattern.
- 5 Dots: Four dots in a square with one in the center.
- 6 Dots: Two rows of three dots.
Use a ruler to measure and mark the dots. This ensures they are evenly spaced. A template can also be helpful.
Drill Bit Selection And Techniques
Select the right drill bit for clean holes. Here are options:
| Drill Bit Type | Recommended Size | Use Case |
|---|---|---|
| Standard Twist Bit | 1/8 inch | Common for standard dot sizes. |
| Brad Point Bit | 1/8 inch | Best for precise drilling in wood. |
| Forstner Bit | 1/4 inch | Creates wider holes for larger dots. |
Use a drill press for stability. If using a handheld drill, keep it steady. Drill slowly to avoid splintering the wood.
Start with a pilot hole if necessary. This helps guide the larger bit. Make sure to drill straight down.
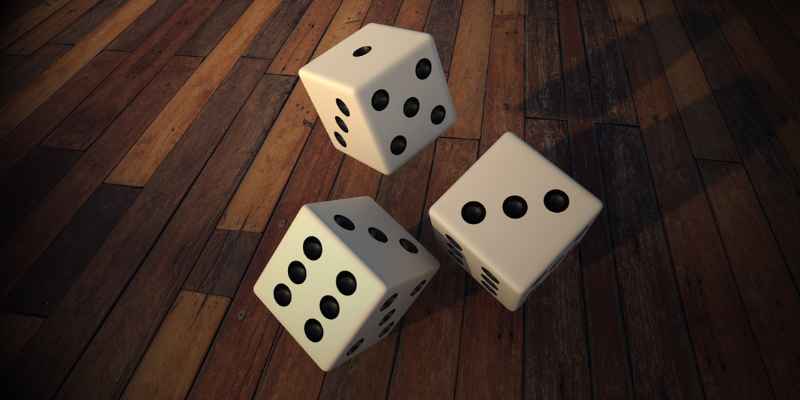
Finishing Touches
Finishing touches make your wooden dice stand out. These steps enhance its look and durability. Proper staining and sealing will protect your hard work.
Staining And Painting Tips
Choose the right stain or paint for your wooden dice. Here are some tips:
- Select a color: Pick a shade that complements your design.
- Test samples: Always test the stain on a scrap piece first.
- Apply evenly: Use a brush or cloth for a smooth finish.
- Multiple coats: Apply several coats for a richer color.
Let each coat dry completely before applying the next. This prevents smudging and uneven coloring.
Sealing And Protecting The Wood
Sealing your wooden dice is crucial for longevity. Here’s how to do it:
- Choose a sealant: Look for a non-toxic wood finish.
- Application method: Use a clean brush or spray can.
- Coat thoroughly: Ensure all surfaces are covered.
- Drying time: Allow the sealant to dry as instructed.
Sealing protects against scratches and moisture. It keeps your dice looking new for years.
| Sealant Type | Features |
|---|---|
| Polyurethane | Durable and water-resistant |
| Shellac | Quick-drying and non-toxic |
| Varnish | Flexible and UV resistant |
Choose the right sealant for your needs. Enjoy your beautifully finished wooden dice!
Quality Control And Testing
Ensuring quality control and testing is vital in making wooden dice. Each die should be measured for precision and evenly sanded to prevent rough edges. Thorough testing guarantees a balanced and fair gaming experience.
Ensuring Balanced Rolls
Troubleshooting Common Issues
Quality control and testing are crucial steps in the process of making wooden dice. To ensure balanced rolls, it is important to check for imperfections and inconsistencies. One common issue that may arise is uneven weight distribution. This can be resolved by sanding down any protruding edges or corners. Another issue to watch out for is loose or misaligned spots, which can be fixed by applying a small amount of wood glue and clamping the dice together until the glue sets. Regular testing by rolling the dice multiple times on different surfaces can help identify any issues and ensure a fair outcome. By following these steps, you can create high-quality wooden dice that provide an enjoyable gaming experience.
Creative Variations And Ideas
Creating wooden dice opens a world of creativity. Explore unique designs and personal touches. Make your dice stand out with these fun ideas.
Personalizing Your Dice
Personalization adds charm. Here are ways to make your dice special:
- Engraving: Use a wood burner for names or symbols.
- Coloring: Paint faces with vibrant colors.
- Decals: Apply stickers or decals for quick designs.
- Shapes: Experiment with shapes like hearts or stars.
Consider different materials for personalization:
| Material | Effect |
|---|---|
| Bamboo | Lightweight and eco-friendly. |
| Oak | Durable with a classic look. |
| Walnut | Rich color and texture. |
Expanding Beyond Traditional Dice
Think outside the box with these unique dice ideas:
- Custom Game Dice: Create dice for specific games.
- Story Dice: Use images to inspire storytelling.
- Educational Dice: Add numbers or letters for learning.
- Holiday-Themed Dice: Craft dice for special occasions.
Try mixing different styles:
- Combine shapes and colors.
- Use different sizes for variety.
- Add textures for sensory play.
With these creative variations, your wooden dice will be one-of-a-kind.
Frequently Asked Questions
How Do You Start Making Wooden Dice?
Begin by selecting quality wood, such as maple or oak. Cut the wood into equal cubes, ideally measuring 1 inch on each side. Use a saw for precision. Sand the edges to ensure smoothness. This initial step sets the foundation for your custom dice.
What Tools Are Needed For Wooden Dice?
Essential tools include a saw, sandpaper, and a drill. A square will help ensure perfect angles. Additionally, a ruler is vital for measurements. You may also want a wood burner for engraving numbers. These tools make the process smoother and more enjoyable.
How Do You Engrave Numbers On Wooden Dice?
Engraving can be done using a wood burner or a drill. For a wood burner, carefully trace the numbers onto each face. If using a drill, create small indentations for each number. This step adds personalization and enhances the visual appeal of your dice.
What Finish Should I Use For Wooden Dice?
A natural wood finish, like tung oil or polyurethane, works best. These finishes protect the wood and enhance its appearance. Apply a thin coat and let it dry completely. This not only preserves the dice but also gives them a beautiful shine.
Conclusion
Making wooden dice is a rewarding project that combines creativity and craftsmanship. With the right tools and materials, anyone can create unique, functional dice. Whether for games or decoration, your handmade dice will surely impress. Embrace the process, and enjoy the satisfaction of crafting something truly special.
Happy woodworking!