How to Make a Wooden Soccer Ball (32 Panels, Sizes, Bevels)
A wooden soccer ball is a truncated icosahedron: 12 pentagons and 20 hexagons, 32 panels joined along 90 edges. You can build that faceted shell from beveled plates, turn a true sphere on a lathe and paint the pattern, or start from a ball blank. This guide gives panel sizes for four ball diameters, the two bevel angles, and a weight check showing why a full-size wooden ball is a display piece, not a toy.
Which Wooden Soccer Ball Method Should You Pick?
Best Ball Blank Pick | |
 |
Woodpeckers 3 Inch Unfinished Birch Wooden Balls (3-Pack), $17.40 Skips the bevel math and the lathe: a 3 inch (about 75 mm) blank matches the smallest row in the size table below, so you can mark the 12 pentagon centers with dividers and paint the pattern.
|
As an Amazon Associate we earn from qualifying purchases.
Only the faceted shell is truly made of 12 pentagons and 20 hexagons, and it needs accurate bevels on 32 plates. The other routes give you a round ball with the pattern painted on.
| Method | Main tools | Skill needed | What you get | Best for |
|---|---|---|---|---|
| Faceted shell of 32 plates | Table saw or miter saw with a bevel, clamps, glue | Intermediate to advanced | A real polyhedron with visible seams | A display piece that shows the geometry |
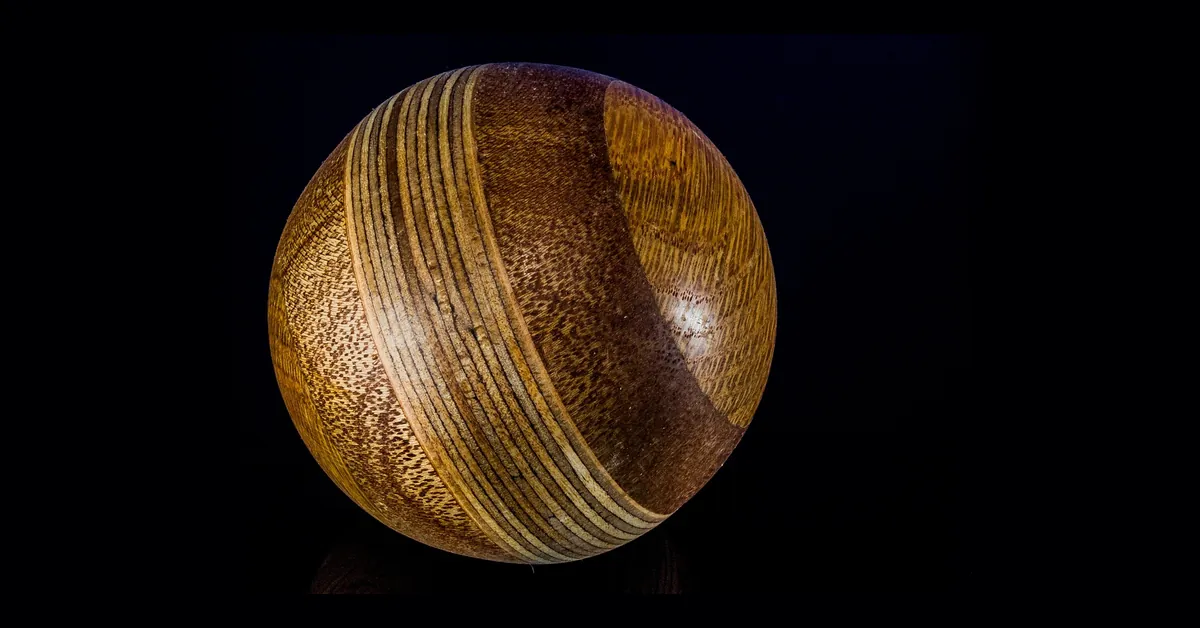
| Turned sphere, pattern painted | Lathe, roughing gouge, calipers, sandpaper | Intermediate (lathe) | A true sphere, pattern added on top | A smooth ball with a hand-painted pattern |
| Ball blank, pattern painted | Dividers, fine sandpaper, paint or burner | Beginner | A bought sphere you finish yourself | A quick gift or classroom project |
| Band saw and rasp from a block | Band saw, rasp, sanding block, ring gauge | Intermediate | A sphere as round as your checking is careful | No lathe, but time to spare |
If you are also cutting curves for other toy projects, our guide to shaping wood and crafting curves covers the rasp and sanding work that the band saw route relies on. For a different kid-sized build, see the wooden sword cut list.
How Many Shapes Does a Wooden Soccer Ball Need?
You need 32 panels: 12 regular pentagons and 20 regular hexagons, all with the same edge length. That is standard geometry for the truncated icosahedron. The solid has 60 vertices and 90 edges, and the counts check out with Euler’s formula: 60 vertices minus 90 edges plus 32 faces equals 2.
Two counts matter once you start cutting. Every pentagon touches five hexagons, and every hexagon touches three pentagons and three hexagons. That gives 60 pentagon-to-hexagon joints and 30 hexagon-to-hexagon joints, which is why the two bevel angles in the next section are not used equally. A shell built from plates has 180 bevelled plate edges in total, two for each of the 90 joints.
Assembly goes easiest in bands. With one pentagon at the pole, the 32 panels fall into 8 rings counted from that pole: 1 pentagon, 5 hexagons, 5 pentagons, 5 hexagons, 5 hexagons, 5 pentagons, 5 hexagons, and the last pentagon. Glue one ring at a time so any gap shows early.
A myth worth correcting: a ball made from flat panels is not a sphere. Using the standard volume and surface-area formulas, our calculation puts the faceted solid at a sphericity of 0.967, and its width depends on where you measure. Across opposite hexagon faces the ball is about 91.5 percent as wide as it is across opposite vertices. If you want a ball that rolls evenly, turn it. If you want the soccer-ball look in wood, accept the facets.
Panel Sizes and Bevel Angles for Four Ball Sizes
Pick the diameter of the sphere that touches all 60 corners, then divide by 4.956 to get the edge length of every panel. Everything else follows from that one number. The table below is our own arithmetic from the standard truncated icosahedron proportions, rounded to 0.1 mm, and it describes the outer face of each plate.
| Ball diameter (corner to corner) | Edge length | Hexagon, across flats | Hexagon, across corners | Pentagon, across corners | Pentagon, width |
|---|---|---|---|---|---|
| 75 mm (about 3 in) | 15.1 mm | 26.2 mm | 30.3 mm | 24.5 mm | 23.3 mm |
| 100 mm (about 3.9 in) | 20.2 mm | 34.9 mm | 40.4 mm | 32.6 mm | 31.0 mm |
| 150 mm (about 5.9 in) | 30.3 mm | 52.4 mm | 60.5 mm | 49.0 mm | 46.6 mm |
| 220 mm (about 8.7 in, size 5 scale) | 44.4 mm | 76.9 mm | 88.8 mm | 71.8 mm | 68.3 mm |
To draw a hexagon, set a compass to the edge length, draw a circle, and step the compass around the circle six times. The six marks are the corners. A pentagon is 1.618 times the edge corner to corner and 1.539 times the edge wide.
The two bevel angles
The angle between two neighboring faces of this solid is 138.19 degrees where two hexagons meet and 142.62 degrees where a pentagon meets a hexagon. A plate edge is cut at half the difference from 180 degrees, measured from square to the plate face. That gives the table below.
| Joint | Faces meeting at | Bevel from square | Joints on the ball |
|---|---|---|---|
| Hexagon to hexagon | 138.19 degrees | 20.9 degrees | 30 |
| Pentagon to hexagon | 142.62 degrees | 18.7 degrees | 60 |
Each hexagon therefore gets three edges at 20.9 degrees and three at 18.7 degrees, alternating around the plate, while every pentagon edge is 18.7 degrees. Mark each edge with its angle in pencil before you tilt the saw, and cut a trial set from MDF or cardboard first.
Choosing Wood for a Wooden Soccer Ball
Hard maple rates 1,450 lbf on the Janka scale. The Wood Database says it turns, glues and finishes well, though it can blotch with stain and burn under high-speed machining, and its dust has been reported to cause skin and respiratory irritation. See the hard maple profile at the Wood Database.
Basswood sits at 410 lbf, and the same source calls it one of the best species for hand carving. It turns with minimal tearout, glues and finishes well, but it dings easily and makes a powdery dust, so plan on dust collection. See the basswood profile at the Wood Database. If you want to compare other species first, see our types of wood guide or the birch wood characteristics page, since many ball blanks are birch.
How to Turn a Wooden Sphere on a Lathe
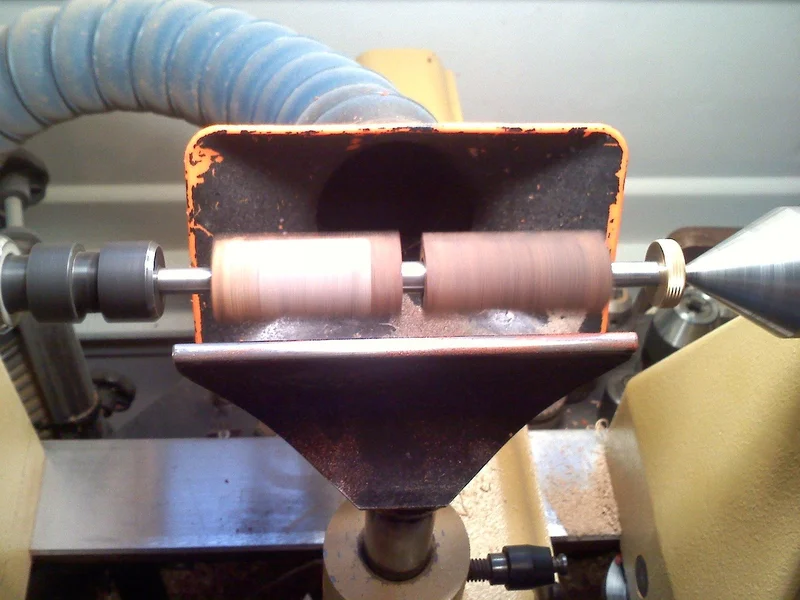
The Woodworker’s Journal walkthrough starts with a square blank of 3 x 3 x 4.5 inches mounted between drive and live centers. It sets the tool rest parallel to the bed about 1/4 inch from the wood, runs at roughly 1,500 rpm, and uses a spindle roughing gouge to turn the corners into a cylinder. Read the full method at Woodworker’s Journal: Build Skills by Turning a Sphere. In outline:
- Rough the blank into a cylinder, then take one or two full-length planing passes.
- Set outside calipers to the cylinder diameter and burnish layout marks that fix the sphere length.
- Part in near the marks to about 3/4 inch diameter, then clean the ends with a skew.
- Round each half with successive bead cuts from a 3/4 inch shallow spindle gouge, shaping by eye.
- Remount between shop-made cup centers, softwood with shallow coves, so you can reach and remove the stubs from different angles.
- Refine with shear-scraping cuts, sand from 150 to 400 grit, and wipe on an oil finish.
Check the lathe speed against the blank size before you start; our shop calculators include a lathe speed tool, and the swing on a lathe page explains whether your machine can hold the blank at all.
Lathe safety for sphere work
The American Association of Woodturners (AAW) safety guidebook says to tie back long hair, not wear gloves, avoid loose clothing and jewelry, rotate the workpiece by hand before switching on, and check the lathe speed first. It says full face shields give the protection needed for bowls and anything held on a chuck or faceplate, with safety goggles that have side protectors as the minimum for small items. A sphere blank is a spinning square at the start, so wear the face shield. Its suggested speed for 3 inch spindle stock is 1,500 rpm, and 1,000 rpm or less for 4 inch stock and larger. Sources: AAW woodturning safety and the AAW Safety Guidebook for Woodturners (PDF).
- Set the tool rest at the right height and distance so the blank cannot touch it, lock it, then rotate the blank by hand to confirm it clears.
- Rest the tool on the tool rest before it touches the wood, and keep your hands on the handle and rest, never wrapped around or in front of the spinning blank.
- Stop the lathe before you adjust the tool rest, inspect the ball or sand. AAW also says to remove the tool rest before sanding and finishing.
- Step out of the line directly in front of and behind the blank when you switch on, with a hand on the switch.
- A nearly finished ball held on soft cup centers can slip, so keep the last cuts light.
Shape a Sphere Without a Lathe
Start from a cube slightly larger than the finished diameter. Draw the ball circle on all six faces, band saw to those lines, cut off the corners, then rasp and sand, rotating the ball often. That sequence is our suggested route, not a tested one. Keep the stock flat on the saw table while you cut and keep your fingers clear of the blade; never feed a rounded ball into a band saw by hand, because it can roll or spin in your grip.
The weak point of this method is checking roundness by eye. Cut a hole in a piece of thin scrap with a hole saw at the finished diameter. Push the ball into the hole from several directions: where it sticks or leaves a gap, there is a flat or a bump to remove. Because that ring gauge is our own idea, use it as a guide, not a guarantee.
Mark and Paint the Soccer Ball Pattern on a Round Ball
Painting the pattern on a sphere comes down to 12 pentagon centers. One sits at each pole and two rings of five sit between them. On the sphere, every pentagon center is 63.4 degrees from its five nearest neighbors. The ring nearest the top pole is 63.4 degrees from the pole, and the second ring is 116.6 degrees from it, rotated 36 degrees against the first.
Use a divider set to the straight-line distance between neighboring pentagon centers, which is 0.526 of the ball diameter. From the top pole, mark five points at that distance, then mark the next ring from those. Pentagon corners lie 20.1 degrees from their center. Paint each pentagon dark and leave the hexagons light.
| Ball diameter | Divider setting (neighbor pentagon centers) | Pentagon center to its corner, along the surface |
|---|---|---|
| 75 mm | 39.4 mm | 13.1 mm |
| 100 mm | 52.6 mm | 17.5 mm |
| 150 mm | 78.9 mm | 26.3 mm |
| 220 mm | 115.7 mm | 38.5 mm |
Why a Full-Size Wooden Ball Is Not a Toy
FIFA’s Law 2 sets the size 5 ball at 68 to 70 cm in circumference and 410 to 450 g at the start of a match. A wooden ball of that size is solid hardwood and weighs several times as much.
Weight check: the Wood Database lists hard maple at 44 lb/ft3 (705 kg/m3) and basswood at 26 lb/ft3 (415 kg/m3), both as average dried weights. A solid sphere at the 69 cm midpoint, about 220 mm across, has a volume near 5,550 cm3, which works out to roughly 3.9 kg in maple or 2.3 kg in basswood. Source for the match limits: IFAB Law 2: The Ball.
| Solid ball | Volume | Maple (705 kg/m3) | Basswood (415 kg/m3) |
|---|---|---|---|
| 75 mm sphere | 221 cm3 | about 156 g | about 92 g |
| 220 mm sphere (size 5 scale) | about 5,550 cm3 | about 3.9 kg | about 2.3 kg |
These are our estimates for fully solid spheres at average dried weight. A faceted solid holds about 87 percent of the volume of the sphere that touches its corners, so it weighs about 13 percent less than the figures above, and a hollow plate shell weighs far less again.
Child Safety Checklist and Finishes
Treat every ball in this guide as a display piece. A full-size wooden ball is heavy and hard, and a handmade ball has not been tested or certified as a toy, so it should not be given to a child under 3. If a ball might end up with an older child, check current rules yourself and use the checklist below.
- Small parts (under 3): the CPSC small-parts rule at 16 CFR Part 1501 covers toys and articles intended for children under 3, and a small part is any object that fits completely inside a test cylinder 2.25 inches (57.1 mm) long by 1.25 inches (31.7 mm) wide, which approximates a young child’s fully expanded throat. The smallest plates in the table above are only 23 to 26 mm across, so keep loose panels, glue-up offcuts and paint chips away from young children while you build. CPSC small parts summary
- Small balls: under 16 CFR 1500.18(a)(17), a ball intended for children under 3 is banned if it passes entirely through a 1.75 inch (44.4 mm) hole under its own weight, and toys and games for ages 3 to 6 that contain small balls or small parts must carry a choking-hazard warning under 16 CFR 1500.19. Every ball size in this guide is 75 mm or larger, so it clears the 44.4 mm size limit, but that does not make a handmade wooden ball a toy for a toddler. See 16 CFR 1500.18 and 16 CFR 1500.19.
- Lead in paint: products for children 12 and under must not carry paint or similar surface coatings with more than 0.009 percent (90 ppm) lead. See the CPSC lead FAQ. Buy paint from a maker that states it is safe for children’s toys.
- Finish choice: one toy-finish guide lists medical-grade mineral oil, pure tung oil, beeswax and carnauba wax, and milk paint as toy-safe, and warns against boiled linseed oil (toxic driers), vegetable oils (can go rancid) and treated wood. It also recommends a full week or two of cure time before use. See Toy safe finishes. For general finishing basics see our wood finishing guide.
- Sanding and dust: maple dust has been reported as an irritant, so wear a dust mask and sand outdoors or with collection. Sand every edge and any spot that could splinter.
- Supervise: keep children away from the lathe or saw entirely. If you sell or give away balls as children’s products, the CPSC rules for children’s products apply to you and are beyond this guide, so check them first.
Frequently Asked Questions
How many pentagons and hexagons are on a wooden soccer ball?
A soccer ball pattern has 12 pentagons and 20 hexagons, 32 panels in all. The solid has 60 corners and 90 edges.
What bevel angle do wooden soccer ball panels need?
Cut 20.9 degrees from square where two hexagons meet and 18.7 degrees where a pentagon meets a hexagon. Most joints are the 18.7 degree kind: 60 of 90.
Can you make a wooden soccer ball without a lathe?
Yes. Cut a rough ball on a band saw, refine it with a rasp and sanding block, and check the shape with a ring gauge. A bought ball blank skips shaping entirely.
How much does a wooden soccer ball weigh?
A solid maple ball the size of a size 5 soccer ball weighs about 3.9 kg, and basswood about 2.3 kg, against 410 to 450 g for a match ball. These are our estimates from average dried density.
Is a wooden soccer ball safe for kids?
No, not as a toy for children under 3. Treat a wooden soccer ball as a display piece: it is hard and heavy, a handmade ball is not tested as a toy, and loose panels or paint chips can be small parts that fit the CPSC 1.25 by 2.25 inch test cylinder. For older children, use paint under the 0.009 percent (90 ppm) lead limit, pick a finish known to be toy-safe, let it cure fully, and supervise.
Conclusion
Choose the faceted shell to show off the geometry, turn a sphere if you want it round, or paint a ball blank if you want it done this weekend. Keep the counts straight: 12 pentagons, 20 hexagons, 90 joints, two bevel angles. For more offcut builds see projects with wood scraps, or try the wooden sword guide next.
Sponsored / affiliate links. As an Amazon Associate I earn from qualifying purchases. I may earn additional commission from eligible campaigns.