DIY Wooden Stool Plans: Cut List and Leg Angles (18-30 in)
A basic DIY wooden stool is four 2×2 legs, one 1×12 seat and eight short 1×3 rails, about 18 inches tall and buildable in an afternoon with pocket holes and glue. The catch is that stools tip more often than they break, so this layout keeps the legs within 1/2 inch of the seat edge. This guide gives a checked cut list, seat heights for 18, 24 and 30 inch stools, leg splay math and a safety note.
DIY Wooden Stool Plan: Materials and Cut List
Best Pocket-Hole Jig Pick for a First Stool | |
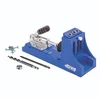 |
Kreg Pocket Hole Jig K4 ($99.00) The plan below joins every rail to a leg with pocket screws, and Amazon lists this jig for stock from 1/2 to 1-1/2 inch thick, which covers the 3/4 inch rails and 1-1/2 inch legs here.
|
As an Amazon Associate we earn from qualifying purchases.
This plan builds a square four-leg stool with the seat at 18 inches. Every size below was added up so the parts fit: a 3/4 inch seat on 17-1/4 inch legs gives exactly 18 inches. Nominal lumber sizes are smaller than their names, so measure your boards before you cut. A 1×12 is normally 3/4 by 11-1/4 inches, a 2×2 is 1-1/2 by 1-1/2 inches and a 1×3 is 3/4 by 2-1/2 inches.
| Part | Qty | Stock | Cut size |
|---|---|---|---|
| Seat | 1 | 1×12 (3/4 x 11-1/4 in) | 11-1/4 x 11-1/4 in |
| Legs | 4 | 2×2 (1-1/2 x 1-1/2 in) | 17-1/4 in long |
| Top rails | 4 | 1×3 (3/4 x 2-1/2 in) | 7-1/4 in long |
| Lower stretchers | 4 | 1×3 (3/4 x 2-1/2 in) | 7-1/4 in long |
Here is the arithmetic behind the rail length. The legs sit 1/2 inch in from every seat edge, so the outside span of the legs is 11-1/4 minus 2 x 1/2, which is 10-1/4 inches. Take away two legs at 1-1/2 inches each and the gap between legs is 7-1/4 inches, so every rail is 7-1/4 inches long.
Buying list: one 6 foot 2×2 (the four legs use 69 inches, leaving about 3 inches before saw kerfs), one 6 foot 1×3 (the eight rails use 58 inches) and a piece of 1×12 about 12 inches long. You also need wood glue, 1-1/4 inch pocket screws, sandpaper in 120 and 220 grit, a combination square, clamps, a saw and a drill.

Pick the Seat Height Before You Cut Anything
Seat height decides every leg length, so settle it first. Furniture guides such as SizeMarker and Barstool Comforts agree on the same working rule: leave 10 to 12 inches between the seat top and the underside of the surface. Subtract that from the surface height and you have your seat height.
| Stool type | Seat height | Surface it fits | Surface minus 10 to 12 in |
|---|---|---|---|
| Table stool (this plan) | 18 in | Typical table, 28 to 30 in | 16 to 20 in |
| Counter stool | 24 to 26 in | Counter, 34 to 36 in | 22 to 26 in |
| Bar stool | 28 to 30 in (30 most common) | Bar, 40 to 42 in | 28 to 32 in |
To change the plan, subtract 3/4 inch for the seat. A 24 inch stool needs 23-1/4 inch legs and a 30 inch stool needs 29-1/4 inch legs. Tall legs flex more, so add a second ring of stretchers and read the tip-over section below before you build a bar-height stool.
How to Build the Stool Step by Step
- Cut the legs together: Clamp the four 2×2 blanks side by side, mark one line across all four and cut them in one pass so they match.
- Cut the rails: Cut eight 7-1/4 inch pieces of 1×3. Use a stop block so every piece is the same length.
- Drill pocket holes: Put one pocket hole in each end of all eight rails, with the holes on the face that will point inward.
- Build two side frames: Glue and screw a top rail between two legs, with the rail flush to the top of the legs. Add a lower stretcher about 4 inches up from the floor end. Repeat for the second side.
- Join the frames: Connect the two frames with the remaining rails. Stagger the pocket holes by about 1 inch in height from the side rails so screws from neighboring rails do not meet inside the leg.
- Check square and flat: Measure both diagonals, which should match, and set the frame on a flat surface to confirm no foot lifts.
- Attach the seat: Center the seat so there is 1/2 inch overhang all around. Drive two pocket screws from each top rail up into the seat and test one on scrap first, so the screw tip cannot poke through the top.
- Sand and finish: Ease the seat edges, sand to 220 grit and apply your finish.
Not comfortable with pocket holes on thin stock? Our guide to pocket holes in thinner stock covers the limits. If you would rather use a spinning seat, a wood swivel base bolts under the same seat.
Why Stools Wobble and Tip (and the Myth About Leg Angle)
A common claim is that wobble comes from getting the leg angle wrong. For a straight-leg stool like this one there is no angle, and it still rocks if one leg is off. The real cause is simple geometry: three feet always touch a flat floor, so the fourth foot either touches or it does not. A stool rocks when any leg is even a little short, or when the floor is uneven.
Tipping is a different problem. A stool tips when the load passes beyond the line connecting its feet. With the legs inset 1/2 inch, someone perching on the extreme edge of the seat puts weight 1/2 inch outside that line, and the stool’s own light weight does little to resist. That is why the plan limits the overhang. Keep it at 1/2 inch or less, and do not cut a seat bigger than the leg frame under it.
Optional: Splayed Legs and the Angle Math
Splaying the legs sideways moves the feet outward so they sit beyond the seat edge. The numbers below come from basic trigonometry. With seat thickness 3/4 inch, the vertical leg height H is seat height minus 3/4. The leg length along its centerline is H divided by the cosine of the angle, and the foot moves outward by H times the tangent of the angle.
| Seat height | Vertical leg height | 5 degrees: length / foot offset | 10 degrees: length / foot offset |
|---|---|---|---|
| 18 in | 17-1/4 in | 17.32 in / 1.51 in | 17.52 in / 3.04 in |
| 24 in | 23-1/4 in | 23.34 in / 2.03 in | 23.61 in / 4.10 in |
| 30 in | 29-1/4 in | 29.36 in / 2.56 in | 29.70 in / 5.16 in |
Worked example for the 18 inch stool at 5 degrees: 17.25 divided by cos 5 degrees (0.9962) is 17.32 inches, and 17.25 times tan 5 degrees (0.0875) is 1.51 inches. With the leg top 1/2 inch inside the seat edge, the foot lands about 1 inch outside it. Cut the top and bottom of each leg parallel so the foot sits flat, and mark the cuts with a bevel gauge.
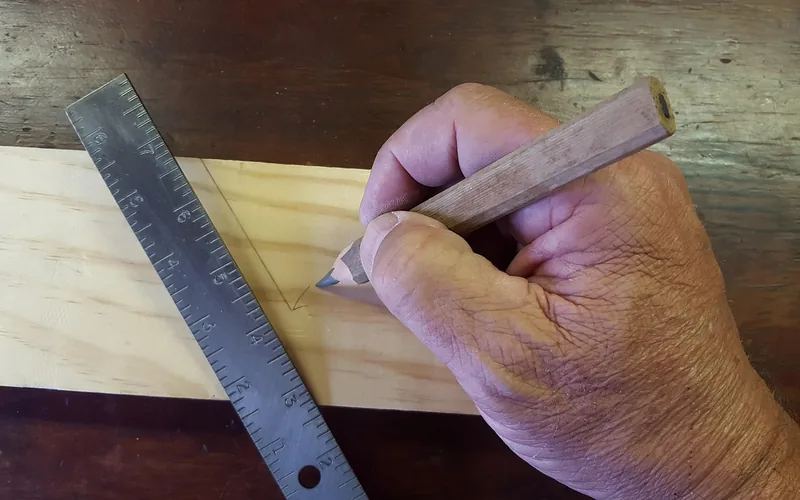
Splaying in one direction only is the beginner-friendly version: the two side frames lean outward and the rails between them need angled ends, so dry-fit and measure the real gap instead of trusting a formula. Splay only protects the direction it leans in. Leave the other direction straight with a small overhang, or learn compound angles first.
Stability and Safety Note
- No load rating: This plan has not been load-tested and we do not claim a weight limit. A home-built stool is not certified to any furniture standard, so test it with a gradual load while someone spots you.
- Do not stand on it: A seat stool is designed for sitting. Standing raises your center of gravity above the feet. Use a proper step stool or ladder to reach high places.
- Taller means less stable: A 30 inch stool has a higher center of gravity than an 18 inch one, so use splay, wide stretchers and no seat overhang.
- Check the joints: Look for loose screws and cracked glue lines every few months, and retighten them.
- Kids and shop floors: Wear eye protection when cutting and drilling, and keep children from climbing on a finished stool.
- Rags with oil finishes: Rags soaked in some oil-based finishes can heat up as they cure, so lay them flat outdoors to dry before you throw them away.
Wood, Finish and Where This Stool Fits
Pine from a home center is the cheapest way to build the stool and takes paint well. For a stain finish, choose poplar or a hardwood and sand it to 220 grit before applying. Always seal the underside of the seat and the feet, since feet sit on damp floors the most.
If you plan to sit at a bench, match the seat height to your bench using our guide to ideal workbench height. Need to hold the legs steady while cutting? A pair of DIY saw horses does that, and leftover offcuts from the 1×12 make good parts for small wooden boxes. For another way to join legs to a top, see attaching legs without an apron.
Common Stool-Building Mistakes
- Cutting the legs one at a time, so the stool rocks.
- Using nominal sizes (1×12 is not 12 inches) in the cut list.
- Making the seat much wider than the leg frame, which invites tipping.
- Skipping glue and relying on screws alone.
- Driving seat screws without a scrap test and having them poke through.
- Building a tall stool with no lower stretchers.
DIY Wooden Stool FAQ
How tall should a DIY wooden stool be?
Take the height of the surface it sits under and subtract 10 to 12 inches. That gives about 24 to 26 inches for a 34 to 36 inch counter and about 30 inches for a 42 inch bar. For a 28 to 30 inch table, an 18 inch seat leaves 10 to 12 inches.
What is the best wood for a DIY stool?
Pine and poplar are the easiest for a first build because they cut and screw without much effort. Oak and maple cost more and are harder to drill, but they resist dents better. Choose straight, flat boards with no loose knots in the legs, since a leg is the part that carries the load.
How do you stop a four-leg stool from wobbling?
Make all four legs the same length by clamping them together and cutting them in one pass, then check the finished stool on a flat surface. Four feet only touch a plane when they are level, so even a small error rocks the stool. Sand the longest foot a little at a time.
How much splay should stool legs have?
Five to ten degrees is a practical range. At 5 degrees an 18 inch stool’s feet sit about 1.5 inches outward from the leg tops, which puts them roughly 1 inch past the seat edge. At 10 degrees the offset is about 3 inches. More splay widens the base but makes the cuts and rails harder.
Can you build a stool without pocket holes?
Yes. Glued and screwed joints, dowels or mortise and tenon all work. Pocket holes are popular because they hide the screws and forgive small measuring errors. Whatever you use, glue every joint and add lower stretchers so the legs cannot spread under load.
Conclusion
Start with the seat height you need, subtract 3/4 inch for the seat, and cut the four legs together. Keep the seat overhang at 1/2 inch or less, use lower stretchers and glue every joint. Splay the legs only if you have checked the angle math and the rails. Always treat a homemade stool as a seat, not a ladder.
Sponsored / affiliate links. As an Amazon Associate I earn from qualifying purchases. I may earn additional commission from eligible campaigns.