How to Nail Hardwood Flooring Near Walls (1/4-Inch Gap Rule)
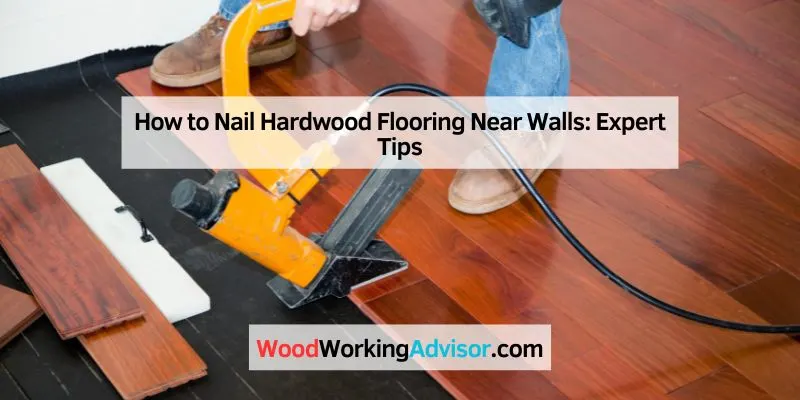
Nail hardwood flooring near a wall by face-nailing the first and last rows by hand, since a pneumatic flooring nailer cannot swing close enough to blind-nail through the tongue at the standard 45-degree angle.
Skip the 1/4-inch expansion gap or force a blind nail too close to the wall, and the tongue cracks or the floor buckles once humidity rises. This guide covers face-nailing technique, gap spacing, and the tools you need to finish rows cleanly against any wall.
Introduction To Hardwood Flooring Installation
Best Flooring Nailer Pick
NuMax 4-in-1 Mini Flooring Nailer/Stapler – $89.99
A compact head that still fits into the tight clearance this guide’s face-nailing rows require, so you are not stuck buying a second tool for the last few rows against the wall.
- Best for: Finishing rows near walls where a full-size nailer cannot swing
- Why we picked it: The 4-in-1 mini design switches between brad nails and staples, matching the face-nailing and blind-nailing methods covered in this guide
- Main drawback: The compact head will not drive 2-inch cleats, so 3/4-inch solid hardwood in the open field of the room may still need a full-size nailer
Compare more flooring nailer options
 Option 1 3PLUS 4-in-1 Flooring Stapler/Nailer – $76.88
|
 Option 2 Bostitch Mallet-Actuated Flooring Nailer – $219.00
|
 Option 3 Freeman Lightweight 2-in-1 Flooring Nailer/Stapler – $169.00
|
As an Amazon Associate we earn from qualifying purchases.
Choosing hardwood flooring offers many advantages. It adds beauty and value to your home. Hardwood is also durable and can last for years. It is easy to clean and maintain.
Pre-installation considerations are key. Measure your space carefully before starting. Check for any moisture issues in the area. This can affect the flooring’s lifespan. Choose the right wood type based on your style and budget. Consider the acclimation process for best results. For a full rundown of flooring types, costs, and care, see our wood flooring guide.
Tools And Materials Needed
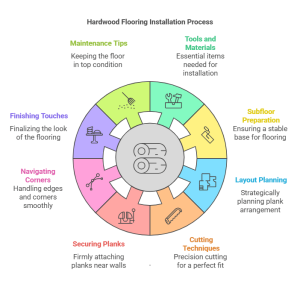
For a successful hardwood flooring project, you need the right tools. Essential tools include a measuring tape, circular saw, and miter saw. A nail gun is also very helpful for securing the planks.
Gather materials like flooring adhesive, wood glue, and safety goggles. Keep a rubber mallet handy for tapping planks into place. A level ensures the floor remains flat and even.
Selecting the right hardwood planks is crucial. Choose planks that match your room’s decor. Consider the wood type and finish for durability. Various styles and colors offer plenty of options.
Preparing The Subfloor
Start by cleaning the subfloor. Remove all dirt, dust, and debris. Use a vacuum or broom for this task. A clean surface helps with proper adhesion.
Next, level the subfloor. Check for any high or low spots. Use a leveling compound to fill in low areas. This ensures a smooth surface for your hardwood flooring.
Moisture control is important for the subfloor. Test the moisture levels using a meter. Ideal moisture levels should be below 12%. If levels are high, allow the subfloor to dry.
Consider using a vapor barrier to protect against moisture. This barrier helps keep your flooring safe. Proper preparation leads to a successful installation.
Measuring And Planning Layout
Measuring for hardwood flooring starts with precise calculations. Plank width at the walls is crucial. Measure the total room width and divide it by plank width. This ensures even rows on both sides.
Expansion gaps are vital for wood movement. Leave a gap between the wall and planks. This space allows for expansion and contraction due to humidity changes. Typically, a 1/4 inch gap works well.
| Step | Description |
|---|---|
| 1 | Measure room width accurately. |
| 2 | Calculate plank width for even rows. |
| 3 | Leave a 1/4 inch expansion gap at walls. |
Cutting Techniques For A Perfect Fit
Using the right precision cutting tools is key for a perfect fit. A jigsaw is great for curves. A circular saw works well for straight cuts. Keep the blade sharp for cleaner edges.
Cutting planks around obstacles requires careful planning. Measure the space accurately before cutting. Use a template to trace the shape needed. Always double-check measurements to avoid mistakes.
Practice on scrap pieces to improve your skills. This helps build confidence and ensures accuracy. Take your time for the best results.
Securing Planks Near Walls
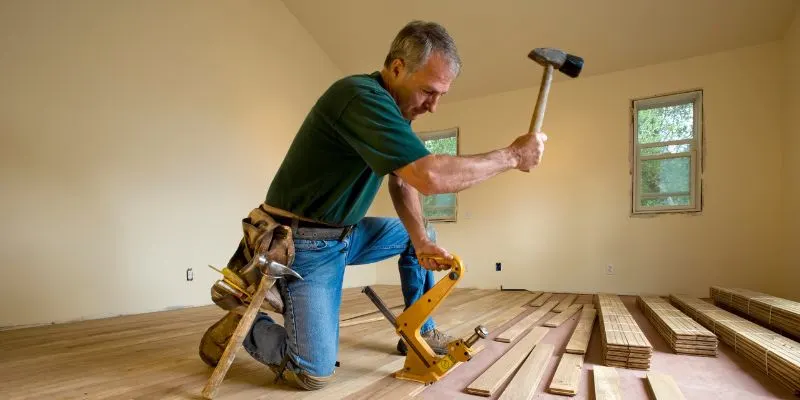
Securing planks near walls requires proper nailing techniques. Start with a stapler for the first few rows. Use a nail gun for the remaining planks. Make sure to space nails evenly for a strong hold. Each plank should be nailed at the ends and sides.
For areas near the wall, gluing down hardwood is another effective method. Use a strong wood adhesive to ensure the planks stay in place. Apply the glue to the subfloor before laying the planks. This method prevents gaps and keeps the floor looking neat.
Check for levelness before securing. A level floor helps prevent creaking sounds. Always wear safety gear to protect yourself while working.
Navigating corners and edges can be tricky. Corner cuts are essential for a clean look. Use a miter saw for precise angles. Measure carefully before cutting each piece.
For transitions, consider using a transition strip. It helps blend different flooring types. Always ensure the strip fits snugly against the wall.
Dealing with uneven walls requires patience. Use a level to check the wall’s straightness. If the wall is uneven, trim the boards accordingly. This keeps the flooring looking neat and professional.
Finishing Touches For A Professional Look
Installing baseboards and moldings adds a finished look to your hardwood floor. Choose materials that match your décor. Use a nail gun for easy installation. Ensure tight seams for a clean appearance.
Sealing and protecting edges is crucial for durability. Use a high-quality sealant on the edges. This helps prevent moisture damage and wear. Make sure to apply the sealant evenly for the best results. Regular maintenance keeps your floor looking new.
Maintenance And Care Tips
Regular cleaning is key for maintaining hardwood floors. Use a soft broom or vacuum to remove dirt. A damp mop works well for deeper cleaning. Avoid using too much water, as it can damage the wood.
For preventing scratches, place mats at entrances. This stops dirt and debris from entering. Use furniture pads under chairs and tables. These pads protect the floor from scratches and dents.
Consider using area rugs in high-traffic spots. They offer extra protection and add style. Regularly inspect for any signs of wear or damage. Early detection helps in preventing bigger problems.
Troubleshooting Common Issues
Gaps between hardwood flooring and walls can be fixed easily. Use wood filler to fill small gaps. For larger gaps, consider using quarter round or baseboards.
Squeaks often happen due to loose planks. Tighten screws or nails in the squeaky areas. A little wood glue can also help secure loose boards.
Repairing damaged planks is essential for a clean look. Replace the damaged plank if possible. If not, sand it down and apply matching stain.
| Issue | Solution |
|---|---|
| Gaps | Use wood filler or install quarter round. |
| Squeaks | Tighten screws or use wood glue. |
| Damaged Planks | Replace or sand and stain the plank. |
Frequently Asked Questions
How Do I Start Hardwood Flooring Near A Wall?
Begin by measuring the room and planning the layout. Leave a small expansion gap between the flooring and the wall for movement. Use a chalk line to mark where the first row will go. Start laying planks from the wall, ensuring they fit snugly against it.
What Tools Do I Need For Installation?
You’ll need essential tools like a miter saw, tape measure, and flooring nailer. A pry bar, hammer, and spacers are also important. Ensure you have safety gear, like goggles and gloves. These tools will help ensure a smooth and efficient installation process.
Should I Leave Space Between The Floor And Wall?
Yes, leaving a gap is crucial for expansion. Hardwood flooring can expand and contract due to temperature and humidity changes. A 1/4-inch space is typically recommended. This gap will prevent buckling and allow the wood to move freely without damaging the walls.
How Do I Secure Hardwood Flooring Near Walls?
Use flooring nails or staples to secure the planks. Start from one end and work your way to the other. Ensure each plank is tightly fitted against the previous one. Using adhesive can also provide extra stability, especially in high-traffic areas.
Conclusion
Mastering hardwood flooring near walls requires patience and precision. Use the right tools and techniques for flawless results. Always leave expansion gaps to ensure durability. With careful planning, your hardwood floors will look stunning. Follow these tips, and you’ll achieve a professional finish that enhances your space beautifully.
Happy flooring!
Sponsored / affiliate links. As an Amazon Associate I earn from qualifying purchases. I may earn additional commission from eligible campaigns.