How to Reduce Diameter of Wooden Dowel: Quick DIY Tips
Reduce a wooden dowel’s diameter with sandpaper, a hand plane, or a lathe, moving from coarse to fine grit and checking size with calipers as you go.
Remove too much in one pass and the dowel drops below its safe load rating for the joint it’s meant to fit. This guide covers three methods — sanding, lathe turning, and hand planing — plus fixing uneven spots and picking the right dowel wood.
Introduction To Dowel Modification

Sandpaper Assorted Grit Pack (12-Pc, 80-400) – $8.99
Best for: the sanding method this guide walks through step by step
Why we picked it: covers the coarse-to-fine grit progression (80 up through 220-plus) this article uses to sand a dowel down without gouging it
Main drawback: sheets, not discs — hand-sanding only, no power-sander adapter
View Our Pick on AmazonCompare more dowel-resizing options
 Wood Rasp File Set (3-Pc) – $14.99
The rasp this guide names as a first-choice tool for taking down dowel diameter fast, before switching to finer sandpaper. Check on Amazon |
 Digital Caliper (6-In) – $19.98
For the frequent diameter checks this guide recommends during sanding, lathe turning, and hand planing so you don’t oversand. Check on Amazon |
 Wood Filler Kit w/ Putty Knife – $11.97
Comes with the putty knife this guide’s troubleshooting section calls for when filling deeper imperfections after resizing. Check on Amazon |
As an Amazon Associate we earn from qualifying purchases.
Resizing wooden dowels is important for many projects. It helps fit them into smaller spaces. Sometimes, a dowel may not fit your design. This modification can improve the overall look and function.
There are different types of wooden dowels available. Common options include:
| Type of Dowel | Description |
|---|---|
| Birch | Strong and smooth, perfect for furniture. |
| Pine | Lightweight and easy to work with. |
| Oak | Durable and great for heavy-duty projects. |
Choosing the right dowel type is crucial. Each type has different properties and uses. If your project calls for a harder species than what’s in this table, see this guide to ash wood dowel characteristics.
Safety First: Preparing Your Workspace
Setting up a safe workspace is crucial for any project. Start by wearing essential safety gear. This includes safety goggles, ear protection, and gloves. These items will help prevent injuries.
Clear the area of any clutter. Make sure tools and materials are organized. This reduces the risk of accidents. Good lighting is also important. It helps you see your work clearly.
Ensure that your workbench is stable. A sturdy surface keeps everything secure. Keep a first aid kit nearby just in case of emergencies. Regularly check your tools for safety.

Choosing The Right Tools
Choosing the right tools is crucial for dowel resizing. Manual tools include hand sanders and files. These tools offer great control and precision. Power tools like rotary sanders and lathes save time and effort.
Here are some recommended tools for dowel resizing:
| Tool Type | Examples |
|---|---|
| Manual Tools | Hand Sandpaper, Files |
| Power Tools | Rotary Sanders, Lathes |
Choose tools based on your project needs. For small tasks, manual tools work well. For larger projects, power tools can be more efficient. If you still need to cut a dowel to length first, see how to cut dowels for the full process.
Technique 1: Sanding For Precision
Choosing the right sandpaper is crucial for effective sanding. Start with a coarse grit sandpaper, like 60 or 80 grit. This grit helps remove material quickly.
Next, switch to a medium grit sandpaper, such as 120 or 150 grit. This smooths the surface and prepares it for finer sanding.
Finally, use fine grit sandpaper, like 220 grit. This will give your dowel a smooth finish.
Follow these steps for the best results:
- Secure the dowel in a workbench or clamp.
- Sand in a consistent direction along the grain.
- Check the diameter frequently to avoid oversanding.
- Wipe off dust with a clean cloth after sanding.
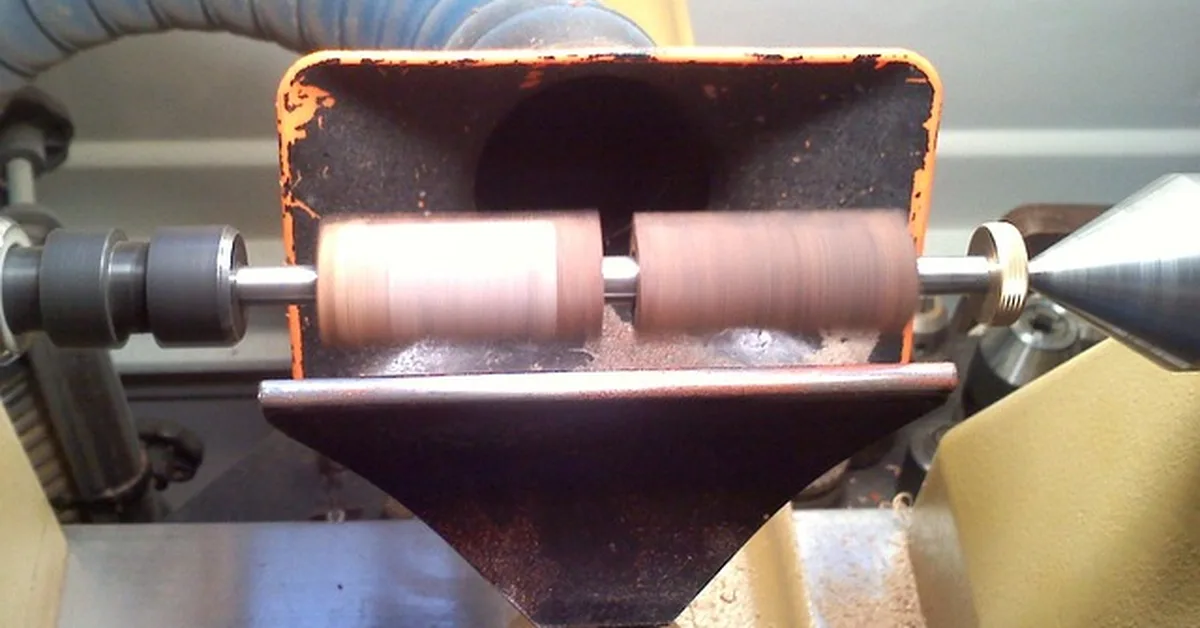
Technique 2: Using A Lathe
Start by measuring the diameter of the wooden dowel. Make sure it fits the lathe. Use a caliper for accurate measurement.
Next, secure the dowel in the lathe. A tight grip is crucial for safety. Ensure the lathe is off before you start setting it up.
Check the lathe speed. A slower speed is better for beginners. It helps control the cutting process more easily.
Use a chisel to shave off the dowel’s surface. Keep the chisel at a slight angle. This ensures a smooth finish.
Regularly check the diameter as you work. Stop the lathe and measure often. This way, you achieve the desired size safely.
Technique 3: Hand Planing Method
Choosing the right hand plane is crucial for reducing the diameter of a wooden dowel. Look for a block plane or a jack plane. These types are easy to handle and control. They help create a smooth finish.
Check the blade sharpness before you start. A sharp blade makes cutting easier and cleaner. Always use a straight edge to guide your cuts. This ensures even removal of material.
For best results, work slowly and steadily. Apply gentle pressure while planing. This will help you avoid removing too much material at once.
Remember to sand the dowel afterward for a polished look. Use fine-grit sandpaper to smooth out any rough spots.
Finishing Touches
Start by using fine-grit sandpaper to smooth the surface of the wooden dowel. Sand in the direction of the grain for the best results. This helps remove any rough spots and imperfections.
After sanding, wipe off the dust with a clean cloth. This prepares the dowel for a finish. Choose a wood finish that suits your project. Options include varnish, lacquer, or oil.
Apply the finish evenly with a brush or cloth. Allow it to dry completely before adding more coats. This provides protection and enhances the wood’s natural beauty.
Follow the manufacturer’s instructions for the best results. Always work in a well-ventilated area to stay safe.
Troubleshooting Common Issues
Uneven reduction of a wooden dowel can be frustrating. Measure the dowel carefully before starting. Use a caliper to check the diameter. If one side is larger, sand it down gently. Rotate the dowel while sanding for an even surface.
For fixing surface imperfections, start with coarse sandpaper. This helps remove larger flaws. Move to finer sandpaper for a smooth finish. Always keep the dowel rotating to avoid flat spots. Wipe off dust with a clean cloth after sanding.
Use a wood filler for deeper imperfections. Apply it with a putty knife. Once dry, sand it down to match the dowel’s surface. This ensures a seamless look.

Frequently Asked Questions
How Can I Easily Reduce The Diameter Of A Dowel?
To reduce the diameter of a wooden dowel, you can use sandpaper or a dowel sander. Start with coarse grit sandpaper to remove material quickly. Gradually switch to finer grit for a smooth finish. Always measure the dowel frequently to ensure accuracy throughout the process.
What Tools Are Best For Dowel Diameter Reduction?
The best tools for reducing dowel diameter include a hand-held sander, dowel sander, or a lathe. Each tool provides different levels of precision and ease. For small projects, sandpaper works well. For larger or more precise work, consider using a lathe for consistent results.
Is It Safe To Reduce Dowel Size At Home?
Yes, it is safe to reduce dowel size at home with proper precautions. Always wear safety goggles to protect your eyes from dust. Ensure your workspace is clear and stable. Follow the manufacturer’s instructions for any power tools to minimize risk during the process.
What Grit Sandpaper Should I Use For Dowels?
Start with 80-grit sandpaper to remove material quickly. After achieving your desired size, switch to 120-grit for smoothing. Finally, use 220-grit for a polished finish. This progression ensures a smooth surface and prevents scratches, enhancing the dowel’s overall appearance and usability.
Conclusion
Reducing the diameter of a wooden dowel can enhance your woodworking projects. With the right tools and techniques, you can achieve precise results. Remember to take your time and measure accurately. By following these steps, you’ll create smooth, perfectly-sized dowels tailored to your needs. A resized dowel also fits more easily when joining round wood together. Need to go the other direction instead? Here’s how to widen a hole in wood.
Happy woodworking!
Sponsored / affiliate links. As an Amazon Associate I earn from qualifying purchases. I may earn additional commission from eligible campaigns.
 PATIKIL 5/8 x 8 Inch Wooden Dowel Rod, 30 Pcs Wood Dowels Unfinished Round Wood Sticks Precut Wooden Rods for Craft DIY Projects Home Decor, Natural Color
 PATIKIL 3/4 x 8 Inch Wooden Dowel Rod, 8 Pcs Wood Dowels Unfinished Round Wood Sticks Precut Wooden Rods for Craft DIY Projects Home Decor, Natural Color