How to Remove Polyurethane From Wood Without Sanding
Sanding removes polyurethane by grinding it away, dust and all – but a chemical stripper removes it by dissolving the cured finish so you can scrape it off in soft sheets. That difference matters more than most guides let on: the method only works if you actually let the stripper finish dissolving the finish before you touch a scraper to it. Rush that step and you’ll gouge the wood instead of lifting the coating. This guide covers the citrus and soy-based stripping method in the detail it actually needs – what “ready to scrape” looks like, the mistake that ruins most first attempts, and the real safety notes that matter, including one that gets skipped on older furniture.
The Chemical-Stripping Method That Actually Works
OUR PICK FOR THIS METHOD
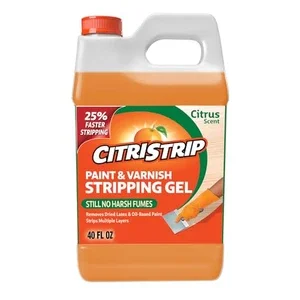 |
Citristrip Stripping Gel, 40 oz – $16.85 A citrus-based gel stripper that stays active long enough to fully dissolve polyurethane without sanding, exactly the method covered in this guide.
|
A dedicated furniture stripper, or a citrus/soy-based lower-fume alternative, chemically softens the cured polyurethane film so it lifts off the wood instead of grinding off with it. The process has four real steps, and the one people skip is dwell time.
What You’ll Need
- A citrus or soy-based paint and varnish stripping gel (not a spray-on aerosol – gel clings to vertical surfaces and stays active longer)
- A plastic putty knife or scraper (never metal for this method)
- Nitrile gloves and safety glasses
- Plastic wrap, if you’re stripping multiple old coats and need to extend the dwell time
- Mineral spirits and clean rags for neutralizing residue afterward
- A drop cloth or plastic sheeting to protect the surrounding work area
1. Apply a Generous, Even Coat
Brush the stripper on in one direction, in a layer thick enough that you can’t see the wood grain through it. Thin, patchy coats dry out before they finish working, which is the single biggest reason a first attempt at this method fails and someone concludes “it didn’t work” when really it just never got a fair shot.
2. Let It Dwell – Don’t Rush This Part
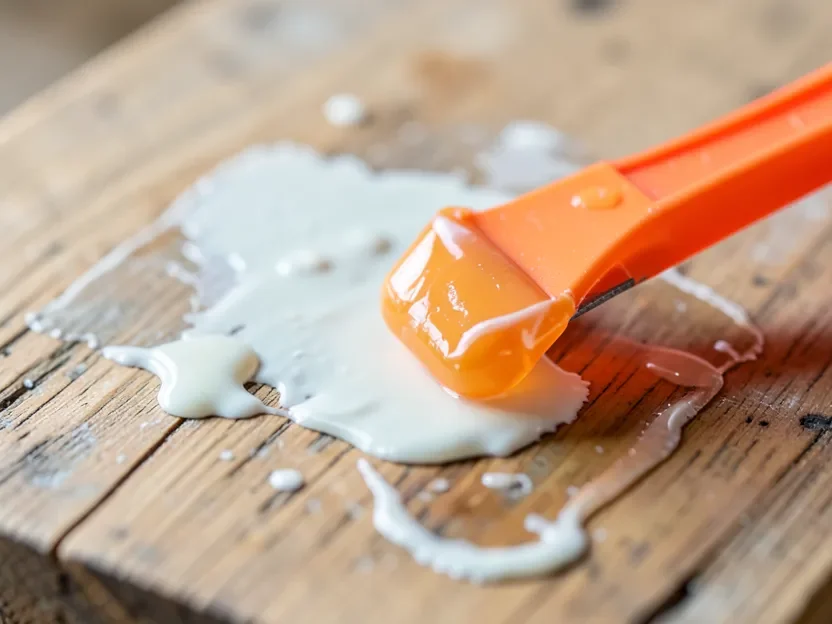
This is the step almost everyone shortcuts. A citrus-gel stripper like Citristrip is formulated to stay wet and active for a long window (the manufacturer’s own instructions cite up to 24 hours under the right conditions), specifically so it can keep working through multiple coats of finish without you having to babysit it. For a single coat of polyurethane, checking after 20 to 30 minutes is reasonable; for a piece with several old coats stacked up, plan on it taking considerably longer, and covering the surface loosely with plastic wrap will keep the gel from skinning over and drying out before it’s done. You’ll know it’s ready when the finish has gone from a hard, glossy film to something that looks wrinkled, bubbled, or matte and soft – not when the clock says so.
3. Scrape With Plastic, Not Metal
Once the finish has visibly softened, use a plastic putty knife or scraper, not a metal one. Metal edges gouge the softened wood fibers underneath the finish, especially on softer species like pine, and those gouges show up as dents once you refinish. Work the scraper at a low angle in the direction of the grain and let the softened polyurethane curl off in sheets. If a section resists and feels like you’re grinding rather than lifting, stop – that section needs more dwell time, not more pressure.
4. Neutralize and Clean Up
After scraping, wipe the surface down with mineral spirits (or whatever neutralizer the product label specifies) to lift the last of the dissolved residue before it re-hardens on the wood. Skipping this step is why some people end up with a tacky, hazy surface that won’t take a new finish evenly. Let the wood dry fully before applying any new stain or topcoat.
Why Vinegar and Hydrogen Peroxide Aren’t a Real Substitute
A lot of “natural” polyurethane-removal advice recommends plain vinegar or hydrogen peroxide as a chemical-free alternative. It’s worth being direct about this: neither one actually dissolves a cured polyurethane film the way a real stripper does. Vinegar is a mild acid that can dull or haze some finishes and help loosen surface grime, but it doesn’t break down cross-linked polyurethane resin, and a few minutes of “sitting” won’t change that. What usually happens is someone scrubs hard enough to burnish or scratch the existing finish and mistakes that surface change for the polyurethane coming off. If the goal is genuinely dissolving the finish rather than abrading it, a real citrus or soy-based solvent stripper is doing actual chemistry that household acids and peroxide aren’t built for.
Safety Notes That Actually Matter
- Ventilation: Even a “low-fume” citrus stripper should be used with windows open or a fan moving air out of the workspace, not sealed in a small closet or basement corner.
- Gloves and eye protection: Nitrile gloves and safety glasses, every time – the gel is milder than a caustic stripper but it’s still meant to dissolve a finish, and that includes skin contact you don’t want.
- Older furniture and lead paint: If the piece could be from before 1978, don’t assume the coating underneath is just clear finish – older furniture sometimes has a lead-based paint or primer layer beneath later topcoats. Stripping that dry (sanding) is the higher-risk method; if you suspect lead is present, a wet chemical-stripping approach like this one is already safer than dry sanding, but consider testing the finish first and dispose of the stripped-off waste according to your local hazardous-material guidelines rather than in household trash.
The Honest Caveat: This Isn’t Effortless
“Without sanding” doesn’t mean “without work.” A single thin coat of polyurethane on a small project might come off in one application. A tabletop with three or four old coats built up over the years will realistically need at least two full rounds of stripper, and you should expect to spend real time scraping, not just spraying and walking away. The genuine upside over sanding is that you’re not grinding dust into the air or thinning the wood with an orbital sander – you’re trading sanding’s mess for a slower, more patient process. Budget your time accordingly rather than expecting a five-minute fix.
It’s also worth testing the stripper on a hidden spot first, like the underside of a tabletop or the back of a leg, before committing to the whole piece. Some finishes respond faster than others depending on age and how many coats were originally applied, and a quick test tells you roughly how long to plan for before you’re committed to a full application on a visible surface.
What About a Heat Gun Instead?
A heat gun is the other real no-sanding option: it softens the finish with heat instead of chemistry, which works well on large, flat panels but is harder to control on carved or detailed pieces, and it carries its own risk of scorching the wood if you linger too long in one spot. Keeping the gun moving in a steady sweeping motion, a few inches off the surface, and pulling it away the moment the finish starts to bubble is what separates a clean lift from a scorch mark. Chemical stripping tends to win out on detailed or multi-coat pieces precisely because it doesn’t carry that heat risk. If you want a full side-by-side of chemical stripping, heat, and sanding so you can pick the right method for your specific piece, we cover all three in detail in our full polyurethane removal comparison guide.
Frequently Asked Questions
How long should I let a citrus stripper sit before scraping?
Check a small area after 20 to 30 minutes for a single coat. Multiple old coats can take considerably longer – go by how the finish looks and feels (wrinkled and soft, not hard and glossy) rather than a fixed clock time, and cover the area with plastic wrap to keep the gel from drying out while it works.
Will vinegar or hydrogen peroxide really remove polyurethane?
No, not in the way a real chemical stripper does. Both can dull or abrade the surface of a finish with enough scrubbing, but neither actually dissolves cross-linked polyurethane resin. For genuine removal without sanding, a citrus or soy-based solvent stripper is doing real chemistry that vinegar and peroxide can’t replicate.
Is chemical stripping safer than sanding for old furniture?
Generally yes, especially if the piece might have an older lead-based paint or primer layer underneath – dry sanding that creates airborne dust, while wet chemical stripping keeps the material contained in a gel you scrape and wipe away. Test first if you suspect lead is present, and dispose of the waste per your local hazardous-material rules.
Do I need to scrape with a metal putty knife for stubborn spots?
No – stick with plastic even on stubborn areas. If a spot isn’t lifting easily, it needs more dwell time or a second application, not more force from a metal blade. Metal scrapers gouge the wood fibers underneath the softened finish.
Sponsored / affiliate links. As an Amazon Associate I earn from qualifying purchases. I may earn additional commission from eligible campaigns.