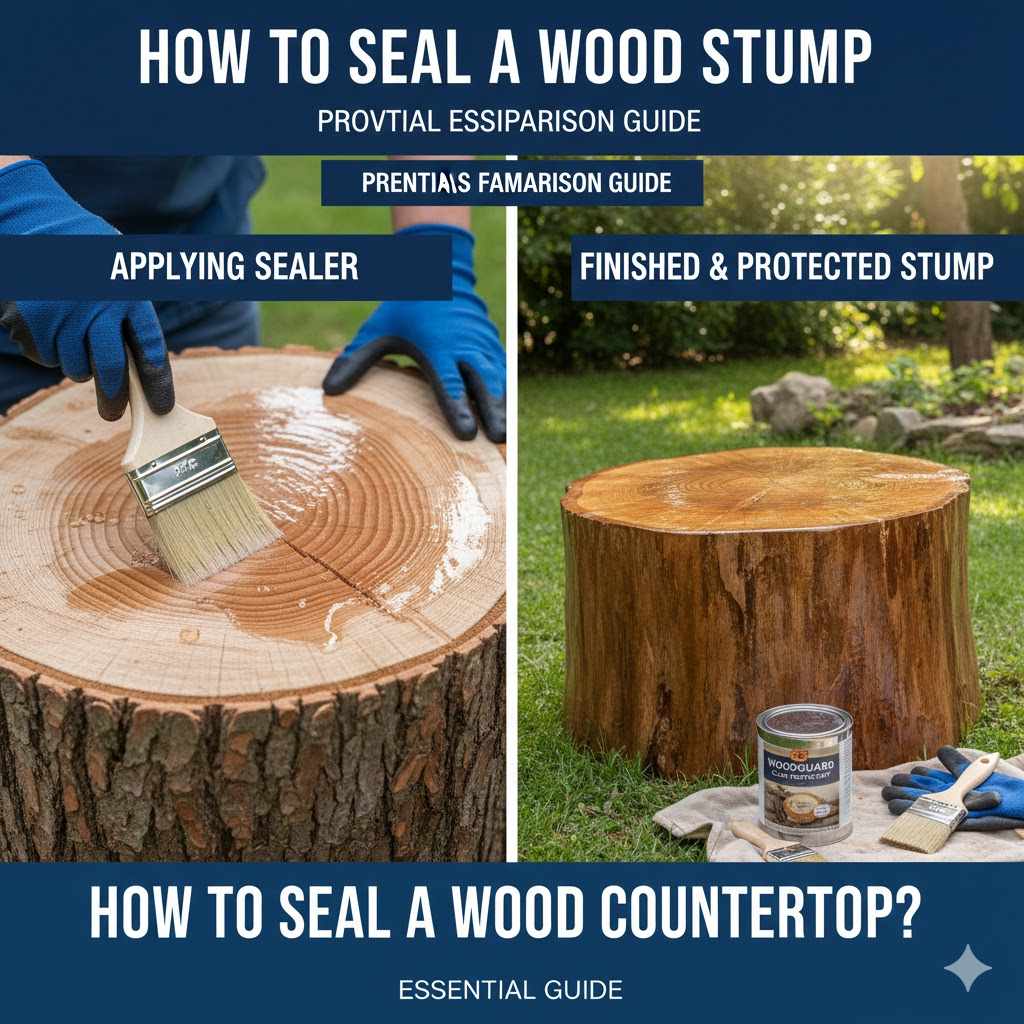
How To Seal A Wood Stump: Proven Essential Guide
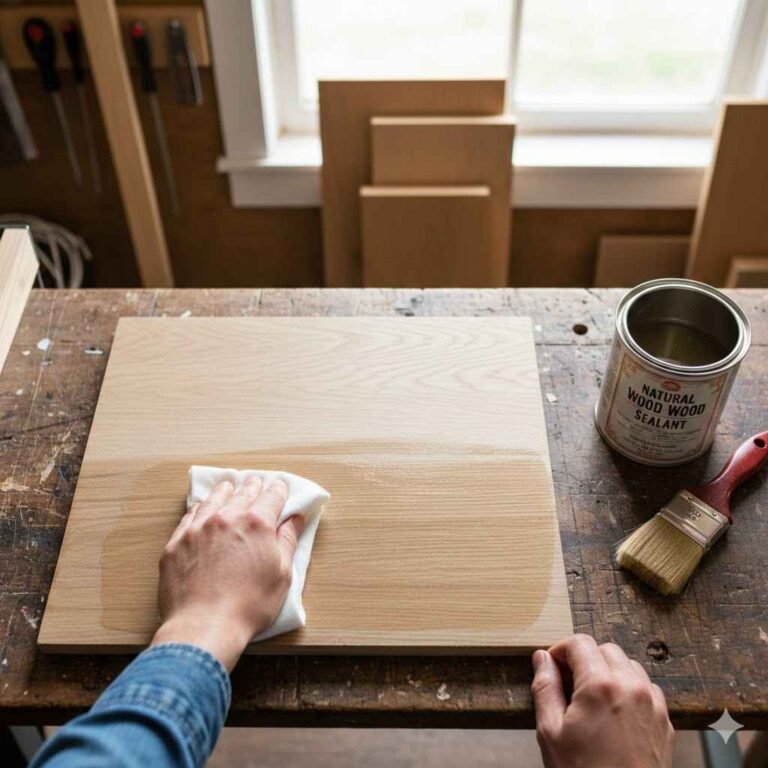
To successfully seal a wood stump, you must first clean and thoroughly dry the surface, then apply multiple liberal coats of a quality wood sealer, exterior paint, or specialized epoxy, paying close attention to end grain areas, to prevent water intrusion, decay, and pest damage.
Welcome to the workshop! Dealing with a leftover wood stump—whether from a newly removed tree or an old project piece—can feel frustrating. Exposed wood outside just seems to rot, warp, and attract pests way too fast. It’s a common problem, even for seasoned DIYers. You want that stump to last longer, maybe as a natural patio seat or a garden feature.
Don’t worry! Sealing a wood stump is an easy, rewarding project once you know the simple steps. We will walk through exactly what you need, how to prepare the surface perfectly, and which sealant works best for lasting protection.
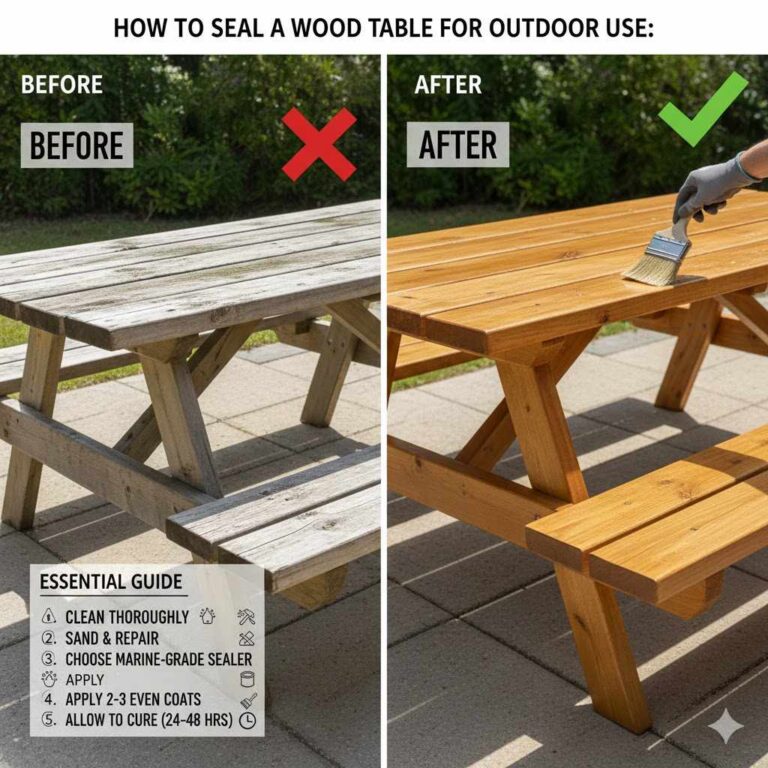
As your woodworking mentor, I believe that good preparation makes 90% of any finishing job successful. Sealing a stump isn’t just about brushing on a clear coat; it’s about creating a weatherproof shield against the elements. Water is wood’s worst enemy, leading to fungal growth, rot, and splitting (checking). By sealing it right, you keep moisture out and significantly extend the stump’s life, preserving its natural look and structure.
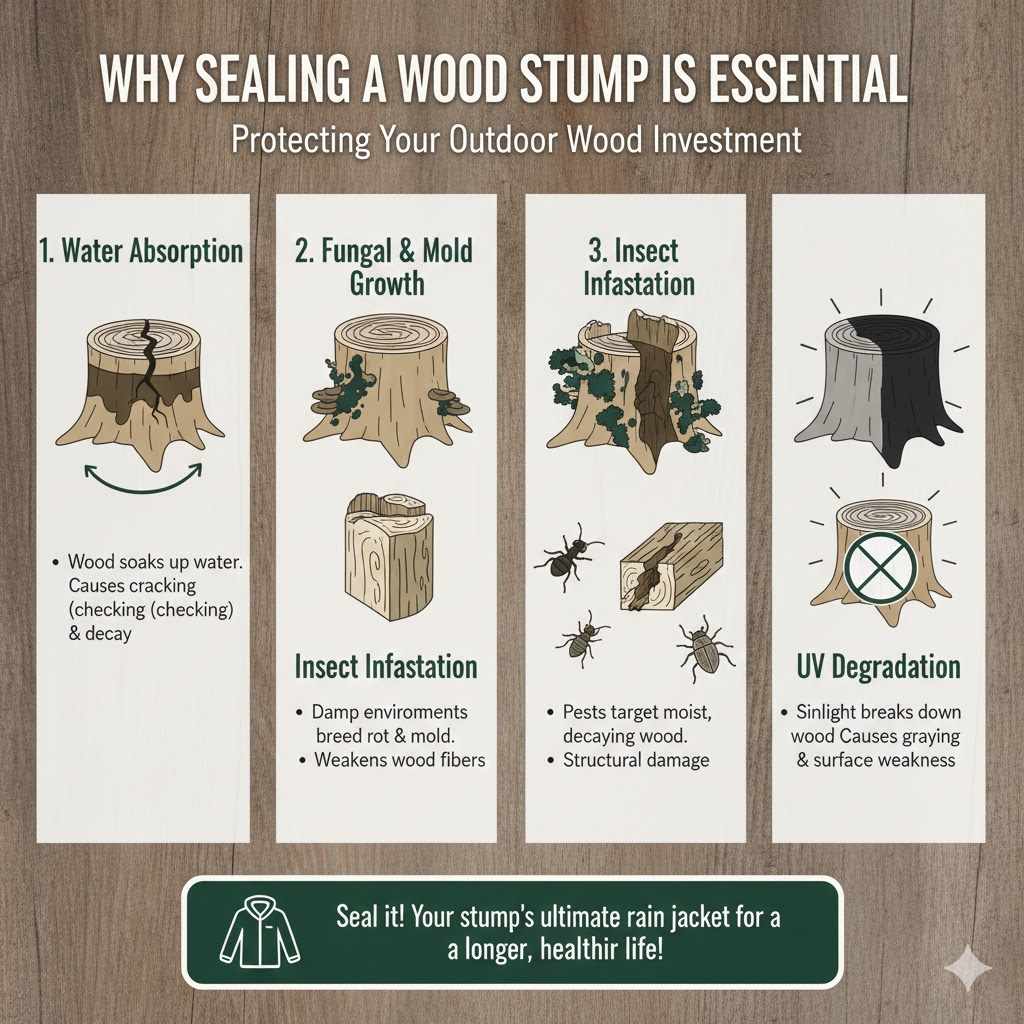
Why Sealing a Wood Stump is Essential
Many beginners think if the tree is dead, it’s already safe. That’s not true when it’s exposed to rain, snow, and sun. An unsealed stump will break down quickly, making it an eyesore and a safety risk sooner than you’d like.
The Major Threats to Outdoor Wood Stumps:
- Water Absorption: Wood soaks up water like a sponge. This swelling and shrinking causes cracks (checking) and allows decay to set in.
- Fungal and Mold Growth: Damp, dark environments—like the bottom of a stump or deep cracks—are perfect breeding grounds for fungi that cause rot.
- Insect Infestation: Carpenter ants, termites, and powderpost beetles target wood that is moist or already weakened by decay.
- UV Degradation: Sunlight breaks down the wood fibers (lignin) on the surface, causing graying and making the wood weak.
By sealing the stump, you proactively stop these issues. Think of the sealer as the ultimate rain jacket for your wood.
Step 1: Choosing Your Stump Sealing Product
The “best” sealer depends on how you plan to use the stump. Do you want it to look natural, or do you prefer a painted, opaque finish? For beginners, look for products labeled “exterior grade” or “waterproofing sealant.”
Common Sealing Options Compared
| Sealer Type | Appearance | Durability/Longevity | Best For |
|---|---|---|---|
| Clear Exterior Water Sealant | Natural, allows wood grain to show. May amber slightly. | Good (1–3 years before reapplication). | Garden accents where natural wood look is desired. |
| Oil-Based Deck Stain/Sealer | Semi-transparent to solid colors, good UV protection. | Very Good (3–5 years). | Stumps used as informal seating; better moisture barrier. |
| Exterior Primer & Paint | Opaque, completely hides wood grain. | Excellent (5+ years if topcoated properly). | Stumps needing maximum weather protection or decoration. |
| Penetrating Epoxy (for high-end projects) | Can dry clear or be tinted, often used for stabilization. | Excellent/Permanent. | Stumps meant to be furniture or high-exposure features. |
If you are just starting out, a good quality exterior deck or fence stain with built-in UV inhibitors is usually the most forgiving and effective choice for a stump.
Step 2: Gathering Your Tools and Supplies
Safety first! Before we start cleaning, make sure you have everything laid out. Preparation prevents frustration later on. You don’t need a professional woodworking shop for this; simple hand tools work great.
Essential Supply Checklist:
- Safety Gear: Safety glasses, gloves (rubber for cleaning, work gloves for handling), dust mask or respirator.
- Cleaning Supplies: Stiff-bristled brush, mild soap (like dish soap), bucket of water, garden hose.
- Drying Tools: Rags or old towels, electric leaf blower (optional but highly recommended).
- Preparation Tools: Sharp wood chisel or utility knife, sandpaper (80 or 100 grit).
- Application Tools: Wide paintbrush (natural or synthetic bristles), foam brushes (good for corners), rollers (for the top surface).
- Sealing Product: Your chosen exterior sealer, stain, or paint.
Step 3: Thorough Preparation of the Stump Surface
This is the single most crucial step. If you apply sealer onto dirt, moss, or wet wood, the sealer will peel off, trapping moisture underneath. We must make the stump clean and completely dry.
A. Removing Debris and Moss
Start by clearing the area around the stump. If there are leaves, twigs, or grass growing against the sides, remove them. We need clear access to the whole exterior surface, including where the stump meets the ground.
- Use your stiff-bristled brush to scrub away any visible moss, algae, or surface grime. Don’t be gentle; we want it clean!
- If the stump has heavy mold or algae growth, you can use a very weak solution of water and bleach (about 1 part bleach to 10 parts water) or a dedicated deck wash. Apply this solution, let it sit for 10 minutes, scrub well, and rinse thoroughly.
- Rinse the entire stump down using the garden hose. Avoid soaking the wood; just rinse off the soap and loose debris.
B. Trimming Loose Wood and Smoothing Rough Spots
A freshly cut stump often has fuzzy edges, splinters, or wood fibers that lift when they get wet. These need to be removed or sealed tightly.
- Inspect the top (the “face”) of the stump. If you see deep, soft fuzz, gently scrape it away with a utility knife or wood chisel. We want a relatively smooth surface to hold the sealant.
- Use your 80 or 100-grit sandpaper to knock down any major sharp edges or prominent splinters on the sides. A power sander is often too much for this job; hand sanding the irregular surfaces is best.
C. Drying Time: The Patience Game
You cannot rush this. Wet wood will trap moisture under the sealer, leading to rapid failure and rot. How long you wait depends entirely on the weather.
- Ideal Conditions: Warm, dry weather (above 50°F or 10°C) with low humidity.
- Wait Time Estimate: Even if it feels dry on top, the center can hold moisture. Aim for at least 3 to 7 days of consistent dry, sunny weather after washing.
- The Quick Dry Tip: If time is short, use an electric leaf blower set to high to blast water out of all the cracks, crevices, and especially the top face grain. Keep it running for 20–30 minutes all over the stump.
Expert Tip: You can perform a quick moisture test. Place a small square of clear plastic wrap taped down over an area of the top surface overnight. If condensation forms underneath the plastic in the morning, the wood is still too wet, and you need more drying time.
Step 4: Sealing All Sides of the Stump
The main goal here is coverage. Remember, wood moves. We need to seal the wood inside the cracks and, most importantly, seal the end grain.
Understanding End Grain vs. Side Grain
The side of the stump (the bark side) doesn’t absorb much liquid—it’s already naturally water-resistant. However, the top and bottom—the cut surfaces where the wood grain runs vertically—are like straws, sucking up moisture instantly. These are called the end grain, and they need extra attention.
Application Process Step-by-Step:
- Ventilation Check: Ensure you are working in a well-ventilated area. Even “low-VOC” finishes give off fumes. Wear your dust mask or respirator, especially when applying oil-based products.
- Start on the Bottom (Optional but Recommended): If you can safely lift the stump onto blocks (bricks or scrap wood) for better access, do it. Apply two generous coats of sealer directly to the bottom cut surface first, allowing proper cure time between coats as directed on the can. This is your first defense against ground moisture.
- Tackle the Top (End Grain Focus): Apply your first coat heavily to the entire top surface. Don’t brush lightly; force the product down into the grain lines and any existing checks (cracks). Wait for the time specified on the can (usually 30 minutes to a few hours).
- The Second Top Coat: Apply a second, liberal coat to the top surface. Make sure you overlap the edges, letting some runoff drip down the sides naturally.
- Sealing the Sides (Bark Area): Use your brush to apply a thinner coat to the bark area. You don’t need heavy saturation here, but you must seal the wood just beneath the bark line, as this area often splits first.
- Re-coating Checks and Cracks: Using a foam brush or a narrow artist brush, deliberately fill every crack, check, or knot hole you can find with the sealer. You can never have too much protection where water can collect.
- Curing: Let the stump cure fully. Depending on the product (and temperature/humidity), this might take 24 to 72 hours before it’s ready for heavy use or constant rain. Do not cover the stump while curing unless the manufacturer specifies otherwise, as it needs air circulation.
For reference, a highly durable product that experts often recommend for severe outdoor exposure is a marine-grade spar varnish, although this might be harder to apply on such a rough surface. For accessibility, standard high-quality exterior oil-based penetrating stains are a great choice. Always consult the specific manufacturer’s guidelines on recoating times found on websites like the U.S. Forest Products Laboratory (FPL) for wood protection guides.
Step 5: Maintenance and Reapplication
Sealing a wood stump is not a one-and-done project, especially outdoors. Sunlight, temperature swings, and constant moisture exposure will slowly degrade the finish.
When to Re-Seal:
- Visual Check: If the surface looks dull, chalky, or if water no longer beads up (it soaks in immediately), it’s time to refresh the sealer.
- Timeline: Depending on sun exposure, you should plan to inspect and lightly re-coat clear sealers every 1–2 years. Oil-based stains might last 3–5 years.
- Cleaning Before Re-coating: Before reapplying any finish, give the stump a quick wash with soapy water and a light scrub to remove surface dirt. You usually do not need heavy sanding unless the old finish is peeling severely. Apply a fresh top coat following the product’s instructions.
Troubleshooting Common Stump Sealing Mistakes
Even when following the steps, small problems can pop up. Here are a few common issues and how to fix them like an experienced pro.
Problem 1: The Wood Is Cracking/Checking Worse After Sealing
Why it happens: If the wood was already too dry before sealing, or if you only sealed the outside surfaces and not the end grain deeply enough, the wood still shrinks and expands unevenly, forcing existing cracks to widen.
The Fix: You need to fill those cracks. Once the original sealer has cured, use a flexible exterior caulk specifically made for wood (like a polyurethane sealant), or if you want a rustic look, mix some sawdust from the stump with wood glue or a small amount of penetrating epoxy and force that mixture into the cracks. Seal over the repair later.
Problem 2: The Sealer is Too Shiny/Sticky
Why it happens: This usually means you applied too thick of a coat, or you applied the finish when the temperature was too high, causing it to “over-cure” unevenly, or perhaps the humidity was high during drying.
The Fix: If it is only slightly tacky after several days, try increasing ventilation or placing a fan near it (not blowing directly, just circulating air). If it’s truly gummy, you may need to gently buff the tacky areas with very fine steel wool (0000 grade) or high-grit sandpaper (220 grit) and wipe away the dust. If it remains sticky, you might have to scrape off the worst of it and restart the topcoat application thinly.
Problem 3: Moss/Mold Returned Quickly
Why it happens: This almost always means one of two things: Either the wood wasn’t completely clean and dry before the first coat (trapping growth underneath), or the sealer chosen did not contain adequate mildewcides.
The Fix: You must strip or neutralize the affected area. Clean the spot aggressively with a solution of bleach and water. Let it dry for several days. When reapplying the sealer, look specifically for exterior stains or sealers designed for high-moisture areas, which often have stronger mildewcides built in.
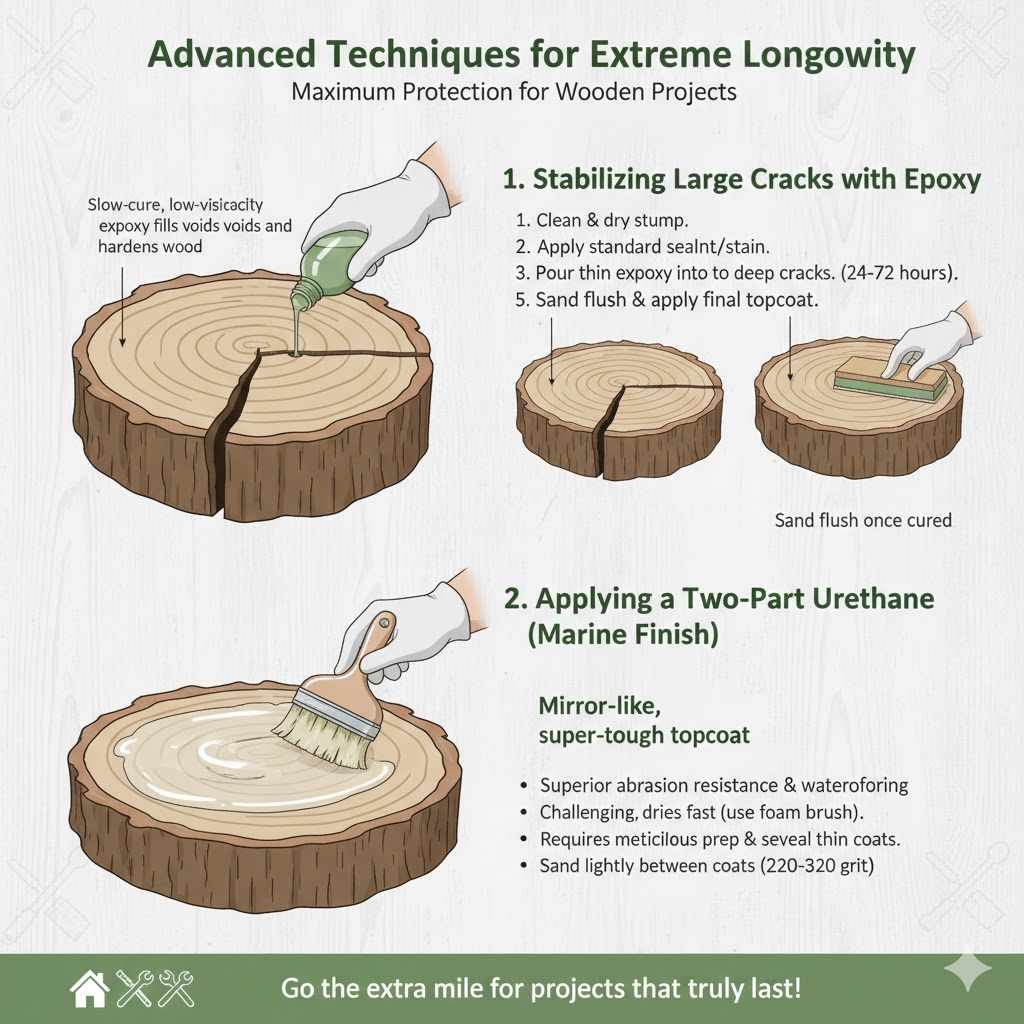
Advanced Techniques for Extreme Longevity
If this stump is going to be a permanent, high-traffic feature, you might consider going a step further than simple stain. These methods require more effort but offer maximum payoff in lifespan.
Stabilizing Large Cracks with Epoxy
For stumps that will be heavily used (like a rustic side table), you want rock-solid stability. Penetrating epoxy is perfect for this. Epoxy chemically bonds with the wood fibers.
- Clean and dry the stump thoroughly.
- Apply your standard sealant/stain to the sides first.
- For deep cracks on the top, pour slow-cure, low-viscosity (thin) epoxy directly into the voids. It will soak deep into the dry wood.
- Let it cure completely (often 24–72 hours, depending on the depth). This hardens the soft wood in the crack, making it structurally sound again.
- Once cured, you can lightly sand the epoxy flush with the wood surface and apply a final protective topcoat over the entire stump face if desired.
Applying a Two-Part Urethane (Marine Finish)
If you want a mirror-like, super-tough topcoat reminiscent of a fine boat finish, a marine varnish or a two-part polyurethane is the ultimate shield. This is best done after the first coat of penetrating sealer has soaked in well.
- This type of finish offers superior abrasion resistance and waterproofing.
- It’s challenging because it dries fast, requiring quick application with a high-quality foam brush for a smooth finish.
- It requires meticulous preparation and often several thin coats, sanded lightly between coats (using 220 or 320 grit).
Beginner Wood Stump Sealing FAQ
Q1: Do I need to remove the bark before sealing the stump?
A: Generally, no, and you usually shouldn’t! The bark offers natural protection. Only scrape off loose, flaking, or rotten bark. The sides where the bark meets the cut wood are the areas that need sealer attention.
Q2: What is the single most important area to seal on a stump?
A: The end grain—the flat top and bottom cut surfaces. These act like chimneys, drawing water deep into the wood core, leading to internal rot much faster than the sides.
Q3: Can I use the same sealer I used for my wooden deck?
A: Yes, if the deck sealer is explicitly rated for exterior use and has UV protection. Exterior deck sealers or stains are designed for exactly this kind of tough, exposed wood, making them an excellent choice for stumps.
Q4: How long must the stump be dry before I can seal it?
A: After washing, wait until it has experienced several days of warm, dry weather, ideally 5–7 days if you can manage it. If you must rush, use a leaf blower extensively to force out trapped moisture, but always ensure the surface isn’t visibly damp.
Q5: What do I do if the stump is resting directly on the ground?
A: You need to break contact with the soil. Even the best sealer will fail if the bottom constantly sits in damp dirt. Try to lift the stump slightly by embedding paving stones or concrete blocks underneath it to create a small air gap. Then, seal the entire bottom surface liberally.
Q6: Is sealing the stump only for looks, or does it really stop insects?
A: Sealing is excellent for both! Most pests prefer moist or decaying wood. By blocking water absorption, you remove their ideal living conditions. Furthermore, oil-based and paint sealers create a physical barrier that deters many boring insects.
Conclusion: Enjoying Your Durable Wooden Feature
Congratulations! You’ve learned exactly how to seal a wood stump effectively. By taking the time to clean properly, focusing especially on those hungry end grain surfaces, and choosing a durable exterior product, you have armed that old stump with excellent defense against Mother Nature. Remember, sealing wood is a partnership: you provide the shield (the sealant), and the environment tests it. Check back yearly for simple touch-ups. With this guidance, your natural wood feature will stay strong, beautiful, and functional for many seasons to come. Go ahead and enjoy that beautifully protected piece of nature in your yard!