How to Start Woodworking: Tool List, Real Costs, First Projects
To start woodworking, buy eight inexpensive items, not a shop: a cordless drill, combination square, tape measure, clamps, wood glue, and three pieces of safety gear. At prices checked on October 5, 2026, that totals about $156. The costly mistake is buying a table saw or a boxed "kit" first. Below: the priced tool list, five skills to practice in order, the safety steps to take before any saw runs, and a first-project sequence.
What You Actually Need to Start Woodworking
You do not need a workshop. A garage corner, a sturdy outdoor table, or a folding workbench is enough for the first month. What you need is a short list that covers four jobs: measuring, joining, holding the work still, and protecting yourself. If you can only buy one power tool, make it a cordless drill, because it drills the pilot holes and drives the screws for nearly every beginner build.
Best First Power Tool Pick | |
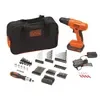 |
BLACK+DECKER 20V MAX POWERCONNECT Drill Driver Kit (BDC120VA100), $64.99 Drills the pilot holes and drives the screws for every first project in the sequence below. Battery, charger, and a 100-piece bit and socket set are included, so the only other purchase is wood.
|
As an Amazon Associate we earn from qualifying purchases. | |
Starter Tool List With Real Prices (October 2026)
Most beginner guides list tools without a single price, which is why people either overspend or give up when the cart total surprises them. The table below prices a complete first kit using live Amazon listings checked on October 5, 2026. Prices move, so treat the totals as a budget estimate rather than a promise.
| Item | Why it comes first | Example product | Price |
|---|---|---|---|
| Cordless drill | Pilot holes and screws on every early project | BLACK+DECKER 20V MAX drill driver kit | $64.99 |
| 12-inch combination square | Marks 90 and 45 degree lines and checks joints for square | IRWIN 12-inch combination square | $12.99 |
| 25-foot tape measure | Every project starts with a measurement | STANLEY FATMAX 25-foot (33-725) | $22.01 |
| Two 12-inch bar clamps | Hold boards still while you cut, drill, and glue | IRWIN QUICK-GRIP mini bar clamps, 2-pack | $20.37 |
| Wood glue | A glued joint plus screws is stronger and tidier than screws alone | Titebond II Premium, 16 oz | $7.57 |
| Safety glasses | Eye protection for every cut, drill, and sanding session | TICONN clear safety glasses, 3-pack (listed ANSI Z87.1) | $9.99 |
| Hearing protection | Power tools are loud enough to damage hearing over time | 3M folding earmuff, NRR 25 dB | $11.49 |
| Dust mask | Sawing and sanding put fine wood dust in the air | 3M 8210 N95 respirator, 2-pack | $6.38 |
| Total | $155.79 |
Once your first two or three projects are done, the logical next purchases are a circular saw for straight cuts (about $69 for the SKIL 15-amp 7-1/4 inch model) and a random orbital sander (about $37 for the SKIL 5-inch model). Together those lift the total to roughly $262. If you want to compare saws first, our circular saw comparison lays out the options, and our guide to saw types and blade TPI explains what each saw is actually for.
Notice what is missing: a table saw, a router, a miter saw, and any boxed "complete beginner set." Those tools make sense after you have learned to measure, cut, and join accurately with the basics. Buying them first just means learning the fundamentals on a more dangerous and more expensive machine.
Buy Safety Gear Before Any Saw
The cheapest items on the list protect the most expensive parts of you. Treat them as the first purchase, not an afterthought.
- Hearing: NIOSH recommends keeping noise exposure at or below 85 dBA averaged over an eight-hour day, and notes that every 10 dB increase is a tenfold increase in sound intensity (CDC/NIOSH). Corded saws and routers run loud enough that short sessions without muffs still add up, so put them on before the tool starts, every time.
- Lungs: OSHA describes excessive wood dust as an irritant to the eyes, nose, and throat that can impair lung function and is considered a human carcinogen (OSHA). Wear an N95 when you saw or sand, and sand outdoors or with a shop vacuum attached where you can. If you end up working indoors regularly, see our home shop dust collector guide.
- Eyes: wear safety glasses for every cut, drill, and sanding session, not only the ones that feel risky. Look for the Z87.1 marking on the frame.
- Hands and habits: clamp the workpiece so both hands stay behind the blade, unplug the tool or remove the battery before changing a blade or bit, and tie back long hair and loose sleeves.

Table saws deserve their own warning. The U.S. Consumer Product Safety Commission’s 2007-2008 injury study estimated about 67,300 medically treated table saw blade-contact injuries a year, including roughly 11 amputations every day (CPSC). That is the reason this guide tells you to skip the table saw until you have several projects behind you. Every saw can hurt you, but a clamped board and a straight edge on a circular saw covers the cuts you need early on.
Five Skills to Practice, in Order
Each of these skills builds on the one before it. Rushing past any of them is the most common reason a first project comes out crooked, so practice each one on scrap pine before you cut into a board you care about.
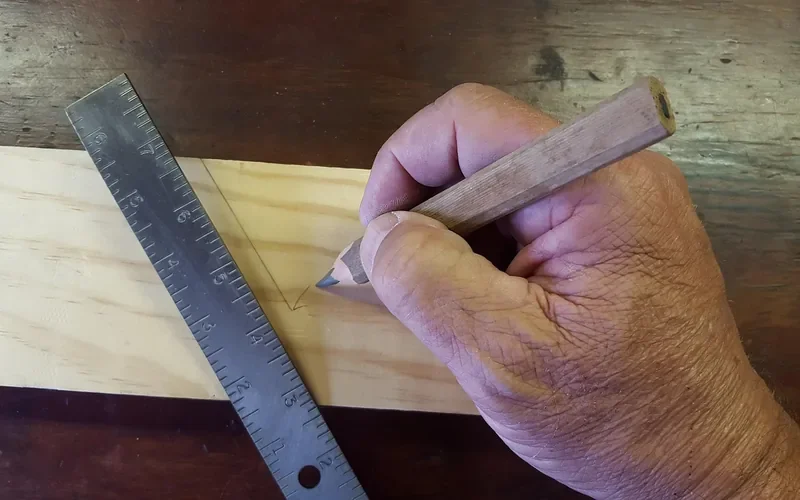
- Measure and mark. Measure from the same end of the board every time, mark with a sharp pencil, and draw the line with a square so it is truly perpendicular. A thin pencil line is more accurate than a thick one.
- Cut to the line. Clamp the board, then cut on the waste side so the pencil line stays visible after the cut. A cut that splits the line removes wood you cannot put back.
- Drill a clean pilot hole. Choose a bit about as wide as the screw’s shank, not its threads, and drill slightly deeper than the screw will go. Pilot holes keep pine from splitting near an edge.
- Join and check for square. Spread a thin layer of glue, clamp the joint, drive the screws, then check the corner with your square before the glue sets. Our wood glue types and cure times chart shows how long to leave a joint clamped.
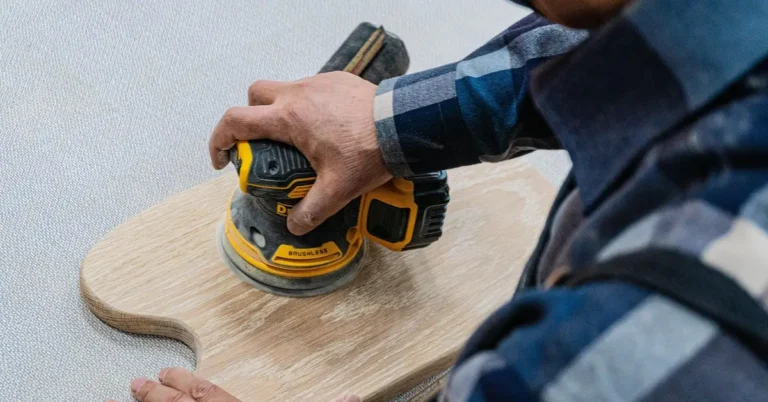
- Sand with the grain. Start with a coarser sandpaper and work up to a finer one, always moving along the grain. Our sandpaper grit guide explains which grit to use at each stage.
Which Wood Should a Beginner Buy?
Start with pine from a home center. It is inexpensive, soft enough to cut and drill easily, and forgiving when a measurement is off. Hardwoods such as oak and maple are denser, cost more, and are harder on beginner mistakes, so save them for later projects.
| Softwood (pine, spruce, cedar) | Hardwood (oak, maple, walnut) | |
|---|---|---|
| Comes from | Conifers (needle-bearing trees) | Deciduous (broadleaf) trees |
| Typical cost | Lower | Higher |
| Cutting and drilling | Easier on tools and on beginners | Denser, slower to cut, less forgiving |
| Best first use | Shelves, benches, boxes, practice cuts | Cutting boards and furniture once your joints are accurate |
One buying trap catches almost every beginner: lumber sizes are nominal, not actual. A "2×4" board measures about 1-1/2 by 3-1/2 inches and a "1×4" about 3/4 by 3-1/2 inches. When a plan says "1×4," cut and drill to the real dimensions, not the numbers on the label, or your pieces will not fit.
Set Up a Workspace Without Building a Shop
Pick a spot with good light and enough room to swing a board end to end. Work at a surface you can clamp to: a sturdy table, a pair of sawhorses, or a folding workbench. Keep your tools in one place so you do not hunt for the square mid-cut. Finishing products and sanding both need ventilation, so open the garage door or work outside whenever you can.
Your First Five Projects, in Order
Project order matters as much as tool order. Each build below adds one new skill, so you are never learning two hard things at once.
| Order | Project | New skill it teaches | Tools beyond the starter kit |
|---|---|---|---|
| 1 | Simple wall shelf | Measure, mark, pilot-drill, screw | None |
| 2 | Planter box | Repeat identical cuts and square corners | None (a hand saw works) |
| 3 | Step stool or small bench | Glue plus screws, checking for square | Circular saw helps with longer cuts |
| 4 | Cutting board | Flat glue-ups and sanding to a fine grit | Random orbital sander |
| 5 | Basic side table | Four legs, an apron, and a flat top | Circular saw |
For build plans with real costs and times, start with our 12 simple woodworking projects for true beginners. Once the first five feel easy, our woodworking projects sorted by tool tier is the next step. If you learn better from a book or video, see our best woodworking project books and recommended YouTube channels.
Beginner Mistakes and the Myths Behind Them
- "I need a table saw first." You do not. A drill, clamps, and a hand saw or circular saw cover the early builds, and the injury data above is the reason to wait.
- "A big kit is the safe, easy start." Kits bundle tools you may never use. Buying the eight items above and adding one tool per project keeps you from paying for gear you have not earned a use for.
- "Hardwood looks better, so start there." Hardwood hides no mistakes and costs more per board. Learn on pine, then switch.
- "Skipping the square saves time." A joint that is a few degrees off will rock, gap, or wedge shut, and fixing it costs more time than checking.
- "Dull tools are fine for rough work." Dull blades and bits burn, tear, and slip, which is how injuries happen. Replace or sharpen when a cut starts to need force.
If you want to see these skills demonstrated before you buy anything, this video covers several ways to get started.
Frequently Asked Questions
How much does it cost to start woodworking?
About $156 for the eight-item starter kit above (drill, square, tape, clamps, glue, and safety gear), based on Amazon prices checked October 5, 2026. Adding a circular saw and random orbital sander brings it to roughly $262. Lumber and screws are extra, and prices change.
What tools do I need to start woodworking?
A cordless drill, a combination square, a tape measure, two clamps, wood glue, safety glasses, hearing protection, and a dust mask. Add a circular saw and a sander as your first projects call for them. You do not need a table saw to begin.
What wood should beginners use?
Pine. It is inexpensive, easy to cut and drill, and forgiving of mistakes. Save hardwoods like oak and maple for later projects, once your cuts and joints are accurate.
Do I need a table saw to start woodworking?
No. A circular saw with a clamped board and a straight edge covers the early cuts. The CPSC estimated about 67,300 medically treated table saw blade-contact injuries per year in 2007-2008, so wait until you have several projects behind you.
What should I build first?
A simple wall shelf. It teaches the five core skills in order: measuring, marking, cutting to a line, drilling pilot holes, and joining with screws. It needs no tools beyond the starter kit.
Where to Go From Here
Buy the eight starter items, build a shelf, and then add one tool for each new project. That pace keeps your spending tied to skills you actually have, and it keeps the safety gear on your face and ears from day one. When you want to go further, the project lists and tool guides linked above pick up where this page stops.
Sponsored / affiliate links. As an Amazon Associate I earn from qualifying purchases. I may earn additional commission from eligible campaigns.