How to Wash Wood Safely Without Damaging It
Washing wood seems simple, right? Just add water and soap. But, How to Wash Wood Safely Without Damage is a common challenge for many. The good news is, you don’t need to be a professional to clean wood properly. You can easily do it yourself without hurting your furniture or floors. This guide will take you step-by-step through the process, so you can clean wood with confidence. We’ll start with prepping your wood surfaces and choosing the right cleaning supplies.
Choosing the Right Cleaning Supplies for Wood
Selecting the correct cleaning products is the first important step in cleaning wood. Using the wrong items can lead to damage. Harsh chemicals can strip away finishes, leaving the wood dull, discolored, or even warped. Before you start, gather supplies designed for wood surfaces. This section will guide you through picking the best cleaners, cloths, and other tools, helping you avoid mistakes and keep your wood looking great.
Recommended Cleaning Solutions for Various Wood Finishes
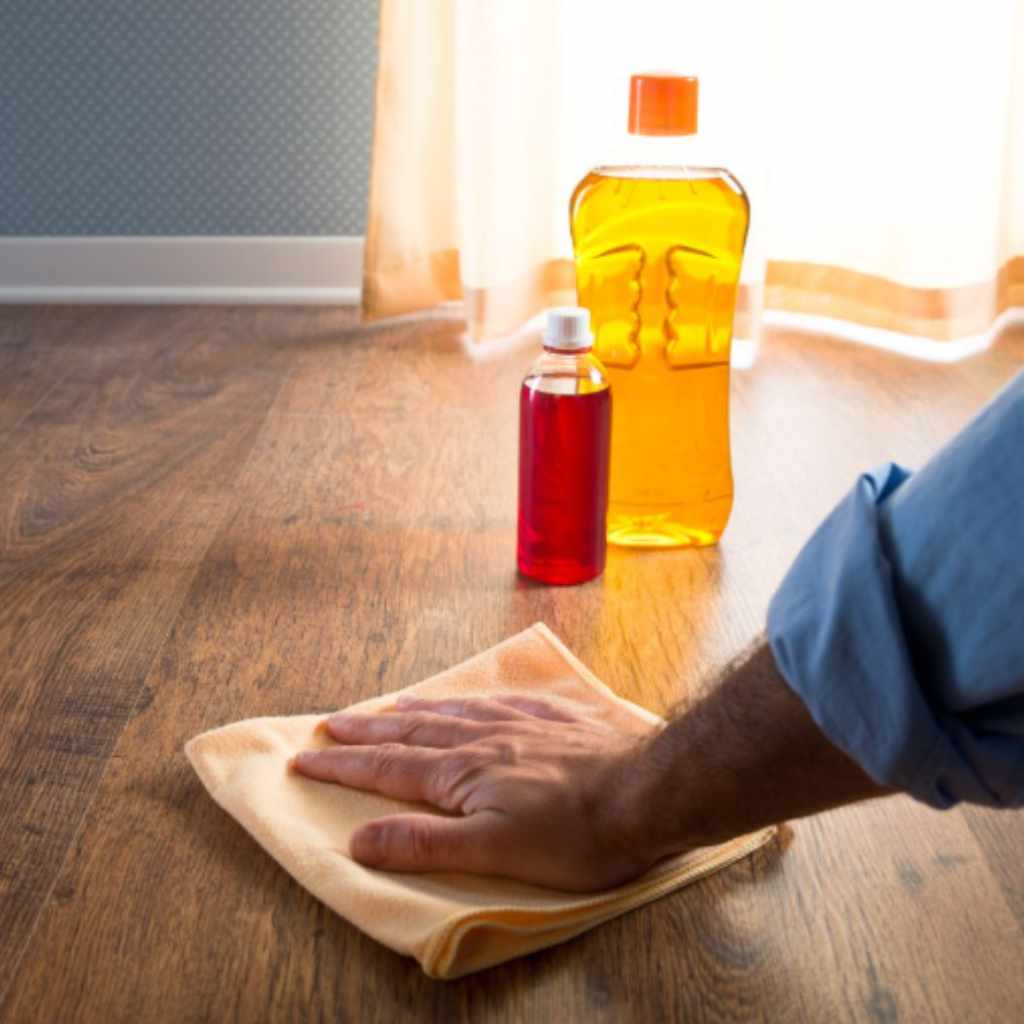
The type of wood finish will dictate your choice of cleaning solution. Some finishes are more sensitive than others. Unfinished wood requires a different approach than a piece with a protective varnish. Knowing the finish helps you select cleaners that won’t harm the wood. You’ll want to avoid products with harsh chemicals like ammonia or bleach, as these can strip away the wood’s natural oils and cause damage. Instead, think about mild, pH-neutral cleaners or solutions specifically created for the type of wood you’re working with.
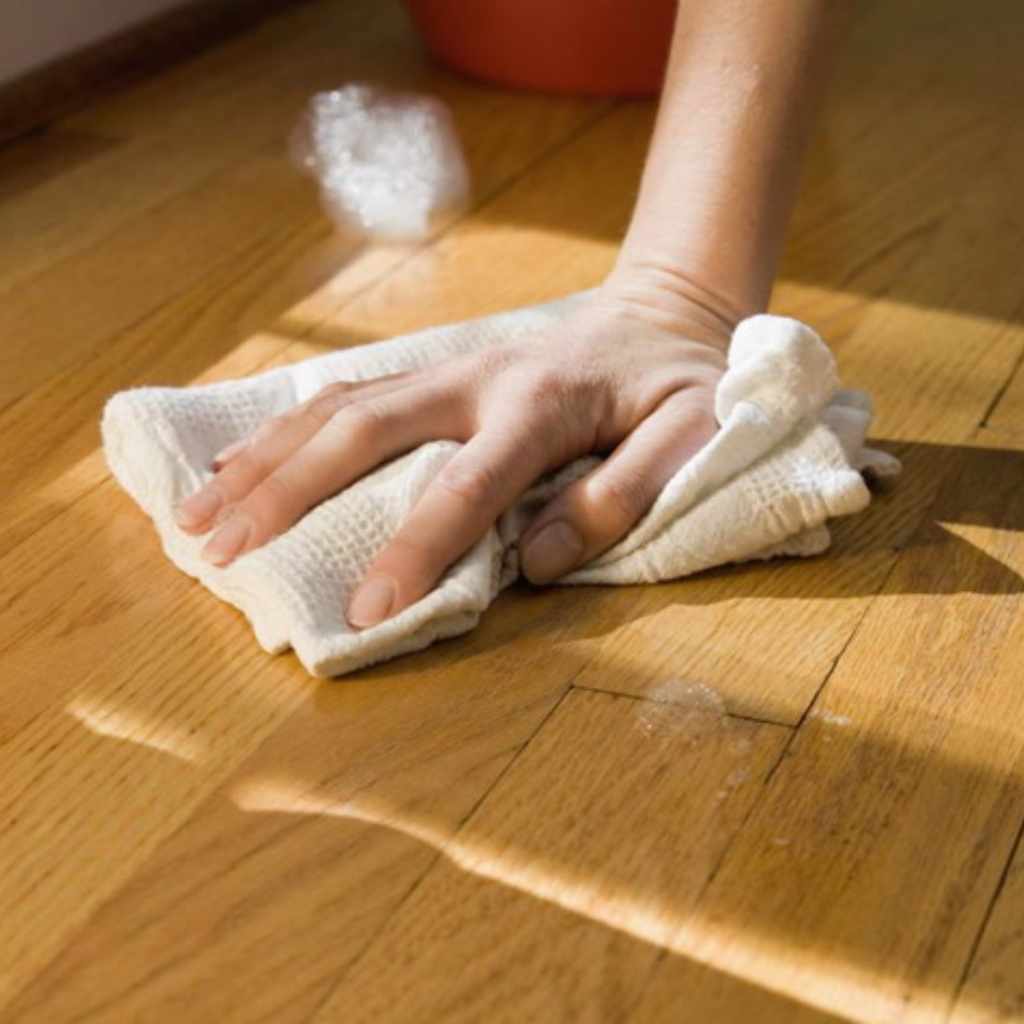
Mild Soap and Water: For most finished wood, a simple solution of mild soap and warm water is usually sufficient. Mix a small amount of dish soap with water. Always test in a hidden area first.
This method is great for everyday cleaning and removing light dirt and dust. It’s gentle and effective, making it a good starting point for most wood surfaces. Just remember to wipe away any excess moisture.
Wood-Specific Cleaners: Look for commercial wood cleaners that match your wood’s finish. These products are developed to clean without causing harm.
These cleaners often contain conditioning agents that help keep the wood from drying out. They’re available in sprays, lotions, and wipes, making them easy to use. Reading the product directions is critical to avoid damaging your wood.
Vinegar and Water Solution: For a natural cleaning option, mix white vinegar with water. Use a ratio of one part vinegar to ten parts water.
Vinegar is a mild acid that can help remove dirt and grime. It’s also known for its antibacterial properties. While effective, test on a small, hidden area first to ensure it does not harm the finish.
Avoid Harsh Chemicals: Steer clear of ammonia, bleach, or abrasive cleaners. These substances can quickly damage the finish.
Harsh chemicals can also discolor wood and accelerate wear. They are often too strong for wood, breaking down the protective layers and leaving the wood open to damage from moisture and UV light.
Selecting the Best Cleaning Tools and Accessories
The tools you use can influence the outcome of your wood cleaning efforts. Choosing the right tools makes the task easier. It also protects the wood surface from scratches or damage. Soft cloths, gentle brushes, and the right spray bottles are key. Avoid anything that might be too rough or abrasive. Consider the material and design of each tool to make sure it will be safe and effective for your wood cleaning project.
Soft Microfiber Cloths: Microfiber cloths are ideal for cleaning wood.
They are soft, absorbent, and do not scratch. These cloths pick up dust and dirt. They also work well for wiping away cleaning solutions.
Spray Bottles: Use a spray bottle to apply cleaning solutions. This allows you to control the amount of liquid you are using.
Avoid applying too much water to the wood, as this can lead to damage. A spray bottle lets you lightly mist the surface. This prevents water from seeping into the wood.
Soft-Bristled Brush: For detailed areas, a soft-bristled brush can gently remove dirt from crevices. Make sure the bristles are not too firm to prevent scratching.
A soft brush can reach areas a cloth cannot. This is important for intricate designs or hard-to-reach places on your wood furniture or floors. Choose brushes specifically designed for delicate surfaces.
Avoid Abrasive Sponges or Pads: These can easily scratch the wood surface, leading to damage. Stick to soft materials like microfiber or cotton cloths.
Abrasive materials damage the finish of the wood. This leaves it vulnerable to moisture and wear. Always opt for gentler options to keep your wood protected.
How to Prepare Wood Surfaces Before Washing
Before you start cleaning, proper preparation is essential. It can affect the outcome of your cleaning project. This section will guide you through all the necessary prep work. This makes the cleaning easier and protects the wood from damage. Taking the time to prepare ensures you’re ready to clean safely and effectively.
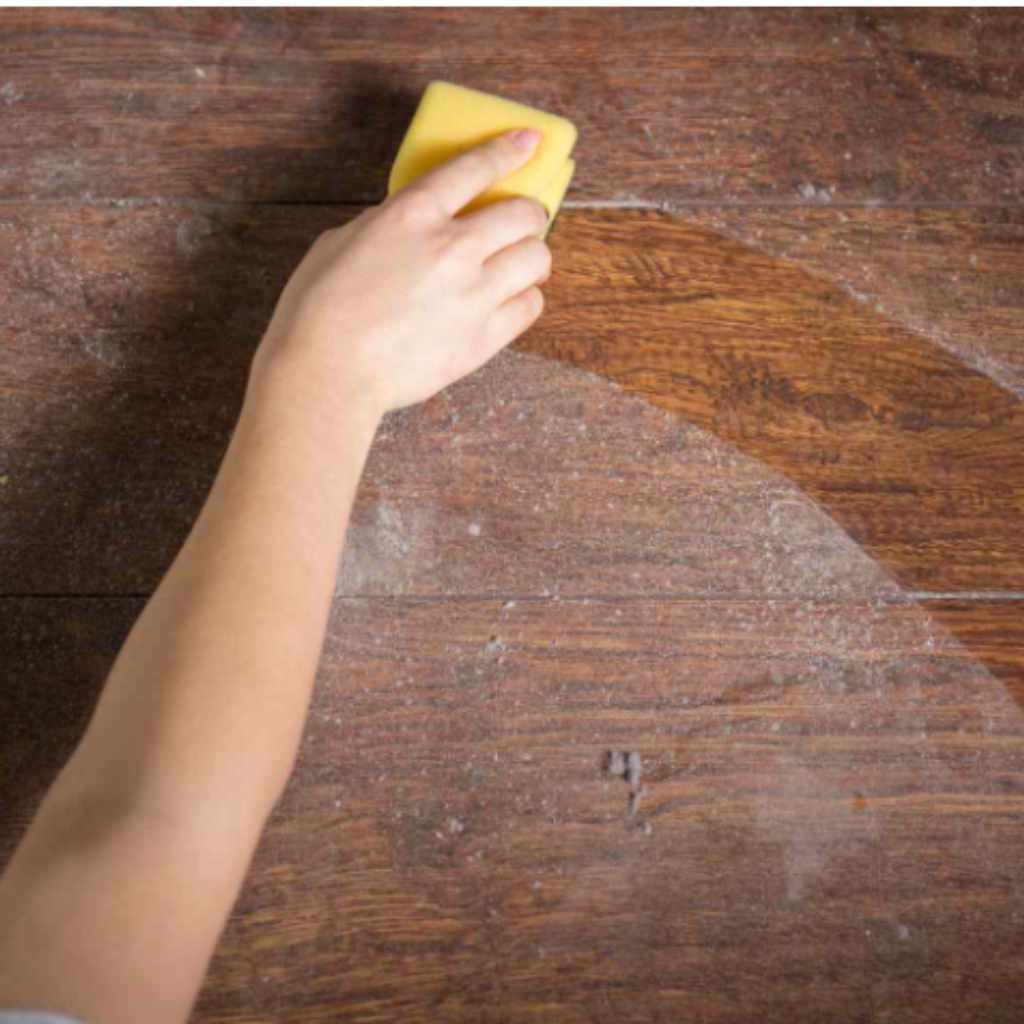
Dusting and Removing Loose Debris
Dusting is an important first step. Removing loose dirt and dust is critical before washing. This step stops you from pushing dirt into the wood’s surface. Begin with a soft cloth or a dust mop, depending on the wood surface you’re cleaning. Consistent dusting stops dust from building up. This prevents grime from becoming difficult to remove.
Use a Soft Dusting Cloth: A microfiber cloth is best. It attracts and holds dust, preventing it from spreading.
Avoid cloths that can scratch. A soft cloth ensures gentle cleaning.
Vacuuming: For wood floors, vacuuming is a good choice. Use a brush attachment to lift up dust and debris.
This is especially important in corners and crevices where dust gathers. Using the brush attachment avoids scratching the floor.
Frequency: Dust wood surfaces regularly, at least once a week or more often in high-traffic areas.
Regular dusting prevents dirt buildup. This makes cleaning less complicated in the long run.
Dampen Cloths Lightly: When dusting, slightly dampen the cloth with water. This helps trap dust.
Wring out the cloth thoroughly. Too much water can damage the wood.
Identifying the Wood Finish Type
Knowing the type of finish on your wood is vital. This helps you select the correct cleaning method and products. Different finishes need different care. Some are more water-resistant than others. Not all wood finishes are the same. Some common types include varnish, polyurethane, lacquer, and oil-based finishes. Examining the surface closely and doing some research will help you figure out what you are working with.
Test with Water: Drop a small amount of water on an area that is not visible. If the water beads up, the finish is likely water-resistant.
This test helps you decide if it is okay to use a damp cloth. If the water soaks in quickly, the wood is not as well-protected, and you should use a very mild cleaning method.
Look for Characteristics: Examine the wood surface carefully. Varnish and polyurethane create a glossy or semi-glossy shine.
Lacquer can look similar but may be thinner. Oil-based finishes may have a softer sheen and feel different to the touch.
Consult Guides: Use resources like books or online guides to help you identify wood finishes.
You can often find information about the finish on the product label. This will give you helpful clues.
Test Cleaners: Before applying any cleaner, test it on a hidden area of the wood.
This will help you ensure the cleaner does not damage the finish.
Step-by-Step Guide to Safely Washing Wood
Now, let’s explore the actual cleaning process. This section breaks down the steps to wash wood. The goal is to clean effectively without causing any harm. With clear directions, you can do this job with confidence. Remember, patience and care are key. Following these steps helps you maintain the wood’s beauty.
Cleaning Method for Finished Wood
Finished wood is the most common type you’ll encounter. It has a protective layer that helps it resist water and wear. The cleaning process for finished wood is usually straightforward. You can easily remove dirt and grime without damaging the surface. Here’s a detailed guide to help you maintain your finished wood.
Prepare the Cleaning Solution: Mix a few drops of mild dish soap with warm water.
This will be the base for your cleaning solution. Make sure the water isn’t too hot, as this can affect the finish.
Dampen a Microfiber Cloth: Dip a microfiber cloth into the solution. Wring it out well. The cloth should be damp, not dripping.
Too much water can seep into the wood, causing damage. A damp cloth will remove dirt without soaking the wood.
Wipe the Wood Surface: Gently wipe the wood surface, moving with the grain of the wood.
This will help you remove dirt. Working with the grain prevents scratches and preserves the finish.
Rinse the Cloth: Rinse the cloth in clean water and wring it out again.
This removes any soap residue. Soap can leave streaks or build up over time if not properly removed.
Wipe Dry: Immediately dry the surface with a clean, dry microfiber cloth.
Drying the wood quickly prevents water spots and ensures the wood is not exposed to moisture for long periods. Dry thoroughly.
Cleaning Method for Unfinished Wood
Unfinished wood is porous and absorbent. It is very susceptible to water damage. Washing unfinished wood requires a more cautious approach. Moisture can easily seep into the wood, leading to swelling, warping, or staining. This guide provides a safer method to clean and preserve the natural beauty of unfinished wood.
Dry Cleaning First: Begin by dry cleaning. Use a soft brush or a vacuum with a brush attachment to remove dust and dirt.
Dry cleaning is important for unfinished wood. It stops dirt from turning into mud if it gets wet.
Damp Cloth (Lightly): Lightly dampen a microfiber cloth with water. Wring it out very well. The cloth should be just barely damp.
Use as little water as possible. This reduces the risk of moisture absorption.
Wipe with the Grain: Gently wipe the wood’s surface in the direction of the wood grain.
Avoid excessive rubbing. You don’t want to press moisture into the wood.
Quick Drying: Immediately dry the wood with a clean, dry cloth.
This is extremely important. Get rid of any moisture as quickly as you can.
Consider Wood Soap: For more serious cleaning, you can try using a wood soap. Follow the product’s directions and test in an area that is out of sight.
Wood soap is designed to clean without damaging unfinished wood. Always test it first to make sure it is safe.
Dealing With Stubborn Stains and Marks on Wood
Sometimes, wood gets marks that are difficult to remove. These can be from water rings, ink stains, or other issues. You might have to try different techniques. Be careful when addressing stains. Always test your method in an area that is out of view. This helps you get rid of stains without hurting the wood’s surface.
Water Rings: Gently rub a water ring with a soft cloth dampened with a small amount of mineral oil.
Mineral oil can help lift the ring and restore the wood’s appearance. It acts as a light moisturizer for the wood.
Ink Stains: Dab an ink stain with a cotton swab dipped in rubbing alcohol.
Rubbing alcohol can dissolve the ink. Test this method in a hidden place before using it widely. This helps protect the finish.
Scuffs and Scratches: Use a wood scratch remover or a touch-up marker that matches the wood’s color.
These products help hide minor damage. They make the scratches less noticeable.
Adhesive Residue: Use a plastic scraper to gently remove any adhesive residue.
You can also try a solvent designed for adhesive removal. This should be done carefully to avoid damaging the wood.
Protecting Wood Surfaces After Washing
Washing your wood is only part of the job. Following the wash, you should take steps to protect your wood. This will help maintain its appearance and prevent future damage. This section will guide you through ways to protect wood after cleaning. Protecting wood involves applying protective coatings, conditioning the wood, and using preventative methods.
Applying Protective Coatings and Sealants
After cleaning, adding a protective coating or sealant can greatly enhance the durability of your wood. These coatings create a barrier that helps prevent damage from moisture, spills, and UV rays. This process can significantly extend the life of your wood. Applying these protective layers is a key step to keeping your wood beautiful and well-preserved.
Types of Coatings: Consider varnishes, polyurethanes, or wood oils.
These create a layer on the wood. They protect against scratches and spills.
Choosing the Right Coating: Select a coating based on the wood finish and how you use the wood.
Polyurethane is water-resistant. Oil finishes are good for adding shine.
Application: Follow the instructions on the product label. Apply coatings in thin, even layers.
Use a brush or a cloth for application. Make sure the wood is clean and dry. Let each layer dry completely.
Reapplication: Regular reapplication will keep the wood protected.
The time between reapplications varies. It depends on the coating and use of the wood. Check the wood regularly for wear.
Conditioning Wood to Maintain Moisture Balance
Conditioning helps maintain the right moisture balance. This is especially important for wood. Wood naturally expands and contracts with changes in humidity. Conditioning helps to lessen these effects. Regular conditioning keeps the wood from drying out, cracking, or warping. This process is important to maintain the beauty and strength of wood surfaces.
Use Wood Conditioners: Use products designed to moisturize and protect wood.
These products contain oils. They replace lost moisture and help keep the wood flexible.
Frequency: Condition wood surfaces about twice a year. If the wood is in a dry environment, you may need to condition it more often.
Conditioning will help maintain the wood. It will prevent drying and cracking.
Application: Apply the conditioner to a clean cloth. Rub it gently into the wood.
Let it soak in and then wipe away any excess. Follow the product’s directions.
Consider the Environment: If you live in a dry place, using a humidifier can help.
This will maintain the right moisture level in the air. This protects the wood.
How to Deal With Wood Damage After Washing
Sometimes, despite your best efforts, damage can occur. You might see water spots, streaks, or even a damaged finish. The goal is to address damage quickly and effectively. This section explores several ways to address common issues that might arise. Knowing how to react to these problems can save you time and preserve your wood’s value.
Repairing Water Spots and Stains
Water spots and stains are common. Fortunately, most can be fixed or minimized. The steps you take depend on the severity of the damage. Here are some techniques to help you restore the wood’s appearance. The aim is to get the wood back to looking its best and protect it against further damage.
Light Water Rings: Gently rub the water ring with a cloth dampened in a solution of equal parts vinegar and water.
This mild acidic solution may lift the stain. Make sure you test the spot in an area that is out of sight first.
More Stubborn Stains: Try using a commercial wood stain remover. Follow the directions carefully.
These products are made to break down the stains. Make sure you select a product appropriate for the finish. Test it in a hidden area first.
Deep Stains: For deep stains, you might need to sand down the surface lightly.
After sanding, you can reapply the finish. This is more involved. If you are not comfortable doing this, seek help from a professional.
Seek Professional Help: If the stain is too deep or the damage is severe, call a professional.
They have the skills and products needed for more complicated repairs. They can help you save your wood.
Addressing Streaks and Residue
Streaks and residue can happen. They are often caused by using too much cleaning solution or by not rinsing properly. Removing streaks and residue requires a careful approach. Here is how you can effectively fix these issues and restore the wood’s original look.
Wipe with Clean Water: Wipe the streaked area with a cloth dampened in clean water.
This can remove any excess cleaner. It is a simple first step.
Rinse Thoroughly: Rinse the cloth frequently and wring it out completely.
This will help you get rid of all the residue.
Use a Wood Cleaner: If water does not remove the streaks, use a wood cleaner that is designed for your wood’s finish.
Follow the directions on the product label. This can help to dissolve the residue.
Dry Immediately: After cleaning, always dry the area with a clean, dry cloth.
This will help to stop new streaks from appearing.
Frequently Asked Questions
Question: Can I use all-purpose cleaners on wood?
Answer: No, you should avoid all-purpose cleaners on wood. They often contain harsh chemicals that can damage the finish.
Question: How often should I wash my wood furniture?
Answer: Wash your wood furniture as needed. Regular dusting helps to reduce the need for washing. Washing frequency can depend on how often you use the furniture.
Question: What’s the best way to remove water stains from wood?
Answer: For light stains, try rubbing the area with a cloth dampened in a solution of vinegar and water. For more stubborn stains, you might want to consider using a commercial wood stain remover.
Question: Is it safe to use a steam cleaner on wood?
Answer: It’s generally not recommended to use a steam cleaner on wood. The high heat and moisture can damage the finish and potentially warp the wood.
Question: How do I choose the right cleaning product for my wood floor?
Answer: Check the finish type (e.g., polyurethane, oil, etc.). Then, select a cleaner specifically made for that finish. Always read the product label and test in a hidden area first.
Final Thoughts
Washing wood safely is achievable with the right knowledge and tools. You’ve now explored how to prepare wood surfaces, choose appropriate cleaning solutions, and execute the washing process. Protecting your wood after cleaning is equally important. By applying protective coatings and practicing regular maintenance, you can ensure your wood surfaces stay beautiful for years.
Remember, start with gentle methods and always test products in an inconspicuous area. With care, you can clean wood without fear of damage. This allows you to preserve the beauty and value of your furniture and floors. Now, go ahead and keep your wood looking its best with confidence!