How to Waterproof Plywood: Seal the Edges First (5 Methods)
Plywood becomes waterproof when you seal all six sides — including the cut edges, where moisture enters fastest according to APA, The Engineered Wood Association. Skipping edge-sealing is the top reason outdoor plywood projects delaminate within a year. This guide covers surface prep, the edge-sealing step most guides skip, and which sealant (epoxy, polyurethane, or exterior paint) holds up best outdoors.
Best Plywood Waterproofing Sealer Pick
 |
Thompson’s WaterSeal Multi-Surface Waterproofer, 1 Gallon – $17.97 A clear, water-based waterproofer that covers wood, concrete, and brick in one product — useful if the same project mixes plywood with a concrete footing or brick base.
|
As an Amazon Associate we earn from qualifying purchases.
Waterproofing plywood is crucial to protect it from moisture damage, extending its lifespan. By applying a waterproof sealant, such as epoxy or polyurethane, you can create a barrier that prevents water penetration and rot. Regular maintenance and resealing is recommended to ensure long-lasting protection.
Preventing Moisture Damage
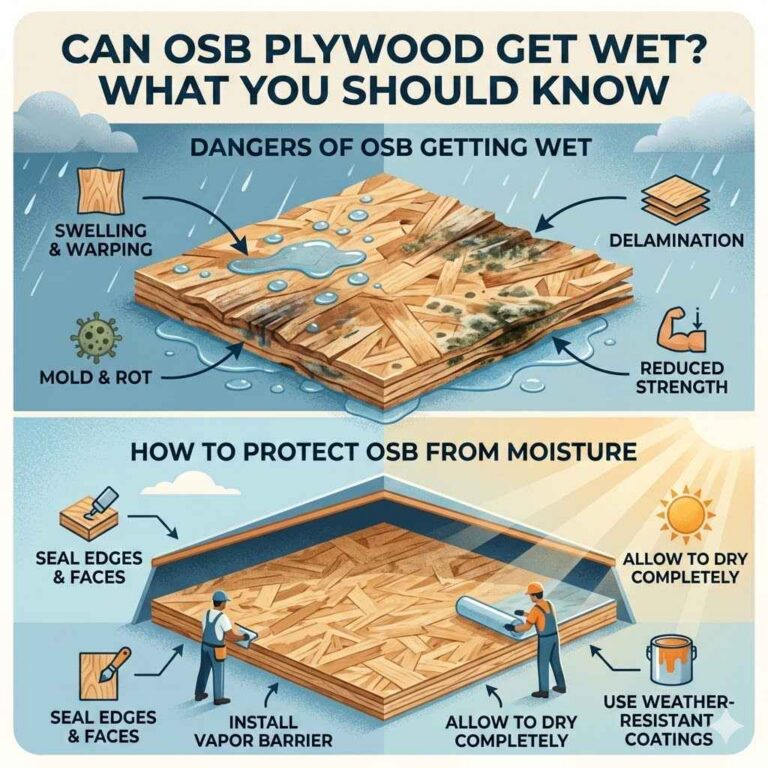
Waterproofing plywood is essential to prevent moisture damage. Plywood is a versatile material used in various applications, from construction to furniture making. However, when exposed to moisture, plywood can absorb water, leading to swelling, warping, and even rotting.
Without proper waterproofing, plywood used in outdoor projects, such as decks or boat construction, is particularly susceptible to moisture damage. Rain, snow, and humidity can seep into the wood, causing it to deteriorate over time. But it’s not just outdoor use – even indoor plywood can be affected by moisture from air conditioning or plumbing leaks.
Increasing Lifespan
Waterproofing your plywood is essential for increasing its lifespan. Plywood is often used in applications that require durability and longevity, such as roofing, flooring, or outdoor structures like sheds and gazebos.
When plywood is left unprotected, it becomes vulnerable to moisture, which can lead to gradual deterioration and weakening of the wood fibers. This can significantly shorten the lifespan of your plywood projects, making them less reliable and cost-effective in the long run.
However, by investing in proper waterproofing methods, you can significantly extend the lifespan of your plywood. Waterproofing agents create a protective barrier that seals the wood surface, preventing moisture infiltration and minimizing the risk of damage. As a result, your plywood projects can withstand the test of time, ensuring they remain sturdy and functional for years to come.
Choosing The Right Waterproofing Method
In order to effectively waterproof plywood, it is crucial to choose the right waterproofing method. This ensures that the plywood is adequately protected against moisture and other environmental factors that can cause damage over time. By understanding different plywood grades and evaluating environmental factors, you can make an informed decision on the most suitable method for your specific needs.
Understanding Plywood Grades
Plywood comes in different grades, which indicate the quality and suitability of the wood for various applications. When selecting plywood for your project, consider the grading system established by the American Plywood Association (APA) — see our full wood types guide for how plywood compares to solid lumber and other engineered wood.
The APA plywood grading system consists of four main grades:
- Grade A – This is the highest quality and is suitable for projects where appearance is important, such as furniture or cabinetry.
- Grade B – This grade is slightly lower in quality but is still suitable for applications where some defects are acceptable.
- Grade C – This grade contains more defects and is commonly used for construction purposes where appearance is less important.
- Grade D – This is the lowest grade and is typically used for projects where strength is more important than appearance, such as subflooring.
It is important to select the appropriate plywood grade for your project to ensure the waterproofing method you choose is compatible.
Evaluating Environmental Factors
When waterproofing plywood, it is essential to evaluate the environmental factors that the plywood will be exposed to. These factors can include:
- Humidity levels – High humidity can accelerate the deterioration of unprotected plywood.
- Temperature variations – Extreme temperature changes can cause plywood to expand and contract, leading to cracks and gaps.
- Exposure to water – Plywood that will be in direct contact with water, such as in outdoor applications or wet areas, requires more extensive waterproofing.
- UV radiation – Sunlight can cause the wood to fade and degrade over time, necessitating UV resistant coatings.
By evaluating these environmental factors, you can choose a waterproofing method that provides adequate protection against specific conditions.
Preparing The Plywood For Waterproofing
Before you can effectively waterproof plywood, it’s crucial to properly prepare the surface. This step ensures better adhesion and a longer-lasting waterproof finish. In this section, we will discuss two essential steps for preparing the plywood: cleaning and sanding the surface, and filling cracks and gaps.
Cleaning And Sanding The Surface
To begin, start by cleaning the surface of the plywood. Use a mixture of mild soap and water to remove any dirt, dust, or grease that may be present. Gently scrub the surface using a soft-bristle brush or sponge. Rinse thoroughly with clean water and allow the plywood to dry completely.
After cleaning, the next step is to sand the surface. Sanding helps smooth out any rough areas and promotes better adhesion of the waterproofing material. Start by using a medium-grit sandpaper, such as 80 grit, and sand in the direction of the wood grain. Sanding in long, smooth strokes will help achieve an even surface.
Note: Wear a dust mask and safety goggles during the sanding process to protect yourself from airborne particles.
Filling Cracks And Gaps
Once the surface is clean and smooth, it’s important to address any cracks and gaps in the plywood. These openings can allow water to penetrate and damage the wood over time. Here’s how to fill them:
- Inspect the plywood thoroughly, paying close attention to areas where boards meet or where there are visible cracks.
- Remove any loose or deteriorated material using a putty knife or sandpaper.
- Apply a suitable wood filler to fill in the cracks and gaps. Use a putty knife to ensure a smooth and even application.
- Sand the filled areas lightly once the filler has dried completely. This will help achieve a seamless surface.
Note: Follow the manufacturer’s instructions for the specific wood filler product you are using.
By cleaning and sanding the surface and filling cracks and gaps, you are now ready to proceed with waterproofing the plywood. These steps ensure a well-prepared surface that enhances the effectiveness and longevity of the waterproofing process.
Sealing the End-Grain Edges (the Step Most Guides Skip)
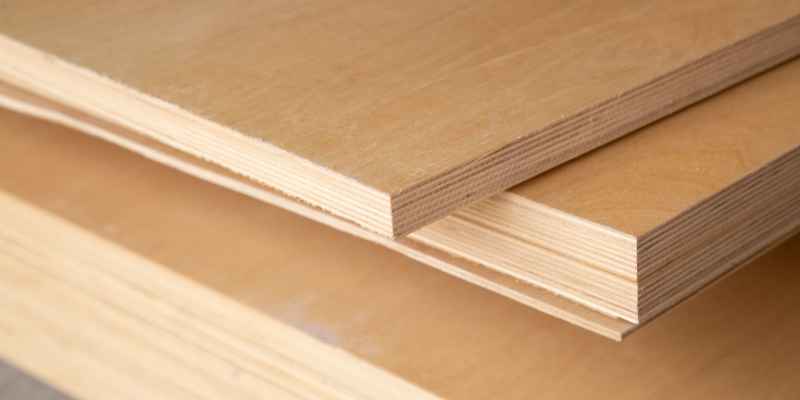
Cut edges expose plywood’s raw end-grain — dozens of thin veneer layers stacked like a stack of straws. That end-grain pulls in moisture faster than the flat face, which is why edges are usually where delamination and rot start first, not the middle of the panel.
Before applying any face sealant, brush or roll a dedicated edge sealer (or two extra coats of your chosen sealant) onto every cut edge, including screw holes and any spot where the veneer layers are visible. Let each coat soak in until the edge stops absorbing liquid, then move on to the faces.
📊 Moisture enters the end grain of plywood faster than through the flat face — Source: APA – The Engineered Wood Association
“Edge sealers are not necessarily moisture-proof or permanently durable — they help minimize sudden changes in moisture.”
Applying Waterproofing Products
Now, let’s move on to the next step in waterproofing plywood: applying waterproofing products. There are two popular options for this – using sealants and caulk, or applying waterproofing paints. Both methods are effective in creating a protective barrier for your plywood and preventing water damage.
Using Sealants And Caulk
Sealants and caulk are versatile products that are commonly used in waterproofing applications. They create a watertight seal on the surface of the plywood, blocking any potential entry points for water. Here’s how you can use them:
- Clean the surface: Before applying the sealant or caulk, make sure the plywood surface is clean and free of dust, dirt, or any other contaminants. Wipe it down with a damp cloth to ensure a clean surface.
- Choose the right product: There are various types of sealants and caulk available in the market, so it’s important to choose the one that suits your specific needs. Look for a product that is designed for exterior use and is compatible with wood surfaces.
- Apply the product: Follow the instructions provided by the manufacturer to apply the sealant or caulk. Use a caulking gun for precise application. Start from one end of the plywood and work your way to the other, applying a thin and even layer of the product.
- Smooth the surface: After applying the sealant or caulk, use a putty knife or a wet finger to smooth out the surface and ensure a proper seal. This will help in achieving a neat and professional-looking finish.
- Allow time to cure: Give the sealant or caulk enough time to cure properly as per the manufacturer’s recommendations. This will ensure that it sets and forms a strong and durable seal.
Applying Waterproofing Paints
Another option for waterproofing plywood is to use waterproofing paints. These paints contain special additives that provide enhanced protection against water damage. Follow these steps to apply waterproofing paints:
- Prepare the surface: Just like with sealants and caulk, it’s important to start with a clean and dry plywood surface. Remove any loose particles and sand down any rough areas.
- Choose the right paint: Look for a high-quality waterproofing paint that is specifically designed for wood surfaces. Ensure the paint is suitable for exterior use and provides long-lasting protection.
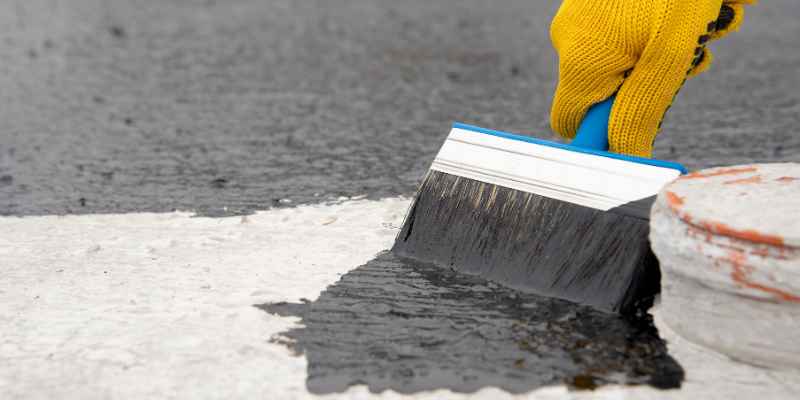
- Apply the paint: Use a brush or a roller to apply the waterproofing paint evenly on the plywood surface. Start from one end and work your way to the other, applying multiple thin coats for better coverage.
- Allow drying time: Follow the drying time instructions provided by the manufacturer. It’s crucial to give the paint enough time to dry and cure properly before subjecting it to moisture or water.
- Consider additional layers: Depending on the level of waterproofing you require, you may consider applying additional coats of waterproofing paint. This will provide added protection and increase the longevity of the plywood.
By following these steps and properly applying sealants, caulk, or waterproofing paints, you can effectively waterproof your plywood and protect it from moisture and water damage. Remember to choose the right products and follow the manufacturer’s instructions for optimal results.
Tips For Long-lasting Waterproofing
Looking to waterproof plywood? Follow these tips for long-lasting waterproofing. With these guidelines, you can protect your plywood from moisture damage and prolong its lifespan.
Proper maintenance and regular inspection are essential for ensuring a long-lasting waterproofing for your plywood. By following these tips, you can keep your plywood protected from moisture damage and extend its lifespan.
Proper Maintenance And Inspection
Maintaining your waterproofed plywood is crucial for having long-lasting protection against water damage. Here are some key practices to follow:
- Regularly clean and remove any debris or dirt that may accumulate on the plywood surface. This will prevent the buildup of moisture-trapping materials and help maintain the integrity of the waterproofing layer.
- Inspect the plywood periodically for any signs of damage, such as cracks, peeling, or discoloration. Promptly address any issues to prevent water from seeping through and causing further harm.
- Ensure that the edges and seams of the plywood are properly sealed. Apply additional waterproofing or sealant as needed to keep these vulnerable areas protected.
- Table 1: Proper Maintenance and Inspection of Waterproofed Plywood
| Action | Frequency |
|---|---|
| Clean debris and dirt | Regularly |
| Inspect for damage | Periodically |
| Seal edges and seams | As needed |
Reapplying Waterproofing As Needed
Over time, the effectiveness of the waterproofing on plywood may diminish due to wear and tear. Reapplying the waterproofing layer is crucial to maintain optimal protection against moisture. Here’s what you need to consider:
- Thoroughly clean and dry the plywood surface before reapplying any waterproofing product. This ensures proper adhesion and helps achieve the best results.
- Choose a high-quality waterproofing sealant suitable for the type of plywood and the intended application. Consult the manufacturer’s instructions for the recommended application method and drying time.
- Apply the waterproofing sealant evenly, making sure to cover the entire plywood surface. Pay extra attention to the edges and seams, as these areas are more prone to water penetration.
- Allow sufficient drying time as per the manufacturer’s instructions before exposing the plywood to moisture or other elements. This helps ensure the sealant fully cures, providing maximum waterproofing protection.
By following these reapplication tips, you can maintain the water resistance of your plywood and ensure its long-lasting durability.
Frequently Asked Questions
Do you need to waterproof plywood before painting it?
Yes. Exterior paint alone is not a full waterproof barrier — it can still crack and let water into the edges and any cut surfaces. Seal the edges and apply a penetrating sealer or primer first, then paint over it for UV and color.
How long does waterproofed plywood last outdoors?
A quality sealant or waterproofing paint typically lasts 2–5 years outdoors before it needs a fresh coat, depending on sun and rain exposure. Edges and horizontal surfaces that collect standing water wear out fastest and may need resealing yearly.
Can you waterproof plywood that’s already installed outside?
Yes, but clean and fully dry the surface first, sand off any peeling old coating, and re-seal any exposed edges before applying a new topcoat. Waterproofing over trapped moisture just seals the damage in.
Is epoxy or polyurethane better for waterproofing plywood?
Epoxy resin creates a harder, more waterproof barrier and is the standard for boat and marine builds, but it’s more expensive and less flexible. Polyurethane sealant is cheaper, easier to apply, and flexes with the wood, which is usually enough for decks, sheds, and furniture.
What plywood grade is best for outdoor waterproofing?
Exterior-grade or marine-grade plywood (bonded with waterproof glue) waterproofs more reliably than interior-grade plywood, because the glue itself resists moisture even if the sealant coat is thin or worn in a spot.
Conclusion
Waterproofing plywood is an essential step to protect it from moisture damage and extend its lifespan. By following the right techniques and using the appropriate sealants, you can ensure that your plywood remains durable and resistant to water. Remember to clean and prepare the surface properly, select a suitable sealant, and apply multiple coats for optimal protection.
With these tips, you can confidently preserve your plywood projects and enjoy their benefits for years to come.
Sponsored / affiliate links. As an Amazon Associate I earn from qualifying purchases. I may earn additional commission from eligible campaigns.