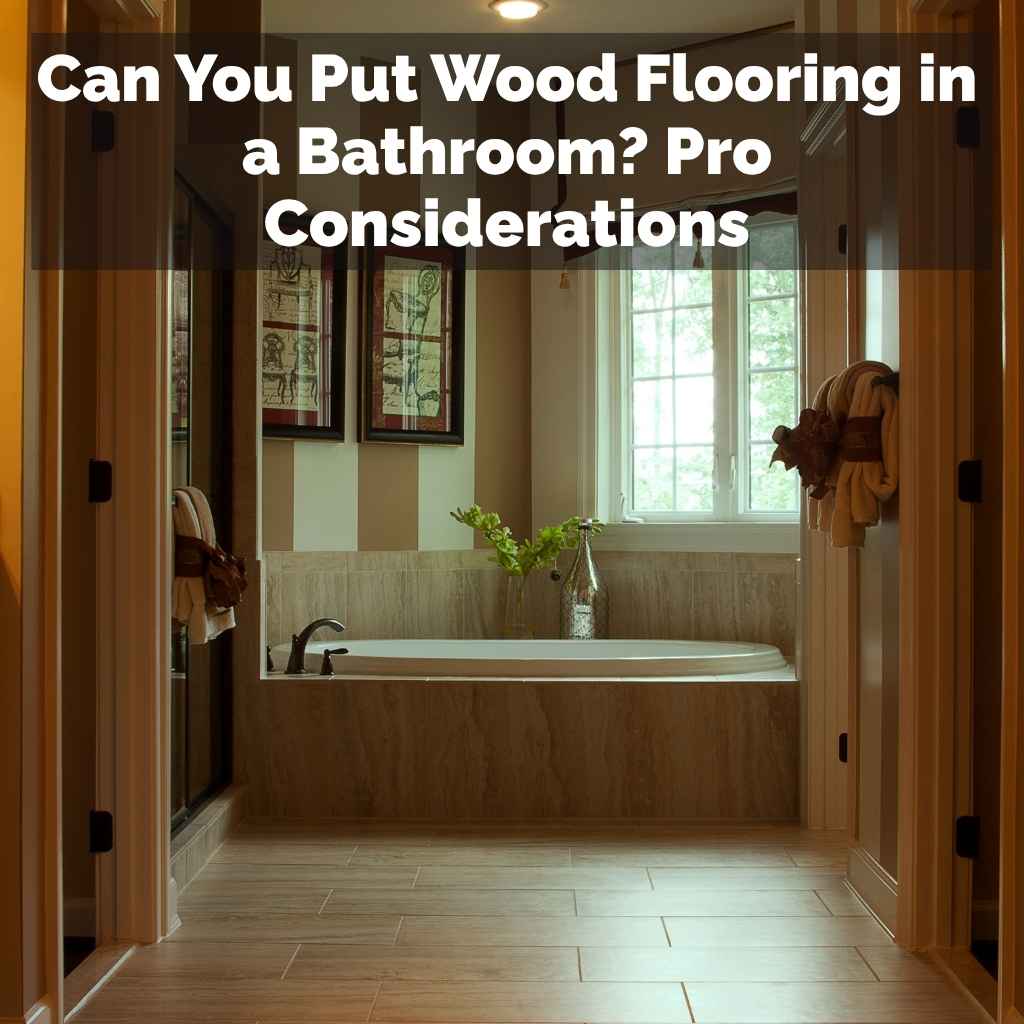
Can You Put Wood Flooring in a Bathroom? Pro Considerations
Many people wonder about Can You Put Wood Flooring in a Bathroom? Pro Considerations because bathrooms get wet. This might seem like a tricky question for folks new to home projects.
You might worry about water damage or how to keep it looking nice. Don’t worry! We’ll make it simple.
We will walk you through what you need to know so you can decide if wood floors are right for your bathroom.
Understanding Wood Flooring Types For Bathrooms
Deciding if wood flooring belongs in a bathroom is a big question for homeowners. Bathrooms are known for moisture from showers, baths, and sinks. This can make traditional wood floors warp or rot over time.
But there are newer options and careful installation methods that make it possible. This section will explore the different kinds of wood-like flooring and real wood options that can work in a bathroom setting, focusing on their water resistance and durability.
Engineered Wood Flooring
Engineered wood flooring is a popular choice for rooms where moisture might be a concern. It’s made of several layers. The top layer is real hardwood veneer.
Underneath are layers of plywood or high-density fiberboard. This layered construction makes it more stable than solid hardwood. It can handle changes in temperature and humidity better.
The real hardwood top layer gives you the look and feel of natural wood. The sturdy core layers provide strength and help prevent warping. This design is key to its improved performance in damp environments.
Many engineered wood floors come with a protective finish. This finish adds an extra barrier against moisture.
When choosing engineered wood for a bathroom, look for products specifically rated for this use. Some have special moisture-resistant cores or sealants. The thickness of the hardwood veneer also matters.
A thicker veneer means it can be refinished more times if needed.
One real-life example is a family who wanted a spa-like feel in their master bathroom. They chose a high-quality engineered oak flooring. Over two years, it has held up well with daily use.
They wipe up any standing water quickly. The floor still looks beautiful and natural.
Solid Hardwood Flooring
Solid hardwood flooring is made from a single piece of solid wood. This is the traditional type of wood flooring many people think of. It offers a classic, natural beauty that is hard to match.
However, solid hardwood is also the most vulnerable to moisture damage.
Water can cause solid wood to expand, contract, and even warp. This can lead to gaps between planks or cupping. For this reason, solid hardwood is generally not recommended for bathrooms.
The high humidity and potential for direct water splashes are too much for it.
If you are set on solid hardwood, you would need to take extreme precautions. This includes perfect sealing of the wood and very fast cleanup of any spills. It also requires excellent ventilation in the bathroom.
Even with these measures, the risk of damage remains higher compared to other options. Many flooring experts strongly advise against using solid hardwood in bathrooms.
Luxury Vinyl Plank (LVP) Flooring
Luxury Vinyl Plank (LVP) flooring is a fantastic alternative for bathrooms. It is designed to mimic the look of real wood or stone. LVP is made from several layers of PVC (polyvinyl chloride) and other materials.
These layers make it very durable and waterproof.
One of the biggest advantages of LVP is its 100% waterproof nature. This means water spills or high humidity won’t damage it. It won’t swell, warp, or rot like real wood can.
This makes it an ideal choice for busy bathrooms.
LVP comes in a wide variety of styles, colors, and textures. You can find planks that look very similar to oak, maple, or walnut. The printing technology used is very advanced.
This allows for realistic wood grain patterns. The surface is often textured to feel like real wood underfoot.
Installation is often easier with LVP. Many types use a click-lock system. This allows for floating installation.
It can be laid over existing subfloors. This saves time and labor costs. Also, cleaning is simple.
A damp mop and mild cleaner are usually all you need.
Consider a scenario where a family with young children renovated their main bathroom. They installed LVP that looked like distressed pine. The kids often splash water out of the tub.
The LVP has handled the water without any issues. It’s easy to clean up after messy bath times.
Waterproof Laminate Flooring
Waterproof laminate flooring is another excellent option that offers a wood look. Unlike traditional laminate, which can be damaged by water, waterproof versions are made with a special core and a superior water-resistant surface. This makes them much more suitable for bathrooms.
The core of waterproof laminate is typically made from high-density fiberboard (HDF). This HDF is treated to resist moisture. The wear layer on top is also sealed.
This prevents water from seeping down into the core and causing swelling. Many waterproof laminates can even withstand standing water for a limited time.
These floors provide the aesthetic appeal of wood at a generally lower cost than real wood or high-end LVP. They are also quite durable and scratch-resistant, which is a plus in high-traffic areas. The locking systems for waterproof laminate are designed to create a tight seal between planks, further preventing water penetration.
When selecting waterproof laminate for a bathroom, check the manufacturer’s specifications. Ensure it is clearly labeled as waterproof or water-resistant for bathroom use. Pay attention to the warranty as well.
Some warranties might have specific exclusions for bathroom installation.
Key Considerations For Wood-Look Floors In Bathrooms
When thinking about Can You Put Wood Flooring in a Bathroom? Pro Considerations, it’s not just about the type of material. Proper installation and ongoing maintenance are just as vital.
Even the best waterproof flooring needs care. This section will cover the crucial steps and factors that ensure your wood-look bathroom floor stays beautiful and functional for years to come.
Subfloor Preparation
The subfloor is the foundation of your bathroom floor. Preparing it correctly is absolutely essential. It needs to be clean, dry, and level.
Any bumps or dips can make your new flooring look uneven. They can also cause planks to loosen over time.
First, remove any old flooring and adhesive completely. Then, inspect the subfloor for any damage. Rotten or weak spots need to be repaired or replaced.
A level subfloor is key. You might need to use a leveling compound to fill low areas. High spots might need to be sanded down.
If you have a concrete subfloor, it’s important to ensure it’s properly sealed. Moisture can seep up from concrete. This can damage wood or laminate flooring.
Use a good quality concrete sealer. For wooden subfloors, ensure there’s no risk of water from below. Check for leaks in pipes or the ceiling below.
A stable and level subfloor prevents issues like creaking or buckling. It also helps your flooring last longer. It provides a solid base for the planks to lock into securely.
This is especially important for floating floors.
Moisture Management And Ventilation
Moisture is the biggest enemy of wood and wood-look flooring in bathrooms. Proper moisture management and good ventilation are your best defenses. This means preventing water from sitting on the floor and allowing air to circulate.
After showers or baths, it’s important to wipe up any standing water immediately. Use a towel or a squeegee. This small step makes a big difference.
It prevents water from seeping into the seams of the flooring. It also reduces the chance of mold or mildew growth.
Good ventilation helps to dry out the bathroom air. This is important to prevent condensation. Consider installing an exhaust fan.
Make sure it’s powerful enough for the size of your bathroom. Run it during and after showers. Open windows when possible to let fresh air in.
Check for leaks around toilets, sinks, and tubs regularly. Address any leaks promptly. Even small drips can cause long-term damage.
Proper sealing around fixtures is also important. Use caulk to seal the edges where the flooring meets walls, tubs, and showers. This creates a barrier against water intrusion.
Consider these practical tips for moisture control:
Always wipe up spills right away. Use an exhaust fan during and after showers. Ensure your bathroom has good air circulation.
Regularly check for and fix any leaks.
Sealing And Finishing (For Real Wood Options)
If you are using engineered wood flooring, the finish is crucial for its protection. The factory finish is usually quite good. However, you can add extra layers of sealant for added defense.
This is especially important in a bathroom environment.
Polyurethane finishes are common. They create a protective barrier on the surface of the wood. Water beads up on a well-sealed surface.
This allows you to wipe it away easily. For bathrooms, a high-traffic, water-resistant polyurethane is recommended. Look for finishes with a higher solids content, as they offer better protection.
Multiple coats are better than one. Each coat adds another layer of defense. It’s important to allow each coat to dry completely before applying the next.
You might also consider using a marine-grade sealant. These are designed for harsh, wet environments.
Beyond the finish, consider sealing the edges and seams of the planks. Some installers use a clear, waterproof caulk. This can add an extra layer of protection.
It’s particularly useful around bathtubs, showers, and toilets. This step helps prevent water from getting underneath the planks.
Remember that even with excellent sealing, real wood will require more maintenance than LVP or waterproof laminate. You will need to reapply sealant periodically. The frequency depends on the type of sealant and the amount of wear and tear the floor experiences.
Expansion Gaps
Wood and laminate flooring expand and contract with changes in temperature and humidity. This is a natural property of wood. To accommodate this movement, it is essential to leave an expansion gap around the perimeter of the room.
This gap allows the flooring to shift without buckling or lifting.
The gap is typically about 1/4 inch to 1/2 inch wide. It should be present along all walls, door frames, and any permanent fixtures. This gap will be covered by baseboards or quarter-round molding.
The molding is usually attached to the wall, not the floor, so it doesn’t restrict movement.
For bathrooms, especially those with high humidity, this expansion gap is even more critical. Without it, the wood has nowhere to go when it expands. This can lead to significant damage.
It can cause the planks to push against each other forcefully.
Some types of flooring, like certain LVP products, might not require as large an expansion gap, or sometimes none at all, if they are designed to be rigid and less susceptible to movement. Always check the manufacturer’s installation guidelines. They will specify the required expansion gap for their product.
A common scenario: A homeowner skipped the expansion gap on a bathroom remodel. Within a year, the planks started to buckle near the bathtub. The constant humidity caused the wood to expand.
It had no room to move and pushed upwards. This resulted in costly repairs.
Installation Methods And Professional Help
The way wood flooring is installed greatly affects its performance, especially in a bathroom. While DIY is possible for some flooring types, bathrooms present unique challenges. This section will discuss the common installation methods and when it’s best to call in a professional.
Getting the installation right is key to longevity and avoiding future problems.
Floating Installation
Floating installation is a common method for engineered wood, laminate, and many LVP floors. In this method, the planks are not directly attached to the subfloor. Instead, they are connected to each other using a click-lock system or adhesive.
The entire floor essentially “floats” over a subfloor or underlayment.
This method is often favored for its speed and ease of installation. It can be a good option for DIYers. It also allows the flooring to expand and contract naturally.
This is why it works well with materials that are sensitive to humidity changes.
For bathrooms, the choice of underlayment is critical. You’ll want an underlayment that provides a moisture barrier. Some underlayments have built-in vapor barriers.
Others require a separate one to be installed first. The key is to prevent moisture from the subfloor reaching the flooring material from below.
When floating a floor in a bathroom, pay extra attention to sealing the perimeter. Ensure the expansion gaps are maintained. Even though the floor floats, it still needs room to move.
Over time, a poorly installed floating floor can develop gaps between planks or other issues.
Sample scenario: A couple wanted to update their bathroom quickly. They chose a click-lock LVP. They installed it themselves as a floating floor over the existing tile.
They took care to leave expansion gaps. The floor has held up well against daily moisture.
Glue-Down Installation
Glue-down installation involves adhering the flooring planks directly to the subfloor using a special adhesive. This method creates a very stable and secure floor. It’s often used for engineered wood, solid hardwood, and some types of LVP.
In a bathroom, a glue-down installation can offer enhanced protection against moisture. The adhesive acts as a secondary vapor barrier. It helps to seal the planks to the subfloor.
This reduces the chance of water seeping underneath.
However, it’s vital to use the correct type of adhesive. Not all adhesives are suitable for bathrooms. You need an adhesive that is specifically designed for the flooring material and for use in wet areas.
It must be waterproof or highly water-resistant. It should also be flexible enough to allow for some expansion and contraction.
Proper subfloor preparation is even more critical with glue-down installation. The subfloor must be perfectly smooth and clean. Any debris will prevent the adhesive from bonding properly.
This can lead to loose planks later on. Applying the adhesive evenly and ensuring full coverage is also key.
This method generally requires more skill and labor than floating. It’s often best left to professionals. They have the experience to apply the adhesive correctly and ensure a strong, lasting bond.
Professional Installation
For most homeowners, hiring a professional installer is the safest bet when dealing with wood flooring in a bathroom. Professionals have the knowledge and tools to handle the unique challenges of this environment.
They understand the importance of subfloor preparation. They know how to assess the existing subfloor for moisture issues. They also know which types of underlayments or vapor barriers are best.
Professionals can correctly calculate and maintain expansion gaps.
A skilled installer will use the right adhesives or fasteners. They will ensure the flooring is laid perfectly straight and secure. They can also handle tricky cuts around toilets, vanities, and doorways.
This ensures a clean, finished look.
While professional installation adds to the cost, it often saves money in the long run. A poorly installed floor can lead to costly repairs or premature
Statistics show that around 60% of flooring installation failures are due to improper installation rather than product defects. This highlights the value of professional expertise, especially in moisture-prone areas like bathrooms. Choosing a seasoned professional significantly increases the chances of a successful and long-lasting installation.
Here are some reasons to hire a pro:
Expertise in moisture control for bathrooms. Proper subfloor preparation and leveling. Correct application of adhesives and sealants.
Knowledge of expansion gap requirements. * Professional finishing touches and sealing around fixtures.
Maintenance And Longevity
Once your wood or wood-look flooring is installed in the bathroom, keeping it in good shape is important. The main goal is to protect it from the constant moisture and daily use. This section will provide practical advice on how to maintain your floor.
This will help it look its best and last as long as possible.
Daily Cleaning Practices
Regular cleaning is the first line of defense for any floor. For wood or wood-look bathroom floors, this means being diligent about keeping them dry. The most important daily habit is to wipe up any water spills immediately.
Use a soft, dry cloth or a microfiber mop to dry the floor after showers or baths. Don’t let water sit on the surface. Even waterproof materials can be compromised if water is left standing for long periods.
Pay attention to areas around the tub, shower, and sink.
Beyond drying, a gentle daily sweep or vacuuming will remove dust and debris. This prevents grit from scratching the surface over time. Use a vacuum cleaner with a soft brush attachment.
Avoid using harsh abrasive cleaners or scrub brushes. These can damage the finish.
A damp mop can be used periodically for a more thorough cleaning. Use a cleaning solution specifically designed for your flooring type. Always ensure the mop is only slightly damp, not wet.
Wring it out thoroughly before mopping. Follow up by drying the floor with a clean, dry cloth.
Consider this simple routine:
1. Wipe up water spills immediately after use. 2.
Sweep or vacuum daily to remove dirt. 3. Use a damp mop with appropriate cleaner once a week or as needed.
4. Dry the floor thoroughly after any mopping.
Dealing With Spills And Accidents
Accidents happen, especially in bathrooms. Whether it’s a spilled bottle of shampoo, a leaky faucet, or a child’s bath overflow, prompt action is key. The speed at which you address a spill directly impacts the potential for damage.
For most spills, blot them up immediately with an absorbent towel. Do not wipe, as this can spread the liquid. If it’s a sticky substance, use a damp cloth with a mild, pH-neutral cleaner.
Make sure to rinse the area with a clean, damp cloth afterward.
If you encounter a more significant leak, like from a toilet or sink, turn off the water source if possible. Then, remove as much standing water as you can. Use towels, a mop, or even a wet-dry vacuum.
After removing the bulk of the water, dry the area thoroughly.
Pay close attention to the edges of the flooring, near walls and fixtures. Water can wick up under the planks if it gets a chance to sit there. If you suspect water has gotten underneath, you may need to lift a few planks to dry the subfloor.
This is where professional help might be needed.
After any major spill or leak, monitor the area for a few days. Check for any signs of swelling, discoloration, or lifting of the planks. Early detection is crucial for minimizing damage and repairs.
Periodic Deep Cleaning And Protection
Beyond daily upkeep, periodic deep cleaning and protection measures can help maintain the beauty and integrity of your bathroom wood flooring. This is especially true for engineered wood floors that have a protective finish.
Manufacturers often recommend a deep clean every few months. This might involve using a specialized wood floor cleaner. These cleaners are formulated to remove tougher grime without stripping the finish.
Always follow the product instructions carefully.
For engineered wood, consider reapplying a protective sealant every 1-2 years, or as recommended by the manufacturer. This adds an extra layer of defense against moisture and wear. Choose a high-quality polyurethane finish designed for high-traffic areas.
Ensure the floor is thoroughly cleaned and dried before applying any new coats.
Using doormats at the bathroom entrance can trap dirt and moisture. This reduces the amount of grit that gets tracked onto the floor. You can also place small mats or rugs in front of the sink and shower to catch drips.
Make sure these mats have a non-slip backing so they don’t become a tripping hazard.
These protective measures, combined with consistent cleaning, will help ensure your bathroom wood flooring remains a beautiful and functional part of your home for years to come. It’s about proactive care to prevent problems before they start.
Frequently Asked Questions
Question: Is it ever okay to use solid hardwood in a bathroom?
Answer: While not generally recommended due to high moisture levels, solid hardwood can be used with extreme caution and extensive protective measures. This includes multiple layers of waterproof sealant, meticulous daily drying of the floor, and excellent ventilation. However, the risk of damage remains significantly higher compared to other options.
Question: What is the best type of wood-look flooring for a bathroom?
Answer: Luxury Vinyl Plank (LVP) flooring is often considered the best option for bathrooms. It is completely waterproof, durable, and comes in a wide range of realistic wood styles. Waterproof laminate flooring is also a very good and often more budget-friendly alternative.
Question: How important is ventilation in a bathroom with wood floors?
Answer: Ventilation is extremely important. Good airflow, often achieved with an exhaust fan, helps to dry out moisture and prevent condensation. This reduces the risk of water damage to wood or wood-look flooring.
Question: Can I install wood flooring in a bathroom myself?
Answer: For materials like LVP or waterproof laminate using a click-lock system, DIY installation can be feasible. However, proper subfloor preparation, moisture management, and leaving expansion gaps are crucial. For solid or engineered wood, or if you’re unsure, professional installation is highly recommended to ensure durability.
Question: How do I clean wood flooring in a bathroom?
Answer: Always wipe up spills and standing water immediately. Sweep or vacuum regularly to remove dirt. For deeper cleaning, use a slightly damp mop with a pH-neutral cleaner specifically made for your flooring type.
Ensure the floor is dried thoroughly after any wet cleaning.
Summary
You can put wood or wood-look flooring in your bathroom with the right choices and care. Engineered wood with a strong finish, waterproof laminate, and especially luxury vinyl plank are great options. Key steps include preparing the subfloor well, managing moisture with good ventilation, and installing with proper expansion gaps.
Regular cleaning and quick attention to spills will keep your floor looking great. Professional installation is often the best way to ensure long-lasting results.