Christmas Woodworking Projects: Ornaments, Gifts and Decor
Choose Christmas woodworking projects by matching five filters: skill level, tools on hand, build time, material budget, and end use—gift, craft-fair sale, or home decor. Pick badly, and you waste wood, miss holiday deadlines, or end up with pieces that look rough for all the wrong reasons. This guide sorts ornament, gift, and decor ideas by those filters so you can choose a project that fits your setup.
Start with the use case: tree ornament, mantel piece, porch decor, personalized gift, faith-based display, or craft-fair inventory. Then check that your stock is dry enough, your tools suit the cut style, and your finish has enough time to dry and cure before the holiday deadline.
That sequence matters because each project fails in different ways. Wood slices crack if they are not fully dried and sealed, pallet boards twist after milling, and scroll-saw ornaments break at tight inside corners if the stock is brittle or the pattern leaves weak points.
Choose your project first
Pick by use case before picking by style
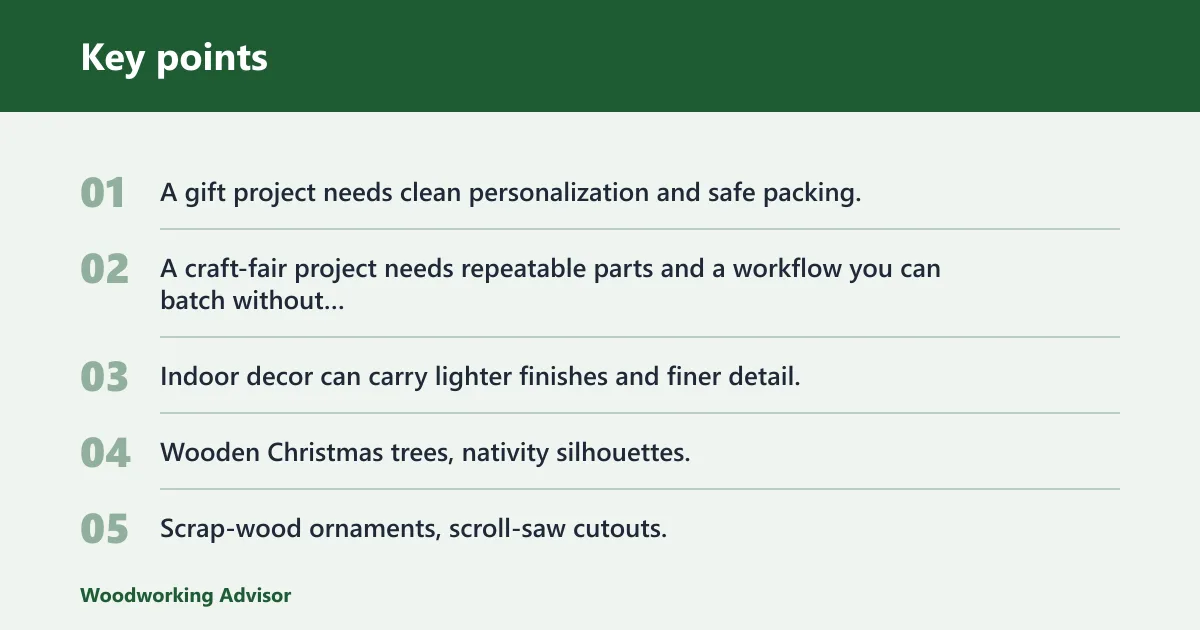
A gift project needs clean personalization and safe packing. A craft-fair project needs repeatable parts and a workflow you can batch without bottlenecks. Indoor decor can carry lighter finishes and finer detail, while porch decor needs weather-tolerant stock, simpler shapes, and a topcoat suited to outdoor exposure.
Wooden Christmas trees, nativity silhouettes, and village houses fit best as display pieces. Scrap-wood ornaments, scroll-saw cutouts, and wood slices fit gifts and small-batch sales better. Pallet signs and porch trees make more sense for larger decor where shipping is not the first concern.
Match the build to your tools and stock
Thin plywood and hardwood blanks suit scroll-saw ornaments and village houses. Wider reclaimed boards suit signs better than delicate cutouts. Dowels, slats, and straight scrap strips are a better match for wooden trees than short, knotty offcuts with mixed thickness.
Scrap wood helps when the design can absorb variation. It creates trouble when parts must match exactly, when grain runs into narrow points, or when mixed species take stain at different rates.
Balance build time against finish and cure time
Cutting is often the short phase. Edge cleanup, paint drying, stencil work, sealer coats, and cure time decide whether a build is realistic in late November. Charleston Crafted recommends starting Christmas woodworking projects in November, but that timing fits small batches better than porch signs, village sets, or painted inventory.
Take a set of six village houses cut in one evening from thin plywood. The sawing may be done, but sanding window cutouts, painting roof edges, and waiting on the inside light access setup can push real completion back by several days.
Use risk level to rule out poor fits early
Some projects look easy and still fail often. Fresh-cut branch slices split after hanging. Pallet boards hide staples and dirt. Compound-cut ornaments look attractive, but Wood It Good notes that compound-cut Christmas ornaments are more advanced.
If the stock is damp, twisted, deeply cracked, or full of bark separation, change projects. A rough branch can become a bundled rustic accent. It should not become a thin ornament with a drilled hanger hole near the edge.
What are the easiest Christmas woodworking projects for beginners?
The easiest beginner Christmas woodworking projects use simple shapes, little or no joinery, forgiving stock, and short finishing cycles. Good starters include flat scrap-wood ornaments, basic wood slice ornaments made from dried slices, slat-style tabletop trees, and small block nativities with painted details instead of fragile cutouts.
Best starter builds with basic cutting and sanding
Flat ornaments teach layout, clean cutting, drilling, and edge cleanup without asking for complex assembly. A star, tree, mitten, or simple tag shape made from thin plywood or stable softwood is much safer for a first batch than a lacy snowflake.
Tabletop wooden trees also rank well for beginners. Straight slats or stacked blocks avoid tight curves, and small layout errors are easier to hide with paint or an opaque finish.
The same source says its list includes 17 easy Christmas woodworking projects, which matches the broader pattern: beginners do best when parts stay flat, shapes stay bold, and finishing stays simple.
Projects that teach useful basics
A solid first holiday build should teach one or two repeatable shop skills, not ten. Ornaments teach template transfer, drilling hanger holes, and edge sanding on small parts. Signs teach board prep, simple bracing, and paint layout, while block nativities teach square cuts, stable glue-ups, and painted accents without tiny fretwork.
Wood It Good positions the topic as festive projects for new woodworkers, and that approach works best when setup stays light and cut quality is easy to correct with sanding.
Beginner traps to avoid
Skip green wood, ultra-thin points, and mixed reclaimed stock for your first holiday build. Fresh rounds split, fragile corners break during sanding, and mixed boards can stain in three different tones on the same sign.
A common first-timer mistake is using a pallet offcut for a 24-inch porch tree without checking twist. Once the slats are screwed together, the tree rocks on the floor and the paint line looks crooked even though the cuts were square.
Building Small Wooden Reindeer for Holiday Decor
A stable wooden reindeer starts with precise dimensions: a 3/4-inch-thick body standing 5 to 6 inches tall, 1/4-inch legs, and 1/8-inch peg holes. Incorrect hole placement or undersized legs cause the figure to wobble, split, or snap during assembly.
This guide covers exact cut sizes, drill diameters, assembly fixes, and finishing steps for a kid-friendly Christmas project. Following these measurements prevents joint failure and produces a sturdy decoration suitable for gifts or mantel displays. For complete proportions and drilling details, follow this small wooden reindeer tutorial before cutting your stock.
Best Beginner Woodworking Gifts to Buy First
If you’re shopping for someone who’s just getting started, the safest gift is usually a useful tool or shop basic they’ll use on nearly every project. The woodworking gifts for beginners article breaks down the best starter options, from a combination square and clamps to a waxed canvas apron, pull saw, or even a gift card for lumber. That matters because beginner woodworkers often already have a few basics, so a thoughtful gift should be practical, low-risk, and unlikely to be duplicated.
It also explains what to avoid buying, which helps you skip niche tools that depend on a specific setup or skill level and choose something that actually makes a first workshop easier to use.
Carving Charming Wooden Gnomes: A Step‑by‑Step Guide
The article walks you through everything needed to carve a wooden gnome, starting with choosing a straight‑grained blank that’s two to three times taller than its widest part. It then details the essential tools, proportion rules, grain direction, and a step‑by‑step sequence for shaping the hat, nose, beard, and body, ending with tips for carving the face and beard. You’ll also find a worksheet for planning dimensions and a checklist of the three most common failure points to watch for.
Following this guide saves time and prevents costly mistakes, so you can produce a sturdy, whimsical gnome that makes a perfect holiday décor piece or a handmade gift. Learn how to carve wooden gnomes with confidence.
Simple Block Gnomes for Shelf Decor and Gifts
If you want a quick project that still looks polished, wood block gnomes are a strong choice for shelf sitters, gift sets, and holiday displays. The supporting guide walks through the practical details that make the difference: choosing a block with the right proportions, sizing the hat so it covers the top correctly, and shaping the body so the finished piece looks balanced instead of bulky. It also covers sanding, painting, and adding the beard, nose, and hat for a cleaner result. See the full wood block gnomes guide for the step-by-step build and common mistakes to avoid.
Wooden Candle Holder Project Guide
This project shows how to turn a simple wood block into a rustic candle holder that sits flat, fits the candle base securely, and looks finished on a mantel or table. It covers the basic cuts, how to size the recess so the candle does not wobble or bind, and how much depth you need for a stable fit.
It also explains common fit problems and simple Christmas styling options, making wooden candle holder DIY useful whether you want a single accent piece or a matched set for seasonal decor.
Build a Wooden Phone Stand That Fits Your Device
If you want a small project that is useful every day, this guide shows how to size and build a wooden phone stand around your actual phone, case, and charging setup. The key takeaway is that the dimensions matter more than the shape: cradle width, lip height, base length, and viewing angle all need to match the device so it sits securely and still charges.
The full wood phone stand article walks through the materials list, sizing checklist, angle choice, assembly steps, and common mistakes to avoid. That makes it a practical reference for turning scrap wood into a stand that looks good and works correctly on the first try.
Project selector table
| Project | Skill level | Estimated build time | Primary tools | Material cost band | Best use case | Risk notes |
|---|---|---|---|---|---|---|
| Flat scrap-wood ornaments | Beginner | 1-3 hours per batch | Jigsaw or scroll saw, drill, sander | Low | Gifts, kid-safe tree decor | Short grain at hanger hole, paint buildup on detail edges |
| Scroll-saw silhouette ornaments | Beginner to intermediate | 2-4 hours per batch | Scroll saw, drill, detail sander | Low to medium | Gifts, personalized sales | Fuzzy cross-grain edges, brittle cuts at tight corners |
| Compound-cut ornaments | Advanced | 2-5 hours per batch | Scroll saw | Low to medium | Specialty gifts | Layout errors ruin blanks, fragile points break easily |
| Wood slice ornaments | Beginner | 2-3 hours plus drying prep | Band saw or pre-cut slices, sander, drill | Low | Rustic gifts, name ornaments | Cracking, bark loss, warped slices if not dried |
| Pyrography name ornaments | Beginner to intermediate | 1-3 hours per batch | Wood-burning tool, fine tips, sander | Low | Personalized gifts, fair inventory | Burn marks wander on rough grain, overburning darkens detail |
| Tabletop wooden trees | Beginner | 2-4 hours | Miter saw, drill, sander | Low to medium | Mantel and shelf decor | Uneven slat spacing, wobble from poor base alignment |
| Porch wooden trees | Intermediate | 3-6 hours plus finish cure | Miter saw, drill/driver, brad nailer | Medium | Outdoor decor | Warped slats, finish failure outdoors, unstable base |
| Pallet wood Christmas signs | Beginner to intermediate | 3-6 hours plus paint time | Pry tools, saw, detector magnet, sander, drill | Low to medium | Indoor or porch display | Hidden nails, twist, dirt, blotchy paint or stain |
| Block nativity set | Beginner | 2-5 hours | Miter saw, glue, sander, brushes | Low | Faith-based decor, gifts | Tipping figures, muddy paint detail if overworked |
| Thin-panel nativity silhouette | Intermediate | 3-6 hours | Scroll saw or jigsaw, sander | Low to medium | Faith-based wall or shelf decor | Breakage at narrow interior cuts, weak bases |
| Christmas village houses | Intermediate | 4-8 hours per set | Scroll saw or jigsaw, drill, sander | Medium | Mantel, tabletop, gift sets | Fragile window cutouts, poor light access, roof misalignment |
| Rustic log and branch decor | Beginner to intermediate | 2-5 hours plus drying prep | Saw, drill, sander, glue | Low | Farmhouse and woodland decor | Insects, checking, unstable cuts, bark shedding |
What tools do you need for Christmas woodworking projects?
Most Christmas woodworking projects need only a basic cutting, drilling, and sanding setup. A small saw, a drill, clamps, and sanding tools cover ornaments, signs, and simple tabletop decor. Add a scroll saw for curved cutouts, a pyrography pen for detailed personalization, and weather-suitable finishing supplies for porch pieces.
Essential tools for most builds
For broad coverage, start with a miter saw or jigsaw, a drill or drill/driver, random-orbit or detail sanding, clamps, layout tools, and a way to clean dust before finishing. Those tools handle slat trees, signs, block decor, and flat ornaments.
If the work comes from reclaimed stock, add metal detection before every cut. That can be as simple as careful visual inspection and a strong magnet for suspected staples, but the point stays the same: pallet wood is not ready-to-cut stock.
When a scroll saw earns its place
WoodWorkly says scroll saws are used for cutting the wooden tree ornaments, and that matches the category that benefits most from precise curved cuts. Scroll-saw Christmas ornaments work best in thin plywood or hardwood blanks where the pattern includes snowflakes, trees, names, or other custom silhouettes.
They fit beginner to intermediate skill levels when the pattern uses broad curves and few needle-thin points. As inside corners tighten, the project moves up in difficulty because blade control and grain direction matter more.
Useful add-ons for small-batch work
- Drill press: cleaner hanger holes and repeatable light holes in village houses.
- Brad nailer: faster assembly for signs, slat trees, and porch decor.
- Pyrography pen: permanent names, dates, line art, and rustic detail.
- Detail sander or sanding sticks: cleanup inside ornament cutouts and window openings.
Practical gifts woodworkers will actually use
If you want a gift that gets used instead of shelved, focus on tools and accessories that solve a real shop problem. The woodworker gift guide breaks ideas down by budget, skill level, and need, so you can match the present to how the recipient actually works. That makes it easier to avoid duplicate tools, poor-fit accessories, and novelty items that add clutter.
It also highlights gift categories that improve day-to-day work, like measuring, setup, cleanup, sharpening, and organization. For anyone buying for a woodworker, that matters because the best gift is usually the one that saves time, reduces frustration, or makes the shop safer and easier to use.
How do you make wooden Christmas ornaments from scrap wood?
Make scrap-wood ornaments from thin, stable stock that cuts cleanly and stays flat after finishing. Use a simple template, keep the hanger hole away from weak short-grain areas, clean the edges before paint or clear finish, and avoid heavy finishes that fill crisp detail on small shapes.
Choose stock that stays stable
Thin plywood is the safest batch material because it resists splitting and stays flat. Hardwood offcuts also work well if the grain does not run into narrow points. Stable softwood works for larger simple shapes, but it dents more easily and can fuzz along cross-grain edges.
For small ornaments, consistency matters more than saving every scrap. A pile of offcuts in mixed species and mixed thickness often creates more sanding and finishing work than it saves in material cost.
Follow a simple workflow
- Pick blanks with flat faces and no end checks crossing the planned shape.
- Transfer the template with pencil, spray adhesive pattern paper, or carbon paper.
- Drill the hanger hole before final edge cleanup so tear-out can be sanded away.
- Cut outside the line if using a jigsaw; cut on the line if the scroll-saw pattern allows.
- Sand faces and edges, then refine inside curves with sanding sticks or folded paper.
- Apply paint, pyrography, or a light clear finish that does not pool on detail.
Finish choices for small parts
For ornaments handled by kids, low-odor indoor finishes make more sense than heavy outdoor coatings. Paint is often better than stain on mixed reclaimed stock because it hides species mismatch and filler repairs.
Pyrography works especially well when the wood has a clean, sanded face. Use fine tips for linework and names. Treat it as a decoration method, not a separate build category.
Picture a 3-inch plywood snowflake with several tight inside points. If a thick brushed finish fills those corners, the crisp cutout starts to look soft. A thinner clear coat or painted face with light edge sealing keeps the pattern cleaner.
Picking the right decoration method for wooden ornaments
The best decoration method depends on the ornament’s surface, how it will be handled, and how much time you have for drying and cleanup. Smooth, sealed blanks usually work well with paint, markers, or vinyl, while rougher wood often looks better with stain, glue, glitter, or woodburned accents. That choice affects more than appearance: the wrong finish can smear, peel, or crack once the ornament is hung, packed away, or used by kids.
The wooden ornament decorating guide breaks down the main options, prep steps, and common pitfalls so you can match the decoration to the wood and the project’s purpose.
How do you choose the right size and finish for wood snowflakes?
Wood snowflake decor works best when the size matches the setting: smaller pieces suit tree branches and table accents, medium sizes fit mantels, and larger snowflakes stand out on walls, doors, or porches. The supporting guide on wood snowflake decorating explains how to pick dimensions, wood species, cut styles, and finishes so the piece looks intentional instead of crowded or undersized.
It also covers hanging methods and layout choices for Christmas and winter displays, which matters if you want the snowflake to hold up indoors or outdoors and still read clearly from a distance. That makes it easier to plan a project that fits your space before you cut the first piece.
Pick the Right Birdhouse Entrance Size
The right entrance hole size helps a birdhouse attract the species you want while keeping out larger birds, predators, and nest competitors. The supporting guide breaks down common hole diameters by species and explains how to choose a size that matches your target bird without making the opening so large that the nest becomes vulnerable. If you are building for wrens, chickadees, bluebirds, or other cavity nesters, this kind of sizing reference removes guesswork and helps the box function as intended. Use this birdhouse hole size chart to compare species-specific measurements before you cut.
How to Choose the Right Picture Frame Moulding Profile
The frame profile affects fit, appearance, and how well your artwork sits in the rabbet. The supporting guide breaks down picture frame moulding profiles by rabbet depth, face width, wood species, and common profile shapes, so you can match the stock to prints, mats, glass, or thicker pieces without ending up with proud glazing or a loose assembly.
It also explains which profile families suit different projects, how wide the frame should be, and what lengths and buying options to expect. That matters because choosing the wrong geometry can make cutting and assembly harder, while the right profile saves material and gives the finished frame a cleaner, more professional look.
Sizing and Stringing Wood Bead Garlands for Trees and Mantels
A wood bead garland drapes well only when bead size, cord length, and spacing are planned before you start stringing. Tighter spacing creates a full, heavy strand suited for mantels, while looser spacing produces a lighter drape that wraps easily around tree branches. Skipping the math often results in awkward gaps or a garland that falls short of your display area.
The complete walkthrough on making wood bead garlands covers sizing worksheets, finishing the ends securely, adding tassels, and avoiding common mistakes like brittle cord or uneven tension. Planning these details first ensures your finished piece fits the intended space without wasted beads or last-minute adjustments.
Crafting Sturdy Log Slice Ornaments
Using log slices for Christmas decorations requires more than just paint; it involves proper material preparation to prevent structural failure. log slice Christmas ideas detail specific thickness recommendations, ranging from 1/4 to 3/8 inch, and emphasize the critical need for full drying before sanding and sealing. If you skip the drying process, ornaments are prone to cracking, cupping, or shedding bark. The guide breaks down decoration methods suitable for various skill levels and provides a finish matrix to ensure your projects remain stable throughout the holiday season.
Prepare Log Slices for Holiday Decor
Cracking, stain bleed, and adhesive failure are common pitfalls when using raw wood for seasonal projects. Proper preparation involves selecting the correct thickness—3/8 to 3/4 inch for hanging items and 1 to 1 1/2 inch for freestanding pieces—before sealing and decorating. This step ensures paint and pyrography adhere correctly without ruining the grain.
To get a detailed breakdown of slice thicknesses, sealing techniques, and specific decoration methods, review the complete guide on log slice craft techniques. This resource maps material conditions to specific Christmas projects, helping you avoid structural failures and achieve a professional finish.
Prepping Natural Wood Slices for Ornaments
Fresh-cut wood slices often contain 10–12% moisture, which causes cupping, splitting, and tannin bleed if skipped. Ignoring this drying step ruins paint, pyrography lines, and seals. Our detailed guide covers how to properly dry store-bought or fresh slices until the weight stabilizes, then sand and seal the faces for longevity.
The article outlines the best slice sizes for ornaments, when to drill hanger holes, and how to keep bark intact. It provides a clear path for choosing the right finish method whether you plan to paint, burn, or use a clear coat. This preparation ensures your Christmas decorations remain structurally sound and visually appealing throughout the season. Learn the full drying and prepping process via natural wood slice prep.
Ordering Custom Wood Pet Ornaments That Actually Look Like Your Animal
Commissioning a likeness that holds up year after year requires choosing the right wood species and ensuring the maker uses photo-based tracing rather than generic clip art. Durable hardwoods, high-contrast engraving, and a pre-production photo proof prevent the finished piece from looking flat or unrecognizable.
The guide on custom wood pet ornaments breaks down material comparisons, personalization options, pricing tiers, and storage methods so you can order a memorial or holiday display piece with confidence. It also covers how artisans convert a standard photograph into an engraved design, helping you evaluate quality before committing to a purchase.
Best Christmas wood projects by category

Scroll-saw ornaments and cutout designs
Scroll-saw ornaments are one of the strongest categories for gifts and small sales. Wood It Good highlights scroll saw Christmas ornaments as a handmade holiday project, and the appeal is plain: they personalize well, store flat, and use little material.
Best stock choices are thin plywood or hardwood blanks. Good beginner-to-intermediate patterns include snowflakes, trees, stars, and simple custom shapes. Risk rises when the design adds very tight inside turns or long unsupported points.
Wood slice ornaments and rustic log or branch projects
Use only dried branch or log slices. The same source describes rustic wood slice coasters as being cut from dried branches or logs with a band saw, and that same dried-stock rule matters for ornaments. Sand both faces, soften the edge lightly, and seal to slow moisture swings that lead to checking.
The same source recommends a food-safe sealant like beeswax or mineral oil for wood slices. That is most useful where a natural feel matters, though decorative wall or tree pieces may call for a different topcoat based on handling and exposure.
Rustic log and branch builds suit farmhouse and woodland styles: Santa logs, tied bundles, candle-look accents, and name tags. Prep matters more than the cut itself. Check for insects, loose bark, hidden grit, and moisture before bringing the material into the shop area.
Pallet signs, wooden trees, and porch pieces
Pallet wood Christmas signs stay popular because they suit snowmen, snowflakes, greenery, and distressed painted motifs. But reclaimed stock needs prep: remove fasteners, detect buried metal, trim splits, accept that perfect straightness may be unrealistic, and brace wide signs so they do not rack.
Wooden Christmas trees are more flexible than many single-theme projects. You can build tabletop, wall, or porch versions from slats, dowels, or scrap wood. Paint suits mixed stock, stain suits matched boards, and a natural finish suits cleaner hardwood or straight softwood with consistent grain.
For porch pieces, simplify silhouettes and increase part thickness. Outdoor decor fails more often from wood movement and finish mismatch than from weak design ideas.
Nativity sets, village houses, and faith-based decor
Wooden nativity decor appeals strongly to buyers who want faith-based Christmas displays. Small block builds are the fastest route: stable rectangles, simple figure silhouettes, and hand-painted detail. Thin-panel versions look lighter and more refined but need steadier cutting and stronger bases.
Christmas village houses are best for mantels and tabletops. Thin plywood or panels make cut-out windows and roof details manageable, and the houses can be lit from within if you plan access, wiring clearance, and heat carefully. A removable back or base often solves the maintenance problem before it starts.
Charleston Crafted includes a DIY wooden snowflake wall art project and a DIY wooden adult advent calendar project. Both show how holiday woodworking often expands from ornaments into larger wall and countdown decor once the basic cutting and finishing workflow is in place.
Free Wood Santa Patterns for Different Projects
Choosing the right Santa pattern depends on your project type, and not all formats work equally well across ornaments, shelf sitters, or yard displays. This guide covers free printable Santa patterns by category, helping you avoid mistakes like breakage, tipping, or fuzzy results from improper scaling.
You’ll find resources for locating reliable patterns, a comparison of format options, guidance on matching patterns to projects, recommended wood thicknesses, transfer and cutting tips, finishing advice, and instructions for building a freestanding Santa decoration — see the Wood Santa Patterns Free resource for complete details.
DIY Christmas Presents for Dad: Choose a Gift He’ll Actually Use
If you need a practical gift that still feels personal, this guide helps you narrow down the best DIY Christmas presents for dad based on his habits, your budget, and the time you have. It breaks the idea down into quick wins, weekend-friendly builds, and kid-made options, so you can pick something realistic instead of starting a project that stalls out before Christmas.
You’ll also find advice for different kinds of dads, from handy problem-solvers to the guy who says he wants nothing, plus simple personalized keepsakes that add meaning without adding much complexity. For a focused breakdown of the best options, see DIY Christmas presents.
What Christmas wood projects work best for gifts or selling?
For gifts and selling, choose projects that balance labor, personalization, and safe handling after the build is done. Ornaments, wood slices, name tags, and block nativities usually repeat better than large signs or village sets. The best sellers are often compact, easy to carry, and hard to break in transit.
Best fits for gifting
Personalized ornaments, pyrography name slices, and small nativity sets make strong gifts because they feel specific without requiring large material costs. They also store well and can be wrapped without bulky packaging.
Best fits for craft-fair inventory
For fairs, repeatability matters more than one-off complexity. Flat ornaments, simple tabletop trees, pallet signs with repeat motifs, and rustic tag-style slices are easier to batch. Cut all blanks first, sand all edges next, burn all names after that, then finish all pieces.
That matters in a crowded seasonal market. Christmas.com says it offers products from a variety of vendors for holiday decorating, and its Christmas category listing features 5,523 products. Handmade work competes best when the project has a clear point of difference such as local wood, personalization, or faith-based themes.
Where labor creeps up fast
Village houses, detailed scroll-saw sets, and distressed multi-board signs can look profitable until sanding and paint time are counted honestly. Shipping risk also rises fast with fragile window cutouts, tall roof peaks, and projecting details.
Christmas.com sells Christmas decorations, gifts, lights, ornaments, and storage solutions. That broad holiday market means handmade sellers usually do better with focused categories than by trying to match every product type at once.
Wood Gifts That Match How He Actually Uses Them
If you want a wood gift that gets used instead of tucked away, start with the recipient’s routine: desk, bar, kitchen, or display. The wood gifts guide explains how to narrow choices by use case, budget, and wood species so the gift feels practical as well as personal.
It also covers personalized options and the buying checks that matter most, like engraving quality, finish, and whether the piece is sturdy enough for everyday use. That makes it easier to choose between a simple keepsake and a higher-value gift that fits the occasion.
Fast Wood Gifts When Time Is Tight
If you need a gift fast, this guide helps you pick a build that fits the time you actually have, from under-an-hour scrap projects to half-day keepsakes. It breaks down options by build time, recipient, tools, and how quickly you can finish and wrap them, so you can avoid choosing a project that turns into a scramble. The focus is on simple, practical gifts that still feel thoughtful and finished, not just “whatever can be cut tonight.”
Use last minute wood gifts to match the project to your deadline and skill level, then move straight into a clean finish plan. That matters because a well-chosen quick build is more likely to look polished, dry in time, and make it to the celebration without stress.
Wooden Gift Ideas for Bakers
If you want a gift that a baker will actually use, focus on the task they do most: rolling, mixing, shaping, or decorating. The supporting guide breaks down which wooden tools fit pastry bakers, bread bakers, and cake decorators, so you can choose a gift that matches their routine instead of guessing.
It also explains what makes a baking gift practical, from food-safe woods and finishes to size, durability, and cleanup. That matters because the wrong tool can end up unused or wear out quickly. For a clear breakdown of the best options, see woodworking gifts for bakers.
Wood gifts that get used
If you want a wedding gift that feels thoughtful and still gets used, focus on practical pieces like cutting boards, serving trays, salad bowls, wine boxes, and picture frames. The supporting guide breaks down which wood gifts for newlyweds fit different couples best, so you can avoid giving something decorative that ends up stored away.
It also helps you choose by lifestyle, personalization options, and clutter risk, which matters when you want the gift to match the couple’s routine and taste instead of duplicating something they already own.
Wood Coasters That Make Easy Gifts
If you want a small project that looks thoughtful without demanding a big time commitment, wood coasters are a smart choice. The wood coaster guide compares rustic log slices, painted or stenciled versions, and laser-engraved sets so you can match the build to the occasion, budget, and skill level. It also explains which wood choices help avoid warping and ring stains, plus how thickness affects durability and finish quality.
That matters because coaster gifts are judged on both appearance and performance: a clean, stable set feels premium, while a poorly sealed one can look cheap fast. This section helps you choose a style that’s practical to make and likely to be used, not tucked away.
How do you build a Christmas sign that lasts through the season?
The key is to start with a flat, dry board and choose a lettering method and finish that match where the sign will hang. A simple project can fail fast if the wood cups, the paint bleeds under the stencil, or the coating can’t handle moisture. The Christmas sign wood guide walks through board selection, transferring the design, and sealing the finished piece so it stays crisp indoors, on a covered porch, or outside.
That matters because a good Christmas sign should be easy to display, easy to read, and durable enough to reuse next year. If you want a festive project with polished results, this article helps you avoid the most common material and finishing mistakes.
Build a Charcuterie Board Gift
If you want a gift that looks polished and gets used often, a charcuterie board is a smart woodworking project. The supporting guide explains how to choose a hardwood board, pick practical dimensions, and apply a food-safe finish so the piece is attractive without wearing out quickly. It also shows how to shape the board around the foods it will hold, which helps the final gift feel intentional instead of generic.
For a build that suits a small gathering and is still easy to carry, see the full charcuterie board gift guide. It covers size planning, food layout, and construction details so you can make a board that is both useful and presentable.
When a Cutting Board Gift Set Makes Sense
A cutting board gift set works best when you want a present that feels useful, polished, and easy to tailor to the recipient. The supporting article breaks down how to build the set around one strong board, then add only the extras that improve daily use—like a matching knife, food-safe oil, or a storage piece—without turning the gift into a random bundle. It also helps you match the set to cooks, hosts, bakers, grillers, or couples so the gift feels intentional.
If you want a simple way to choose the right board, extras, and budget, this cutting board gift set guide shows what to include, what to skip, and how to keep the whole package practical.
Wood Gifts for Hunters That Feel Personal
If you want a hunter-specific gift that feels thoughtful instead of generic, this guide shows how to match the right wood piece to the person, the hunt, and the display style. It breaks down practical ideas such as plaques, ornaments, and other personalized keepsakes, then explains how to choose wood formats that hold up well and still look clean on a shelf, wall, or tree.
The article also covers engraving choices and gift selection tips for Christmas, milestone hunts, or any occasion where the memory matters. For a focused overview of those ideas, see wooden gifts for hunters.
Wood gifts that fit retirement life
Retirement gifts land best when they match how the person will spend time now, and that usually means something useful rather than purely decorative. The wood gifts for retirement guide breaks down solid options by retiree type, from desk accessories for someone leaving the office to serving boards for hosts and storage pieces for hobbyists.
It also helps you choose a sensible budget, since many strong wood gifts fall in the $25 to $100 range, and it explains why practical items are more likely to be used than generic engraved plaques. That makes it easier to pick a gift that feels personal without guessing wrong.
Wood Gifts for Musicians That Feel Personal
If you want a woodworking gift a musician will actually use, focus on the instrument, the setting, and the budget. The supporting guide breaks down practical options like guitar pick holders, personalized signs for teachers or studio owners, and decorative displays that fit a desk, shelf, or practice room.
It also helps you narrow the choice by instrument and price range so the gift feels specific instead of generic. For a quick, thoughtful shortlist, see woodworking gifts for musicians.
Wood Burning Wedding Gift Ideas That Feel Thoughtful
If you want a wedding gift that feels personal without becoming fussy, this guide helps you choose the right wood-burned project for the couple’s style and routines. It explains when a display piece, serving item, or small keepsake makes the most sense, and why matching the gift to how they live matters more than adding extra detail. For example, a décor-focused couple may appreciate a framed plaque, while hosts are better served by a practical piece with clean, durable personalization.
The article also covers wood choice, lettering clarity, and transfer methods so the final piece looks intentional rather than rushed. See the full wood burning wedding gift guide for project ideas that balance sentiment, readability, and usability.
Workshop gifts that solve real shop problems
The best workshop gifts for men are the ones that fix a specific pain point, not the ones that just add another duplicate tool. This section shows how to choose gifts by problem solved—storage, accuracy, cleanup, or comfort—so you can pick something useful whether he is setting up a new space or refining an established shop. The linked guide to workshop gifts breaks the ideas down into practical categories and helps you avoid mismatched buys that end up unused.
That matters because a well-chosen shop gift saves time, improves workflow, and gets used often, which is usually better than another item that repeats what he already owns.
Gift Ideas for Carpenters That Get Used
If you need a present a carpenter will actually put to work, this guide focuses on practical options like layout tools, carry gear, shop accessories, and small upgrades that make daily tasks easier. It also helps you avoid the most common mistake: buying a generic gift that gets duplicated, ignored, or tucked away in the truck. The article breaks down carpenter gifts by use case, so you can match the present to framing, trim, or woodworking work.
That makes it easier to choose something useful without guessing whether the person needs measuring tools, protection gear, or a better way to organize their kit.
Building a Wooden Sleigh That Holds Its Shape
A wooden sleigh fails when the scale is wrong. Choosing dimensions first—24 to 36 inches for tabletop decor, 4 to 6 feet for porch displays, or over 6 feet for full-size Santa props—keeps the frame balanced and prevents tipping or structural collapse under its own weight.
This guide walks through material selection, framing steps, runner construction, assembly sequence, and weatherproofing finishes so each component matches your intended size. It also covers common mistakes that lead to wobbly runners or warped frames. Getting these details right ensures your finished piece stays sturdy whether it sits indoors or faces winter weather on a porch. Follow this complete breakdown to build a wooden sleigh scaled correctly from the first cut to the final coat of finish.
Build a reusable wooden advent calendar
Determine the correct structural format before cutting wood, as drawers accommodate larger keepsakes while cubbies, doors, and hanging pockets each serve different storage and build-speed needs. Choosing the wrong geometry leads to wasted space or openings that are too small for your hidden items. wood advent calendar options are compared by size, skill level, and reuse potential to help you match a specific compartment style to your available floor or wall space. This ensures the final cabinet holds treats without requiring excessive construction time or material waste.
Wooden Toy Cars for Quick Builds
If you want a small project that is simple to cut, assemble, and finish, DIY Wooden Toy Cars covers the full build from blank block to rolling car. It explains the basic materials, the axle and wheel sizes that keep the car moving freely, and the beginner-friendly cuts that avoid binding or wobble.
This matters because the details make the difference between a toy that rolls smoothly and one that drags or tips. The article also walks through safe finishing choices and common mistakes, so you can make a durable, kid-friendly toy without guessing at the measurements.
Free Wooden Toy Train Patterns: Safe Plans for Kid-Friendly Builds
Free toy train plans are most useful when they help you build a train that is simple, sturdy, and safe for the child who will use it. The supporting guide on wooden toy train patterns explains how to spot patterns with appropriately large parts, secure wheel and axle details, and finish choices that are better suited to children. That matters because a cute design can still be a poor project if it creates choking hazards, tips easily, or falls apart during sanding and assembly.
It also shows how to judge whether a free pattern is truly buildable, then adapt the size and details to fit different ages and safety needs before you cut wood.
Make a Child-Friendly Wooden Toy Boat
If you want a small project that’s still useful, a wooden toy boat is a practical gift because it can be built as a simple float toy, a sailboat, or a paddle-wheel boat depending on the child’s age and the tools you have. The supporting guide breaks down each build, compares materials and finishes, and shows which details matter most for safety, durability, and how the boat will actually be used. wooden toy boat DIY
That makes it easier to avoid common mistakes like sharp edges, poor sizing, or a finish that isn’t suitable for kids or water play.
Build a Safe Toy Box for Gifts or Storage
A toy box is a practical weekend build when you want a storage piece that also works as a keepsake. The toy box build guide explains how to choose plywood or solid wood, size the box for a room, and pick a lid style that matches the child’s age and use. That matters because the wrong lid can pinch fingers, trap stale air, or make the box too heavy to open comfortably.
It also covers joinery, finishing, and common mistakes so the finished piece is sturdy, safer around kids, and easier to use every day. If you want a project that looks polished without requiring complex shaping, this article gives you the basics in a clear order.
How to choose the right toy storage build
The right toy storage project depends on what you need to hold and how often kids use it. For everyday toys, low open cubbies make cleanup fast and keep items visible. For mixed sets, deeper bins handle bulk without constant sorting, while closed cabinets work better for tiny parts that need containment. The guide at toy storage DIY projects explains how to match the structure to the toy type, choose practical dimensions, and avoid wasted floor space.
It also highlights the safety choices that matter most, like keeping tall units anchored, placing heavier items lower, and avoiding designs that make tipping or choking hazards more likely.
Build a Gift Box That Feels Personal
A keepsake box is a simple project that turns into a meaningful gift when the size, style, and finish match the person receiving it. The supporting guide walks through the full build, from choosing beginner-friendly materials and deciding on the box dimensions to assembling the case, fitting the lid, and adding a soft interior that protects small treasures.
It matters because a well-proportioned box gets used, while a box that is too small, awkward, or unfinished often gets set aside. If you want a project that is practical, giftable, and customizable without complicated joinery, the keepsake box guide shows the key decisions that make the difference.
Building a Nativity Stable
If you want a stable that actually fits your figures and holds up, this guide walks through the key decisions: how tall and wide to make it, what materials work best, and which hardware and finishes to use for indoor or outdoor display. The sizing advice matters because a stable that is too small looks cramped, while one built from weak stock can warp or fail outside.
It also shows how to assemble a rustic frame step by step, so you can turn a simple plan into a display-ready piece. For the full breakdown, see this nativity stable guide.
Wooden Nativity Scene Basics
A wooden nativity scene DIY is a practical way to make a holiday display that fits your space, skill level, and placement needs. The supporting guide explains how to choose the right material, from indoor plywood to weather-resistant exterior stock, then shows how to size the figures, transfer a full-size pattern, cut the pieces, and assemble and finish the scene for a clean result.
That matters because the wrong wood or finish can leave you with warped parts, weak joints, or a display that breaks down quickly outdoors. If you want a simple silhouette or a more detailed layered look, the wooden nativity scene DIY article helps you match the build to your tools, location, and time.
Building a Freestanding Stocking Holder Without a Mantel
A freestanding wooden stocking holder lets you hang holiday stockings without drilling into walls or relying on a mantel. The design you choose—floor stand, tabletop box, or lantern-post—determines how many stockings it safely supports and how much base weight is required to prevent tipping.
Sizing the base correctly matters because an underweighted stand can topple, pulling ornaments down with it. This freestanding stocking holder guide walks through comparing the three forms, calculating base dimensions for stability, and finishing the piece so it looks decorative rather than purely utilitarian. It also covers common build mistakes that compromise balance, making it a practical reference for woodworkers who need a reliable, non-permanent holiday display solution.
Stable Design for Wooden Stocking Holders
A wooden stocking holder is only useful if it stays put. Many designs fail because they are too narrow or lack a protected base, causing them to tip over or scratch expensive mantel finishes. To build a structure that safely supports the weight of gifts, you need to calculate the correct base dimensions and select a layout that distributes load evenly. This guide details how to size your project for specific shelf depths and prevents common instability issues.
Follow the sizing and stability guidelines in this DIY wooden stocking holder tutorial to ensure your display remains secure throughout the holiday season.
Hiding the Tree Base with a DIY Stand Cover
If the goal is a cleaner holiday display, a DIY stand cover can hide the hardware around a real or faux tree base without sacrificing stability. The supporting guide explains which stand styles are easiest to cover, how to measure for the right fit, and what materials work best for a simple collar or box. It also covers practical details like leaving room for water access on real trees and choosing finishes that hold up through the season. For a project that looks finished instead of improvised, Christmas tree stand DIY gives you the sizing and build decisions that matter most.
Maximize yield with 2×4 Christmas craft ideas
Planning cut counts before you saw is the difference between a finished set of gifts and a pile of wasted pine. A single 8-foot board yields four to six mini trees, three ornament blocks, or tabletop signs, but splintering grade marks and knots will ruin the finish if you ignore the layout. The 2×4 Christmas craft ideas guide provides the specific cut logic, tool lists, and finishing techniques necessary to turn cheap, knotty stock into polished holiday décor. It also clarifies when this dimensional lumber is the wrong material choice, helping you avoid structural issues in small-scale builds.
Build a Simple 2×4 Christmas Tree
A straightforward 2×4 Christmas tree is one of the most rewarding beginner projects you can tackle this season. With just one 8-foot board, a 15° miter on each branch side, and a solid assembly plan, you can build a stable four-foot tree that won’t gap, lean, or tip. This guide walks through a no-waste cut list, the right cutting angles, step-by-step assembly, and fixes for common problems like wobble and outdoor durability.
If you’re ready to cut your first holiday project, this build a 2×4 tree resource breaks down every decision point so you get it right the first time.
How do you avoid cracks, warp, and brittle cuts?

Preventing common failures starts before cutting. Use dried stock for slices and branches, reject badly twisted reclaimed boards, keep fragile ornament patterns away from short grain, and choose a finish that matches indoor handling or outdoor exposure. Most Christmas project failures trace back to stock prep and finish choice, not the final assembly step.
Dry wood slices and branches before decorating
Do not build from fresh-cut rounds if the final piece must stay flat or hang cleanly. Dried slices still move, but far less. Sand both faces so the finish bonds evenly, and seal soon after prep to slow sudden moisture exchange.
Bark loss is common on slices with loose cambium. If the bark shifts under finger pressure, treat bark retention as uncertain and design the piece so bark is optional, not structural.
Manage pallet board and slat movement
Warped pallet boards rarely become flat because a holiday sign needs them to. Trim around the worst twist, cut shorter parts, or move the stock to a rustic category where variation works visually. For slat trees, use straighter stock than the design appears to require. Small twist becomes obvious once parts stack around a centerline.
Blotchy stain is another reclaimed-stock issue. On mixed softwoods, paint often gives a cleaner result than stain, especially when repairs, nail holes, and filler are visible.
Reduce fuzzy edges and broken points on cutouts
Fuzzy cross-grain edges usually come from soft stock, a dull blade, or pushing small parts through too quickly. Brittle breaks show up near inside corners, hanger holes, and needle-like points. Round very sharp pattern points slightly if the ornament is meant to be handled or packed.
WoodWorkly frames the topic around easy DIY Christmas wood crafts and project ideas, but some patterns become advanced quickly once tiny negative spaces and multiple interior cuts enter the design.
Match the finish to the use case
Indoor ornaments benefit from lighter, low-odor finishes that do not gum up fine detail. Porch decor needs a topcoat suited to outdoor moisture swings and more frequent handling. Mixed reclaimed stock usually takes paint better than stain. Natural finishes pair especially well with pyrography and clean wood grain when the stock is consistent.
How to Keep Wooden Spoons Food-Safe and Long-Lasting
If a wooden spoon looks dry, rough, or starts to absorb odors, seasoning it can restore the finish and help it stay safe for everyday cooking. The supporting guide explains when conditioning makes sense, which food-safe oil to use, and how to apply it after washing and fully drying the spoon.
It also covers simple checks for when care is no longer enough, such as cracks, deep warping, or splintering. For a clear, practical walkthrough, see seasoning wooden spoons.
Safe small-part cutting techniques
Cutting intricate holiday shapes safely requires specific mechanical controls. Instead of releasing tiny components immediately, keep them attached to a larger blank until the final cut to prevent kickback and tear-out. For tight curves, select a blade between 3/16 and 1/4 inch to maintain control and reduce deflection. The band saw cutting guide details this sequence, explaining how to manage flat, low-profile blanks and apply appropriate finishing methods to seasonal wood. This approach minimizes operational hazards while ensuring the final pieces retain clean edges suitable for gifting or display.
Repeatable Table Saw Cuts for Snowflake Arms
This supporting guide shows how to make a balanced wood snowflake by cutting one center hub and six matching arms at consistent 60° spacing. The key takeaway is a repeatable layout and cut sequence, which keeps the shape symmetrical and helps prevent weak joints or awkward gaps during assembly. It also explains why a sled or miter gauge makes the process safer and more accurate than improvising each cut.
If you want the step-by-step method, see the wood snowflakes guide. It covers the cut plan, basic materials, and common mistakes so you can build a cleaner snowflake with less trial and error.
How early should you start Christmas woodworking projects?
Start based on drying needs, batch size, and finish cure time, not just on the calendar. A few scrap-wood ornaments can start later than a set of porch signs or village houses. If the project uses green wood, layered paint, or craft-fair quantities, start well before the month you plan to display or sell.
Use a simple planning timeline
For one-off gifts, a late-season start can work if the stock is dry and the finish is simple. For batches, cut and sand first, then group all personalization and finishing. For market inventory, leave room for rejects, breakage, and cure time.
- Simple gifts: a few weeks can be enough with stable stock and quick finishes.
- Painted decor: allow extra days for multiple coats and cure before wrapping.
- Reclaimed or green material: start earlier because prep and drying are the real bottlenecks.
Batch the right steps
Batch cutting saves less time than batch sanding and finishing. Drill every hanger hole in one session. Burn all names together. Prime signs together. That order cuts setup changes and keeps matching pieces more consistent.
Abbotts At Home groups its content as 50 DIY Christmas projects and homemade decorations. Large idea lists are useful for inspiration, but holiday deadlines are easier to meet when the actual build plan narrows to a few repeatable categories.
What should you know before making wood toys for kids?
Wood toys are a great project when you match the design to the child’s age and keep the build simple. The supporting guide breaks down what works for 0–3, 3–5, and 6+ age groups, then explains how size, sanding, and finish choices affect choking, splinter, and chemical risks. It also helps you decide whether a project is better suited to blocks, push toys, vehicles, or pretend-play pieces.
That matters because a toy that looks easy can still be unsafe if it has loose parts or rough edges. If you want a practical starting point, the DIY wood toys guide shows the safest project types, basic tool needs, and the limits that keep homemade toys kid-friendly.
Frequently asked questions
What Christmas wood projects can I make to gift or sell?
Good gift and sale projects include flat ornaments, scroll-saw silhouettes, wood slice name tags, small nativity sets, tabletop trees, and simple pallet signs. Choose pieces that personalize well, survive packing, and repeat without heavy sanding or long cure times eating up the margin.
What can I build out of wood for Christmas decor?
You can build tree ornaments, mantel villages, tabletop or porch trees, nativity displays, pallet signs, wall snowflakes, rustic branch bundles, and wood slice accents. The best choice depends on where the piece will sit, how much detail it needs, and whether the stock is stable enough.
What are good Christmas woodworking projects for a scroll saw?
Scroll saws suit ornaments, silhouette nativities, village house windows, snowflakes, tree cutouts, and custom name shapes. Thin plywood or hardwood blanks work best. Beginner-friendly patterns use broad curves, while tight inside corners, lace-like points, and compound cuts move the difficulty up fast.
How do I make rustic Christmas decor from pallet wood or logs?
Use reclaimed boards only after checking for nails, staples, dirt, and twist. Use logs and branches only when they are dry, sound, and insect-free. Good rustic projects include pallet signs, slat trees, Santa logs, bundles, and name slices finished with paint, sealer, or pyrography.
Sponsored / affiliate links. As an Amazon Associate I earn from qualifying purchases. I may earn additional commission from eligible campaigns.