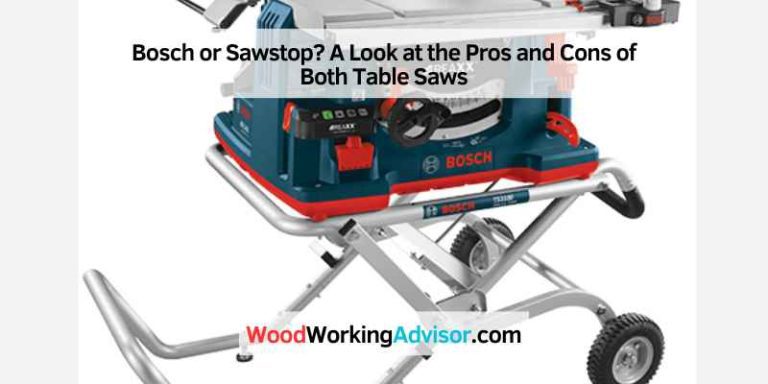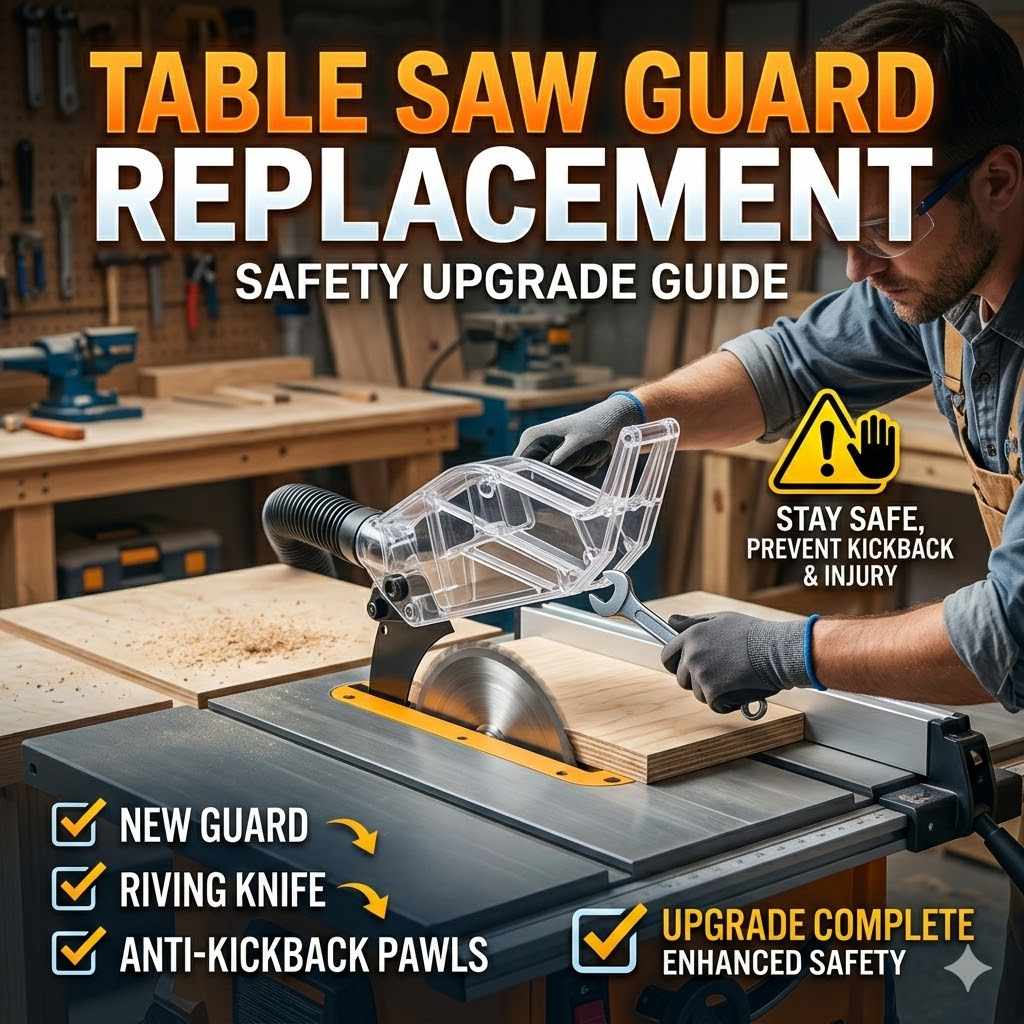
Table Saw Guard Replacement: Safety Upgrade Guide
Replacing your table saw guard might seem tricky at first, especially if you’re new to woodworking tools. It’s like learning a new dance step, a bit awkward until you get the rhythm. But don’t worry!
This guide breaks down the Table Saw Guard Replacement: Safety Upgrade Guide into simple steps. We’ll make sure you can get your saw protected and working safely again. Let’s look at how to make your table saw safer.
Understanding Table Saw Guards
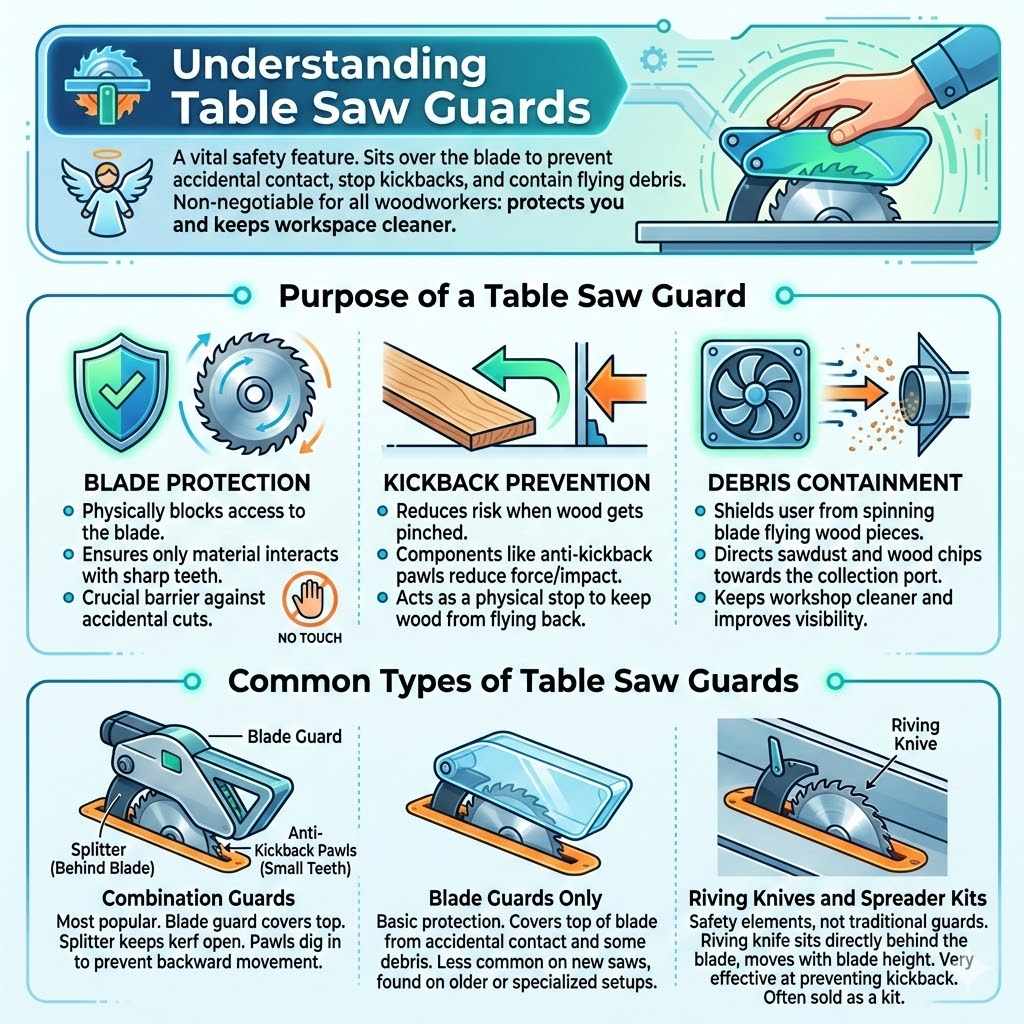
A table saw guard is a vital safety feature. It sits over the blade to prevent accidental contact. This helps stop kickbacks and flying debris.
Having a working guard is non-negotiable for any woodworker. It protects you and keeps your workspace cleaner. Think of it as your saw’s guardian angel.
Purpose of a Table Saw Guard
The main job of a table saw guard is to shield the user from the spinning blade. When the blade cuts through wood, small pieces can fly off. The guard deflects these pieces away from you.
It also stops your hands from getting too close to the blade. This significantly reduces the risk of serious injury. A good guard also helps with dust collection by directing sawdust towards the port.
- Blade Protection This is the most obvious role. The guard physically blocks access to the blade. It ensures that only the material being cut interacts with the sharp teeth. This barrier is crucial for preventing accidental cuts.
- Kickback Prevention Kickback happens when the wood gets pinched between the blade and the fence or the throat plate. A properly functioning guard, especially those with anti-kickback pawls, can help reduce the force and impact of a kickback. It acts as a physical stop.
- Debris Containment Sawdust and wood chips are a byproduct of cutting. The guard helps to contain this debris. It directs it towards the dust collection port or a designated area. This keeps your workshop cleaner and improves visibility.
Types of Table Saw Guards
There are several common types of table saw guards. Most modern table saws come with a combination guard. Older saws or those used for specific tasks might have simpler designs.
Understanding these helps when you need a replacement.
- Combination Guards These are the most popular. They usually include a blade guard, a splitter, and often anti-kickback pawls. The blade guard covers the top of the blade. The splitter is a metal piece behind the blade that keeps the kerf open. Pawls are small teeth that dig into the wood if it starts to move backward.
- Blade Guards Only Some very basic guards only cover the top of the blade. They offer basic protection from accidental contact and some debris. These are less common on new saws but might be found on older models or specialized setups.
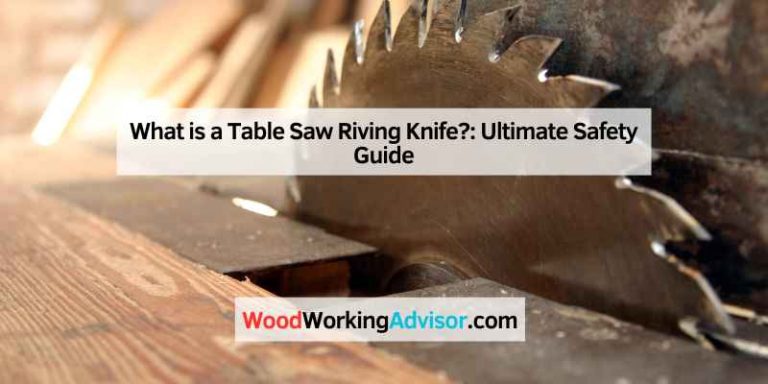
- Riving Knives and Spreader Kits While not strictly “guards” in the traditional sense, riving knives and spreaders serve a similar safety purpose. A riving knife is a thin piece of metal that sits directly behind the blade. It moves with the blade’s height adjustment. They are very effective at preventing kickback. Often, these are sold as part of a safety kit.
When and Why to Replace Your Table Saw Guard
Table saw guards are built to last, but they aren’t invincible. Over time, they can wear out or get damaged. Knowing when to replace yours is key to maintaining a safe workshop environment.
Don’t wait until it’s too late to upgrade your safety gear.
Signs of a Damaged or Worn Guard
Several indicators suggest your guard needs replacing. Keep an eye out for these issues. They are important warnings.
- Cracks or Breaks A guard made of plastic or acrylic can develop cracks. If you see any splits or significant chips, the guard’s integrity is compromised. It might shatter during use, causing more harm.
- Bent or Warped Metal Parts If your guard has metal components like a splitter or pawls, check for bending or warping. Damaged metal parts might not function correctly. They could snag on the wood or fail to prevent kickback.
- Loose or Missing Fasteners The guard is attached with screws or bolts. If these are loose or missing, the guard might shift during operation. This makes it less effective and can be dangerous.
- Reduced Visibility If the guard is scratched or clouded over, it can obstruct your view of the blade and the cut line. Good visibility is essential for accurate and safe cuts.
Safety Benefits of a New Guard
A new, properly fitted guard offers significant safety advantages. It brings your saw back to its safest operational state. Investing in a replacement is an investment in your well-being.
- Improved Kickback Protection Modern guards often have improved anti-kickback features. These can be more effective than older designs. A new guard ensures these safety mechanisms are in top working order, providing better defense against kickback.
- Enhanced Debris Management New guards are designed to work efficiently with dust collection systems. This means better containment of sawdust and chips. A cleaner workspace improves visibility and reduces the risk of slips or trips.
- Better Blade Visibility Newer designs may offer clearer materials or improved shapes. This can give you a better view of the blade and the cut. Clearer sightlines contribute to more accurate and safer woodworking.
Legal and Manufacturer Recommendations
Many manufacturers and safety organizations recommend replacing guards if they are damaged or are of an outdated design. Following these guidelines ensures you are using your equipment responsibly. It aligns with industry best practices for woodworking safety.
Choosing the Right Replacement Guard
Selecting the correct replacement guard is crucial. A guard that doesn’t fit properly won’t offer the intended safety benefits. It might even create new hazards.
Take your time to find the perfect match for your saw.
Identify Your Table Saw Model
The most important step is knowing your table saw’s exact make and model number. This information is usually found on a plate attached to the saw’s body. Look on the back or side of the saw.
This detail is essential for finding compatible parts. Without it, you’ll be guessing.
For example, a Delta 36-5000 table saw will need a guard designed for that specific model. A guard for a Craftsman saw might not fit a DeWalt saw at all. Compatibility ensures proper function.
It also means the guard will attach securely. It’s worth taking a moment to write down the model number. You can then use this information to search for parts.
Where to Purchase Replacement Guards
Several reliable sources exist for purchasing table saw guards. Choosing a reputable vendor ensures you get a genuine or high-quality aftermarket part. Avoid unknown sellers for critical safety equipment.
- Manufacturer Websites Your table saw’s manufacturer is the best place to start. Their official websites usually have parts diagrams and ordering sections. This guarantees a perfect fit and is often the safest option.
- Authorized Parts Distributors Many companies specialize in selling
- Reputable Online Retailers Large online marketplaces can offer
- Woodworking Specialty Shops Local woodworking stores or repair shops might also stock or be able to order replacement guards. They can offer expert advice.
Aftermarket vs. OEM Guards
You might find both Original Equipment Manufacturer (OEM) guards and aftermarket options. Both have pros and cons.
- OEM Guards These are made by the original manufacturer. They are guaranteed to fit your saw perfectly and meet original specifications. They are often more expensive but offer peace of mind.
- Aftermarket Guards These are made by third-party companies. They aim to be compatible with specific saw models. Some are excellent quality, while others might be less so. Always research the brand and read reviews for aftermarket parts. They can sometimes be a more affordable choice.
Table Saw Guard Replacement: Safety Upgrade Guide Steps
Replacing a table saw guard is usually a straightforward process. With the right tools and a little patience, you can do it yourself. Follow these steps carefully to ensure a safe and successful replacement.
This is your essential Table Saw Guard Replacement: Safety Upgrade Guide in action.
Tools and Materials You’ll Need
Gather your tools before you begin. Having everything ready makes the job smoother and safer. You don’t want to stop midway to find a missing tool.
- Your New Replacement Guard The correct guard for your saw model.
- Screwdriver Set Phillips and flathead screwdrivers, likely in various sizes.
- Wrench Set or Adjustable Wrench If bolts are used for attachment.
- Safety Glasses Always wear these to protect your eyes from debris.
- Gloves Work gloves can protect your hands from sharp edges.
- Work Surface A clean, stable area to lay out parts.
- Manufacturer’s Manual If available, refer to your saw’s manual for specific instructions.
Step-by-Step Replacement Process
Follow these steps in order. Safety first at every stage. Disconnect power before starting any work on the saw.
This cannot be stressed enough.
- Disconnect Power Unplug the table saw from the electrical outlet. Double-check that it’s unplugged.
- Remove the Old Guard Carefully detach the old guard. It’s usually held in place by screws or clips. Note how it was attached. Take pictures if it helps you remember.
- Inspect the Saw Check the area where the guard attaches. Clean away any dust or debris. Make sure the mounting points are clean and undamaged.
- Install the New Guard Position the new guard correctly. Attach it using the provided hardware. Start all screws or bolts by hand to avoid cross-threading.
- Tighten Fasteners Once the guard is in place, tighten all screws or bolts securely. Don’t overtighten, as this can strip threads or crack plastic parts.
- Test the Guard’s Movement If your guard has moving parts (like height adjustment), test its range of motion. Ensure it moves freely and doesn’t bind.
- Re-attach Accessories If you removed any other safety features like the riving knife or blade insert, re-attach them now.
- Final Check and Power Up Visually inspect the guard one last time. Ensure it’s firmly attached and positioned correctly. Plug the saw back in. Test the guard’s function at low speed if possible, with no material present.
Troubleshooting Common Issues
Sometimes, things don’t go exactly as planned. Here are a few common problems and how to fix them.
- Guard Doesn’t Fit This usually means you have the wrong replacement guard. Double-check your saw’s model number and the guard’s compatibility. Contact the seller for an exchange if it’s a fitment issue.
- Holes Don’t Align Some saws have slight variations. You might need to use a file to slightly enlarge a mounting hole on the guard. Only do this if absolutely necessary and the guard is otherwise correct.
- Guard is Loose After Installation Ensure all fasteners are fully tightened. If the mounting holes on the saw are stripped, you might need to use a larger screw or a specialized repair kit.
Advanced Table Saw Safety Features
Beyond just replacing the guard, you can enhance your table saw’s safety even further. These upgrades can provide an extra layer of protection. They are valuable additions for any serious woodworker.
Using a riving Knife
A riving knife is a critical safety device. It’s a thin piece of metal that follows the blade. It keeps the kerf (the cut slot) open.
This prevents the wood from pinching the blade and causing kickback.
What is a Riving Knife? A riving knife is a safety feature that is positioned directly behind the saw blade. It is made of thin metal, typically steel. Unlike a splitter, which is usually fixed and sits behind the blade, a riving knife is designed to move up and down with the blade.
This is a significant advantage because it ensures that the kerf of the wood always stays open, regardless of how high the blade is set. This continuous support is key to preventing kickback.
How it Works When you cut wood, the two sides of the cut can move towards each other. This movement, known as kerf closure, is a primary cause of kickback. A riving knife actively holds the kerf open.
This creates a clear path for the blade. It significantly reduces the chance of the wood binding on the blade. Many modern table saws come standard with a riving knife, or it can be purchased as an upgrade.
Benefits of a Riving Knife The primary benefit is a drastic reduction in kickback risk. It also improves the quality of the cut by preventing vibration. Some riving knives are designed to also serve as the base for an overarm blade guard.
This offers a very robust and effective safety system.
When to Use It A riving knife should be used whenever the blade is raised above the material being cut. It’s essential for almost all types of cuts, including ripping and crosscutting. Its presence is a major step up in table saw safety.
Anti-Kickback Pawls
These are small, toothed devices. They are often integrated into combination guards or riving knife systems. Pawls dig into the wood if it starts to move backward.
What are Anti-Kickback Pawls? Anti-kickback pawls are small, sharply pointed metal teeth. They are usually hinged or spring-loaded. Their purpose is to engage with the workpiece if it begins to slide backward along the saw table.
They act like tiny anchors, digging into the wood to resist this backward motion. They are a secondary line of defense against kickback.
How They Function When wood is being cut, it moves forward through the blade. If kickback occurs, the wood is violently propelled backward. Pawls are designed to catch on the underside of the wood during this backward movement.
Because they are angled, they dig into the wood’s fibers. This effectively stops or significantly slows down the backward motion. They are a physical deterrent to the dangerous reversal of the workpiece.
Importance in Safety While a riving knife prevents the situation that leads to kickback, pawls are a direct reaction mechanism. They are particularly useful for tasks like ripping where the wood is guided by a fence. If the wood somehow pinches or binds, the pawls provide an immediate physical barrier.
They are a vital component of a comprehensive safety setup.
Dust Collection Systems
A good dust collection system is also a safety feature. It removes sawdust and chips. This improves visibility and reduces the risk of respiratory problems.
Dust Collection Explained A table saw generates a significant amount of fine dust and wood chips. These particles can be harmful to your health if inhaled. They can also create a fire hazard and reduce visibility.
A dust collection system uses a vacuum or fan to draw this debris away from the blade area. It then filters or collects it in a bag or container.
Types of Systems There are two main types: shop vacuums and dedicated dust collectors. Shop vacuums are portable and can be used for multiple tools. Dedicated dust collectors are more powerful and designed for larger workshops or heavy dust production.
Many table saws have a dust port that connects to these systems.
Safety Benefits Improved visibility is a major safety benefit. When the air is clear, you can see your cut line clearly. This leads to more accurate cuts and fewer mistakes.
Reducing airborne dust also protects your lungs. Furthermore, a cleaner workshop floor means less chance of slipping.
Integration with Guards Many modern blade guards and riving knives are designed with dust collection in mind. They have integrated ports or channels to direct sawdust effectively into the collection system. This synergy between guard design and dust management makes the saw safer overall.
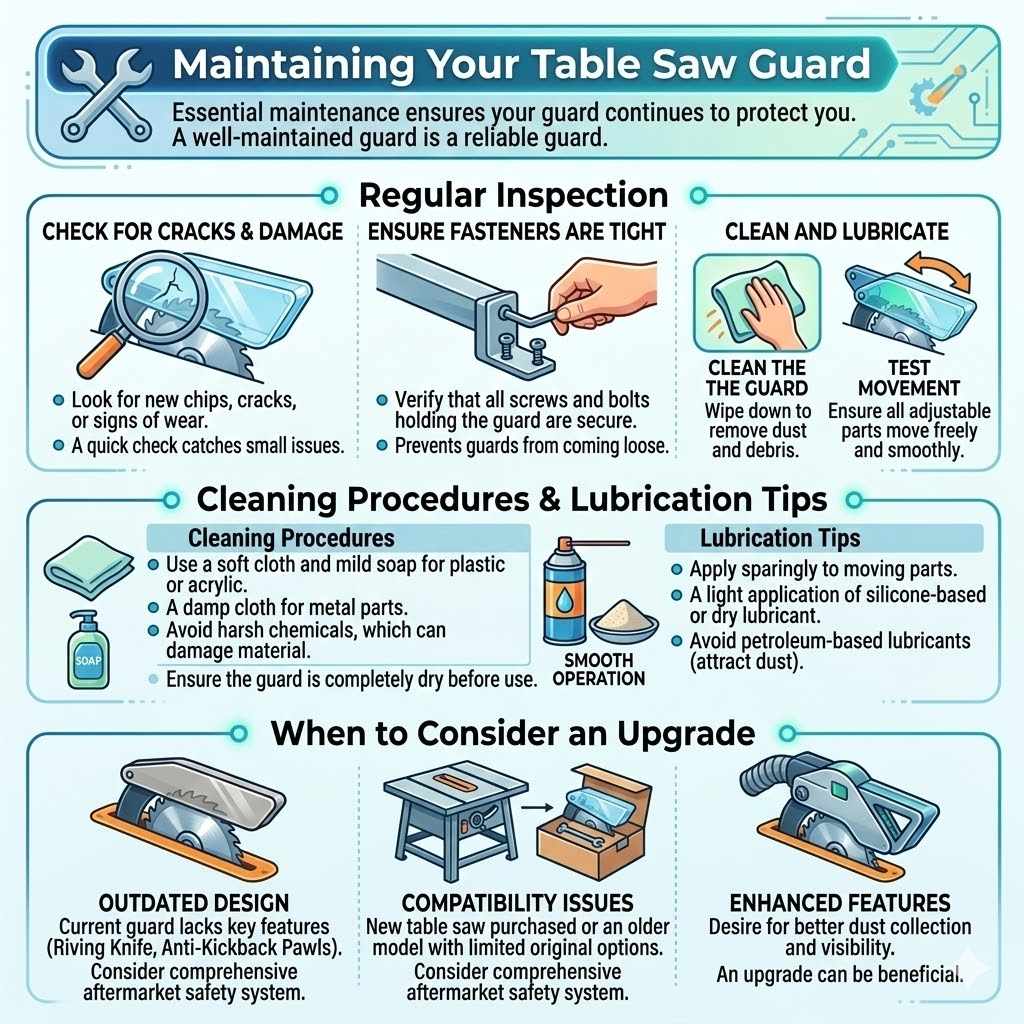
Maintaining Your Table Saw Guard
Once you have a new, properly installed guard, keeping it in good condition is essential. Regular maintenance ensures it continues to protect you. A well-maintained guard is a reliable guard.
Regular Inspection
Make it a habit to inspect your guard before each use. This quick check can catch small issues before they become big problems. It’s a small effort for significant safety gains.
- Check for Cracks and Damage Look for any new chips, cracks, or signs of wear.
- Ensure Fasteners are Tight Verify that all screws and bolts holding the guard are secure.
- Test Movement If your guard has adjustable parts, ensure they move freely and smoothly.
- Clean the Guard Wipe down the guard to remove dust and debris. This maintains visibility.
Cleaning and Lubrication
Keeping your guard clean is simple but important. If it has moving parts, a little lubrication can help them operate smoothly.
Cleaning Procedures Use a soft cloth and mild soap to clean plastic or acrylic guards. For metal parts, a damp cloth is usually sufficient. Avoid harsh chemicals, as they can damage the material.
Ensure the guard is completely dry before use. Accumulated sawdust can reduce visibility and even hinder movement.
Lubrication Tips If your guard has hinges or sliding mechanisms, a light application of a silicone-based lubricant or a dry lubricant can help. Apply sparingly to the moving parts. Avoid petroleum-based lubricants, as they can attract dust and gunk.
The goal is smooth operation without making parts sticky.
When to Consider an Upgrade
Even with good maintenance, technology advances. If your current guard is very old, it might be worth considering an upgrade to a more modern design. Newer guards offer improved safety features.
- Outdated Design If your guard lacks features like a riving knife or effective anti-kickback pawls, consider upgrading to a comprehensive safety system.
- Compatibility Issues If you’ve purchased a new table saw or are using an older model that has limited guard options, an aftermarket upgrade might be necessary.
- Enhanced Features Modern guards often offer better dust collection integration and improved visibility. If these are lacking in your current setup, an upgrade can be beneficial.
Frequently Asked Questions
Question: How do I know if my table saw guard needs replacing
Answer: Look for visible cracks, chips, or warping in the guard. Check if metal parts are bent or if fasteners are loose or missing. If the guard obstructs your view of the blade or cut line, it should also be replaced.
Question: Can I use a guard from a different brand of table saw
Answer: It is strongly recommended to use only guards specifically designed for your table saw’s make and model. Using an incompatible guard may not fit correctly, compromising safety and potentially causing damage.
Question: Is it difficult to install a new table saw guard
Answer: For most table saws, installing a new guard is a relatively simple process. It typically involves unscrewing the old guard and attaching the new one with the provided hardware. Always refer to your saw’s manual if available.
Question: What if my new guard doesn’t seem to fit perfectly
Answer: Double-check that you have the correct
Question: Are aftermarket table saw guards as safe as OEM guards
Answer: Many aftermarket guards are designed to meet safety standards and can be as safe as OEM guards when chosen carefully. It’s important to buy from reputable brands, read reviews, and ensure the guard is certified or designed to meet relevant safety regulations.
Wrap Up
Replacing your table saw guard is a straightforward safety upgrade. Following these steps ensures your tool is protected. A properly fitted guard prevents accidents.
It keeps you safe while you work. Always prioritize safety. Enjoy your woodworking.