Threaded Inserts in Plywood: Size, Pilot Hole & Installation
Threaded inserts can work well in plywood when they enter the face plies, the panel is thick enough, and the pilot hole matches the insert maker’s specification. They are less dependable near an edge or driven into exposed ply ends, where layers can split or peel under load.
For furniture that will be assembled repeatedly, a steel or brass insert gives a machine screw a durable thread. For high pull-out loads, thin panels, or safety-critical joints, a through-bolt, cross dowel, or T-nut may be the stronger choice.
Best Threaded Insert for Plywood
Use a coarse external-thread insert designed for wood, with a length shorter than the plywood thickness. A flanged insert resists being driven too deep; a back-side flange or T-nut improves pull-out resistance when the rear face is accessible.
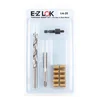
- Best for: hardwood and thick plywood where you want a complete, matched install kit (drill bit, tap, and drive tool sized to the insert).
- Why we picked it: E-Z LOK is a dedicated insert manufacturer, not a generic hardware-kit brand, and the drill/tap/drive tool are pre-matched to the 1/4-20 brass insert so there’s no guessing on pilot-hole size.
- Main drawback: single thread size per kit, and the price per insert is higher than a bulk assortment kit.
 30 Sets 1/4-20 Wood Insert Kit – approx. $16
30 threaded inserts, 30 furniture screws, washers and 2 hex wrenches – a budget-friendly single-size kit.
Check on Amazon
|
 170-Pc Multi-Size Assortment – approx. $22
10 sizes (1/4-20, 5/16-18, 3/8-16 plus M6/M8/M10) – best if a project calls for more than one thread size.
Check on Amazon
|
 40-Pc Insert & Bolt Kit – approx. $16
Includes matched bolts and a drill bit, so it’s a good option for furniture builds that need fasteners too.
Check on Amazon
|
Pilot Hole and Size Selection
| Check | Why it matters |
|---|---|
| Machine thread | Must match the bolt: 1/4-20, M6, etc. |
| Insert length | Must not break through the panel |
| Pilot hole | Too small splits plies; too large causes spin-out |
| Edge distance | More material around the insert improves reliability |
Do not guess the pilot hole from the machine-thread size. Drill the diameter specified for the insert’s outside body and test in an offcut of the same plywood. E-Z LOK’s wood-insert instructions likewise call for the specified hole and a hex-drive installation.
Types of Threaded Inserts for Plywood
Not every threaded insert installs the same way, and the installation method matters as much as the size chart when the base material is plywood rather than solid wood or MDF.
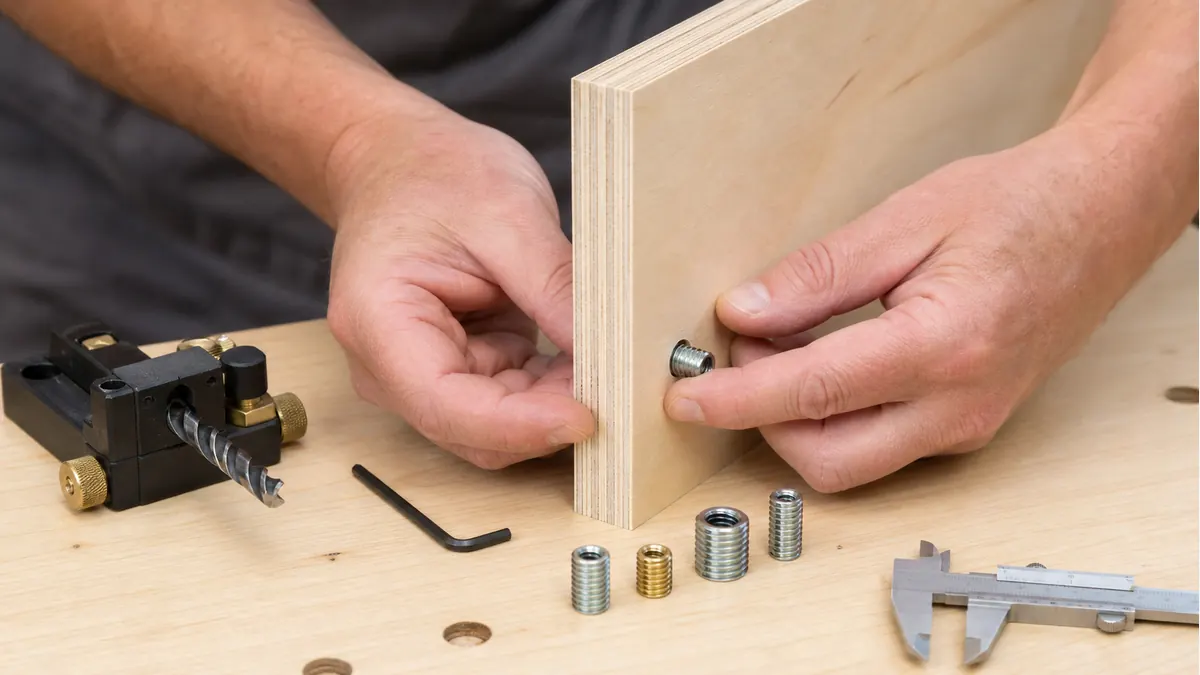
- Screw-in / hex-drive inserts. These have coarse external wood threads and an internal hex or slot that a hex key or driver turns them in with. No heat and no special tool beyond a drill and a wrench is needed, which is why they’re the most common DIY choice for plywood — they cut into the face plies cleanly without a heat source that could scorch or delaminate veneer.
- Heat-set inserts. A brass insert with knurled or barbed outer threads is pressed in with a heated tip (typically a soldering iron with an insert-installation tip) that melts the material around it. These are far more common in 3D-printed plastic parts and MDF, where the material flows around the barbs as it softens. They can work in plywood, but the heat and the barbed geometry are a better match for a solid, non-layered material; used carelessly near a thin face veneer, the heat can discolor or lift the top ply.
- Knife-thread / self-tapping inserts. These cut their own internal-to-external thread path as they’re driven in, similar to a self-tapping screw, and need no pre-heat. The tradeoff is that the pilot hole size is far less forgiving: slightly undersized and the insert is hard to drive straight without stripping the wood fibers it’s cutting into; slightly oversized and it has nothing to bite into.
For most plywood projects, a screw-in hex-drive insert is the easiest to install correctly and the most forgiving of minor pilot-hole variance, which is why it’s the format used in the kits above. Heat-set and knife-thread inserts remain useful options, but they reward more careful test-fitting on an offcut of the exact plywood before committing to the real workpiece.
Pilot Hole Sizing by Insert Size
The chart below covers typical sizing for common screw-in hex-drive inserts sold for wood. Always confirm against the specific insert’s packaging or manufacturer spec sheet first — outer diameter varies slightly between brands even at the same nominal thread size.
| Insert Size | Typical Pilot Hole | Tool Needed | Plywood Note |
|---|---|---|---|
| #8-32 | ~5/16″ (0.3125″) | Hex key + drill | Best on thicker (3/4″+) plywood; small margin for error on thin panels |
| 1/4-20 | ~3/8″ (0.375″) | Hex key + drill | Most common size for plywood furniture joints |
| 5/16-18 | ~7/16″ (0.4375″) | Hex key + drill | Needs at least 3/4″ plywood to keep wall thickness around the insert |
| 3/8-16 | ~1/2″ (0.5″) | Hex key + drill | Reserve for the thickest plywood (13/16″–1″+); avoid on 1/2″ or thinner panels |
Heat-set inserts installed with a soldering iron typically need a pilot hole close to the insert’s outer diameter rather than its widest barb point, and the iron tip is generally kept in the 350–420°F range long enough to soften the surrounding fibers without scorching them — a few seconds of light, steady downward pressure, not prolonged heat. To avoid splitting thin plywood veneer with any insert type: clamp a sacrificial backer board underneath or behind the drilling area, drill slightly undersized and test the fit in an offcut of the same plywood before drilling the real workpiece, and lightly chamfer the top ply’s hole edge with a countersink bit so the insert doesn’t lever the face veneer up as it’s driven in.
Choosing Insert Size for Your Plywood Thickness
As a rule of thumb, leave at least 1/8″–3/16″ of solid plywood below the bottom of the installed insert so it doesn’t break through the back face or telegraph through a thin veneer. That means the insert’s length, not just its thread size, has to be checked against the actual panel thickness: a 1/2″ long insert has no business in 1/2″ plywood.
- 3/4″ plywood or thicker: comfortably fits 1/4-20 or 5/16-18 inserts with margin to spare below the insert.
- 1/2″–5/8″ plywood: stick to shorter #8-32 or 1/4-20 inserts, and double-check the specific insert’s length against the panel before drilling.
- 1/4″–3/8″ plywood: a poor candidate for most threaded inserts; there usually isn’t enough material to both fit the insert and leave a safe margin behind it. A through-bolt, cross dowel, or T-nut (see the Bottom Line section above) is typically the better choice on panels this thin.
How to Install It Straight
- Mark the face grain and confirm the insert will not break through.
- Clamp a same-material test piece and drill a perpendicular pilot hole to the specified depth.
- Lightly chamfer only the top veneer to reduce lifting.
- Drive the insert slowly with the specified hex tool or driver guide.
- Stop flush; do not keep tightening after the flange seats.
- Test the bolt and load before using the finished joint.
Prevent Splitting and Spin-Out
Keep inserts away from edges, voids, and damaged veneer. A drill press or guide block helps keep the hole square. If an insert spins, do not fill the gap with random glue and immediately reload it; move to sound material or install a bonded hardwood plug and redrill after full cure.
- Use a through-bolt for handrails, seats, moving loads, or other safety-critical joints.
- Avoid overtightening the machine screw.
- Use thread-locker only if compatible and still removable when required.
- Test pull-out strength when the joint design is new.
Common Mistakes
- Stripping the pilot hole. Using an undersized bit and forcing the insert, or continuing to tighten after the flange has already seated, both strip the wood threads the insert relies on.
- Insert pulling out of thin plywood or near an edge. Both reduce the amount of surrounding material gripping the insert’s threads; keep inserts away from panel edges and avoid them entirely on plywood too thin for the insert’s length.
- Wrong pilot hole size. Too small and the plies split as the insert forces its way in; too large and the insert has nothing to bite, so it spins freely instead of threading in. Always match the drill bit to the specific insert’s spec, not a generic “close enough” size.
- Installing into an edge or exposed ply end instead of the face. Plywood’s layered structure means an edge or end grain has far less continuous material gripping the insert than a face ply does; whenever the design allows it, install into the face rather than into the edge.
Bottom Line
Threaded inserts are useful in quality plywood, but the joint is only as strong as the surrounding plies. Choose a wood-specific insert, follow its pilot-hole chart, test the exact panel, and upgrade to a through-fastener when failure would be costly.
Frequently Asked Questions
Can threaded inserts be used in plywood?
Yes, especially in the face of thick, void-free plywood. Edge placement and thin panels reduce reliability.
What pilot hole should I drill?
Use the insert manufacturer’s chart for the exact model and test in the same plywood; machine-thread size alone is not the answer.
Should I glue a threaded insert?
Only when the manufacturer or tested joint design permits it. Glue cannot rescue a split or oversized hole.
Are brass or steel inserts better?
Steel tolerates higher installation torque; brass resists corrosion and is easy to machine. Geometry and plywood quality often matter more.
What is stronger than an insert?
A through-bolt, cross dowel, or rear-mounted T-nut can offer higher pull-out resistance.
What size drill bit do I need for a 1/4-20 threaded insert?
A 1/4-20 wood insert typically calls for roughly a 3/8″ pilot hole, but always confirm against that specific insert’s packaging first — outer diameter varies slightly between brands.
Can threaded inserts be used in plywood edges?
It’s possible but far less reliable than a face installation. Edge and end grain expose fewer continuous plies to grip the insert’s threads, so pull-out strength drops; a through-bolt or cross dowel is usually a better fit for an edge joint.
Sponsored / affiliate links. As an Amazon Associate I earn from qualifying purchases. I may earn additional commission from eligible campaigns.