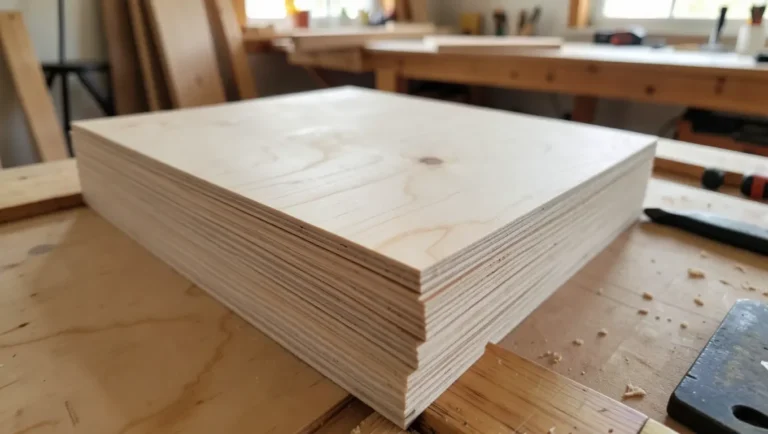
How to Make Drawers With 1/2 Plywood (Cut List, Joints & Slides)
1/2 inch plywood makes a solid drawer box, but the width of that box comes from your side-mount slides, not from the plywood: subtract 1 inch from the cabinet opening, then size every other part from that number. A box cut even 1/8 inch too wide binds on the slides. This guide gives a full cut list for an 18 inch drawer, dado joints, a 1/4 inch plywood bottom, and slide installation.
Size the Drawer Box From the Slides, Not the Plywood
Best 20-Inch Slide Pick
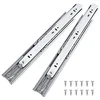 |
Probrico 1 Pair 20 Inch Soft Close Drawer Slides, Ball Bearing Full Extension, $16.23 A single pair of full-extension, side-mount ball bearing slides sized for the 20 inch drawer box in the cut list below, so you can buy exactly what one drawer needs.
|
Full-extension side-mount ball bearing slides need 1/2 inch of space on each side of the drawer box. That makes the outside width of the box the opening width minus 1 inch. The length of the box equals the slide length, so a 20 inch slide means a 20 inch long box, and the cabinet opening must be at least that deep.
This is also where a common myth falls apart. Many guides say you need 3/4 inch plywood for drawers. You do not: 1/2 inch plywood is a normal drawer side thickness, and it leaves room for a 1/4 inch bottom groove without weakening the wall. What actually limits a plywood drawer is the bottom span and how well the corners are joined, both covered below. For a broader look at materials, see our guide to what wood to use for drawer boxes.
Here is how the parts scale for common opening widths, assuming true 1/2 inch sides and the 1/4 inch deep dado joint used later in this guide.
| Opening width | Box outside width | Front and back length | Bottom width (1/4 inch ply) |
|---|---|---|---|
| 15 in | 14 in | 13.5 in | 13.5 in |
| 18 in | 17 in | 16.5 in | 16.5 in |
| 24 in | 23 in | 22.5 in | 22.5 in |
| 30 in | 29 in | 28.5 in | 28.5 in |
One caution on thickness. Sheet plywood sold as 1/2 inch is often a little thinner than a true 1/2 inch, and that changes your numbers. Measure a real sheet with calipers and use the measured thickness in the formula: front and back length equals the opening width, minus 1 inch for the slides, minus twice the side thickness, plus twice the dado depth.
📊 Slide spec used in this guide: 1/2 inch thick, 20 inch long, 100 lb rated, for drawer depths of 500 to 550 mm (about 19.7 to 21.7 inches). Source: manufacturer listing for the Probrico 20 inch slides on Amazon, 2026.
Tools and Materials
- 1/2 inch plywood for the sides, front and back (birch or maple plywood gives clean edges)
- 1/4 inch plywood for the bottom
- Table saw with a fine-tooth blade, or a circular saw with a straightedge guide
- Dado blade, or a router with a 1/4 inch straight bit (a wider dado can be made in two passes)
- Wood glue, clamps and a framing square
- 1 1/4 inch wood screws and a drill with a pilot bit
- A pair of full-extension side-mount slides plus a drawer front
Look for cabinet-grade plywood with a birch or maple face veneer and few voids. Cheaper sheathing plywood often has voids inside the edge, and those show up right where you cut a dado. Our comparison of MDF versus birch plywood covers when each material earns its place.
Cut List for an 18 Inch Wide Drawer
This cut list is for an opening 18 inches wide, at least 21 inches deep, with 20 inch slides. Parts are 4 inches tall, which fits a drawer opening about 6 inches high with room for the slide and drawer front.
| Part | Qty | Material | Size (L x H) |
|---|---|---|---|
| Sides | 2 | 1/2 in plywood | 20 in x 4 in |
| Front and back | 2 | 1/2 in plywood | 16.5 in x 4 in |
| Bottom | 1 | 1/4 in plywood | 19 in x 16.5 in (grain across the width) |
The box comes out 17 inches wide outside, which leaves exactly 1/2 inch per side for the slides. The front and back sit 1/4 inch in from each end of the sides, and the bottom is 1/2 inch larger than the inside opening in both directions because it rides in a groove on all four parts.
Cut the Parts Safely
Cut the plywood parts first and check each against the list before you cut any joinery. On a table saw, keep the good face up, use a push stick, and never freehand a cut. With a circular saw, put the good face down, because the blade lifts the veneer as it exits on the top surface, and clamp a straightedge to guide the cut.
Plywood dust is fine and irritating, so wear eye protection, hearing protection and a dust mask, and run a vacuum at the saw if you can. For a safer setup on repeat cuts, see our plans for table saw push blocks.
Choose a Corner Joint for 1/2 Inch Plywood
Plywood is made of thin layers, so screws driven straight into an end edge tend to hold poorly. A joint that adds glue surface and keeps the parts from sliding is the real upgrade, not thicker plywood.
| Joint | Tools needed | Strength and trade-off |
|---|---|---|
| Butt joint with screws | Drill only | Simplest, but the weakest because screws go into end edges |
| Pocket holes | Pocket-hole jig | Fast and hidden on the inside, but 1/2 inch stock needs the jig set for thin material |
| Dado (used here) | Dado blade or router | Strong glue surface and self-aligning, needs two setups |
| Rabbet | Dado blade or router | Good glue surface, less locking than a dado |
If you want pocket holes, read our notes on pocket holes in 1/2 inch plywood and using a Kreg jig on 1/2 inch plywood first. This guide uses dadoes because they line the parts up on their own.
Cut the Dadoes and the Bottom Groove
- Side dadoes: On the inside face of each side, cut a dado 1/4 inch deep and as wide as your front and back stock, starting 1/4 inch from each end.
- Bottom groove: On the inside face of all four parts, cut a groove 1/4 inch wide and 1/4 inch deep, with its lower edge 1/4 inch above the bottom edge of the part.
- Test the fit: Try every setting on scrap first. Plywood sold as 1/4 inch is often thinner than 1/4 inch, so the groove may need to match the real thickness of your bottom panel.
- Dry-fit: Assemble all five parts without glue and confirm the box is 17 inches wide and 20 inches long.
Assemble and Square the Box
Slide the bottom into the grooves as you build the box, because it cannot go in afterward. Glue the dadoes, seat the front and back into the sides, slide the bottom in, and clamp. Do not glue the bottom into its grooves: leaving it loose lets the plywood move with humidity changes without cracking the box.
Check for square by measuring the two diagonals of the box from corner to corner; they should match. Then drive one or two 1 1/4 inch screws through each side into the front and back, using pilot holes so the plywood layers do not split. Wipe off squeezed-out glue before it dries, because glue left on the outside will resist stain and finish.
Wood glue does most of the work in a dado joint. If you are unsure which glue to use or how long to clamp, our wood glue types and cure times chart has the details.
Install the Slides and Drawer Front
- Screw the cabinet member of each slide to the cabinet side, level, following the slide maker’s front setback.
- Attach the drawer member to the outside of the box, keeping both slides at matching heights.
- Hang the box, then test it fully open and closed before you add the front.
- Attach the drawer front with spacers for even gaps; our guide on putting on drawer fronts with even gaps shows the method.
If the drawer feels stiff, the box is almost always slightly wide or out of square. Our list of fixes for making wood drawers slide easier covers the usual causes, and slotted plywood dividers are an easy next project once the box works.
If you plan to use undermount slides instead, the clearance math changes, so read how to measure for Blum undermount slides before cutting. Working in MDF instead? See how to make MDF drawers, which has its own cut list and sealing steps.
Common Mistakes With Plywood Drawers
- Sizing the box to the cabinet opening instead of the opening minus 1 inch for the slides.
- Assuming the plywood is exactly 1/2 inch thick and cutting dadoes to match.
- Gluing the bottom into its grooves, which can crack the box when the panel moves.
- Skipping the diagonal check, so the box racks and binds on the slides.
- Using a 1/4 inch bottom across a wide, heavy drawer. See what size plywood for drawer bottoms for spans and loads.
Frequently Asked Questions
Is 1/2 inch plywood thick enough for drawers?
Yes. 1/2 inch plywood is a standard thickness for drawer sides, and it leaves enough wood for a 1/4 inch bottom groove. Strength depends more on the corner joint and on how the bottom is supported than on making the sides thicker. For heavier loads, choose good cabinet-grade plywood and a dado joint.
How wide should a drawer box be for side-mount slides?
The outside width of the box should be the opening width minus 1 inch. Side-mount ball bearing slides need about 1/2 inch of space on each side. Always check the slide maker’s listed clearance, because some slides differ.
What thickness plywood should I use for the drawer bottom?
1/4 inch plywood works for small and light drawers when it sits in a groove on all four sides. Wide or heavy drawers need a thicker bottom or extra support underneath, so check the span before you choose.
Should I glue the drawer bottom into the grooves?
No. Let the bottom float in its grooves and glue only the four box parts together. A floating panel can expand and shrink with humidity without cracking the joints.
Can I make plywood drawers without a table saw?
Yes. A circular saw with a straightedge guide cuts the parts, and a router with a straight bit cuts the dadoes and grooves. Pocket holes are a simpler joint if you do not have a dado setup.
Conclusion
A plywood drawer is easy to build when every dimension comes from the slides: opening minus 1 inch for the width, slide length for the depth, and a floating 1/4 inch bottom in grooves. Cut the parts to the list, join them with dadoes and glue, check for square, and the slides will do the rest.
Sponsored / affiliate links. As an Amazon Associate I earn from qualifying purchases. I may earn additional commission from eligible campaigns.