What Is a Sawtooth Hanger? How It Works and When to Use It
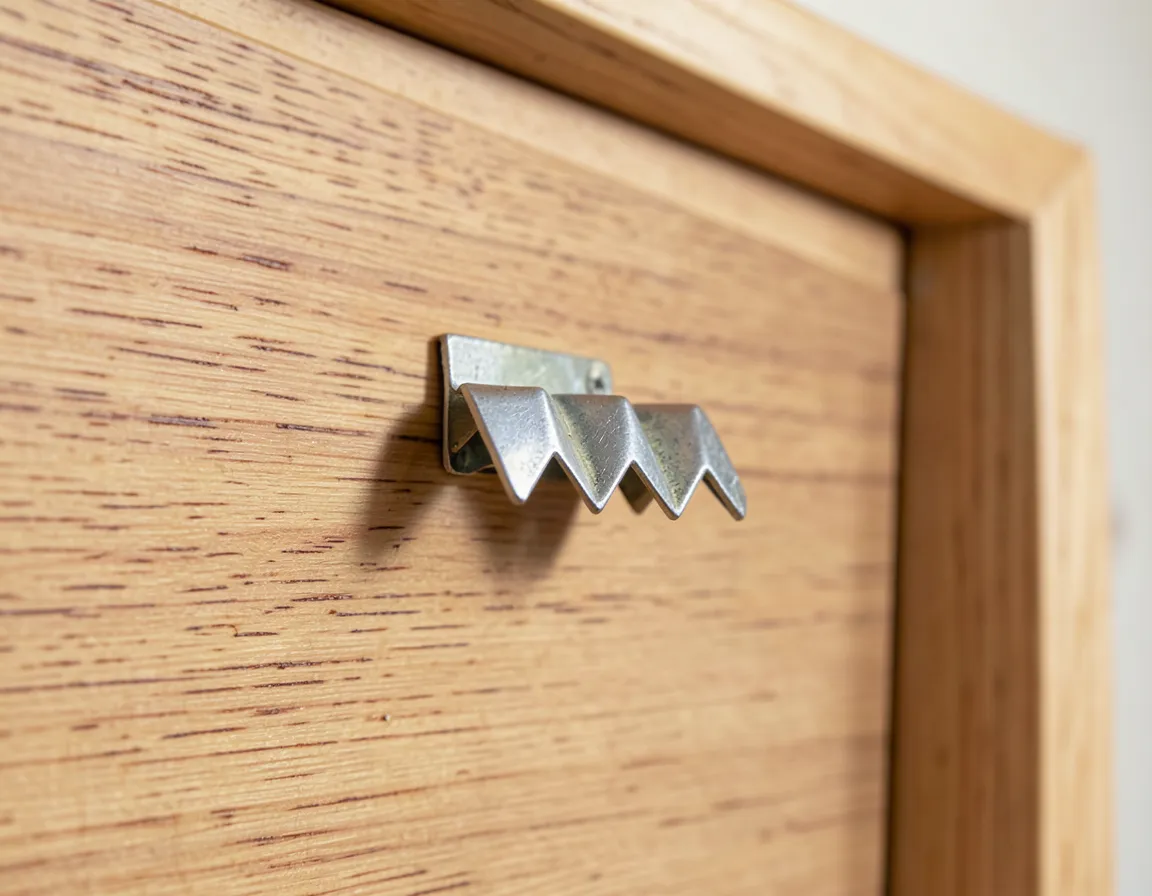
A sawtooth hanger is a thin metal bracket with a row of angled teeth that hooks over a single nail or screw, letting a picture frame sit flush against the wall. It’s the simplest way to hang lightweight frames, mirrors, and artwork — but it isn’t rated for anything heavy.
If you’re also dealing with what nails to use for sawtooth hangers, see our related guide on what nails to use for sawtooth hangers.
Sawtooth hangers are stamped from a single piece of metal — usually zinc-plated steel, sometimes brass for a decorative look — with a row of angled notches punched along the top edge. That single-piece construction is exactly why they’re cheap and universal: there’s no moving part to fail, just a notch that catches a nail head and lets gravity hold the frame in place. The tradeoff for that simplicity is a firm weight ceiling. A standard single-hole sawtooth hanger is typically rated for 15-20 lbs, and even a heavy-duty self-leveling version tops out around 20-25 lbs — well short of what a D-ring or wire setup can carry.
Types of Sawtooth Hangers
Best Sawtooth Hanger for Self-Leveling Frames
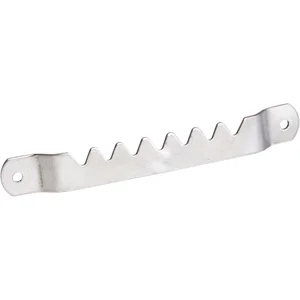 |
OOK Large Self-Leveling Sawtooth Hanger, Zinc, 3-Pack A self-leveling sawtooth hanger corrects for a slightly off nail so the frame still hangs straight.
|
Single-notch hangers have one row of teeth and one screw hole on each end — the simplest, cheapest version, fine for light frames where a slightly off-level nail isn’t a big deal. Self-leveling (or “double”) sawtooth hangers use a slightly curved or pivoting design so the hanger settles level even if your nail is a degree or two off, which matters more than it sounds like — a nail driven even 3-5 degrees off level is enough to leave a frame visibly crooked with a rigid, non-leveling hanger.
Material matters for both strength and finish. Zinc-plated steel is the standard, corrosion-resistant and inexpensive, and it’s what you’ll find on the overwhelming majority of frames sold with hangers pre-installed. Brass-finished versions cost slightly more and are chosen for appearance on higher-end frames rather than any real strength difference — the base metal underneath is usually the same stamped steel either way.
Benefits of Using Sawtooth Hangers
The real advantage is speed: attaching one takes two small nails or screws and under a minute, compared to the extra step of running and tensioning picture wire between two D-rings. For a frame under 20 lbs, that time savings adds up fast if you’re hanging a whole gallery wall of small prints — a sawtooth hanger on each one gets the job done in a fraction of the time a wired setup would.
They also sit flush against the frame’s back, which means the frame hangs closer to the wall than a wire-and-D-ring setup, where the wire’s natural sag pulls the top of the frame away from the wall by a half-inch or more. For a frame you want sitting nearly flat against the wall — common in a tight gallery arrangement — that flush profile is a real, practical benefit, not just a cost-saving one.
Choosing the Right Sawtooth Hanger
Weigh the actual frame — glass, mat board, and backing add up faster than people expect, and an 11×14 frame with glass can easily hit 3-4 lbs before you even count the artwork. Match that number against the hanger’s stated rating with margin to spare; a hanger rated right at your frame’s weight has no buffer for the extra stress of someone bumping the frame while walking past.
For anything approaching 15 lbs, go with a self-leveling design rather than a basic single-notch hanger — the self-leveling mechanism’s tolerance for an imperfect nail becomes more valuable as weight increases, since a heavier frame makes any tilt more visually obvious. Past roughly 20 lbs, stop looking at sawtooth hangers altogether and move to a D-ring and wire setup, which distributes weight across two points rather than one and is rated for substantially more.
How to Install a Sawtooth Hanger
Find the horizontal center of the frame’s back rail and mark it with a pencil — an off-center hanger is the single most common reason a hung picture tilts, since the frame’s weight isn’t balanced around the nail. Center the hanger’s screw holes on that mark, and pre-drill a small pilot hole if you’re working with hardwood or a thin frame rail that might split under a driven screw or brad.
Attach with the screws or brads sized for the hanger’s holes — most sawtooth hangers take small #2-#4 wood screws or 3/4″ brads, both usually included in the package. Drive them fully flush; a proud screw head can catch on the wall or on adjacent frames in a tight gallery arrangement. Once it’s on, hang the frame on a single nail or picture hook driven at a slight upward angle into the wall, and use a level against the frame’s bottom edge to fine-tune before calling it done.
Tips for Secure Mounting
Hang into a stud whenever the frame’s weight and the wall allow it — a nail into solid wood holds dramatically more than the same nail in drywall alone. When a stud isn’t available where you need to hang, use a picture-hanging hook rated for at least double your frame’s actual weight; these distribute load across a small angled nail (or several) rather than relying on a single point the way a bare nail does.
Keep frames with sawtooth hangers away from doors that get slammed or high-traffic hallway corners where they’re likely to get bumped — the single-point contact of a sawtooth hanger has less tolerance for repeated jostling than a two-point D-ring setup does. If a spot gets frequent foot traffic or has kids or pets running through, it’s worth the extra step of switching to D-rings even for a lightweight frame.
Common Mistakes to Avoid
Hanging a frame heavier than the hanger’s rating is the most common failure mode, and it doesn’t always fail immediately — a hanger stressed near its limit can hold for weeks or months before the metal fatigues and the notch finally gives way, which makes it easy to assume a hanger is “fine” right up until it isn’t. If you’re not sure of a frame’s actual weight, a kitchen scale takes ten seconds and removes the guesswork.
Off-center placement is the second-most common issue, and it’s avoidable with the same pencil-mark step every time. A less obvious mistake: reusing an old, bent, or rusted hanger from a previous project rather than installing a fresh one — a hanger that’s already flexed once has reduced fatigue strength even if it looks fine, and rust at the notch specifically weakens the exact point bearing all the load.
Alternative Wall Mounting Solutions
D-rings — small D-shaped metal loops screwed to the back of the frame, one on each side — are the standard step up for anything a sawtooth hanger can’t handle. A properly sized pair of D-rings with picture wire strung between them commonly handles 50-100+ lbs depending on the hardware’s rated capacity, since the load is split across two anchor points and the wire distributes tension rather than concentrating it on one notch.
Wire-and-eyelet setups (screw eyes rather than D-rings, with wire strung between them) work similarly and are common on mid-weight frames — they also make small side-to-side leveling adjustments easier after the frame’s already on the wall, since you can shift the frame slightly along the wire without removing it from the hook. For genuinely heavy pieces — large mirrors or substantial framed art — a French cleat (interlocking angled wood strips, one on the wall and one on the frame) spreads weight across the entire width of the frame rather than one or two points, and it’s the go-to for anything a standard wire setup would strain to hold.
Maintenance and Safety
Check hangers on frequently-bumped or heavier frames every few months — look specifically at the notch itself for rust, bending, or metal fatigue, not just whether the screws are still tight. Rust at the load-bearing notch is worth taking seriously; wipe it down and inspect closely, and if there’s any pitting or visible metal loss at the notch, replace the hanger rather than trying to clean and reuse it.
When replacing a hanger, match or exceed the original’s weight rating rather than grabbing whatever’s on hand — a frame that’s hung safely for years on a properly rated hanger can fail quickly on an undersized replacement. After installing a new hanger, give the frame a firm test tug before walking away, especially if it’s going somewhere that would cause real damage or injury if it fell.
Frequently Asked Questions
What is a sawtooth hanger used for?
It’s used to hang lightweight picture frames, mirrors, and artwork flush against a wall using a single nail or screw. It’s the simplest and cheapest hanging hardware available, but it’s limited to roughly 15-25 lbs depending on the specific hanger.
How do you attach a sawtooth hanger?
Mark the horizontal center of the frame’s back rail, center the hanger’s screw holes on that mark, and drive small wood screws or brads flush through the holes. Centering it accurately is the key step — an off-center hanger is the most common reason a hung frame tilts.
Can sawtooth hangers hold heavy frames?
No. Standard sawtooth hangers top out around 15-20 lbs, and even heavy-duty self-leveling versions rarely exceed 25 lbs. For anything heavier, use D-rings with picture wire, or a French cleat for large mirrors and substantial framed pieces.
Are there different types of sawtooth hangers?
Yes. Single-notch hangers are the basic, cheapest version, while self-leveling designs use a curved or pivoting mechanism to settle level even against a slightly off-angle nail. Both come in zinc-plated steel (the standard) or brass-finished versions for appearance.
Conclusion
A sawtooth hanger is the right call for light frames and quick installs — under about 20 lbs, centered accurately, and hung on a nail with a bit of upward angle to it. Past that weight, or anywhere the frame is likely to get bumped, step up to D-rings and wire rather than pushing a sawtooth hanger past its actual rating; the failure isn’t always immediate, which is exactly why it’s easy to get away with until the day it isn’t.
Sponsored / affiliate links. As an Amazon Associate I earn from qualifying purchases. I may earn additional commission from eligible campaigns.