How to Attach a Metal Rod to Wood: 4 Methods That Hold
Attach a metal rod to wood by drilling a pilot hole slightly smaller than the rod, then securing it with epoxy or a through-bolt and washer for anything load-bearing.
A rod held only by contact adhesive can pull loose under lateral stress, while a pre-drilled, epoxied or bolted rod holds shelving, rails, and trellis loads for years. This guide covers pilot-hole sizing, epoxy vs. mechanical fasteners, and how to stop the wood from splitting.
Introduction To Metal And Wood Fusion
Best Metal-to-Wood Epoxy Pick
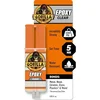
Gorilla 2 Part Epoxy (0.85 oz) – $5.97
Backs up the epoxy-or-mechanical-fastener choice this guide covers for anything that is not heavily load-bearing – sets in 5 minutes and dries clear on steel, aluminum, or brass rod.
- Best for: quick 5-minute bonds on light-duty joints like coat hooks or shelf pins
- Why we picked it: gap-fills on the uneven surfaces a hand-drilled pilot hole leaves behind
- Main drawback: only 0.85 oz per syringe, tight for larger rods or multiple joints
Compare more metal-to-wood adhesive options
 Option 1 J-B Weld Steel Reinforced Epoxy (2 oz) – $6.49
|
 Option 2 PC Products PC-Clear Epoxy (1 oz) – $6.10
|
 Option 3 Abatron WoodEpox Structural Filler (12 oz) – $17.47
|
As an Amazon Associate we earn from qualifying purchases.
Mixing metal and wood creates a unique look. Many people love this style. It combines strength and warmth. The contrast makes projects stand out.
To attach a metal rod to wood, gather the right tools. You’ll need a metal rod, wood, drill, screws, and measuring tape. A saw may also help for cutting. Safety gear like gloves and goggles is important too.
Make sure to measure carefully. Mark where the rod will attach. Pre-drill holes in the wood. This prevents the wood from splitting. Then, secure the metal rod using screws.
Selecting The Right Metal Rod For Your Wood Project
Selecting the right metal rod is crucial for a successful wood project. Consider these factors for optimal results:
- Material Type: Choose rods made of steel, aluminum, or brass.
- Diameter: Ensure the diameter matches your project needs.
- Length: Select a length that suits your wood dimensions.
- Corrosion Resistance: Look for rust-resistant options for durability.
Here are some suitable types of metal rods for wood attachment:
| Type | Description |
|---|---|
| Steel Rods | Strong and durable, ideal for heavy-duty projects. |
| Aluminum Rods | Lightweight and resistant to corrosion, great for indoor use. |
| Brass Rods | Offers a decorative finish and good corrosion resistance. |
Choosing The Best Wood For Your Diy Endeavor
Choosing the right wood is crucial for your project. Softwoods like pine are easy to work with. Hardwoods like oak provide strength and durability. Consider the grain pattern and density of the wood. This affects how well it holds the metal rod.
Compatibility between wood and metal is vital. Some metals bond better with certain woods. Test different combinations to find the best fit. Make sure the wood is dry to prevent warping — if the wood is soft, damaged, or punky where the rod will go, an epoxy wood filler can rebuild it before you drill.
Preparing the wood surface is important for a strong bond. Sand the surface to make it smooth. Remove dust and debris before attaching the metal rod. Apply a suitable adhesive for a lasting hold.
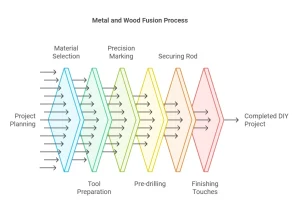
Tools And Safety Gear Checklist
Before starting, gather the essential tools for the job. These include:
- Drill
- Screwdriver
- Metal rods
- Wood pieces
- Measuring tape
- Level
Wear proper safety gear to stay safe. Important items are:
- Safety goggles
- Work gloves
- Dust mask
- Ear protection
Always work in a well-lit area. Keep the workspace clean. This helps avoid accidents.
Measuring And Marking For Precision
Start by measuring the length of the metal rod. Use a straight edge for accuracy. Mark the wood at the desired location. A pencil works best for clear markings.
Next, measure twice to ensure the correct placement. Use a ruler or measuring tape for precision. Mark the width of the metal rod on the wood.
For holes, use a drill to create a guide. Ensure the markings are visible before drilling. This helps in attaching the rod securely.
Check all measurements to avoid mistakes. The more precise the markings, the easier the attachment will be.
Pre-drilling Holes In Wood
Pre-drilling is very important for attaching metal rods to wood. It helps to prevent the wood from splitting. This method allows for a more secure fit and alignment.
To pre-drill effectively, follow these steps:
- Select the right drill bit that matches the size of the metal rod.
- Mark the spot on the wood where you want to drill.
- Use a drill to create a hole at the marked spot.
- Make sure to drill straight down for accuracy.
- Clean any wood shavings from the hole.
Securing The Metal Rod To Wood
Choosing the right fasteners is essential for a strong bond. Screws, bolts, and brackets work well — see this screw comparison guide if you are unsure which type to buy. Select stainless steel for outdoor projects. It resists rust and lasts longer.
To attach the metal rod, start by marking the spot on the wood. Drill a pilot hole to prevent splitting. Insert the fastener and tighten it securely. Ensure the metal rod is level. Check for stability before use.
Using the right tools makes the job easier. A drill, wrench, and screwdriver are usually needed. Follow these steps for a successful attachment.
Finishing Touches And Aesthetic Enhancements
Start by sanding the wood to create a smooth surface. Use fine-grit sandpaper for the best results. This helps the finish adhere better and looks more attractive.
After sanding, apply a wood finish like varnish or stain. Choose a color that complements your metal rod. A glossy finish can enhance the wood’s beauty.
| Decorative Options | Description |
|---|---|
| Paint | Use paint to add color or match the rod. |
| Stencils | Add designs for a personal touch. |
| Woodburning | Create unique patterns on the wood surface. |
Consider these options for a more appealing look. Enhancing the aesthetic can make your project stand out.
Maintenance Tips For Longevity
Regular check-ups are important for maintaining the attachment of metal rods to wood. Periodically tighten any loose screws or bolts. This helps prevent wear and keeps everything secure.
Protect the metal from rust and the wood from decay. Use a sealant to shield against moisture. Avoid placing the wooden structure in direct sunlight for long periods. This helps maintain its integrity.
Creative Project Ideas
Transform your space with metal and wood projects. Make a unique coat rack using a wooden board and metal rods. This simple design adds style to any entryway.
Create a garden trellis with wooden panels and metal rods. It supports climbing plants beautifully. Enjoy a vibrant garden that stands out.
Build a custom shelving unit with bracket-supported shelves. Attach metal rods to wooden planks for a modern look. This project provides extra storage and style.
Design a coffee table with a wooden top and metal legs. This combination gives a chic touch to your living room. Use reclaimed wood for an eco-friendly option.
Troubleshooting Common Issues
Alignment problems can cause many issues. Check the position of the metal rod. Use a level to ensure everything is straight. Adjust the rod if needed. Tightening the screws can also help.
For attachment strength, choose the right adhesive. Use wood glue or epoxy for better bonding. Drill pilot holes to prevent the wood from splitting. Ensure the rod is secured tightly with screws or bolts. This will make the attachment more stable.
Conclusion: Embracing The DIY Spirit
Attaching a metal rod to wood can be simple and fun. First, choose the right tools for the job. A drill, screws, and a screwdriver are essential. Measure and mark where the rod will go. Drill pilot holes to prevent the wood from splitting.
Use screws that fit well with both materials. Make sure the rod is straight and secure. Check for stability after attaching. This method works for many projects, like furniture or decor.
Embrace your creativity in future projects. Try different materials and designs. Each project helps build your skills and confidence.
Frequently Asked Questions
How Do You Attach A Metal Rod To Wood?
To attach a metal rod to wood, use brackets or clamps. First, mark the desired position on the wood. Drill holes for screws or bolts through the metal rod. Secure the rod to the wood using appropriate fasteners. Ensure everything is aligned for a strong connection.
What Tools Are Needed For This Process?
You will need a drill, screws or bolts, and a wrench. A measuring tape helps ensure accurate placement. Additionally, a level can assist in maintaining alignment. Use clamps to hold the rod in place while securing it. A screwdriver may also be necessary for final adjustments.
Can You Use Glue To Attach Metal To Wood?
While glue can be used, it is not the best option. A strong wood glue or adhesive specifically designed for metal and wood may work. However, this method may not provide the strength needed for heavy loads. For lasting durability, consider using mechanical fasteners like screws or bolts instead.
Is It Better To Weld Or Bolt Metal To Wood?
Welding provides a strong, permanent bond, but it requires special skills. Bolting is easier and allows for adjustments if needed. If you’re working with thin metal, welding might cause warping. For most DIY projects, bolting is the safer and more practical choice.
Conclusion
Attaching a metal rod to wood can enhance your projects significantly. With the right tools and techniques, it’s a straightforward process. Always prioritize safety and precision for the best results. Now that you know how to do it, feel confident to tackle your next DIY project with ease and creativity.
Sponsored / affiliate links. As an Amazon Associate I earn from qualifying purchases. I may earn additional commission from eligible campaigns.