Best Way To Hang Shelves On Drywall: Essential Guide
The best way to hang shelves on drywall involves securely anchoring them into wall studs or using robust drywall anchors specifically designed for the weight you intend to store. This ensures your shelves are stable, safe, and won’t damage your wall.
Ever looked at a bare wall and thought, “This needs shelves!”? It’s a common DIY dream, but hanging them on drywall can feel a little tricky. You want your beautiful new shelves to hold your books, plants, or decor, not end up on the floor! Many beginners worry about drilling holes and hoping for the best. But don’t worry, I’m here to guide you!
With a few simple tools and techniques, you can confidently hang shelves that are both stylish and strong. We’ll cover the best methods, from finding those hidden wall studs to choosing the right anchors. Get ready to transform your space with confidence!
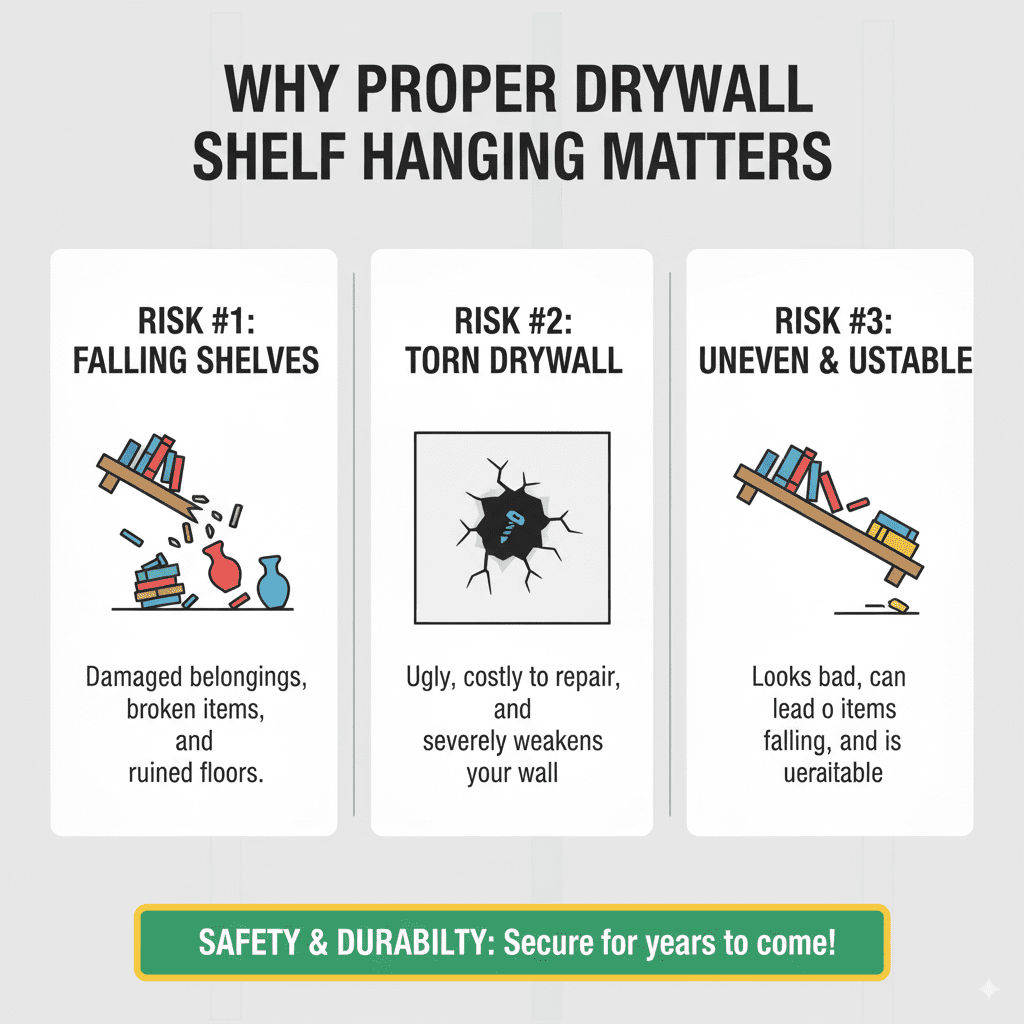
Why Proper Drywall Shelf Hanging Matters
Hanging shelves on drywall isn’t just about making your walls look good; it’s about safety and durability. Drywall itself isn’t very strong. It’s essentially paper and gypsum plaster. If you try to screw directly into only drywall without proper support, especially for heavier items, you risk:
- Shelves falling down: This can damage your belongings and your floor.
- Torn drywall: A shelf pulling away can create a large, unsightly hole in your wall.
- Uneven shelves: Poor anchoring can lead to shelves tilting or becoming unstable.
The “best way” truly means the most secure and appropriate method for the weight your shelf will carry. We want your shelves to be a sturdy and attractive feature in your home for years to come!
Understanding Your Wall Structure
Before you grab a drill, it’s helpful to know what’s behind your drywall. Most interior walls are built with wooden or metal studs spaced about 16 or 24 inches apart. These studs are the structural backbone of your wall and provide the strongest anchor points. Drywall is then attached to these studs. If you can attach your shelf bracket directly to a stud, you’re in the best possible position for strength.
When hammering a nail or screwing into the wall, you’ll often feel a difference when you hit a stud – it’s much harder than the softer drywall. If you can’t easily hit a stud where you want your shelf, don’t worry. Modern drywall anchors are designed to provide excellent support on their own.
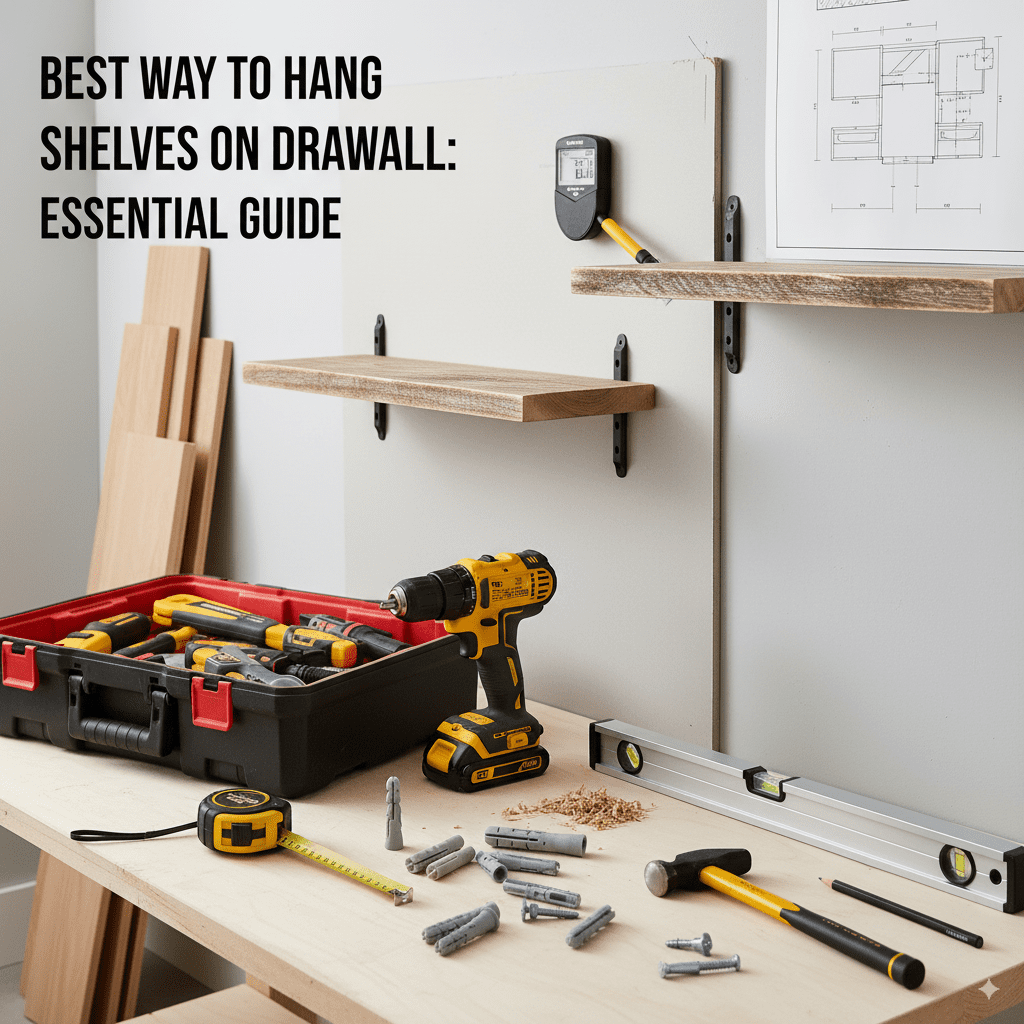
Tools You’ll Need
Gathering the right tools before you start makes the job much smoother. Here’s a basic list for most shelf-hanging jobs on drywall:
- Stud Finder: Essential for locating wall studs. Electronic stud finders are generally more reliable than magnetic ones for beginners.
- Drill and Drill Bits: You’ll need various sizes for pilot holes and for drilling through different materials.
- Level: Crucial for ensuring your shelves are straight.
- Measuring Tape: For accurate placement.
- Pencil: For marking your drilling spots.
- Screwdriver or Screw Gun: To drive screws.
- Hammer: For tapping in some types of anchors.
- Safety Glasses: Always protect your eyes when drilling or hammering.
- Optional: Dustpan and Brush: To clean up drywall dust.
Methods for Hanging Shelves on Drywall
There are two primary, reliable methods for hanging shelves on drywall, depending on whether you can hit a stud. Each method has its strengths and is suitable for different situations.
Method 1: Anchoring Directly into Wall Studs (The Strongest Method)
This is always the preferred method if possible. Attaching directly to studs provides the most secure hold for heavy loads. Here’s how to do it:
- Locate the Studs: Use your stud finder to locate the center of a wall stud in the area where you want to hang your shelf. Mark the edges of the stud lightly with your pencil, then find and mark the center. Repeat for any other stud locations needed for your shelf brackets. Most studs are 16 inches apart on center, but it’s always best to check. For more on stud spacing, this guide from Fine Homebuilding offers great insights.
- Position Your Bracket: Hold your shelf bracket against the wall at the desired height, aligning the screw holes with your stud marks. Use your level to ensure the bracket is perfectly horizontal. Mark the screw hole locations on the wall.
- Drill Pilot Holes: Select a drill bit that is slightly smaller than the diameter of your screws. Drill pilot holes through the drywall and into the center of the stud at your marked locations. This makes it easier to drive the screws and prevents the wood from splitting.
- Attach the Bracket: Drive long wood screws (at least 1.5 to 2 inches long) through the bracket holes and into the pilot holes in the stud. Make sure the screws are long enough to go through the drywall (typically 3/8″ to 5/8″) and at least 1 to 1.5 inches into the stud. Tighten them securely, but don’t overtighten, which could strip the wood.
- Install the Shelf: Once the bracket is firmly attached, you can place your shelf on it and secure it according to the shelf’s design (usually with shorter screws from the top or bottom).
Pros of Anchoring into Studs:
- Extreme strength and stability.
- Ideal for heavy items like large bookcases, heavy electronics, or substantial decor.
- The most reliable long-term solution.
Cons of Anchoring into Studs:
- Limited by stud placement; you might not be able to place shelves exactly where you want them if it doesn’t align with a stud.
- Requires a stud finder and careful measurement.
Method 2: Using Drywall Anchors
When you can’t hit a stud, or need to hang a shelf between studs, sturdy drywall anchors are your best friend. These devices expand or grip behind the drywall to create a secure anchor point. The key is choosing the right anchor for the weight you plan to put on the shelf.
Types of Drywall Anchors and Their Uses
Here’s a look at common, effective drywall anchors:
| Anchor Type | How it Works | Weight Rating (per anchor) | Best For |
|---|---|---|---|
| Plastic Expansion Anchors (Conical or Sleeve) | Drill a hole, insert the plastic anchor. As you drive a screw into it, the anchor expands or flares out behind the drywall. | Light to Medium (5-25 lbs) | Light decorative items, small shelves, picture frames. |
| Self-Drilling (or Screw-in) Anchors | These have a sharp tip that screws directly into the drywall without a pre-drilled hole, creating its own threads. | Light to Medium (10-30 lbs) | Similar to plastic anchors but easier to install. Good for shelves holding up to 30 lbs if used with multiple anchors. |
| Toggle Bolts | A metal bar with springs or wings that folds to go through a drilled hole, then springs open behind the drywall, distributing weight over a larger area. | Medium to Heavy (30-100+ lbs) | Medium-duty shelves, larger picture frames, light cabinets. |
| Molly Bolts (Sleeve-Type Anchors) | A metal sleeve with screw threads. You drill a hole, insert the sleeve, and as you screw in the bolt, the sleeve expands and crimps onto the back of the drywall. | Medium to Heavy (50-100+ lbs) | Heavier shelves, small to medium cabinets, anything requiring significant strength without a stud. |
| Strap Toggles / Snaptoggles | A newer, very strong version of toggle bolts. It consists of a toggle bar with a strap attached. You drill a hole, insert the toggle and then pull the strap to bring the toggle firmly against the back of the drywall without it rotating. | Heavy Duty (up to 200+ lbs) | Heaviest shelves, cabinets, TVs, and other significant loads where studs are not an option. Highly recommended for strength. |
Important Note: Check the manufacturer’s packaging for specific weight ratings. These ratings are often based on ideal conditions and can be reduced by factors like drywall thickness, anchor quality, and how the load is applied. Always aim to use anchors that can hold more than you expect to put on the shelf.
Steps for Using Drywall Anchors
The exact steps vary slightly by anchor type, but here’s a general process:
- Choose Your Anchor: Select an anchor type that suits the weight of your shelf and its contents. For most typical shelves holding decor or books, toggle bolts or molly bolts are excellent choices. For very heavy items, consider strap toggles. For lighter items, a good quality self-drilling anchor can work.
- Mark and Drill: Hold your shelf bracket in place, use your level, and mark the screw hole locations. Refer to the anchor packaging for the recommended drill bit size for the pilot hole. Drill the hole. For self-drilling anchors, you can skip drilling a pilot hole (though a small starter hole can help).
- Install the Anchor:
- For plastic or self-drilling anchors: Gently tap or screw the anchor into the hole until it’s flush with the wall surface.
- For toggle bolts or molly bolts: You’ll typically need to remove a plastic cap and then push the folded toggle or molly bolt through the hole. Once it’s behind the drywall, release the cap and let the wings/toggle open. For molly bolts, you’ll then screw in the bolt to expand the sleeve. For toggle bolts, you’ll thread a screw through the mechanism.
- For strap toggles: Drill the hole, insert the toggle, then pull the straps firmly to seat the toggle, then trim the straps to the wall surface.
- Attach the Bracket: Align the bracket with the installed anchor. Drive the appropriate screw through the bracket and into the anchor. For toggle bolts and molly bolts, you are screwing into the part that sits behind the wall. For plastic/self-drilling, you screw directly into the anchor itself. Tighten until snug.
- Install the Shelf: Once the bracket is securely attached, place your shelf and fasten it.
Pros of Using Drywall Anchors:
- Allows you to place shelves anywhere on the wall, regardless of stud location.
- Modern anchors are incredibly strong.
- Relatively easy to install with basic tools.
Cons of Using Drywall Anchors:
- Weight ratings are critical and must be respected.
- Installation can be slightly more complex than screwing into a stud.
- If installed incorrectly, they might not hold as well.
Choosing the Right Shelf and Hardware
The best way also depends on the load capacity you need. Consider what you plan to store:
- Light Duty (decor, small plants, photos): Can often be supported by standard shelf brackets secured with self-drilling anchors or directly into studs.
- Medium Duty (books, larger plants, moderate knick-knacks): Requires robust brackets and either direct stud attachment or high-quality toggle bolts/molly bolts.
- Heavy Duty (electronics, substantial book collections, heavy storage): Absolutely requires attachment to wall studs. If studs aren’t an option, use the strongest strap toggle anchors available.
When buying shelves, look at their construction. Solid wood shelves are generally stronger than hollow-core or particleboard shelves. Also, consider the bracket type. “Floating” shelves often have internal mounting systems that distribute weight differently, and some might still require stud attachment for stability.
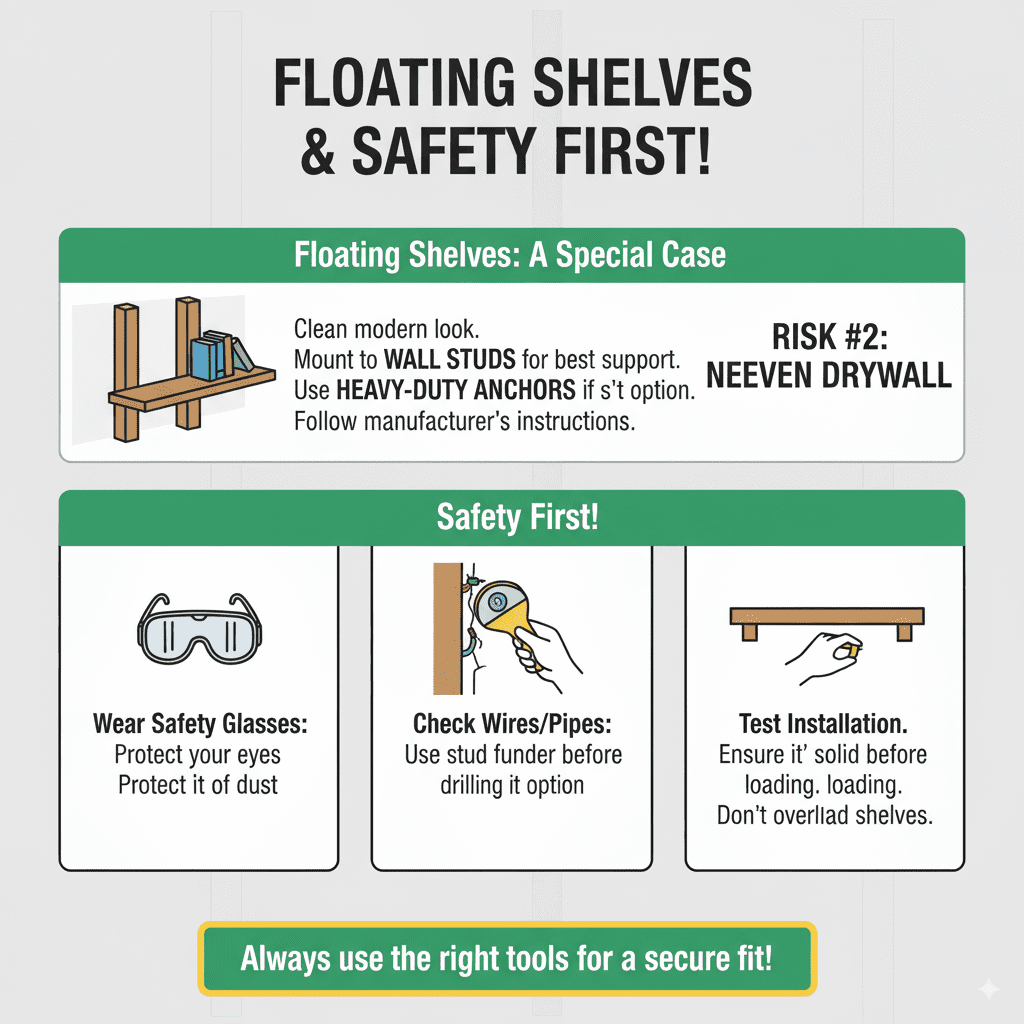
Floating Shelves: A Special Case
Floating shelves offer a clean, modern look by concealing the mounting hardware. They typically attach to the wall via a hidden bracket that the shelf slides onto. Because the weight is distributed through this bracket, it’s crucial to mount it securely. For floating shelves, especially if they will hold more than a few ounces, attaching that hidden bracket to wall studs is highly recommended. If studs aren’t alignable, you will need to use very strong, heavy-duty drywall anchors that can support the entire load. Always follow the manufacturer’s specific installation instructions for floating shelves.
Safety First!
No matter which method you choose, safety should always come first:
- Wear safety glasses: Protect your eyes from dust and debris.
- Check for wires and pipes: Before drilling, especially in exterior walls or areas where plumbing or electrical lines might run, use a stud finder that can also detect live AC voltage or pipes. A quick search on resources like Building Science Corporation can offer insights into wall penetrations.
- Don’t overload shelves: Respect the weight limits of your chosen anchors and brackets. It’s better to be safe than sorry!
- Use the right tools: Using the correct drill bit sizes and screw types prevents stripping and ensures a secure fit.
- Test your installation: Gently tug on the shelf and bracket after installation to ensure it feels solid and secure before placing any items on it.
Frequently Asked Questions (FAQ)
Q1: Can I hang a shelf on drywall without hitting a stud?
A1: Yes, you absolutely can! The key is to use appropriate, heavy-duty drywall anchors designed for the weight you intend to store. Toggle bolts, molly bolts, and strap toggles are excellent choices for securely hanging shelves without studs.
Q2: How much weight can a drywall anchor hold?
A2: Weight ratings vary significantly by anchor type. Plastic or self-drilling anchors might hold 10-25 lbs, while heavy-duty toggle bolts and strap toggles can hold 50-200+ lbs. Always check the anchor’s packaging for its specific rating and use anchors rated for more weight than you plan to load.
Q3: What’s the strongest type of drywall anchor?
A3: Strap toggles (like Snaptoggles) are generally considered among the strongest and most reliable drywall anchors available for heavy loads. Their design distributes weight effectively across a larger area behind the drywall.
Q4: How do I know if I hit a stud?
A4: When drilling or hammering into a stud, you’ll feel much more resistance than you do with drywall. Electronic stud finders are the easiest way to locate studs accurately; they typically beep or light up when over a stud.
Q5: How many anchors should I use for a shelf?
A5: For most shelves, using at least two anchor points at either end is recommended for stability. If the shelf uses multiple brackets or is very long, you may need additional anchors. Always ensure the anchors are spaced to align with studs if possible, or use enough robust anchors if not.
Q6: Can I use regular screws to hang a shelf on drywall?
A6: No. Simply screwing into drywall alone will not provide enough support for anything more than a very lightweight item, and even then, it’s not reliable. Screws need something solid to grip, either a wall stud or the expanded mechanism of a drywall anchor.
Q7: What’s the difference between a toggle bolt and a molly bolt?
A7: Both are strong anchors that work behind the drywall. Toggle bolts use a spring-loaded or hinged bar that swings open behind the wall, while molly bolts use a metal sleeve that expands and crimps onto the back of the drywall as you screw into it. Both are effective, but strap toggles often offer superior holding power.
Conclusion
Hanging shelves on drywall might seem intimidating at first, but with the right knowledge and tools, it’s a perfectly achievable DIY project. Remember, the key to successful shelf hanging is choosing the appropriate method for the job. Whenever possible, anchoring into wall studs provides the ultimate strength and stability. When studs aren’t an option, don’t shy away from modern, heavy-duty drywall anchors – they are engineered to hold significant weight safely.