Best Way To Store Firewood: Essential Guide
The best way to store firewood involves stacking it off the ground, keeping it covered on top but open on the sides for maximum airflow, and ensuring it’s split and seasoned for at least six months before use to maximize heat and safety.
When the air gets cold, having a roaring fire feels wonderful. But if you’ve ever struggled with smoky fires, damp logs, or even pests hiding in your woodpile, you know that improper storage can turn cozy evenings into frustration. Poorly stored wood wastes heat because it has to burn off excess moisture first. As your trusted woodworking mentor, I’m here to tell you that storing wood correctly isn’t hard—it’s just about following a few simple rules of airflow and protection. We are going to walk through the easiest, most effective methods to season and stack your firewood so it burns cleaner, hotter, and lasts longer. Let’s get your woodpile ready for prime time!
The #1 Rule: Why Proper Firewood Storage Matters So Much
Before we talk about how to stack, we need to understand why we stack in the first place. Think of your firewood as a sponge. If it sits on wet ground or under a dripping roof, it soaks up water. Wet wood is called “green” wood, and burning it is inefficient and messy.
Here are the core reasons why storage is non-negotiable:
-
- Efficiency and Heat Output: Dry, seasoned wood lights faster and burns much hotter. Water turns to steam when heated, wasting the energy that should be warming your home.
- Safety: Burning damp wood creates excessive smoke. This smoke carries more unburned particles, leading to a faster buildup of creosote—a tar-like substance that can line your chimney and cause dangerous chimney fires.
- Pest Control: Wood left in damp piles on the ground becomes an inviting home for termites, carpenter ants, and other unwelcome visitors. Proper storage keeps your woodpile away from your house.
Step 1: Preparation is Key – Splitting and Seasoning
You can’t just stack whole logs and expect them to dry properly. The preparatory steps are crucial for effective seasoning (drying).
Splitting for Success
You must split your wood before stacking. Why? Because the rough bark on a whole log acts like natural armor, locking moisture inside. Splitting exposes the dry inner wood (heartwood) to the air.
-
-
- Ideal Size: Aim for pieces roughly 4 to 6 inches in diameter. This size dries quickly but is still manageable for most stoves and fireplaces.
- Tool Tip: If you are processing a lot of wood, consider investing in a quality maul or even a small hydraulic splitter later on. For beginners, a sharp wedge and a heavy maul work perfectly fine.
-
The Waiting Game: Seasoning Time
Seasoning is the process where the wood dries out. This is not optional! Most hardwoods (like oak or maple) need at least six to twelve months in the right conditions. Softwoods (like pine) dry faster, maybe three to six months.
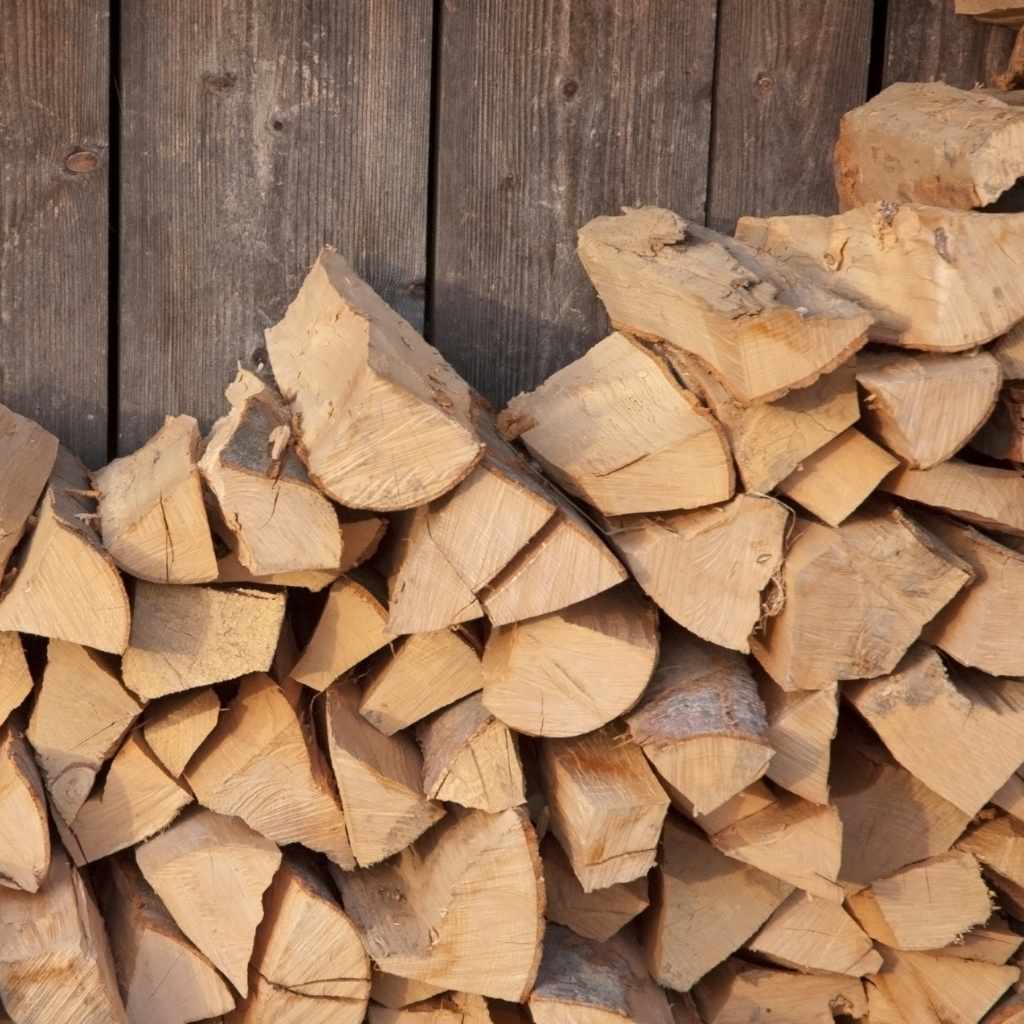
How do you know wood is seasoned? It will look slightly greyish, checking (cracks) will appear on the ends, and it will sound like two rocks hitting each other when knocked together, instead of a dull thud. You are aiming for less than 20% moisture content. Reputable sources, like those in the energy sector, confirm that wood below this threshold burns optimally.
Step 2: Choosing the Best Location for Your Woodyard
The location of your stack determines how well it dries and how convenient it is to use during winter.
Sunlight vs. Airflow
Many folks think sunny southern exposure is the only answer. While sun helps, airflow (ventilation) is actually more important for quickly drawing out moisture.
-
-
- Choose a spot that gets good wind exposure.
- Avoid areas right against the house foundation, as this invites moisture transfer and pests near your home. A distance of at least 10 to 20 feet away is smart.
-
Protecting Against Ground Moisture
This is arguably the most critical piece of advice: Never stack firewood directly on the bare ground. The ground draws moisture into the bottom layer via capillary action, regardless of how well you cover the top. You must elevate the wood.
Step 3: Building the Ultimate Firewood Rack (Elevation is Everything)
To create the best dry storage system, you need a base that raises the wood at least 4 to 6 inches off the soil or concrete.
Simple Elevation Methods:
-
-
- Using Concrete Blocks or Pavers: This is fast and requires no cutting. Lay two rows of concrete blocks about 6 feet apart, and run two pressure-treated 4x4s (or even heavy landscaping timbers) across them. Stack your wood on top of the timbers.
- DIY Pallet Base: Find sturdy, heat-treated (HT stamped) pallets that are safe for wood contact. Place two side-by-side to create a solid, off-the-ground platform.
- Metal Racks: For a more permanent solution, specialized metal firewood racks are available. They are designed perfectly for airflow, though they cost more upfront.
-
Stacking Orientation: The Air Vents
Once you have your elevated base, it’s time to stack. The goal is to create channels for air to pass through the pile, not just around it.
| Stacking Style | Airflow Rating | Pros | Cons |
|---|---|---|---|
| Traditional Cords (Perpendicular to Wind) | Good | Classic look, stable when built tightly. | Can trap moisture if not spaced well. |
| Honeycomb/Crisscross Stack | Excellent | Superior ventilation, self-supporting. | Can be time-consuming to build initially. |
| Flat, Back-to-Back Rows | Fair | Maximizes space linearly. | Requires a solid back structure (like a wall or fence). |
For beginners, the Honeycomb (or Crisscross) Stack is often the best starting point because it inherently builds in excellent ventilation. You essentially stack two rows parallel to each other, and then you lay the next layer perpendicular across the gap between the two rows, creating small air pockets all the way up.
Step 4: Protecting the Top (But Not the Sides!)
This is where many beginners go wrong—they cover the whole pile tightly like a fortress. Sealing it up traps the moisture that is trying to escape from the drying wood.
The Essential Shelter Principle
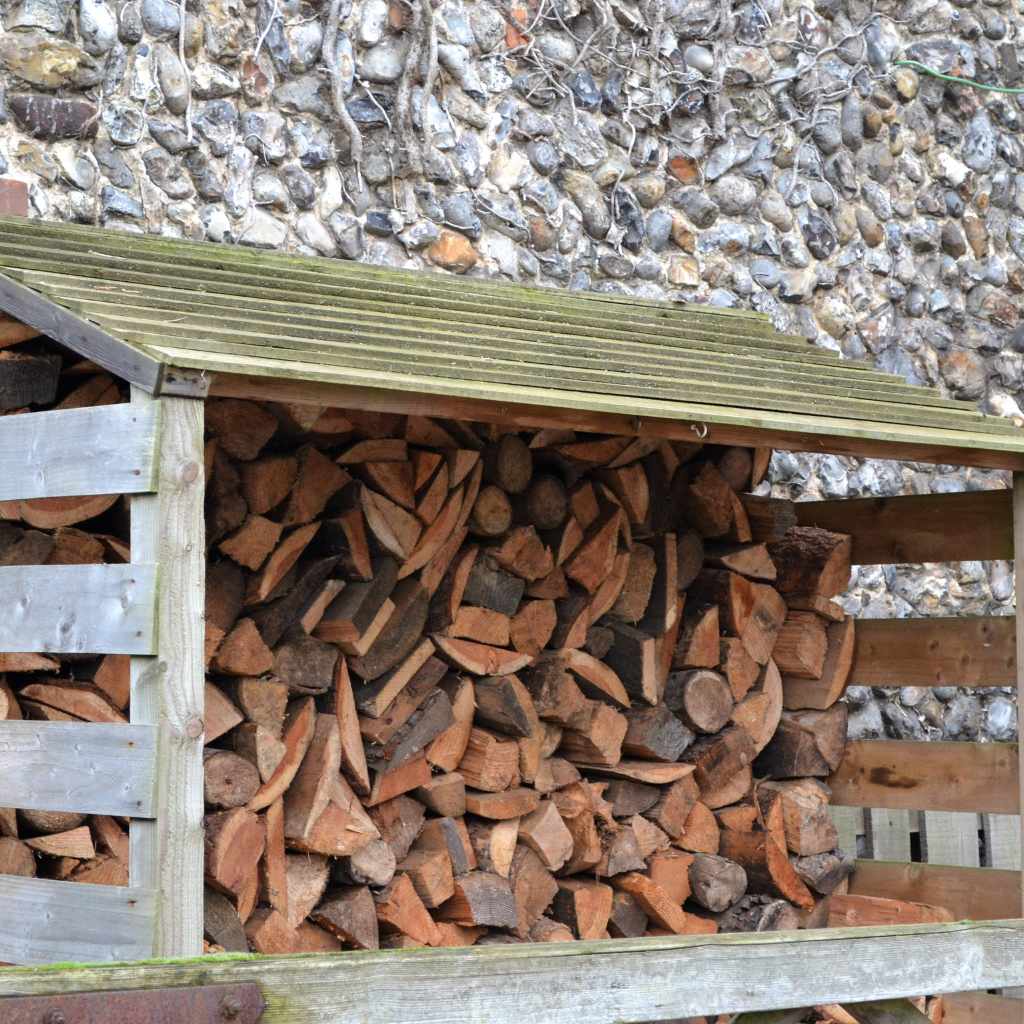
The top layer needs protection from direct rain and snow, but the sides must remain open to allow air to circulate freely and carry that moisture away. Think of it like a roof over a porch, not a sealed box.
What to Use for Covering:
-
-
- Tarp Use: If you use a tarp, drape it over the top layer only, ensuring the edges hang down several inches, leaving the entire length and width of the wood sides exposed to the air. Fasten the tarp so wind can’t rip it off or allow it to drape down and smother the sides.
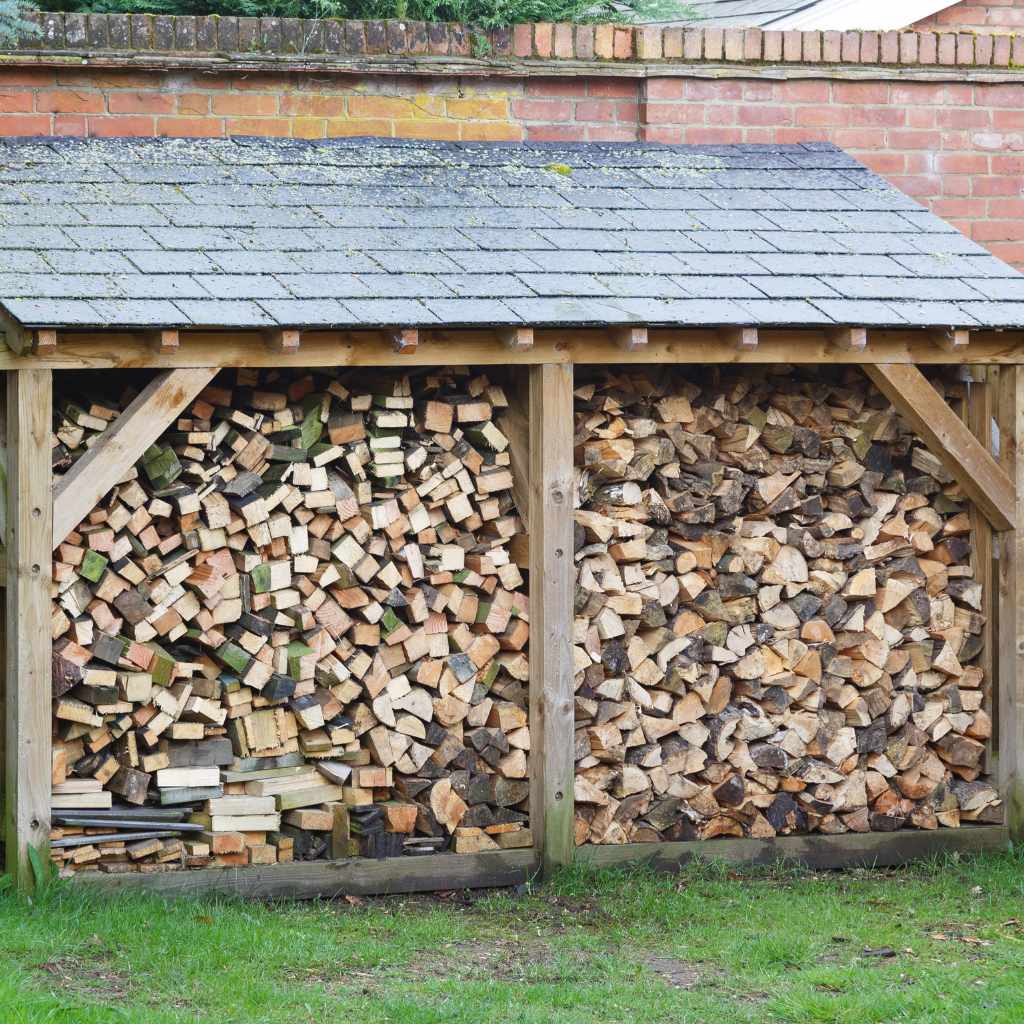
- Shed or Lean-To: The absolute best option is stacking wood inside a simple lean-to structure or along a solid three-sided shed. This provides perfect roof cover while allowing maximum cross-ventilation.
-
For more guidance on building simple, durable outdoor structures that can shelter wood, check out resources from established agricultural extension offices, such as those often found through state university systems, which provide excellent, community-tested plans for affordable outdoor storage.
Optimizing Airflow: Spacing and Structure
To ensure fast drying, you must prevent wood from touching wood for prolonged periods. Air needs to flow between every piece.
When stacking, try to leave a small, intentional gap between the rows, especially if you are stacking against a fence or wall. Even a half-inch gap makes a huge difference.
The Best Structure for Drying: The ‘Single Row’ Method
If you have limited space or are only drying a small amount of wood (less than a full cord), the most effective method is stacking the wood in a single, long row with space around it, rather than a deeply stacked, tightly packed pile.
The maximum depth for a stack that dries efficiently should be no more than 2 to 3 feet deep, even if the pile is covered. Deeper piles mean the wood in the middle takes significantly longer to season.
Section 5: Dealing with Pests and Critters
A damp, dark woodpile is pest paradise. A dry, off-the-ground stack is much less appealing, but proactive measures help.
Exclusion Tactics:
-
-
- Foundation Barrier: Ensure your base uses concrete blocks or pressure-treated lumber. Never use old, untreated wood for the base, as it rots quickly and invites termites.
- Inspect Often: When you pull wood off the pile for use, quickly check the underside of the logs you just removed for evidence of insect activity.
- Do Not Stack Near the Home: As mentioned, keep the primary wood storage area at least 15 feet away from your dwelling.
-
If you notice ants or other insects invading your stack, removing the affected logs and replacing the contaminated base material is the quickest fix. You should never use chemical pesticides directly on firewood intended for a home fire, as burning those chemicals can release harmful fumes.
Storage Location Comparison Table: Indoor vs. Outdoor
While outdoor storage is where the main seasoning happens, you need a place to keep a small amount of dry wood ready for immediate use indoors.
| Storage Type | Primary Use | Pros | Cons |
|---|---|---|---|
| Outdoor Seasoning Stack | Drying wood (6-12 months) | Best airflow, handles large volumes. | Requires weather protection (roof only). |
| Small Indoor Log Holder | Immediate burn readiness (1-2 weeks supply) | Convenient access, prevents tracking dirt inside. | Can introduce pests if wood isn’t already clean; adds humidity if wood is damp. |
Tips for Keeping Your Ready-to-Burn Stock Dry Indoors
Once wood is seasoned outdoors, you’ll want to bring a two-day supply inside. This allows that final bit of surface moisture to evaporate before burning.
-
-
- Use a designated metal or wicker log holder placed on a protective hearth mat or rubber tray.
- Never stack indoor wood directly against a wall or radiator, as this stifles airflow and can cause mildew or damage drywall/paint over time.
- Keep the indoor supply small. If you store too much wood inside your living space for too long, you risk bringing in residual insects from the woodpile.
-
The Right Way to Move and Organize Your Wood
Organization makes using your wood pile much easier, turning a chore into a smooth routine.
Sorting by Seasoning Date
Always practice the “First In, First Out” (FIFO) method. The wood you split and stacked earliest should be the wood you grab first in the winter. Labeling or organizing your stacks by stacking date (e.g., stacking 2023 wood separate from the older 2022 wood) helps prevent you from accidentally burning unseasoned wood.
Using the Right Gear
Moving wood doesn’t require heavy machinery, but good simple tools save your back and make the job safer:
-
-
- Gloves: Always wear sturdy, snug-fitting leather gloves to protect against splinters and sharp edges.
- Log Carrier: A simple canvas or heavy nylon log carrier makes moving several pieces from the outdoor stack to the indoor holder in one trip simple and clean.
- Wheelbarrow or Log Cart: Essential for moving larger quantities from the splitting area to the main storage stack.
-
FAQ: Beginner Questions About Firewood Storage
Q1: How long does firewood need to dry (season) before I can burn it?
A: Most dense hardwoods need a minimum of six months, but one full year is ideal for very hard woods like oak. The wood must reach under 20% moisture content to burn cleanly.
Q2: Can I store firewood under the eaves of my house?
A: Yes, but only if it is stacked several feet away from the siding and is elevated off the ground. Stacking too close traps heat and moisture against your home’s structure, which can lead to rot or pest issues.
Q3: Is it okay to use plastic sheeting or a full tarp to cover my entire woodpile?
A: No, that is the worst thing you can do! A full wrap traps the moisture evaporating from the wood inside the pile. Only cover the top surface to protect from rain, allowing the sides to breathe freely.
Q4: Does covering the ends of the wood help it dry faster?
A: Yes, end-grain sealing is sometimes done with specialized wax, but for beginners, splitting the wood is the crucial end-prep step. Ensure the ends are exposed to air; do not wrap them.
Q5: What is the safest way to stack wood to prevent it from falling over?
A: Stack in shorter, shallower rows (no deeper than 3 feet) and use the crisscross (honeycomb) method, which locks the pieces together for stability without needing external supports for shorter stacks.
Q6: Should I store my wood near my wood stove or fireplace just to keep it handier?
A: Only keep what you plan to burn in the next 12 to 24 hours in a small indoor holder. Storing large amounts indoors can raise the humidity in your home and expose you to potential bugs that hitchhiked in.
Conclusion: Enjoying the Fruits of Your Preparation
Learning the best way to store firewood comes down to respecting two basic elements: elevation and ventilation. By ensuring your wood is split, raised off the damp earth, and protected from direct rain while still breathing freely, you are setting yourself up for success. You’ve taken the time to split and stack—now watch how well that effort pays off when you light that first, clean-burning, roaring fire.
Remember, stacking wood properly isn’t just about neatness; it’s about efficiency, safety, and maximizing the warmth you get from every log you process. Keep those stacks tight, keep them dry on top, and you’ll be a firewood pro for every winter to come. Happy stacking!