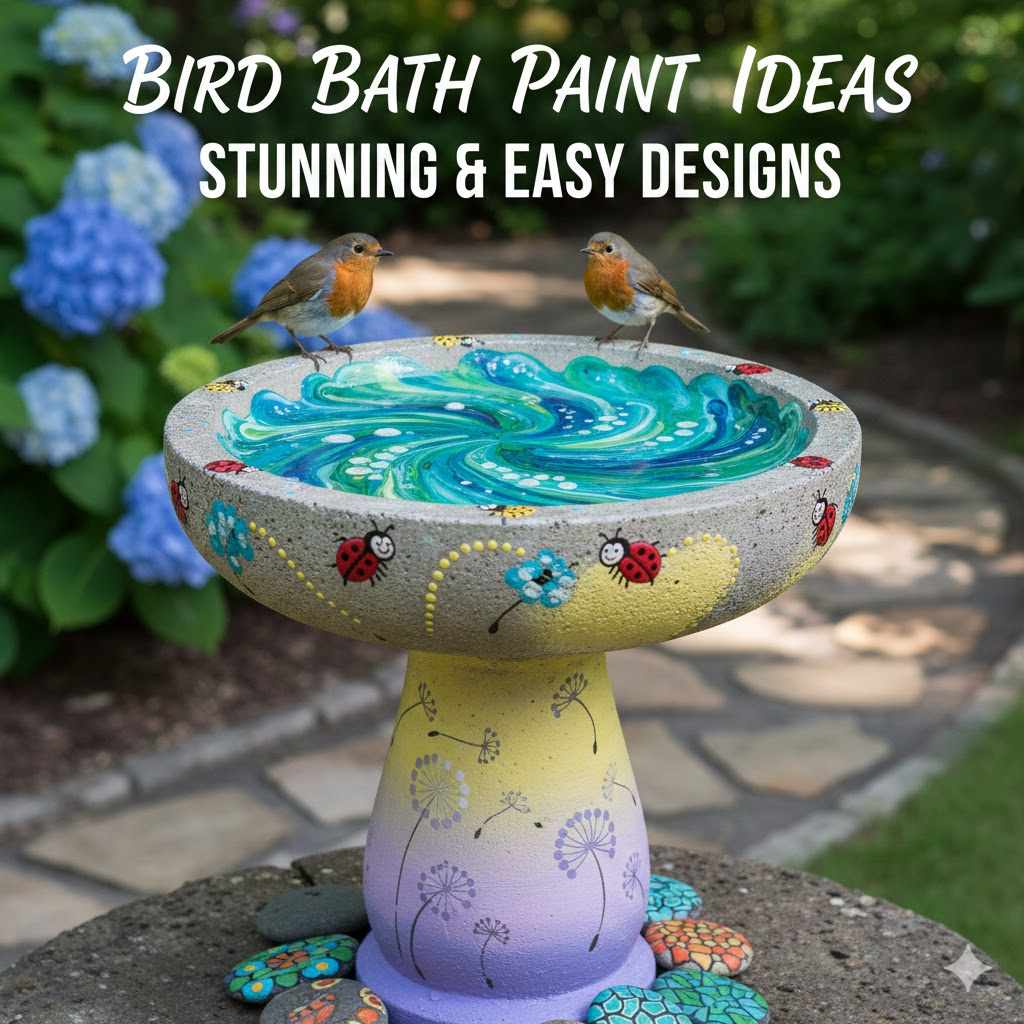
Bird Bath Paint Ideas: Stunning & Easy Designs
To paint a bird bath, start by thoroughly cleaning and sanding the surface. Apply a non-toxic, zero-VOC primer. Use bird-safe acrylic or latex paints to create your design—simple stencils or gradient effects are great for beginners. Finish with multiple coats of a clear, waterproof, non-toxic sealant and let it cure for a week before adding water.
A bird bath can be a wonderful centerpiece for your garden, attracting beautiful feathered friends. But over time, concrete and ceramic bird baths can look a little tired, stained, or weathered. You might think it’s ready for the scrap heap, but I’m here to tell you a little paint can bring it back to life!
Many folks worry about painting a bird bath. Is it safe for the birds? Will the paint just peel off? These are great questions. The good news is that with the right materials and a few simple steps, you can safely give your bird bath a stunning makeover. In this guide, I’ll walk you through everything, from choosing the perfect paint to creating designs that will make your garden shine.
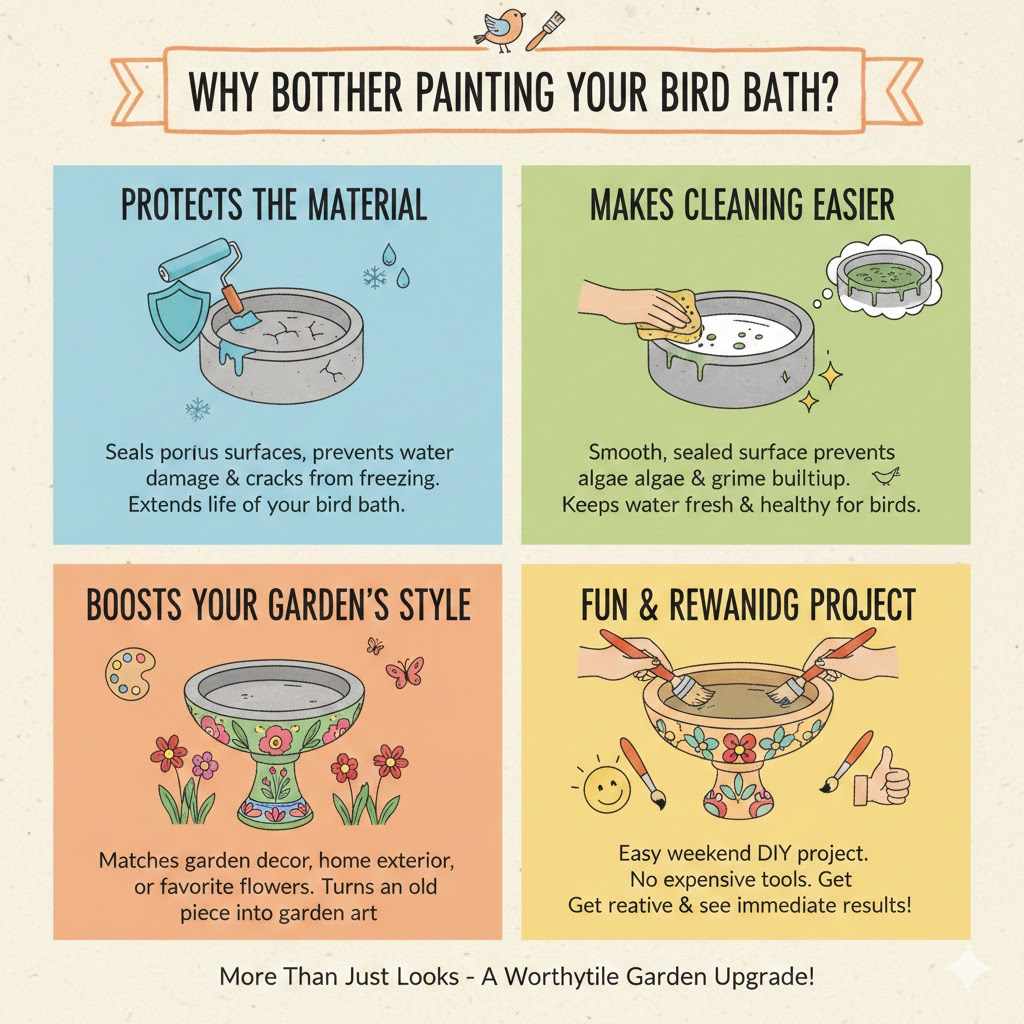
Why Bother Painting Your Bird Bath?
Before we grab our brushes, let’s talk about why this project is so worthwhile. It’s about more than just looks, though that’s a big part of the fun. A fresh coat of paint does a few important things for your bird bath and your garden.
- It Protects the Material: Concrete, in particular, is porous. Over time, water can seep in, and in colder climates, that water can freeze, expand, and cause cracks. A good coat of sealant and paint creates a waterproof barrier, protecting your bird bath from the elements and helping it last for years.
- It Makes Cleaning Easier: Algae and grime can get stuck in the tiny pores of unsealed concrete or aged ceramic. A smooth, sealed, painted surface is much easier to wipe clean, helping you keep the water fresh and healthy for the birds.
- It Boosts Your Garden’s Style: This is the fun part! An old, drab bird bath can stick out. Painting it allows you to match it to your garden furniture, your home’s exterior, or your favorite flowers. You can turn it from an afterthought into a deliberate, beautiful piece of garden art.
- It’s a Fun and Rewarding Project: There’s nothing like taking something old and making it new again. This is a perfect weekend project that doesn’t require expensive tools or expert skills. It’s a chance to get creative and see immediate, satisfying results.
The Most Important Step: Choosing Bird-Safe Paint
This is the part we absolutely must get right. The health and safety of the birds visiting your garden is the number one priority. Not all paints are created equal, and many exterior paints contain chemicals that can be harmful if they leach into the water.
So, what makes a paint “bird-safe”? You need to look for a few key things on the label:
- Non-Toxic: This is non-negotiable. The paint must be certified non-toxic. This ensures it doesn’t contain lead, chromium, cadmium, or other heavy metals that are poisonous to wildlife.
- Zero-VOC: VOCs (Volatile Organic Compounds) are chemicals that turn into gas at room temperature. They are what cause that strong “paint smell.” These fumes can be harmful to you and the birds. Look for paints labeled “Zero-VOC” or “Low-VOC.” You can learn more about the importance of reducing VOCs from the Environmental Protection Agency (EPA).
- Water-Based: Water-based paints, like acrylic or latex paints, are generally safer and easier to clean up than oil-based options. They also tend to have lower VOC levels.
Your best bet is to look for high-quality acrylic craft paints or interior/exterior latex paints that are specifically marked as non-toxic and zero-VOC. These are often used for children’s toys and furniture, making them a great choice for a bird bath.
The Critical Role of a Sealant
Even with non-toxic paint, you need one more layer of protection: a sealant. Paint alone is not enough to be completely waterproof and durable. A good sealant does two things:
- It creates a tough, waterproof barrier that locks the paint in and keeps water out. This prevents the paint from chipping, peeling, or leaching into the water.
- It makes the surface durable and UV-resistant, so your beautiful design won’t fade in the sun.
Just like the paint, your sealant must be 100% non-toxic and bird-safe once fully cured. Look for a clear, water-based polyurethane or acrylic sealer that is labeled as “food-safe” or “animal-safe.” These are often used to seal things like wooden salad bowls or pet enclosures.
Safe vs. Unsafe Paint: A Quick Comparison
Here’s a simple table to help you spot the difference when you’re at the hardware store.
| Feature | Bird-Safe Paint & Sealant | Regular Exterior Paint |
|---|---|---|
| Toxicity | Certified Non-Toxic. Free of heavy metals like lead and zinc. | May contain fungicides and chemicals to prevent mildew, which can be toxic. |
| VOCs | Zero-VOC or very Low-VOC. No harsh fumes. | Often has high VOCs, releasing strong chemical odors as it cures. |
| Base | Typically water-based (acrylic or latex). | Can be oil-based or water-based, with added solvents. |
| Best For | Children’s toys, pet habitats, and bird baths. | House siding, fences, and outdoor furniture not in direct contact with drinking water for wildlife. |
Gather Your Supplies & Tools
You don’t need a professional workshop for this project. Most of these items are probably already in your garage or can be found at any hardware store.
- Safety Gear: Gloves, dust mask, and safety glasses are a must, especially during cleaning and sanding.
- Wire Brush: For scrubbing off any stubborn algae, dirt, or flaking paint.
- Sandpaper: A medium-grit (around 120-grit) sandpaper block will work great.
- Soap and Water: Simple dish soap or a mild detergent.
- Rags or Old Towels: For cleaning and drying.
- Painter’s Tape: To create clean lines or mask off sections.
- Bird-Safe Primer: A water-based, non-toxic primer will help your paint stick and create a more vibrant color.
- Bird-Safe Paints: Your chosen non-toxic, zero-VOC acrylic or latex colors.
- Bird-Safe Sealant: A clear, non-toxic, waterproof sealer.
- Paint Brushes, Sponges, or Stencils: A variety of small and medium brushes, sea sponges for texture, and any stencils you want to use for your design.
Step-by-Step: How to Paint Your Bird Bath Like a Pro
Ready to get started? Let’s break this down into simple, manageable steps. Just take your time and enjoy the process!
Step 1: Clean It Like You Mean It
You can’t paint over dirt. A clean surface is key to a long-lasting finish. Empty any water from the bird bath and give it a good scrub with a wire brush, soap, and water. Focus on removing any green algae, bird droppings, and loose debris. Rinse it thoroughly with clean water until all the soap is gone, then let it dry completely in the sun for at least 24 hours. The concrete or ceramic must be bone-dry before you move on.
Step 2: Smooth Out the Surface
Once dry, put on your dust mask and glasses. Lightly sand the entire surface of the bird bath, both inside and out. You’re not trying to remove material, just roughing up the surface slightly and smoothing out any bumps. This helps the primer and paint grip properly. When you’re done, wipe away all the sanding dust with a clean, damp rag and let it dry again.
Step 3: Prime for Success
Primer is the glue that holds your paint to the surface. Apply a thin, even coat of your bird-safe primer to all the areas you plan to paint. Don’t let it pool in the bottom of the basin. Follow the instructions on the can for drying times, but it’s always a good idea to let it dry for a few hours until it’s no longer tacky to the touch.
Step 4: Let Your Creativity Flow! (The Painting Part)
This is where the magic happens. Whether you’re going for a simple color or an intricate design, the key is to apply thin coats of paint. Two or three thin coats are much more durable than one thick, goopy coat. Let each layer dry completely before adding the next one. Don’t rush this part!
Step 5: Seal the Deal for Safety and Durability
After your final coat of paint is fully dry (wait at least 24 hours), it’s time to seal your work. This step is absolutely essential to protect the birds and your design. Using a clean brush, apply a thin coat of your clear, non-toxic sealant to every painted surface. Pay special attention to the inside of the bowl, where the water will sit. Let it dry according to the manufacturer’s instructions, then apply a second, and even a third, coat. Three thin coats are ideal for the basin to ensure it’s completely waterproof.
Step 6: Be Patient and Let It Cure
This might be the hardest step! Your bird bath may feel dry to the touch after a day, but the paint and sealant need to “cure,” which means fully hardening and setting. To be absolutely certain that no chemicals will leach into the water, you should let the bird bath sit in a dry, sheltered place (like a garage) for at least 7 to 10 days before filling it with water. This patience ensures your project is 100% bird-safe.
Stunning & Easy Bird Bath Paint Ideas for Beginners
Feeling creative? You don’t have to be a professional artist to create a beautiful bird bath. Here are some simple yet stunning ideas that anyone can try.
1. The Timeless Classic
A single, elegant color can completely transform a bird bath. A clean white, a subtle light gray, or a soft aqua blue can look incredibly sharp and sophisticated in a garden. This is the easiest option and is perfect for a clean, minimalist look.
2. The Ombre Gradient
An ombre or gradient effect looks professional but is surprisingly easy to do.
- Choose two or three colors that blend well, like dark blue, light blue, and white.
- Paint the base of the bird bath with your darkest color.
- While the paint is still wet, paint the middle section with your medium color.
- Use a clean, damp sponge to gently dab and blend the area where the two colors meet. Use an up-and-down motion until you get a smooth transition.
- Repeat the process for the top section with your lightest color, blending it into the middle color.
3. Fun with Polka Dots or Stripes
For a whimsical and playful look, you can’t go wrong with polka dots. You can use a circular foam pouncer (found in craft stores) for perfect circles. For stripes, simply use painter’s tape to create crisp, clean lines. Paint your base color, let it dry, apply the tape, and then paint your stripe color.
4. Natural Stone Finish
Want the look of granite or stone without the weight? This can be achieved with a sea sponge.
- Start with a solid base coat, like a medium gray or beige.
- Pour small amounts of a few other stone-like colors (dark gray, white, black) onto a paper plate.
- Lightly dip a damp sea sponge into one of the colors, dab off the excess, and then gently press and twist the sponge onto the bird bath.
- Repeat with the other colors, overlapping them until you have a mottled, natural stone look.
5. Easy Floral and Leaf Stencils
If you’re not confident in your freehand drawing skills, stencils are your best friend. You can buy pre-made stencils of flowers, vines, leaves, or even little birds. Simply tape the stencil in place and use a sponge or stencil brush to dab the paint on. This technique adds an intricate, detailed look with very little effort.
6. The Faux Mosaic
Create the beautiful look of a mosaic without having to cut a single tile. After your primer is dry, lay down a grid of thin painter’s tape on the inside of the bowl. Paint each of the squares a different color. Once the paint is dry, carefully peel off the tape to reveal clean “grout” lines. The original primer color will show through, so using a gray or white primer works best for a realistic look.
| Paint Idea | Difficulty Level | Key Tools |
|---|---|---|
| Classic Single Color | Easiest | Paint Brush |
| Ombre Gradient | Easy | Paint Brushes, Damp Sponge |
| Polka Dots / Stripes | Easy | Foam Pouncer, Painter’s Tape |
| Natural Stone Finish | Medium | Sea Sponge, Paper Plate |
| Floral & Leaf Stencils | Easy | Stencils, Stencil Brush or Sponge |
| Faux Mosaic | Medium | Thin Painter’s Tape, Small Brush |
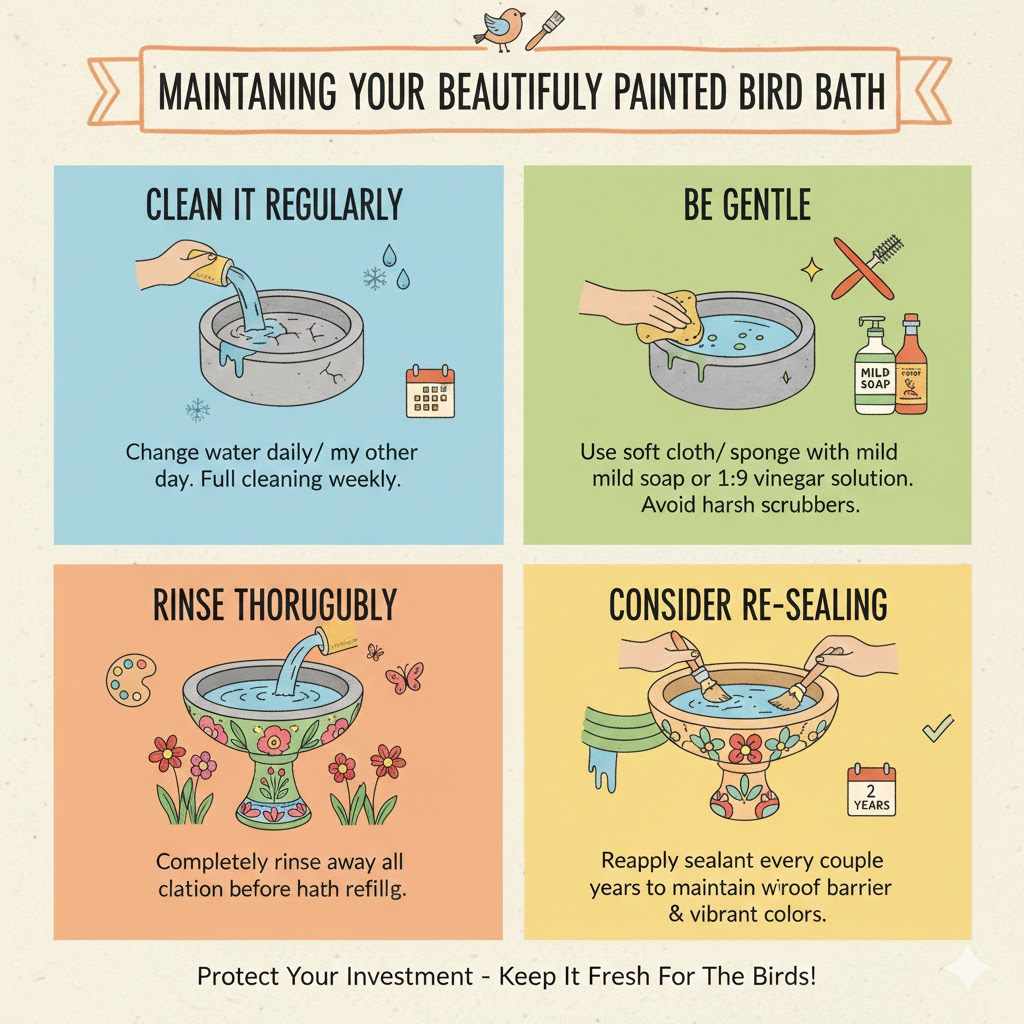
Maintaining Your Beautifully Painted Bird Bath
Your work is done, and your bird bath looks fantastic! Now, let’s keep it that way. Proper cleaning will protect your paint job and keep the water healthy for birds.
- Clean it regularly: Aim to change the water every day or two, and give the bath a full cleaning once a week.
- Be gentle: Don’t use a wire brush or harsh abrasive scrubbers on the painted surface. Use a soft cloth or sponge with a mild soap or a solution of one part white vinegar to nine parts water.
- Rinse thoroughly: Always rinse all cleaning solution away completely before refilling with fresh water.
- Consider re-sealing: Depending on your climate, you may want to apply a fresh coat of sealant every couple of years to maintain the waterproof barrier and keep the colors vibrant.
Frequently Asked Questions (FAQ)
What kind of paint is safe for a bird bath?
The safest paint is a water-based, non-toxic, zero-VOC acrylic or latex paint. Always check the label to ensure it’s certified as non-toxic and safe for use around pets or on children’s items. It is crucial to finish with a bird-safe, non-toxic sealant.
Do I really need to seal a painted bird bath?
Yes, absolutely. A sealant is the most important step for safety and durability. It creates a waterproof barrier that prevents any part of the paint from chipping off or leaching into the water, and it protects your design from sun and weather damage.
How long should I let the paint dry before adding water?
You must let the sealed bird bath fully cure, not just dry. This process takes time. To be completely safe, wait at least 7 to 10 days after applying your final coat of sealant before filling the bird bath with water.
Can I paint the inside of the bird bath bowl?
Yes, you can paint the inside of the bowl, as long as you use the correct non-toxic paint and sealant system described above. In fact, sealing the inside is what protects the main structure and keeps the water clean.
What is the best color to attract birds to a bird bath?
While birds are primarily attracted to the sight and sound of clean, fresh water, some studies suggest they are drawn to natural colors. Shades of blue can mimic clear water, while earthy greens, grays, and browns blend in with the natural environment. However, any color will work as long as the water is kept fresh!
Is spray paint safe for bird baths?
Generally, no. Most standard spray paints contain harsh solvents and high VOC levels that are not safe for birds. You should avoid them unless you find a very specific brand that is a zero-VOC, non-toxic, water-based formula and you seal it thoroughly with a bird-safe clear coat.
How do I clean my painted bird bath without damaging the paint?
Avoid harsh chemicals and abrasive tools like wire brushes. Use a soft cloth or sponge with a gentle soap or a diluted vinegar solution (1 part vinegar to 9 parts water). Gently wipe the surface, rinse completely, and refill with fresh water.
Your Garden, Your Masterpiece
Giving your bird bath a new lease on life is one of the most satisfying DIY projects you can tackle in your garden. It doesn’t take much time or money, but the result is a beautiful, custom piece that adds personality and color to your outdoor space.
By choosing the right safe materials and following these simple steps, you’ve not only created something wonderful to look at but also maintained a safe and healthy spot for your feathered friends to drink and bathe. So go ahead, pick out some colors, and have fun with it. Happy painting, and enjoy the show as the birds start to visit your beautiful new creation!