Building Shelves Between Studs: The Right Way To Do It
Building shelves between studs means you attach them directly to the wall framing. This offers excellent support. You’ll use the wall’s structure to hold up your shelves securely.
It’s a clean look, as no large brackets are usually seen.
What Are Wall Studs and Why Use Them?
Let’s start with the basics. Your walls aren’t just drywall. Inside them, there’s a frame.
This frame is made of studs. These are usually made of wood. They stand up and down.
They give your walls their shape and strength. Drywall is then attached to these studs.
Think of studs as the bones of your house. They hold everything up. This includes your drywall, your cabinets, and yes, your shelves.
When you want to hang something heavy or make something feel really solid, you need to attach it to a stud. This is true for shelves, too.
Using studs for shelves means you’re tapping into that natural strength. It’s like building on a solid foundation. Instead of just screwing into drywall, which can easily tear or give way, you’re screwing into strong wood.
This makes a huge difference in how much weight your shelves can hold.
It also gives a cleaner look. Many shelves need big metal brackets underneath. These can sometimes get in the way or just not match your style.
Shelves built between studs can often sit flush against the wall. They might use small supports or even just rest in clever cutouts. This makes them look like they grew there.
So, why use studs? For strength. For stability.
For a clean finish. It’s the smart way to build shelves that last and look good.
Planning Your Shelf Project
Before you grab any tools, take a deep breath. Planning is your best friend here. It saves you time and stops you from making costly mistakes.
We need to figure out a few things first.
First, where do you want these shelves? Look at the wall. Do you see any outlets or light switches?
You can’t cut into those. Measure the space you have. Think about what you want to put on the shelves.
Books? Plants? Knick-knacks?
This helps you decide how deep and how long the shelves should be.
Next, how far apart should the shelves be? If you’re storing tall books, you’ll need more space. If it’s just decorative items, you can put them closer.
A good rule of thumb is about 10 to 12 inches between shelves. But this can change based on what you’re storing.
Also, think about the style. Do you want them to float? Or have small supports?
Floating shelves look very modern. They make it seem like the shelf is just hanging there. Shelves with small supports are simpler to build.
They feel very sturdy.
You also need to know where the studs are. This is super important. You can use a stud finder tool.
It’s a small gadget that beeps when it finds a stud. You can also tap on the wall. A hollow sound means no stud.
A solid sound usually means there’s a stud.
Once you know where the studs are, you can plan your shelf placement. You’ll want your shelves to be attached to at least two studs. This gives them the best support.
Remember, studs are usually 16 or 24 inches apart. This spacing will guide how long your shelves can be and how many studs you can reach.
Don’t forget about the depth of your walls. Most walls are about 3.5 inches deep. This means your shelves won’t stick out too far.
This is good for small spaces. It keeps things from looking too bulky.
A little planning now saves a lot of trouble later. It makes sure your shelves are strong, look great, and fit your space perfectly.
Tools and Materials You’ll Need
Alright, let’s talk gear. Having the right tools makes any DIY project much smoother. For building shelves between studs, you don’t need a whole workshop.
But you do need a few key items.
First, you’ll need a stud finder. This is a must-have. It helps you locate the wooden studs hidden behind your drywall.
Some are electronic, some are magnetic. Either works fine.
Next, a level. This tool is crucial. It ensures your shelves are straight and even.
A crooked shelf just looks wrong. A level makes sure it looks perfect.
You’ll also need a tape measure. For measuring your space and your materials. And a pencil to mark your lines.
For cutting, a hand saw or a power saw like a circular saw or miter saw will be useful. If you’re buying pre-cut wood, you might skip this. But it’s good to have for adjustments.
You’ll need screws. Make sure they are long enough to go through your shelf material and into the studs. Wood screws are usually best.
Drywall screws can strip easily.
For drilling holes, you’ll need a drill. You’ll want a drill bit for making pilot holes for your screws. Pilot holes stop the wood from splitting.
You might also need a chisel or a utility knife. These are for cleaning up edges or making small adjustments.
For the shelves themselves, you have choices. Common materials include wood, like pine or oak. You can buy planks or boards.
Many hardware stores will cut wood to your size. Plywood can also work, but it might need edge banding.
If you plan on hiding the supports, you might need a router to cut notches. Or strong brackets if you don’t go for a floating look.
Don’t forget safety gear. Safety glasses are a must when cutting or drilling. Gloves can protect your hands.
Make sure you have good light in your work area.
Having these tools ready will make the building process much easier and safer. It’s all about being prepared.
Locating Wall Studs
This is a step you can’t skip. Finding studs is the backbone of building shelves between them. Without knowing where your studs are, your shelves won’t be secure.
Let’s make sure we do this right.
The easiest way is with an electronic stud finder. You turn it on, place it on the wall, and slide it slowly. It usually beeps or shows a light when it finds the edge of a stud.
Most stud finders will find one edge. You might need to go back and forth to find the center. Mark the edges with your pencil.
Then find the center point between those marks. That’s where the stud is.
What if you don’t have a stud finder? You can use the tapping method. Gently tap on the wall with your knuckle.
Listen to the sound. A hollow sound means you’re likely between studs. A solid, dull thud means you’ve hit a stud.
This method takes practice. It’s also best done in areas where you know there’s a stud, like near light switches or electrical outlets.
Another way is to look for nails or screws. Sometimes, you can see small dimples or slight bumps on the drywall where screws or nails were used to attach the drywall to the studs. These are usually spaced about 16 or 24 inches apart.
You can use a small, strong magnet to feel for the nail heads if they’re not visible.
You can also check electrical outlets and light switches. These are almost always attached to a stud. If you’re comfortable with it, you can turn off the power to the outlet or switch.
Then, carefully remove the cover plate. You might be able to see the side of the stud the box is attached to. This can give you a reference point.
Once you find a stud, mark it clearly with your pencil. Then, measure 16 inches over (or 24 inches, depending on your house’s framing) and check for another stud. It’s good practice to confirm the spacing.
Mark all the studs in the area where you plan to put your shelves.
Knowing the exact location of your studs is key. It ensures your shelf supports or the shelves themselves will be screwed into solid wood. This is what makes them strong and reliable.
Quick Stud Finding Tips
Electronic Stud Finder: Easiest and most reliable. Follow its guidance.
Tapping Method: Practice listening for hollow versus solid sounds.
Visual Clues: Look for nail/screw marks on the drywall. They often line up with studs.
Outlet/Switch Boxes: These are typically secured to studs.
Measure Spacing: Once you find one, measure 16 or 24 inches for the next.
Mark Clearly: Use a pencil to mark stud locations. Don’t forget to mark the center.
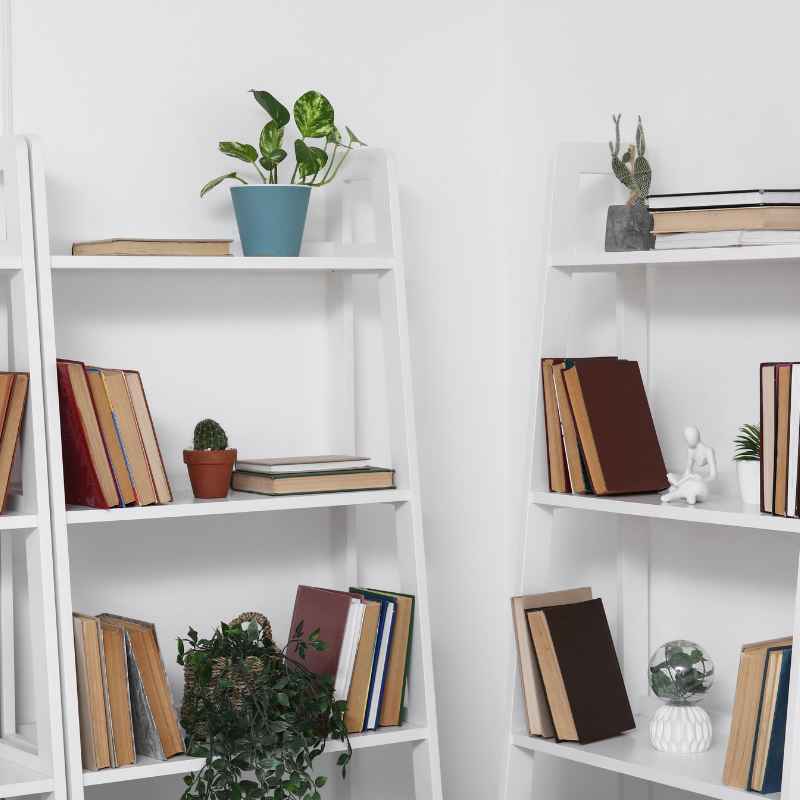
Choosing Your Shelf Style
When you think about shelves between studs, you might picture simple planks. But there are a few ways to do it. Each has its own look and feel.
And some are easier than others.
The most common is the cleat-supported shelf. Here, you attach a piece of wood (a cleat) to the wall, screwed into the studs. Your shelf then rests on top of this cleat.
It’s like a small ledge. It’s very strong and relatively easy to build. You can paint the cleat to match the wall, making it blend in.
Or you can use a nice wood cleat that matches your shelf.
Then there’s the slot-mounted shelf. This looks a bit cleaner. You cut a notch, or slot, into the wall studs themselves.
The shelf then slides into these slots. This method requires more precise cutting. You need to make sure the slots are level and the right depth.
It gives a very sleek, built-in look.
The most popular modern look is the floating shelf. These shelves have hidden supports. Metal rods or a wooden frame are attached to the studs first.
The shelf then slides onto these rods or frame. When done right, it looks like the shelf is just floating there. No visible brackets or supports.
This style can be a bit more advanced, especially if you’re making the floating hardware yourself.
You can also consider shelf brackets. Even though we’re building between studs, you might still want small, decorative brackets. These attach to the studs and support the shelf.
They can add a decorative touch. Think of metal brackets with interesting designs.
The material of your shelf also matters. Solid wood planks, like pine or oak, look classic and strong. You can stain them or paint them.
Plywood can be an option, especially for a painted finish. But the edges of plywood can look unfinished unless you band them with wood veneer or trim.
Think about the overall style of your room. Is it modern, rustic, or traditional? This will help you pick the best shelf style.
And remember your skill level. Some styles are easier for beginners than others. Choose a style that fits your comfort and your vision.
Step-by-Step: Building Cleat-Supported Shelves
This is a great method for beginners. It’s sturdy and looks clean. Let’s break it down into easy steps.
Step 1: Mark Your Shelf Lines. Use your level and pencil. Mark a straight horizontal line on the wall where the bottom of your shelf will be.
Then, measure up for your cleat. A good cleat height is usually about 3 to 4 inches below your shelf line. Mark another line for the top of your cleat.
Step 2: Locate Studs and Mark Cleat Position. Use your stud finder. Find the studs that will be under your shelf.
Mark the center of each stud along your cleat line. The cleat needs to be screwed directly into these studs for support. Make sure your cleat will span at least two studs.
Step 3: Cut Your Cleats. Measure the distance between the studs you’ll be using. Cut pieces of wood for your cleats.
These should be the length you want your shelves to be. Or slightly shorter if you want the shelf to overhang a bit.
Step 4: Attach the Cleats. Hold a cleat against the wall, lining up its top edge with your marked cleat line. Use your level to make sure it’s perfectly horizontal.
Pre-drill pilot holes through the cleat and into the studs. Then, drive screws through the cleat into the studs. Use at least two screws per stud.
Make sure the screws are long enough to get a good grip on the wood stud.
Step 5: Cut Your Shelf Material. Measure the length and depth you want your shelf. Cut your wood plank to size.
If you’re using pre-cut wood, measure and mark carefully. Sand the edges smooth.
Step 6: Attach the Shelf. Place the shelf on top of the cleats. Make sure it’s centered and flush with the back.
From the top of the shelf, pre-drill pilot holes down into the cleat. Drive screws through the shelf and into the cleat. Use screws that are not too long, so they don’t go through the cleat and stick out.
You can also add a couple of screws from underneath, angling them up into the shelf. This makes it super secure.
Step 7: Finishing Touches. Fill any screw holes with wood filler. Let it dry.
Sand the filler smooth. Then, you can paint or stain your shelves. Apply a sealant if needed.
Once dry, your shelves are ready to use!
Cleat Shelf Quick Guide
1. Mark Lines: For shelf bottom and cleat position. Use a level.
2. Find Studs: Mark stud centers where cleat will go.
3. Cut Cleats: To desired shelf length.
4. Attach Cleats: Screw firmly into studs. Ensure level.
5. Cut Shelf: To fit over cleats.
6. Attach Shelf: Screw from top into cleat, or from under.
7. Finish: Sand, fill holes, paint/stain.
Step-by-Step: Building Slot-Mounted Shelves
This method offers a very clean, built-in look. It takes a bit more precision.
Step 1: Locate Studs and Mark Shelf Position. Use your stud finder. Mark the studs where your shelves will go.
Then, decide on the height of your shelf. Use your level to draw a clear, straight line on the wall where the top of your shelf will sit.
Step 2: Mark the Slot Depth. Your wall is about 3.5 inches deep. You want your shelf to stick out a reasonable amount, maybe 6 to 8 inches.
The part of the shelf that goes into the wall (the tenon) should be about 1 to 1.5 inches long. This tenon will sit inside the slot you cut.
Step 3: Cut the Slots in the Studs. This is the trickiest part. You need to cut a slot into the side of the stud.
The slot should be the width of your shelf tenon. You can use a handsaw or a table saw set to the right depth. Carefully make cuts into the stud.
You’ll want to make two parallel cuts, about 1 to 1.5 inches apart, and then chisel out the waste material. Aim for a slot that is about 3/4 inch deep. Make sure the slots are all at the same height and depth on each stud.
Step 4: Prepare the Shelf Tenon. Cut your shelf to its final length and depth. Then, measure the length you want to insert into the wall (the tenon).
You’ll need to cut a piece of wood that fits snugly into the slot you created. The tenon should be the exact width of your slot. You might need to do some test fits and small adjustments with a chisel.
Step 5: Install the Shelf. Gently slide the shelf’s tenon into the slot you cut in the stud. It should be a snug fit.
If it’s too loose, you might need to add a small shim or some wood glue. If it’s too tight, carefully trim it a bit more.
Step 6: Secure the Shelf. Once the shelf is in place, you may want to add a couple of screws from the underside of the shelf into the tenon. Or, if you can access it, a small screw from the side of the stud into the tenon can add extra strength.
The snug fit into the slot does most of the work, but a screw adds peace of mind.
Step 7: Finishing. If you need to fill any gaps, use wood filler. Sand everything smooth.
Paint or stain your shelves to match your room. This method looks very seamless once finished.
Step-by-Step: Creating Floating Shelves
Floating shelves are the epitome of modern design. They look like they defy gravity. This method requires a bit more skill and planning.
Step 1: Build or Buy Floating Shelf Hardware. You can buy floating shelf brackets online or at hardware stores. These are usually metal rods that screw into the studs.
Or, you can build a hidden wooden cleat system. For DIY hardware, you’ll create a wooden box or frame that attaches securely to the studs. This frame will have rods or arms that slide into pre-drilled holes in your shelf.
Step 2: Locate Studs and Mount the Hardware. Use your stud finder. Mark the studs in the wall where your shelves will go.
For store-bought brackets, follow their instructions. They usually involve screwing the bracket base firmly into the studs. For DIY hardware, attach your wooden frame or cleat system securely to the studs.
Ensure it’s perfectly level. This hidden support structure is critical.
Step 3: Prepare Your Shelf. Your shelf needs to have holes drilled into its back edge. These holes must align perfectly with the rods or arms of your hidden bracket system.
The holes should be deep enough to fully accept the rods. For a shelf that’s 8 inches deep, you might drill holes that are 4 to 6 inches deep.
Step 4: Mount the Shelf. Carefully slide the shelf onto the hidden hardware. Ensure it’s pushed all the way back and sits flush against the wall.
The fit should be snug. If it’s wobbly, you may need to add shims or adjust the hardware.
Step 5: Secure the Shelf (Optional but Recommended). Some floating shelf systems include small screws that go up from the bottom of the shelf into the hidden hardware. This prevents the shelf from being accidentally pulled off.
For DIY systems, you might screw up from the bottom of the shelf into the wooden support structure.
Step 6: Finishing. If there are any visible screws or gaps, use wood filler. Sand smooth.
Then, paint or stain your shelf. Floating shelves offer a beautiful, minimalist look.
Floating Shelf Considerations
Weight Limit: Always check the weight limit for your chosen brackets.
Material Choice: Solid wood shelves are best for floating. They are strong and don’t warp easily.
Hole Precision: The accuracy of the holes in the shelf is paramount. Measure twice, drill once.
Stud Engagement: Ensure your hardware is attached to multiple studs for maximum support.
Aesthetic: The beauty of floating shelves is their clean look. Avoid cluttering them.
Considering Shelf Depth and Load Capacity
When building shelves between studs, the depth is a key factor. Most standard walls are about 3.5 inches deep. This means your shelf can’t magically stick out 12 inches on its own.
The support structure, whether it’s cleats, slots, or hidden brackets, uses the wall’s depth.
A typical shelf depth that works well with stud framing is 6 to 8 inches. This is deep enough for most books, decor items, and small plants. If you need deeper shelves, you might have to use a different mounting method, like attaching directly to very sturdy wall anchors, or building a more substantial frame that projects further from the wall.
Now, let’s talk about how much your shelves can hold. This is often called load capacity. It depends on several things.
First, how well the shelves are attached to the studs. Screwing directly into the center of a stud with good quality wood screws is much stronger than screwing into the drywall alone. Using at least two studs per shelf is vital.
Second, the material of the shelf itself. Solid wood shelves are generally stronger than particleboard or thin plywood. The thickness of the shelf material also plays a big role.
A thicker shelf is less likely to sag under weight.
Third, the length of the shelf. Longer shelves are more prone to sagging in the middle, even if they’re well-supported at the ends. For very long shelves, you might need to add a central support or use thicker material.
Fourth, the type of support used. Cleat-supported shelves are very strong. Slot-mounted shelves rely on the strength of the tenon and the stud connection.
Floating shelves’ capacity depends entirely on the hidden bracket system’s strength and how well it’s attached to the studs.
For typical home use, like holding books or decorative items, shelves built between studs should hold a good amount of weight. A common estimate is 15-25 pounds per linear foot for a well-built shelf. However, always err on the side of caution.
If you plan to store very heavy items, like a large collection of encyclopedias or weights, you may need professional advice or a different shelving solution.
Always test your shelves before loading them fully. Place a few heavy items on them and check for any sagging or instability. It’s better to find out then than to have a shelf collapse later.
Shelf Depth & Load Capacity Quick Facts
Typical Wall Depth: ~3.5 inches.
Common Shelf Depths: 6-8 inches for stud-framed walls.
Load Capacity Factors: Stud attachment, shelf material, shelf length, support type.
General Estimate: 15-25 lbs per linear foot (for well-built shelves).
Heavy Items: Consider professional advice or stronger solutions.
Test First: Always test shelves with weight before full loading.
Finishing Your Shelves
The building part is done! Now comes the part that makes your shelves look really polished and professional. Finishing is all about protecting the wood and making it look great.
First, you need to fill any holes. This includes screw holes and any small gaps where pieces of wood meet. Use a good quality wood filler.
For painted shelves, a white or paintable filler works well. For stained shelves, get a filler that matches your stain color or one that takes stain well.
Once the filler is dry, you need to sand everything smooth. Start with a medium-grit sandpaper (like 120-grit). Sand all surfaces of the shelf and any visible parts of the supports.
Pay attention to edges and corners. Then, move to a finer grit sandpaper (like 220-grit) for a really smooth finish. Wipe away all the dust with a tack cloth or a damp cloth.
Now, it’s time to apply your finish. The most common options are paint or stain.
Staining brings out the natural beauty of the wood. Apply the stain with a brush or cloth. Work in the direction of the wood grain.
Wipe off any excess stain after a few minutes. You might need two coats for a deeper color. Let the stain dry completely.
Painting offers a different look. You might need to apply a primer first, especially if you’re using light colors or painting over a dark stain. Apply thin, even coats of paint.
Let each coat dry before applying the next. Two or three coats are usually needed for good coverage.
After staining or painting, it’s a good idea to apply a protective topcoat. This could be a polyurethane, varnish, or a clear wax. This topcoat protects the wood from moisture, scratches, and general wear and tear.
It also gives the shelf a nice sheen, from matte to high gloss.
Apply the topcoat in thin, even layers. Sand lightly between coats with very fine-grit sandpaper (like 320-grit) for a super smooth finish. Make sure to wipe away all dust between coats.
If you’re painting your shelves, consider the finish. A satin or semi-gloss finish is durable and easy to clean. A matte finish can look very sophisticated but might be harder to wipe clean.
Always follow the manufacturer’s instructions for drying times. Good ventilation is also important when working with finishes. A well-finished shelf not only looks great but also lasts longer.
When Are Shelves Between Studs the Right Choice?
So, when should you choose this method? It’s not for every situation, but it excels in many. You’ll find it’s a great option when you want a clean, almost invisible look.
For Modern and Minimalist Designs: If you love that sleek, uncluttered look, building shelves between studs is perfect. Floating shelves especially fit this style. They don’t have bulky brackets to distract the eye.
They make the items on them look like they’re the main focus.
In Small Spaces: In tight rooms or narrow hallways, deep shelves with visible brackets can feel overwhelming. Shelves between studs tend to be shallower. They don’t protrude as much, making the space feel more open.
This is a smart way to add storage without making the room feel smaller.
For Displaying Items: When you want to showcase art, photos, or collectibles, a clean shelf is best. The focus stays on your items, not the hardware. This is why you see this technique used in galleries or high-end retail.
When Wall Integrity is a Concern: If you have very thin drywall or are worried about damaging the wall structure extensively, this method can be less invasive than other heavy-duty shelving systems. You’re utilizing the existing strong points of the wall.
For Decorative Accents: Sometimes, you just want a few shelves for decorative items. You don’t need super heavy-duty support. The strength of the studs is more than enough.
This method makes a subtle yet useful addition to a room.
When You Want Built-In Look: Slot-mounted or well-finished cleat shelves can look like they were part of the original house design. They blend seamlessly with the wall.
However, there are times when this method might not be ideal. If you need to store extremely heavy items, like a massive book collection or tools, you might need more robust shelving systems. Also, if your stud spacing is unusual or you can’t easily locate studs, it can make the project more difficult.
Always consider the specific needs of your project and your DIY comfort level.
When to Worry: Signs of Trouble
Even with the best intentions, things can sometimes go wrong. It’s good to know what to look out for. These are signs that your shelves might not be as secure as they should be.
The most obvious sign is sagging. If your shelves are starting to bend in the middle, that’s a big red flag. This means the material is too weak for the weight, or the supports aren’t strong enough.
Longer shelves are more prone to this.
Another sign is wobbling or looseness. If you gently push on the shelf and it moves or feels unstable, something isn’t right. This usually means the screws aren’t fully gripping the studs, or the shelf isn’t secured tightly to its supports.
Listen for creaking or groaning sounds when you put weight on the shelves. This can indicate stress on the wood or the attachment points. It’s the shelf telling you it’s working too hard.
Look for cracks in the wood, especially around screw holes. This can happen if the wood was over-tightened or if there’s too much weight on it. It means the wood is under strain.
Check if the screws are pulling out of the studs. If you see the head of a screw starting to protrude from the wood, it means the stud might be softer than expected, or the screw isn’t holding anymore. This is a serious sign of potential failure.
Also, consider the weight you’re putting on the shelves. Are you trying to store heavy items that might exceed the shelf’s design capacity? Even the strongest shelves have limits.
If you notice any of these issues, it’s best to address them quickly. Remove the items from the shelf. Re-secure any loose screws.
Add extra supports if possible. For significant sagging or looseness, you might need to rebuild that section of the shelf or reinforce the supports significantly. Never ignore these warning signs.
Warning Signs Checklist
Sagging: Shelf is bending down in the middle.
Wobbling: Shelf moves or feels loose when touched.
Creaking: Noises when weight is applied.
Cracks: Splits or fractures in the wood, especially near screws.
Loose Screws: Screws backing out or not holding tight.
Overloaded: Storing items heavier than the shelf is designed for.
Simple Checks You Can Do
Once your shelves are up and loaded, a few quick checks can give you peace of mind. These are simple things anyone can do.
The Gentle Push Test: After loading your shelves, give them a gentle push. Do they feel solid and fixed? Or do they wiggle?
A solid feel is what you want. If there’s movement, check where they attach to the wall. Are screws tight?
Visual Sag Check: Stand back and look at your shelves from eye level. Are they perfectly straight, or do they have a noticeable dip in the middle? Use a level on top of the shelf to be sure.
A slight dip might be okay if it’s minimal, but a significant curve is not.
Weight Distribution: Look at how you’ve placed your items. Are the heaviest items in the center, or are they spread out evenly? Distributing weight away from the center helps prevent sagging.
Listen Carefully: When you put things on the shelf, or if you bump it, do you hear any unusual noises? A soft creak now and then might be normal, but loud groans are a sign of strain.
Check for Gaps: Look at the seam where the shelf meets the wall or its supports. Is there any daylight showing through? A small gap might be okay, but a large or widening gap could mean the shelf is pulling away.
These checks don’t take long. Doing them every so often, especially after placing new items, can catch problems early. It’s about being proactive with your DIY projects.
Frequently Asked Questions
Can I put shelves between studs if I don’t know where they are?
It’s highly recommended that you locate your studs first. Using a stud finder is the easiest way. Attaching shelves directly to studs provides the necessary strength and stability.
Screwing only into drywall will not support much weight.
How deep can shelves be if they are between studs?
Most interior walls are about 3.5 inches deep. Shelves built using slots or hidden brackets that go into the studs are typically 6 to 8 inches deep. This is a good balance between storage space and not sticking out too far.
What is the best wood to use for shelves between studs?
Solid wood like pine, poplar, oak, or maple are excellent choices. Pine is affordable and easy to work with. Oak and maple are harder woods and very durable.
Plywood can also work, especially for painted shelves, but its edges might need finishing.
Do I need special tools for this project?
You’ll definitely need a stud finder, a level, a tape measure, a pencil, and a drill. For cutting the wood, a hand saw or power saw is needed. For some methods, like slot-mounting, a chisel or router might be helpful.
How much weight can shelves between studs hold?
This varies greatly. A general estimate for well-built shelves attached to studs is 15-25 pounds per linear foot. This depends on the shelf material, its length, and the support method.
Always err on the side of caution and test the shelves.
Can I install shelves on a plaster wall?
Yes, but locating studs in plaster walls can be trickier. You might need a more sensitive stud finder, or you may need to make small exploratory holes. Plaster can also be more brittle, so take extra care during installation.
Final Thoughts
Building shelves between studs is a fantastic way to add storage. It looks clean and feels very secure. By planning carefully and using the right techniques, you can create beautiful, strong shelves.
Remember to find those studs and secure your shelves well. Your home will feel more organized and look much more stylish.