Can You Plane Plywood? Yes, But It Dulls Blades Fast
Yes, you can plane plywood, but only in thin, controlled passes — the glue line between veneers dulls a steel blade in a single sheet, and face veneers on standard sanded plywood run as thin as 1/36 inch before sanding. Push past that margin and you sand through into voids, cross-grain patches, or delamination that no finish can hide. This guide covers how much you can safely remove, which blade actually survives the glue, and the grain-reversal trick that stops tearout on alternating plies.
What Tools Do You Need to Plane Plywood?
Plywood punishes the wrong tool fast. A dull or standard-steel blade doesn’t just cut poorly on plywood — it tears the thin face veneer and burns from friction against the glue line. Here’s what actually holds up:
- A low-angle, bevel-up block plane for edges — the low bedding angle shears through end grain on alternating plies instead of lifting it.
- Carbide-tipped blades for any power planer or jointer — carbide holds an edge roughly 25 to 30 times longer than high-speed steel against plywood’s abrasive resin glue.
- A sacrificial backer board clamped behind the trailing edge to stop blowout at the corners.
- 220-grit sanding block for the final pass once you’re within a hair of the last visible ply.
- A dust mask rated for fine particulate — plywood dust carries formaldehyde-based resin, not just wood fiber.
Best Block Plane Pick for Plywood Edges
 |
JORGENSEN No. 60-1/2 Low-Angle Block Plane A bevel-up, adjustable-mouth block plane sized for edge work on sheet goods.
|
As an Amazon Associate we earn from qualifying purchases.
Why Plywood Planes Differently Than Solid Wood
Solid lumber has one continuous grain direction, so you plane with the grain and you’re done. Plywood is built from an odd number of thin veneers glued with the grain rotated 90 degrees on each layer. That means a plane blade cutting with the grain on one ply is automatically cutting against it on the ply directly beneath — the direction reverses every layer, all the way through the sheet.
That’s why a technique that produces a clean shaving on solid oak can rip a ragged chunk out of plywood one layer down. It isn’t user error most of the time — it’s the material reversing on you mid-cut.
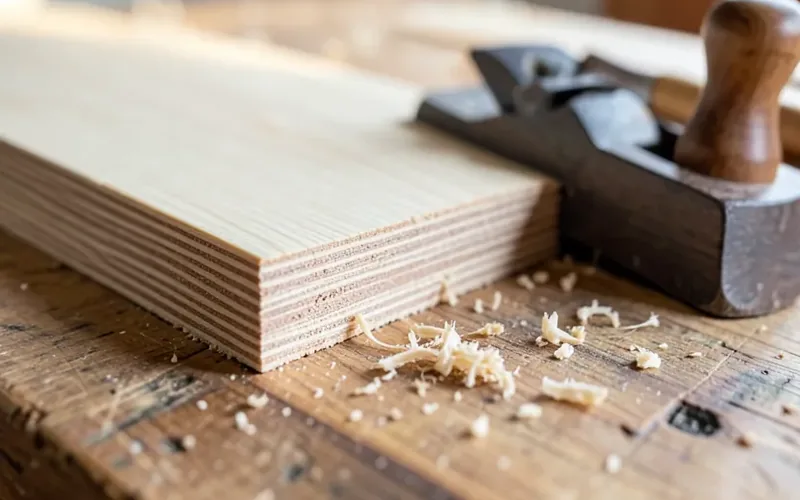
📊 Face veneers on standard sanded plywood are graded C-plugged or better and must be at least 1/10 inch thick before sanding — after sanding, the standard still requires at least 90% of that nominal thickness to remain. — Source: APA – The Engineered Wood Association, Voluntary Product Standard PS 1-22
How to Plane a Plywood Edge Step by Step
- Support the full length: clamp the plywood flat with the edge you’re planing flush to the bench, so it can’t flex and chatter under the blade.
- Run a test pass first: take one light shaving in each direction on a scrap corner. Whichever direction leaves a clean curl instead of a torn flake is the direction to plane in.
- Set a hairline depth: back the blade off until it barely bites — you’re aiming for shavings you can see through, not chips.
- Back up the trailing edge: clamp a sacrificial scrap flush against the far end so the blade has something to cut into instead of blowing out the last inch of veneer.
- Work in short strokes from both ends toward the middle: this keeps the plane from riding off the end grain and splintering the corner, which is where most edge blowout happens.
- Stop the moment you see the next ply’s grain shift: that’s your signal you’re approaching the glue line. Switch to 220-grit sandpaper for the last whisper of material instead of taking another pass.
How Much Can You Plane Off Plywood Before You Hit Trouble?
The honest answer is: less than most people expect. Once the face veneer thins past roughly 90% of its original thickness, per the APA’s own sanded-plywood standard above, you’re gambling with sand-through. Where that leaves you in practice depends on the plywood grade:
| Plywood Type | Typical Face Veneer | Safe Total Removal | Best For |
|---|---|---|---|
| Sanded softwood (BC/CDX grade) | ~1/36″ before sanding | Almost none — already sanded to minimum | Sanding, not planing |
| Hardwood plywood (birch, oak-faced) | 1/32″ to 1/28″ | A few light passes on edges only | Edge fitting, not face flattening |
| Marine/aircraft-grade plywood | 1/24″ or thicker | Slightly more margin on faces | Face leveling in small areas |
| Melamine/veneer-core sheet goods | Paper-thin decorative layer | None — never plane the face | Trim edges only, never the face |
Notice the pattern: 3-ply plywood’s thicker individual veneers give you more forgiveness than a 5- or 7-ply sheet with the same overall thickness, because each layer in a 3-ply sheet simply started out heavier.
Common Mistakes That Ruin Plywood When Planing
Most plywood-planing failures trace back to one of four habits, not a bad tool.
- Planing with a dull blade. A sharp edge shears the alternating grain cleanly; a dull one snags and lifts it, which is what actually causes most tearout — not the plywood itself.
- Taking one deep pass instead of several light ones. Depth is what turns a clean shaving into a torn chunk when the grain direction flips underneath.
- Planing straight through to the far edge without backup. The last half-inch of any cut has nothing behind it to resist the blade, so it blows out unless a backer board is clamped there first.
- Ignoring the good-side rule. Whichever face will show in the finished piece should face down on the bench during heavy planing, so any minor scuffing from clamps or the bench surface lands on the hidden face.
“The number one thing I check before I let a beginner near a plane and a sheet of plywood is blade sharpness — a plane that glides through solid pine will tear plywood apart at the exact same setting if the edge isn’t freshly honed. It’s the single variable that separates a clean edge from a ragged one.”
Sanding After Planing
Sanding after planing is what actually delivers the smooth finish people are after, and our full guide to sanding plywood covers the full grit sequence and edge technique in more depth. Start with 80-grit to knock down any plane marks or minor tear, then move to 120 and finish at 220 for a surface ready for finish.
| Method | Advantage | Trade-off |
|---|---|---|
| Manual sanding block | Better control near edges, less risk of sand-through | Slower on large panels |
| Random-orbit power sander | Covers large faces quickly | Easy to sand through the face veneer if you linger in one spot |
Finishing Edges and Faces After Planing
A freshly planed edge is bare, open wood at every glue line, which makes it the most moisture-prone spot on the whole sheet. Seal it before it sees a shop or a jobsite for long. Wood glue brushed thin into the open plies, or a strip of edge banding, keeps moisture from wicking in and swelling the layers apart. If you’d rather see the plies as a design feature instead of hiding them, our guide on fixing and finishing a plywood edge covers both approaches.
For the faces, oil-based polyurethane or varnish gives the most durable, water-resistant film; a water-based finish dries faster and cleans up easier but needs a couple more coats to match the same protection. Either way, a freshly planed face takes finish more evenly than a sanded one because the pores are cleanly cut rather than clogged with sanding dust.
Frequently Asked Questions
Can you plane plywood effectively?
Yes, but only in light, controlled passes with a sharp blade. Support the sheet fully, test the grain direction first, and stop as soon as you’re within a hair of the next ply — going deeper risks tearing the veneer or sanding through into the core.
Does planing plywood ruin your blades?
It dulls high-speed steel blades fast — the resin glue between plies is abrasive enough to noticeably dull an HSS edge in a single sheet. Carbide-tipped blades resist that wear far longer and are worth the upgrade if you plane plywood regularly.
What tools are best for planing plywood?
A low-angle block plane works best for edges, since its bevel-up design handles the alternating grain direction better than a standard bench plane. For larger surfaces, a power planer with carbide blades removes material faster without dulling as quickly as steel.
How do I prepare plywood for planing?
Inspect the sheet for embedded staples, nails, or screws first — any of these will chip a blade instantly. Clean the surface, clamp it fully flat and supported, and run a test pass on scrap from the same sheet to confirm which direction cuts cleanly before you touch the actual workpiece.
Can you plane the edges of plywood without ruining it?
Yes — edges tolerate planing far better than faces because you’re cutting across the ply stack rather than removing a face veneer. Use light passes, a sharp low-angle block plane, and a backer board at the trailing end to prevent blowout at the corners.
What thickness can plywood face veneer be planed to?
Very little. APA’s PS 1-22 standard requires finished face veneers to keep at least 90% of their nominal thickness after sanding alone, which on standard sanded plywood is often close to 1/36 inch to begin with. Treat any additional planing on the face as a last resort, not a routine step.
Conclusion
Plywood can be planed, but it isn’t solid wood and shouldn’t be planed like it. Sharp, carbide-friendly tools, light passes, and a clear read on which way the grain runs on the outer ply will get you a clean edge without exposing the layers underneath. When in doubt, sand instead of plane — the standard leaves almost no room for error on the face veneer, and a torn edge is far easier to prevent than to fix.
Sponsored / affiliate links. As an Amazon Associate I earn from qualifying purchases. I may earn additional commission from eligible campaigns.