
Can You Restain Engineered Wood Floors? What to Know
Many homeowners wonder, “Can You Restain Engineered Wood Floors? What to Know First” is a common question because engineered wood floors look so much like solid hardwood. Beginners often find it confusing whether restaining is a good idea or even possible.
Don’t worry, it’s simpler than you think to figure this out! This guide will break it down step-by-step so you can make the best decision for your floors.
Understanding Engineered Wood Floors And Restaining
Wood Flooring: Unveiling the Hidden Drawbacks” target=”_blank” rel=”noopener” data-wpil-monitor-id=”19100″>Engineered wood flooring is a popular choice for many homes. It’s made with a thin layer of real wood on top of several layers of plywood or high-density fiberboard. This construction makes it more stable than solid hardwood, especially in areas with changing humidity.
The real wood veneer on top is what gives it the beautiful look of hardwood.
The question of whether you can restain engineered wood floors often comes up when homeowners want to change the color of their floors or refresh a worn look. Solid Hardwood Floors Without Sanding: Easy Hacks” target=”_blank” rel=”noopener” data-wpil-monitor-id=”19103″>hardwood floors can typically be sanded down and restained multiple times. However, engineered wood has a much thinner top layer of hardwood.
This limited thickness is the primary factor determining if and how you can restain it.
The ability to restain depends heavily on the thickness of this top hardwood veneer. If the veneer is too thin, sanding it down to remove the old stain and apply a new one could go through to the plywood core, damaging the floor. This is why knowing the specifics of your engineered wood floor is crucial before considering restaining.
The Veneer Layer Is Key
The hardwood veneer is the most important part of an engineered wood floor when it comes to refinishing or restaining. This is the actual wood you see and feel on the surface. Its thickness varies greatly between different brands and types of engineered wood flooring.
Some veneers can be as thin as 0.5mm (about 1/64 inch), while others can be 3mm (about 1/8 inch) or even thicker.
A thinner veneer means there’s less room for error when sanding. Sanding removes a small amount of wood with each pass. If you sand too much, you’ll remove the veneer entirely.
This would expose the underlying layers, which are typically made of plywood or composite material. These layers are not designed to be stained or to hold up to foot traffic like a hardwood veneer.
When considering restaining, it’s essential to identify the thickness of your floor’s veneer. Manufacturers usually provide this information. Without this knowledge, attempting to sand and restain could lead to irreparable damage.
How Thick Should The Veneer Be?
Generally, for engineered wood floors to be safely sanded and restained, the hardwood veneer should be at least 2mm thick. Veneers between 2mm and 3mm offer a bit more flexibility for light sanding and restaining. If your veneer is 3mm or thicker, you have a much better chance of successfully restaining your floors without issues.
Floors with veneers less than 2mm are usually not suitable for sanding and restaining. In these cases, other methods like recoating or screen-and-recoating might be better options to refresh the look without removing wood material.
To find out the veneer thickness, check the original packaging, the manufacturer’s website, or contact the retailer where you purchased the flooring. If you can’t find this information, it might be best to consult with a flooring professional.
What Happens If The Veneer Is Too Thin?
If the veneer is too thin, attempting to sand it down will likely remove too much material. This can lead to:
- Exposing the plywood or HDF core layers.
- Creating bare spots where the wood color is gone.
- Weakening the floor’s surface, making it prone to damage.
- Irreversible damage that requires replacing the floor.
In such situations, instead of restaining, you might consider recoating the floor with a clear protective layer. This process involves cleaning the surface and applying a new coat of polyurethane or other finishes. It won’t change the color but will refresh the shine and protect the wood.
Another option is screen-and-recoating, which involves lightly abrading the surface and applying a new finish.
The Restaining Process Explained
If you’ve determined that your engineered wood floors have a sufficiently thick veneer and you want to change the color, the restaining process involves several steps. It’s important to approach this carefully, as mistakes can be costly. The general idea is to remove the old finish and stain, prepare the wood, apply a new stain, and then seal it with a protective topcoat.
The process begins with thorough cleaning. Any dirt, grease, or debris must be Hardwood Floors: Ultimate Guide for Spotless Surfaces” target=”_blank” rel=”noopener” data-wpil-monitor-id=”19111″>removed from the floor’s surface. Then, the old finish needs to be removed.
This is typically done by sanding.
After sanding, a new stain can be applied. The choice of stain color is entirely up to your preference. Once the stain is dry, a protective topcoat is applied to seal and protect the new color.
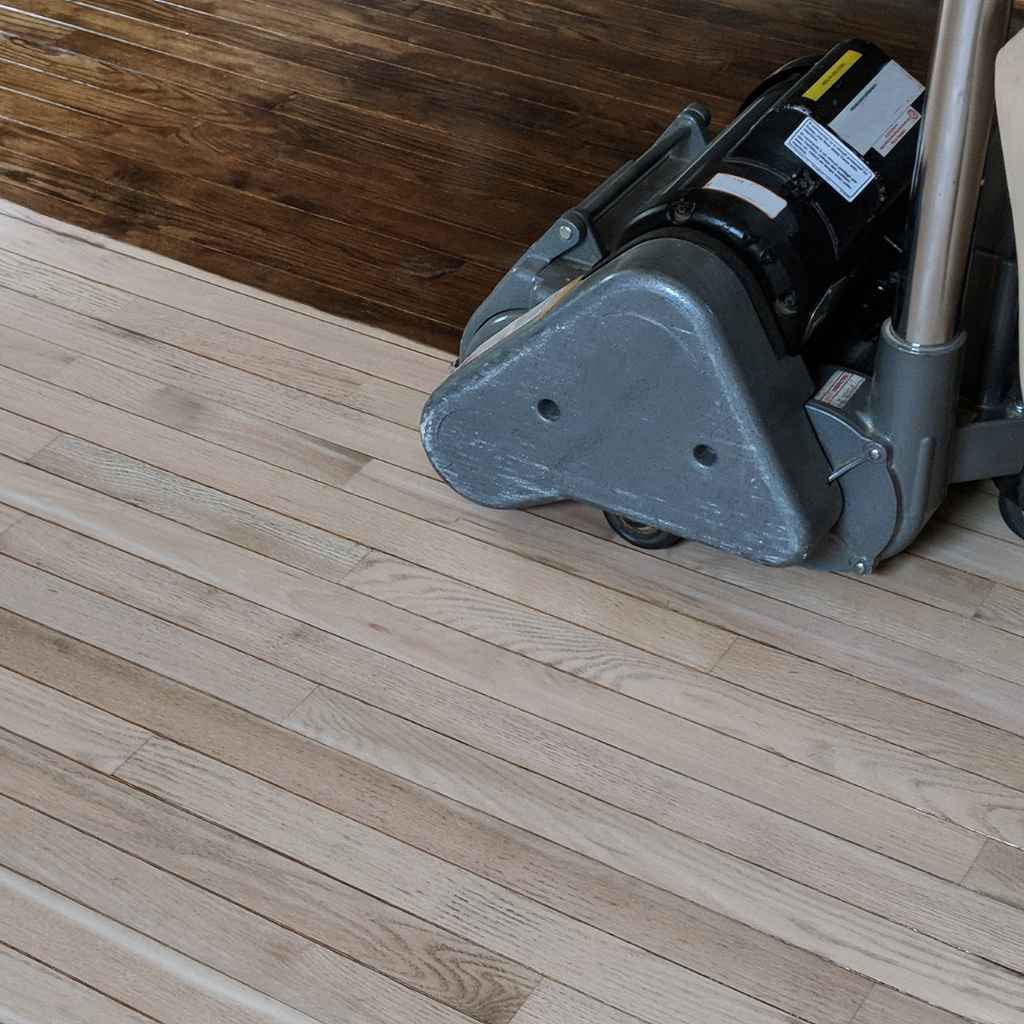
Sanding Engineered Wood Floors
Sanding engineered wood floors is a critical step that requires precision. For restaining, you’ll need to remove the existing stain and finish completely. This is usually done with a drum sander for the main floor area and an edge sander for the perimeter and corners.
You’ll start with a coarser grit sandpaper and gradually move to finer grits to achieve a smooth surface.
The grit progression is important. Typically, you might start with 36-grit sandpaper, then move to 60-grit, and finish with 100-grit or 120-grit sandpaper. Each pass should overlap the previous one slightly.
After sanding, it’s important to vacuum thoroughly to remove all dust.
Given the limited thickness of the veneer, aggressive sanding must be avoided. Professionals often use a buffer with screening pads for engineered wood to minimize the risk of sanding through the veneer. If you are not experienced with floor sanding, it is highly recommended to hire a professional for this step, especially if the veneer is on the thinner side.
Applying New Stain
Once the floor is sanded smooth and dust-free, you can apply the new stain. Choose an oil-based or water-based wood stain according to your preference and the type of finish you plan to use. Oil-based stains tend to offer richer colors and are more forgiving, while water-based stains dry faster and have less odor.
Apply the stain evenly with a high-quality applicator, such as a stain pad or a good brush. Work in small sections, ensuring you maintain a wet edge to avoid lap marks. Wipe off excess stain with a clean cloth after the recommended dwelling time.
The color of the stain will appear lighter as it dries.
Multiple coats of stain can be applied to achieve a deeper or richer color. However, be mindful that each coat adds a slight layer, which might be a concern for very thin veneers.
It’s a good idea to test your stain color on a scrap piece of wood or an inconspicuous area of the floor first. This will help you see how the stain looks on your specific wood species and how it dries.
Sealing The Floor
After the stain has dried completely, it’s time to apply a protective topcoat. This is what gives the floor its sheen and protects the stain and wood from wear, spills, and scratches. Polyurethane is the most common type of finish used for wood floors.
You can choose between oil-based polyurethane, water-based polyurethane, or even a hardwax oil finish. Oil-based finishes are known for their durability and amber tone, which can add warmth. Water-based finishes are clear, dry faster, and have lower VOCs (volatile organic compounds), making them a more environmentally friendly option.
Apply the topcoat in thin, even coats using a high-quality applicator. Allow each coat to dry thoroughly according to the manufacturer’s instructions before applying the next. Typically, two to three coats are recommended for good protection.
Lightly sanding between coats with very fine-grit sandpaper (like 220-grit) or a screen can help ensure a smooth finish and better adhesion of subsequent coats.
When Restaining Isn’t The Best Option
While restaining can refresh your engineered wood floors, it’s not always the right solution. Several factors might make it unsuitable, ranging from the floor’s construction to your desired outcome and budget.
The most significant limitation, as discussed, is the thickness of the hardwood veneer. If it’s too thin, sanding is out of the question. Beyond that, the condition of the floor itself plays a role.
Deep scratches, gouges, or significant wear can be difficult to fully address with just restaining.
Sometimes, the original factory finish on engineered wood floors is very durable and difficult to remove completely with sanding. Trying to force this can lead to uneven results or damage to the wood.
Factors To Consider
Before deciding to restain, consider these points:
- Veneer Thickness: As emphasized, this is the most critical factor. If it’s less than 2mm, avoid sanding.
- Type of Existing Finish: Some factory finishes are extremely hard and may not accept stain well after sanding.
- Damage to the Floor: Deep scratches, dents, or water damage might require more than just restaining.
- Desired Outcome: If you want a dramatic color change or a completely different look, restaining might have limitations.
- Budget: Professional restaining can be costly. Compare this to other options.
If any of these factors are a concern, it’s wise to explore alternative solutions.
Alternative Solutions For Refreshing Floors
If restaining isn’t feasible, you have several other ways to improve the look of your engineered wood floors:
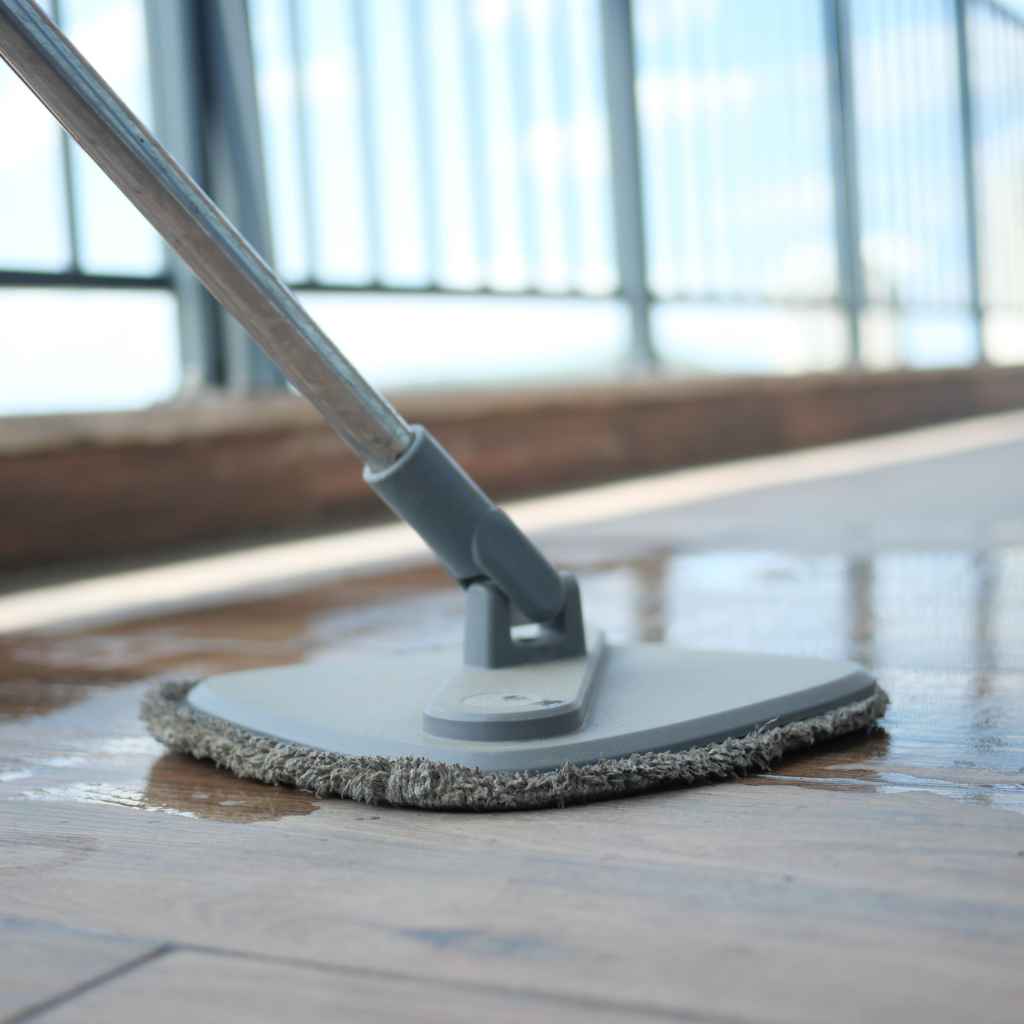
- Recoating: This involves cleaning the floor and applying a new coat of clear finish. It won’t change the color but will restore shine and protect the surface. It’s suitable for floors with minimal wear.
- Screen-and-Recoat: This is a more intensive version of recoating. The floor is lightly abraded with a screen (a flexible abrasive pad) to scuff up the surface, which helps the new finish adhere better. This is good for floors with light scratches and dullness.
- Cleaning and Polishing: For floors with minor dullness and light scratches, a good deep clean followed by a high-quality wood floor polish can make a big difference. Polish adds a protective layer and can fill in very fine scratches.
- Carpet or Rugs: For specific high-traffic areas or to cover up minor imperfections, strategic placement of area rugs can be a simple and effective solution.
- Plank Replacement: If certain planks are severely damaged, it might be possible to replace just those sections. This is a more involved repair but can be cost-effective if only a few planks are affected.
These alternatives can help revive your floors without the risks associated with sanding thin veneers.
Professional Help Versus DIY
Deciding whether to tackle engineered wood floor restaining as a DIY project or hire a professional depends on your comfort level with home improvement tasks, the complexity of the job, and your available time and tools.
Hardwood Floor Restaining: Transform Your Space!” target=”_blank” rel=”noopener” data-wpil-monitor-id=”19113″>Restaining floors can be a rewarding project if you have the right skills and patience. However, it’s also a labor-intensive process with potential pitfalls, especially concerning engineered wood. The risk of damaging the veneer is a significant concern for DIYers.
DIY Considerations
If you decide to go the DIY route for restaining your engineered wood floors, thorough preparation is key. You’ll need to rent or purchase equipment like sanders, edgers, and vacuum systems. You’ll also need to buy stain, brushes, rollers, applicators, and polyurethane finish.
Ensure you understand the type of engineered wood you have, particularly the veneer thickness. Always read and follow the manufacturer’s instructions for all products used.
A common scenario for DIYers is underestimating the amount of dust generated by sanding. Proper dust containment and cleanup are essential. Also, achieving an even stain and a smooth, durable finish requires practice and attention to detail.
A typical DIY restaining project might take a weekend or longer, depending on the size of the area and your experience.
When To Call The Experts
Hiring a professional flooring contractor is often the safest and most efficient choice, especially for engineered wood. Professionals have the experience and specialized equipment to handle the delicate nature of engineered floors.
They can accurately assess the veneer thickness and the condition of your floor. They know which sanding techniques are appropriate and how to avoid damaging the wood. Their expertise ensures a consistent and high-quality finish.
A professional can also offer advice on the best stain colors and finishes for your specific floor and lifestyle. While hiring professionals costs more upfront, it can save you money in the long run by preventing costly mistakes and ensuring a beautiful, long-lasting result.
For instance, a homeowner in a damp climate might need specific types of finishes that a professional can recommend and apply correctly, ensuring the floor withstands humidity changes without issues.
According to the National Wood Flooring Association, professional installation and refinishing services can significantly extend the life of wood floors. While they don’t provide specific statistics for engineered wood restaining versus DIY, the general principle of expert handling applies.
Frequently Asked Questions
Question: Can I restain engineered wood floors if the veneer is very thin
Answer: If your engineered wood floor has a very thin veneer (generally less than 2mm), it is not recommended to sand and restain it. Sanding can easily go through the thin veneer, causing irreversible damage to the underlying layers.
Question: What is the best way to test if my engineered wood floor can be sanded
Answer: The best way to test is to find the manufacturer’s specifications for the veneer thickness. If you cannot find this information, you can try a very gentle sanding test in an inconspicuous area, using the finest grit possible and checking frequently to see how much material is removed.
Question: How long does engineered wood flooring usually last after restaining
Answer: The lifespan after restaining depends on the quality of the work, the thickness of the veneer, and the amount of foot traffic. A properly restained floor with a thick veneer can last many more years, often another 10-15 years or more if well-maintained.
Question: Can I change the color of my engineered wood floors by painting them instead of staining
Answer: While painting engineered wood floors is an option, it’s a different process than staining. Painting covers the wood grain entirely and can be a way to refresh very worn floors with thin veneers. However, paint can be prone to chipping or scratching if not applied and sealed correctly.
Question: What is the difference between recoating and restaining
Answer: Recoating involves applying a new clear protective finish over the existing one to refresh its look and protection. Restaining, on the other hand, involves removing the old finish and stain through sanding and applying a new color of stain before sealing. Restaining changes the color of the wood, while recoating does not.
Summary
You can restain engineered wood floors, but the key is the veneer thickness. Look for veneers of at least 2mm for safe sanding. If it’s thinner, explore recoating or screen-and-recoat options.
Professionals offer the safest route, but DIY is possible with caution. Always know your floor’s specifics before starting!