Can You Spray Paint Glass? Easy DIY Guide
Many people wonder, “Can You Spray Paint Glass? Easy DIY Guide.” It might seem tricky, especially if you’ve never done it before. You might worry about drips or the paint not sticking.
But don’t worry, it’s actually quite simple to get great results with a few easy steps. This guide will show you exactly how to do it. We will walk you through everything you need to know to make your glass items look amazing.
Spray Painting Glass A Simple DIY Project
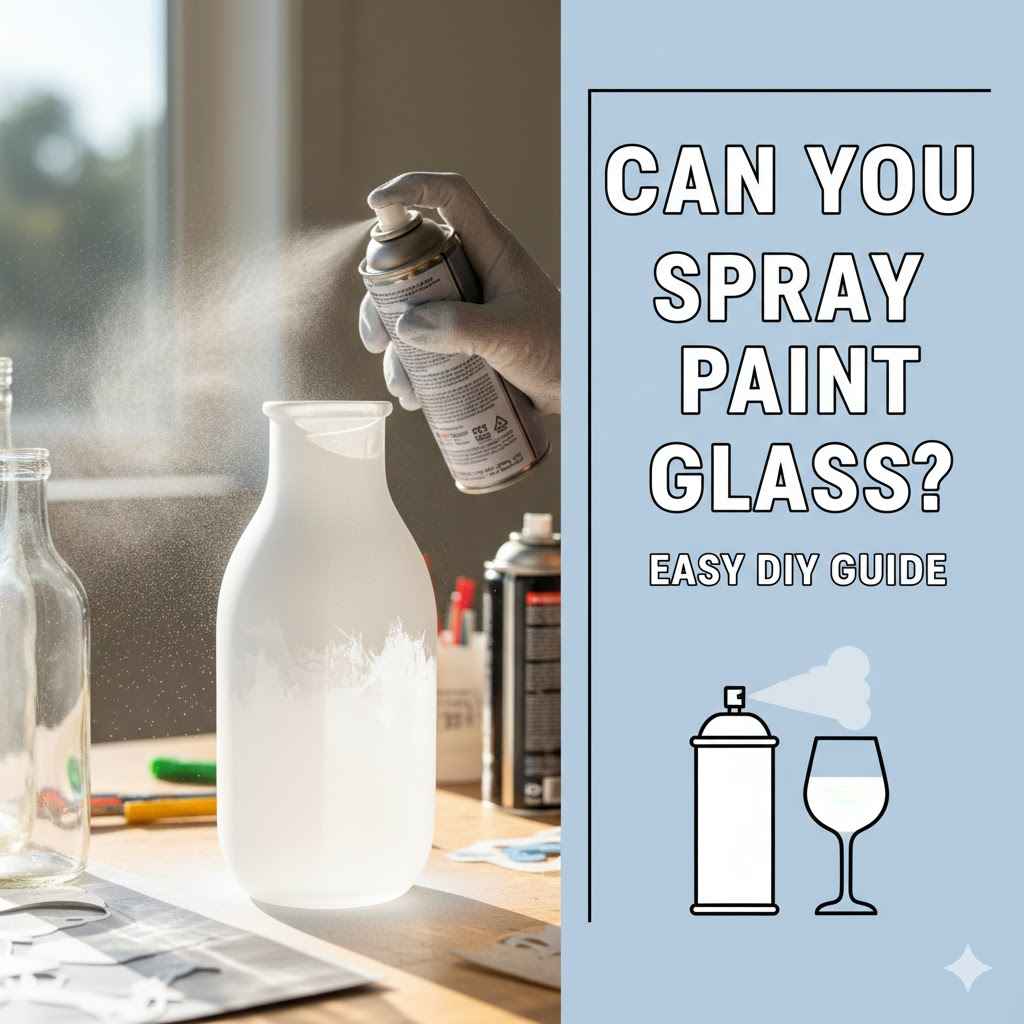
Spray painting glass is a popular way to update old jars, vases, and other decorative items. It’s a project that almost anyone can do, even if they don’t have much crafting experience. The key is to prepare the glass properly and use the right techniques.
This will help you achieve a smooth, even finish that looks professional. You can transform ordinary glass into something special for your home. This section covers the basics of why this is a great project and what makes it accessible to beginners.
Why Spray Paint Glass Is Popular
Spray painting glass is a favorite choice for many DIY enthusiasts because it offers a quick and effective way to change the look of glass items. It is much faster than using a brush and roller, especially for intricate shapes or large surfaces. The spray can allows for a more even coat, reducing the chances of visible brush strokes or drips that can mar the finish.
It’s a budget-friendly option too, letting you refresh existing decor instead of buying new. You can achieve various looks, from a frosted effect to a solid opaque color, with just a few cans of spray paint. This makes it a versatile technique for personalizing your living space and giving old items a new lease on life.
Getting Started With Spray Painting Glass
Before you start, it’s good to know what you’ll need. You’ll want a clean, well-ventilated space to work in. This helps avoid breathing in fumes and ensures the paint dries properly.
Having drop cloths or old newspapers to protect your work area is also important. You will need glass items to paint, of course. Make sure they are clean and dry before you begin.
Choosing the right spray paint is also key. Not all spray paints work well on glass. Special paints designed for glass or multi-surface paints are usually the best choice.
This makes the process smoother and the results last longer.
- Choosing The Right Spray Paint
- Proper Ventilation Is Key
- Protecting Your Workspace
Selecting the correct spray paint is vital for a successful glass painting project. Standard spray paints may not adhere well to the smooth surface of glass. This can lead to chipping, peeling, or a dull finish over time.
Look for paints labeled for use on glass, or multi-surface paints that specifically mention adhesion to non-porous materials like glass. These paints are formulated with special binders that create a strong bond with the glass. Some popular brands offer paints in a wide range of colors and finishes, including matte, satin, glossy, and metallic.
Consider the look you want to achieve when making your selection. For instance, a matte finish can give a softer, more modern look, while a glossy finish adds a touch of elegance.
Ensuring proper ventilation is not just about comfort; it’s about safety. Spray paints contain volatile organic compounds (VOCs) that can be harmful if inhaled in large quantities. Working in an open area, like outdoors or in a garage with the door open, significantly reduces your exposure.
If you must work indoors, open windows and doors wide and consider using a fan to circulate air away from you. Wearing a respirator mask designed for painting will offer additional protection. Good ventilation also helps the paint dry evenly and quickly, preventing dust from settling on the wet surface and ruining your finish.
A fresh flow of air allows the solvents in the paint to evaporate properly.
Protecting your workspace is essential to avoid a messy cleanup. Glass painting can create overspray, where tiny paint particles land on surfaces surrounding your project. Lay down a drop cloth, old newspapers, or cardboard on the floor and any nearby furniture.
This is especially important if you are working indoors. If you are painting something small like a jar, you can place it on a piece of cardboard that is larger than the item itself. This way, any drips or overspray will land on the protected area.
Cleaning up spills and overspray from other surfaces can be very difficult, so taking this preventive step will save you a lot of trouble and keep your project area looking neat and tidy.
Preparing Your Glass For Spray Painting
The success of your spray-painted glass project hinges on proper preparation. Skipping steps here can lead to paint that doesn’t stick well or looks uneven. This section details how to get your glass surfaces ready for a flawless finish.
We’ll cover cleaning, degreasing, and how to get the best adhesion. Following these steps ensures your painted glass looks fantastic and lasts a long time.
Cleaning The Glass Surface
The first step in preparing your glass for spray painting is to clean it thoroughly. Any dirt, dust, fingerprints, or residues on the surface can prevent the paint from adhering properly. This can lead to splotchy coverage, peeling, or an uneven finish.
You want a perfectly smooth canvas for your paint to stick to. A clean surface is the foundation of a durable and beautiful painted piece. This step ensures the paint bonds directly to the glass, not to any dirt or grime.
Start by washing the glass item with warm, soapy water. Use a mild dish soap and a clean cloth or sponge. Gently scrub the entire surface, paying attention to any crevices or textured areas.
Rinse the item thoroughly with clean water to remove all soap residue. After rinsing, dry the glass completely with a lint-free cloth. Paper towels can leave behind small fibers, so a microfiber cloth is often the best choice.
Ensure there are no water spots left behind, as these can also affect the paint’s adhesion.
For an even more thorough cleaning, especially on items that might have grease or oil residues, use rubbing alcohol. After washing and drying with soap and water, wipe down the entire glass surface with a cloth or cotton pad dampened with rubbing alcohol. This will help to remove any lingering oils or residues that the soap might have missed.
Let the alcohol evaporate completely; it dries very quickly. This degreasing step is crucial for ensuring the spray paint has a clean surface to grip onto. A truly clean surface is paramount for long-lasting results.
Degreasing For Optimal Adhesion
Degreasing is a critical part of preparing glass for spray paint. Glass can easily pick up oils from our hands, from cleaning products, or even from the air. These oils act as a barrier, preventing the paint from sticking directly to the glass.
Even if the glass looks clean, microscopic oil residues can be present. Proper degreasing ensures the paint can form a strong chemical bond with the glass surface, which is essential for durability and a smooth finish. Without this step, your paint job might start to peel or chip soon after you finish.
Rubbing alcohol, also known as isopropyl alcohol, is an excellent degreaser for glass. You can find it at most drugstores or supermarkets. Use a concentration of 70% or 91% for best results.
Dampen a clean, lint-free cloth or a cotton ball with the rubbing alcohol. Wipe down the entire surface of the glass item you intend to paint. Make sure to cover all areas where the paint will be applied.
After wiping with alcohol, allow the glass to air dry completely. The alcohol evaporates quickly, leaving behind a clean, oil-free surface.
Another effective degreasing method involves using a mixture of water and white vinegar. Combine equal parts water and white vinegar in a spray bottle. Spray this solution onto the glass and wipe it down with a clean cloth.
Vinegar is acidic and helps to break down grease and mineral deposits. After using the vinegar solution, rinse the glass with clean water and dry it thoroughly with a lint-free cloth. Some people also use specialized glass cleaners, but ensure they do not leave any oily residues behind.
The goal is always to achieve a pristine surface free from any contaminants that could interfere with paint adhesion.
Sanding Or Priming Glass
For most spray painting projects on glass, especially with the right type of paint, sanding or priming isn’t strictly necessary. However, there are situations where it can improve adhesion and durability. If you are using a paint that is not specifically designed for glass or if you want an extra-strong bond, a light sanding can help.
It creates a slightly rougher surface for the paint to grip onto. For certain finishes, like creating a frosted look or applying very dark colors, a primer can be beneficial.
If you decide to sand, use very fine-grit sandpaper, around 220-grit or higher. You can do this dry or wet. Wet sanding can help reduce dust and give a smoother result.
Lightly sand the entire surface of the glass you plan to paint. The aim is not to scratch the glass deeply, but just to create a very fine profile. After sanding, it’s crucial to clean the glass again thoroughly to remove all dust particles.
A final wipe-down with rubbing alcohol is recommended to ensure no dust or oils remain.
Priming can be a good option if you’re painting over dark glass or if you want to ensure a consistent color application. There are spray primers specifically designed for non-porous surfaces like glass. Apply a thin, even coat of primer and let it dry completely according to the product instructions.
Once the primer is dry, you can proceed with your spray paint. Some people choose to use a clear glass etching spray or spray frosting as a base layer. This can give a unique textured effect before applying color.
For most simple spray painting jobs, skipping primer and just using a good quality glass paint is perfectly fine.
The Spray Painting Process Step By Step
Now that your glass is clean and ready, it’s time to apply the paint. This step-by-step guide will walk you through the process of spray painting glass. We’ll cover how to hold the can, how to apply the paint evenly, and tips for avoiding common mistakes.
Following these instructions will help you achieve a smooth and professional-looking finish on your glass items. Get ready to transform your ordinary glass into something beautiful.
Applying The First Coat
Shake the spray paint can vigorously for at least one minute before you start. This ensures the paint and propellant are well mixed, which is essential for an even spray. Hold the can upright and about 8-12 inches away from the glass surface.
Keep the can moving in a steady, sweeping motion, overlapping each stroke by about half. This technique helps prevent drips and ensures even coverage. Avoid spraying in short bursts, as this can lead to uneven application and potential runs.
Start spraying off the edge of your object and move across it, continuing the motion past the opposite edge before releasing the trigger. This helps to avoid puddles of paint at the start and end of each stroke. Apply a light, even coat.
It is much better to apply multiple thin coats than one thick coat. A thick coat is more likely to run and drip, and it may not cure properly, leading to a less durable finish. Allow the first coat to dry for the time recommended on the spray can, which is usually about 10-15 minutes.
The surface should feel dry to the touch but may still be slightly tacky.
If you notice any areas that look thin or uneven after the first coat, don’t worry. Subsequent coats will help to build up coverage. The goal of the first coat is to lay down a base layer of paint.
It might not look perfect, and that’s okay. Just focus on an even application without any heavy drips. If you do get a drip, you can carefully wipe it away with a lint-free cloth dampened with a little mineral spirits or the recommended solvent for your paint, and then reapply a light coat to that area once it’s dry.
Building Up Layers For Coverage
After the first light coat has been applied and allowed to dry for the recommended time, you can begin building up additional layers. This is where you’ll achieve full opacity and a smooth, consistent color. Continue to shake the can periodically between coats to keep the paint mixed.
Maintain the same distance from the glass and the same sweeping motion as before.
Apply each subsequent coat thinly and evenly. Again, aim for about 8-12 inches distance. Overlap your strokes by about half.
Allow each coat to dry for the time specified on the can, typically 10-15 minutes. Patience is key here; rushing the process by applying coats too soon can cause the wet paint to react with the layer underneath, leading to bubbling or wrinkling. This can ruin your finish and require you to start over.
The number of coats needed will depend on the color of your glass item, the color of the spray paint, and the opacity of the paint itself. Lighter colors or paints with lower opacity might require more coats to achieve full coverage. Darker colors might cover more quickly.
You will see the coverage improve with each layer. Inspect the glass from different angles as you work to ensure you haven’t missed any spots. The final coat should provide a solid, uniform color without any streaks or bare patches.
If you’re going for a translucent or stained-glass effect, you’ll use fewer coats.
Drying And Curing Time
Once you’ve applied your final coat of spray paint, it’s time for the drying and curing process. This is a crucial phase for the durability of your painted glass. “Drying” refers to the paint becoming touch-dry, while “curing” means the paint has hardened completely and formed a permanent bond with the surface.
The curing process can take longer than you might expect.
The drying time between coats is usually around 10-15 minutes, but the full curing time can range from 24 hours to several days, or even a week, depending on the type of paint and environmental conditions like humidity and temperature. During the curing period, the paint is still vulnerable. Avoid touching, moving, or cleaning the painted glass too much.
Handle it carefully by its unpainted areas if possible.
To ensure proper curing, keep the painted glass in a dry, temperate environment. Avoid extreme temperatures or high humidity, as these can slow down or prevent the paint from hardening properly. Once the paint is fully cured, it will be much more resistant to scratches, chips, and water.
Many spray paints for glass will mention the curing time on the can. Always refer to the manufacturer’s instructions for the most accurate information. Proper curing is what makes your beautiful spray-painted glass project last.
Tips For A Professional Finish
Achieving a professional-looking finish when spray painting glass is all about attention to detail and using the right techniques. Even beginners can get great results by following a few key tips. This section offers advice to help you avoid common pitfalls and make your painted glass items look like they were professionally done.
Let’s elevate your DIY projects with these expert tips.
Using Stencils For Designs
Stencils are a fantastic way to add intricate designs, patterns, or text to your spray-painted glass. They allow you to create clean, sharp edges that would be difficult to achieve freehand. You can buy pre-made stencils or create your own using cardstock or stencil vinyl.
For glass projects, it’s often best to use stencils that adhere well to the surface to prevent paint from bleeding underneath.
Place your stencil firmly onto the glass surface where you want the design. Use painter’s tape to secure the edges, especially if the stencil isn’t self-adhesive. When spraying over a stencil, use very light coats of paint.
This minimizes the risk of paint seeping under the stencil edges. It’s often recommended to “dust” the area with paint rather than applying a heavy coat. You can also hold the spray can at a slight angle away from the stencil edge to direct the spray away from the opening.
Once you’ve applied the desired number of light coats and the paint is slightly tacky but not wet, carefully remove the stencil. If you wait until the paint is fully dry, you risk pulling the stencil off with it, potentially ruining the design. Peeling the stencil slowly and at an angle can help.
For very intricate stencils, you might even consider using a spray adhesive on the back of the stencil. This helps it stick better without leaving residue. Experimenting with different stencil types and application methods will help you find what works best for your project.
Creating Special Effects
Beyond solid colors, spray paint can be used to create a variety of stunning effects on glass. These techniques can add depth, texture, and a unique artistic flair to your projects. Experimenting with different methods can lead to truly one-of-a-kind decorative pieces.
Think about the look you want to achieve before you start.
Frosted Glass Effect: This can be achieved using a specialized frosted glass spray paint. Apply it in light, even coats. For a more subtle effect, you can also achieve a similar look by lightly sanding the glass or using a spray sealant that has a matte finish.
Some craft stores sell etching creams that can permanently frost glass, which can then be spray painted.
Ombre or Gradient Effect: To create a smooth color transition, start with your base color and spray the lightest shade at the top, gradually moving to the darker shade at the bottom. Overlap the colors slightly as you spray. Blend the transition by spraying back and forth with both colors where they meet.
This requires practice and patience to get a seamless blend.
Distressed or Antiqued Look: After the paint has fully dried, you can lightly sand certain areas to reveal the glass underneath, giving an aged or distressed appearance. Another method is to apply a base coat, let it dry, then apply a second coat of a contrasting color. While the second coat is still wet, use a crumpled rag or sponge to dab at the surface, lifting some of the paint to reveal the base color beneath.
Seal the finished effect with a clear coat.
Dealing With Mistakes
Mistakes happen, but they don’t have to ruin your project. The key is to know how to fix them. Most spray paint errors on glass can be corrected with a little effort and the right approach.
Drips and Runs: If you notice a drip while painting, stop immediately. If the paint is still wet, you can try to gently smooth it out with a brush or cloth. If it has already started to set, you might need to let it dry completely, then carefully scrape off the drip with a razor blade or putty knife held at a low angle.
Once removed, you can lightly sand the area and reapply a thin coat of paint. For larger runs, it might be best to wipe away the affected area with a solvent recommended for your paint (like mineral spirits or acetone, but test first) and repaint.
Uneven Coverage: If you have missed spots or have patchy coverage, simply apply another thin coat of paint. Ensure the previous coat is dry enough according to the can’s instructions before applying the next. Two or three thin coats are always better than one thick, uneven one.
Inspect your work in good light and from different angles.
Paint Not Sticking: If you find the paint is peeling or not adhering well after drying, it usually means the glass wasn’t properly cleaned or degreased, or you used the wrong type of paint. In this case, you may need to remove all the paint using the appropriate solvent or by soaking in hot, soapy water, and then start over with proper preparation. Always use a paint specifically designed for glass or a multi-surface paint known to work on non-porous surfaces.
Can You Spray Paint Glass? Easy DIY Guide Recap
Frequently Asked Questions
Question: What kind of spray paint should I use on glass
Answer: For the best results, use spray paints specifically designed for glass or multi-surface paints that mention adhesion to non-porous materials. These contain special binders for better adhesion.
Question: Do I need to sand glass before spray painting
Answer: For most projects using the right paint, sanding isn’t necessary. However, light sanding with fine-grit paper can improve adhesion if you want an extra-strong bond or are using a paint not specifically for glass.
Question: How many coats of spray paint do I need on glass
Answer: It typically takes 2-3 thin coats for full coverage. The exact number depends on the paint color, opacity, and desired finish. Always apply light, even coats and let each dry properly.
Question: Can I wash spray-painted glass
Answer: Once fully cured (which can take several days), most spray-painted glass items can be gently hand-washed. Avoid abrasive cleaners or scrubbing, and do not put them in the dishwasher.
Question: How long does spray paint take to dry on glass
Answer: Spray paint is usually touch-dry in about 10-15 minutes between coats. However, full curing, where the paint hardens and becomes durable, can take anywhere from 24 hours to a week.
Wrap Up
You absolutely can spray paint glass. This easy DIY guide shows it’s a simple process. With proper cleaning, the right paint, and careful application, anyone can achieve beautiful results.
Just remember to prepare well, paint in thin layers, and allow ample drying time for a lasting finish. Enjoy your newly decorated glass items.