Can You Tint Polyurethane With Stain? Here’S What Happens
It’s a question many DIYers and woodworkers ask: can you mix wood stain directly into polyurethane to get a custom color? You want that perfect, warm hue for your project. Maybe you’ve seen products that seem to do it.
It sounds like a shortcut to a beautiful finish. But what actually happens when you try?
Let’s dive into this. We’ll look at how it works. We’ll also talk about why it might not be the best idea.
Understanding the materials is key. This will help you get the best look for your wood.
You can tint polyurethane with some types of stain, but it’s often not recommended for a durable, professional finish. Oil-based stains can work to a degree, but water-based stains usually don’t mix well and can cause issues with the polyurethane’s curing and clarity. Specialized tinting agents or wood dyes mixed into polyurethane are safer bets for custom colors.
The Science Behind Polyurethane and Stain
Polyurethane is a type of plastic. It forms a hard, protective layer on wood. It comes in different types.
Oil-based polyurethane uses solvents. Water-based polyurethane uses water. Both offer protection.
But they behave differently.
Wood stain is different. Its main job is to color the wood. It soaks into the wood fibers.
Stain also comes in oil-based and water-based types. There are also gel stains. Gel stains sit more on the surface.
The way these two materials interact is important. Polyurethane is a film-forming finish. Stain is a coloring agent.
Mixing them means you are putting the color into the protective layer. This is different from stain soaking into the wood itself.
Think of it like paint. Paint has pigment mixed into a binder. This binder dries to form a coat.
When you mix stain into polyurethane, you are essentially making a tinted clear coat. This tinted coat then dries and hardens.
Why Mixing Stain and Polyurethane Seems Like a Good Idea
It’s easy to see the appeal. You want to color your wood. You also want to protect it.
Why not combine these steps? It feels like you’re saving time. You might also think you’re saving money.
Imagine you have a small table. You want it to match your floor. The floor has a specific shade of brown.
Finding a pre-mixed stain that matches perfectly can be hard. So, you think, “I can just add some stain to my polyurethane.”
This approach can be tempting. You can control the color. You can adjust it little by little.
You don’t need to buy a separate stain and then a clear coat. It feels efficient. Many people have tried it.
Some even get results they like.
But it’s crucial to understand the risks. The finish might not last. The color might not be what you expect.
The application can be tricky. We need to look at what actually happens during the process.
What Happens When You Mix Oil-Based Stain with Polyurethane
When you mix an oil-based stain into oil-based polyurethane, you might have some luck. Oil-based products generally play well together. The stain is an oil-based product.
The polyurethane is also oil-based. They have similar chemical bases.
The stain’s pigments can disperse into the polyurethane. This creates a colored liquid. As this dries, it forms a colored film.
This film provides both color and protection.
However, there are still downsides. The pigments in the stain might not mix perfectly. They can clump up.
This can lead to an uneven color. You might see streaks or a cloudy look. It won’t be as clear as a true stain.
Also, the drying time might change. Stains have their own drying properties. Polyurethane has its own.
Mixing them can make the drying process unpredictable. The finish might not harden as well. It could remain soft for longer.
The color itself might be different than expected. Stain colors wood by soaking in. When you mix it into polyurethane, the color sits on top.
It won’t have the depth of a true stain. It might look more like a thin coat of paint.
Oil-Based Stain + Polyurethane: The Mix
Pros:
- Can create a tinted finish.
- Uses existing materials.
- Oil-based products are somewhat compatible.
Cons:
- Pigments may not disperse evenly.
- Risk of streaks, cloudiness, or splotches.
- Finish may not cure properly.
- Color lacks depth.
- Can be hard to apply smoothly.
What Happens When You Mix Water-Based Stain with Polyurethane
Mixing water-based stain with polyurethane is much more problematic. Water and oil do not mix. Many oil-based polyurethanes are not compatible with water.
Even some water-based polyurethanes can have issues.
If you try to mix a water-based stain into an oil-based polyurethane, you’ll likely see separation. The water in the stain will not blend with the oil. It can cause the polyurethane to become lumpy.
It might even curdle.
This mixture will be very hard to apply. It won’t flow smoothly. It will likely ruin your finish.
You’ll end up with a mess. The protection will be compromised. The color will be uneven and ugly.
If you are using a water-based polyurethane, you might think water-based stain will work. Some water-based stains might mix with water-based poly. But it’s still not ideal.
The same issues of pigment clumping can occur. The clarity of the polyurethane can be lost.
Water-based stains are designed to penetrate wood. They have different binders and solvents than polyurethane. They are not meant to be mixed into a film-forming finish.
The results are often disappointing. You risk damaging your project.
Water-Based Stain + Polyurethane: A Risky Mix
Common Problems:
- Separation: Water and oil don’t mix.
- Curdling: The mixture can become lumpy and unusable.
- Poor Adhesion: The finish might not stick well.
- Uneven Color: Pigments clump, causing splotches.
- Reduced Durability: The protective layer is weak.
Recommendation: Avoid this combination. Use products made for tinting.
The Problem with Pigments
Wood stains use pigments to color. These pigments are solid particles. They are suspended in a liquid carrier.
The carrier is either oil or water. When you apply stain, the carrier evaporates. The pigments are left behind on or in the wood.
Polyurethane also has a carrier. This carrier (solvent or water) evaporates. This leaves behind the polyurethane resin.
This resin hardens to form a protective film.
When you mix stain into polyurethane, you are mixing solid pigment particles into the polyurethane resin and its carrier. These pigment particles are not designed to dissolve. They are meant to sit on the wood fibers.
In polyurethane, these pigments can stay suspended. But they might not stay evenly suspended. They can settle out over time.
They can also clump together. This is like trying to mix sand into water. The sand settles.
It doesn’t disappear.
This uneven distribution leads to a poor finish. You won’t get a smooth, consistent color. The clarity of the polyurethane is also lost.
Polyurethane is meant to be clear or have a slight amber tint from oils. Adding pigments makes it opaque or semi-opaque.
The pigments can also interfere with how the polyurethane cures. They might block the chemical reactions needed for the polyurethane to harden properly. This can result in a soft, sticky, or easily damaged surface.
This is the opposite of what you want from a protective coating.
What About Gel Stains?
Gel stains are different from liquid stains. They are thicker. They have a jelly-like consistency.
This is because they contain more solids. They are designed to stain more on the surface.
Some people have success using gel stain in polyurethane. The thicker nature of gel stain might help it disperse better. It might also be less likely to cause the polyurethane to separate.
However, the same issues still apply. Gel stain pigments can still clump. The finish can still lack depth.
The durability might be affected. It’s still not the ideal method for coloring polyurethane.
If you want to try this, use it on a small, inconspicuous area first. Test it thoroughly. See how it applies.
Let it cure completely. Then, try to scratch it or test its durability. This will show you if it’s a good option for your project.
My Own Experience Trying to Tint Polyurethane
I remember working on an old wooden chair. I wanted it to have a richer, darker color. I had a can of oil-based polyurethane and some oil-based dark walnut stain.
I thought, “Why not mix them?” It seemed so logical at the time.
I took a small amount of polyurethane. I added just a tiny bit of stain. I stirred it well.
It looked like a nice, brownish liquid. I was hopeful. I applied the first coat to the chair leg.
It looked okay.
But when the coat started to dry, I noticed something odd. It wasn’t drying evenly. Some spots looked darker than others.
It was splotchy. I thought maybe I just needed a better stir or a thinner coat.
I applied a second coat. This time, I stirred the mixture constantly while I worked. It helped a little.
But the finish still wasn’t smooth. It had a dull, uneven look. It didn’t have the clear, deep color I was hoping for.
The worst part came later. The finish felt a bit soft. It wasn’t as hard as I expected.
I accidentally bumped the chair. A small chip appeared. It wasn’t the durable, beautiful finish I wanted.
It felt like a wasted effort.
That experience taught me a valuable lesson. Sometimes, the shortcut isn’t the best way. Using products as they are designed is usually safer.
It leads to better, more lasting results. I learned to respect the different roles of stain and polyurethane.
My Chair Project: What I Learned
- Initial Idea: Mix oil-based stain into oil-based polyurethane for color.
- Process: Added stain to polyurethane, stirred well.
- Application: First coat looked okay, but dried unevenly.
- Second Coat: Stirred constantly, improved slightly but still splotchy.
- Result: Finish lacked depth, felt soft, and chipped easily.
- Key Takeaway: DIY mixing is risky; proper products yield better results.
Better Ways to Tint Polyurethane
Since mixing stain directly into polyurethane is often problematic, what are the better options? Fortunately, there are several. These methods are designed to work.
They give you good color and a strong finish.
One excellent option is using specialized polyurethane tints. These are made specifically for this purpose. They are compatible with polyurethane.
They disperse evenly. They don’t harm the finish’s integrity.
These tints come in liquid or paste form. You add a small amount to your polyurethane. Mix it well.
You can often buy them in various colors. They allow you to achieve custom shades without risking the finish.
Another great method is using wood dyes. Dyes are different from stains. Dyes are transparent.
They have color that is absorbed by the wood itself. They don’t contain solid pigments that can clump. They provide a deep, rich color.
You can apply a dye to your wood first. Let it dry completely. Then, you apply clear polyurethane over it.
This gives you the best of both worlds: deep color from the dye and strong protection from the polyurethane.
You can also get dye concentrates. These can sometimes be mixed into polyurethane. Always check the product label.
Ensure it’s safe to mix. Some dye manufacturers make compatible products.
Finally, consider tinted polyurethanes. Some brands sell polyurethane that is already tinted. These are ready to use.
They offer color and protection in one step. You choose the color you want from their selection. This is a very reliable option.
Recommended Tinting Methods
1. Specialized Polyurethane Tints
What: Additives made to color polyurethane.
Why: Even dispersion, maintains finish strength, custom colors.
2. Wood Dyes
What: Transparent colorants that soak into wood.
Why: Deep, rich color; apply before clear polyurethane.
3. Tinted Polyurethanes
What: Pre-mixed polyurethane with color.
Why: Easy to use, reliable color, good protection.
Understanding Wood Dyes vs. Stains
It’s helpful to know the difference between dyes and stains. This understanding helps you choose the best method for your project. Both color wood, but they do it differently.
Wood Stains contain pigments. These are fine particles of color. They sit on top of the wood or fill the pores.
They can obscure the wood grain a bit. They offer some protection on their own, but usually need a topcoat.
Stains are good for a more opaque look. They can also help hide imperfections in the wood. They change the surface color more than they color the wood itself.
Wood Dyes are transparent. They have colorants that are dissolved. They penetrate deep into the wood fibers.
Dyes don’t usually hide the wood grain. Instead, they enhance it. They give the wood a deep, rich, almost glowing color.
Dyes offer very little protection. They are purely for color. You always need to put a clear topcoat over a dyed surface.
This topcoat could be polyurethane, varnish, or lacquer.
When you want a custom color, using a dye first is often best. You can mix dyes to get almost any shade. Then, you apply a clear polyurethane.
This gives you the best of both worlds. You get the depth of dye and the protection of polyurethane.
Applying a Tinted Finish: Tips for Success
No matter how you tint your polyurethane, application is key. A good application ensures a smooth, even finish. A bad one can ruin even the best product.
First, prepare your wood well. Sand it smoothly. Start with a coarser grit and move to finer grits.
Remove all dust. A clean surface is crucial for any finish.
If you are using a specialized tint or dye mixed into polyurethane, test it first. Always do a test piece. This is a scrap piece of the same wood.
It lets you see the color. It also lets you practice your application.
Mix thoroughly. Whether you’re using a tint, dye, or tinted polyurethane, mix it very well. Make sure the color is evenly distributed.
Stir slowly to avoid introducing too many air bubbles.
Apply thin coats. It’s better to apply multiple thin coats than one thick coat. Thin coats dry faster.
They flow out better. They are less likely to sag or drip.
Use a good quality brush or applicator. For oil-based polyurethane, a natural bristle brush works well. For water-based, use a synthetic brush.
You can also use foam applicators or sprayers.
Work in a well-ventilated area. Polyurethane can have strong fumes. Make sure you have good airflow.
Wear a respirator if needed.
Allow each coat to dry properly. Read the product instructions. Drying times vary.
Rushing this step can cause problems with adhesion and curing.
Lightly sand between coats. After a coat is dry, lightly sand it with very fine grit sandpaper (like 220 or 320 grit). This knocks down any dust nibs.
It also helps the next coat adhere better. Wipe away all dust after sanding.
Application Checklist
- Wood Prep: Sand smoothly, remove all dust.
- Test First: Always test on a scrap piece.
- Mix Well: Ensure color is evenly distributed.
- Thin Coats: Apply multiple light layers.
- Use Right Tools: Choose appropriate brushes or applicators.
- Ventilation: Work in a well-ventilated space.
- Dry Time: Let each coat cure as directed.
- Sand Between Coats: Lightly sand for smooth adhesion.
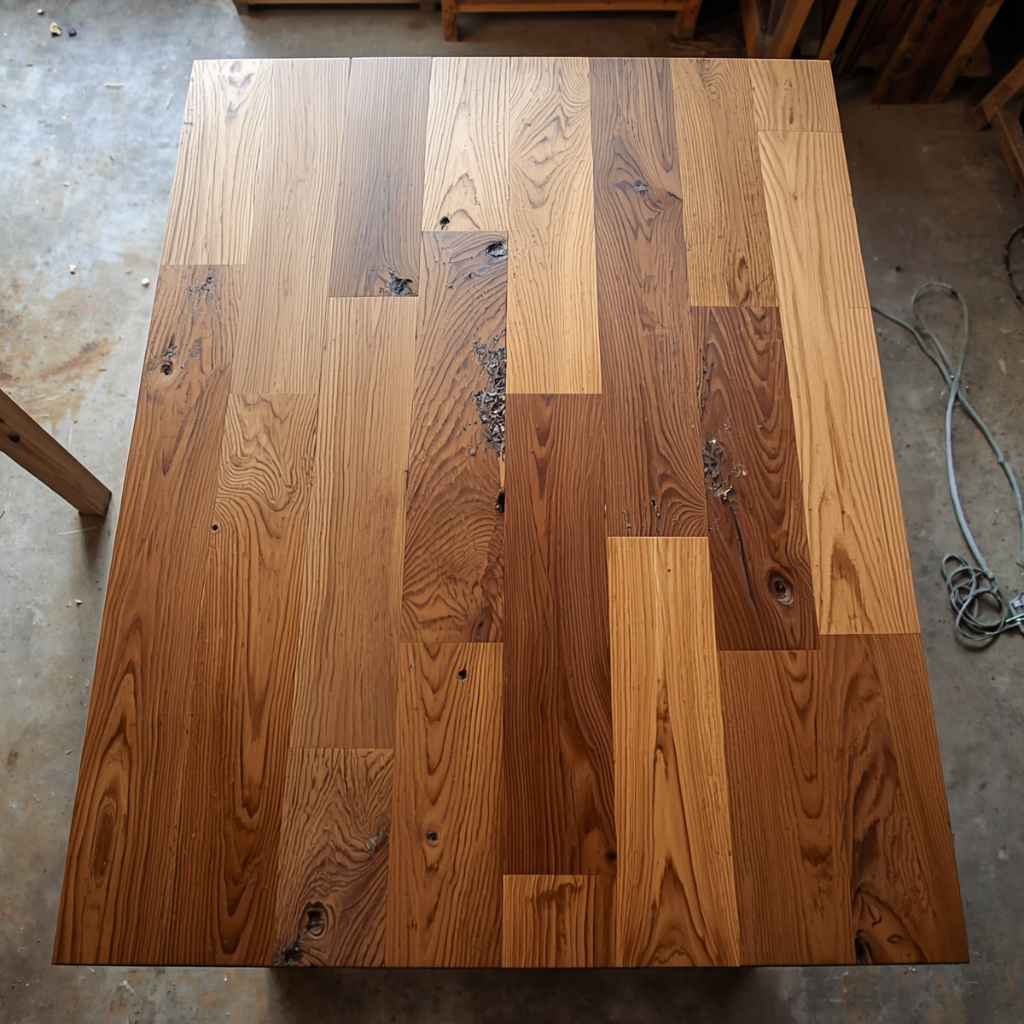
Real-World Scenarios: Where Tinted Finishes Shine
Tinted finishes are not just for hobbyists. They are used in many professional settings. They offer custom looks for furniture, cabinets, and floors.
Furniture Restoration: Imagine a vintage table. The original finish is worn. You want to restore it but give it a slightly different color.
A tinted polyurethane can achieve this. It adds color and protection. It can match existing decor better.
Cabinet Refacing: Homeowners often want to update their kitchens. Refacing cabinets can involve staining or painting. But sometimes, a tinted polyurethane is the perfect solution.
It can provide a subtle color change. It offers durability for high-traffic areas.
Flooring: While rare, some specialty flooring applications might use tinted finishes. This is usually for decorative purposes. It allows for unique color designs.
However, commercial floor finishes are often very specific.
DIY Projects: For home decor items, shelves, picture frames, or custom furniture, a tinted finish can make a project stand out. It allows for personal expression. It turns a simple piece of wood into something unique.
The key in these scenarios is usually using a product made for tinting. This ensures the finish performs as expected. It lasts a long time.
It looks good. It’s about balancing aesthetics with durability.
What This Means for Your Project
So, can you tint polyurethane with stain? The short answer is: it’s usually not the best idea, especially if you want a professional, durable result. While you might get a color with oil-based stain and oil-based polyurethane, the risks are high.
You risk an uneven finish. You risk poor adhesion. You risk a finish that doesn’t cure properly.
This means it won’t protect your wood well. It might chip or scratch easily.
For water-based products, mixing with stain is even worse. It can lead to a ruined batch of finish. You might also damage your wood piece.
What does this mean for you? It means you should rely on tested methods. Use products designed for tinting polyurethane.
This includes specialized tints, wood dyes applied before clear coats, or pre-tinted polyurethanes.
These methods offer predictable results. They ensure the durability and beauty of your project. They save you from potential frustration and wasted materials.
It’s about choosing the right tool for the job.
When Is a Tinted Finish Normal?
A tinted finish is considered normal when it’s achieved using products specifically designed for tinting. This includes:
- Specialty tints mixed into clear coats.
- Pre-mixed tinted polyurethanes or varnishes.
- A clear topcoat applied over a wood dye.
These methods are common in woodworking and furniture making. They provide custom colors without compromising the finish’s integrity.
When Should You Worry?
You should worry if you are:
- Mixing standard wood stain directly into polyurethane without using a tinting product.
- Seeing separation, curdling, or unusual textures in your mixture.
- Experiencing uneven drying, streaking, or a dull appearance after application.
- The finish feels soft, sticky, or easily scratches after a normal curing period.
These are signs that the mixture is not behaving correctly. The finish may fail prematurely.
Simple Checks for Tinted Finishes
After applying a tinted finish, do these checks:
- Visual Inspection: Look for an even color. Check for streaks or splotches.
- Hardness Test: Gently try to scratch a hidden area with your fingernail after a few days. It should not dent easily.
- Water Test: Place a damp cloth on a small area for an hour. If the finish turns white or cloudy, it’s not fully cured or has issues.
- Durability Test: If possible, subject a test piece to normal wear and tear.
Quick Fixes and Tips for Tinted Polyurethane
If you’ve mixed stain into polyurethane and it’s not looking right, here are some things to consider. Often, the best “fix” is to remove it and start over.
If the color is uneven:
- Thin Coats are Key: If you haven’t applied many coats yet, try applying very thin coats. Use a good quality brush. Feather your strokes. This might help blend it a bit.
- Sanding Might Help: Lightly sand the affected areas with fine-grit sandpaper. Then, apply another very thin, even coat. This might help smooth out minor inconsistencies.
If the finish is soft or sticky:
- Check Ventilation: Ensure good airflow. Sometimes, poor ventilation slows curing.
- Humidity: High humidity can slow drying and curing.
- Patience: Some finishes take days or even weeks to fully cure. Be patient.
- The Bad News: If it remains soft after a long time, the pigments likely interfered with curing. You may need to strip it.
General Tips for Success:
- Read Labels: Always read the product labels. Follow manufacturer instructions.
- Use the Right Type: Match oil-based with oil-based. Match water-based with water-based.
- Small Amounts First: When experimenting, use tiny amounts of tint. Add more as needed.
- Stir, Don’t Shake: Stir polyurethane slowly to avoid bubbles. Shaking introduces air.
- Clean Up: Clean tools immediately after use. Mineral spirits for oil-based. Soap and water for water-based.
Frequent Questions About Tinting Polyurethane
Can I mix any color stain into polyurethane?
It is generally not recommended to mix standard wood stains directly into polyurethane. Oil-based stains might mix somewhat with oil-based polyurethane, but water-based stains will likely cause separation. For best results, use specialized polyurethane tints or wood dyes.
What happens if I mix water-based stain into oil-based polyurethane?
Mixing water-based stain into oil-based polyurethane will likely cause the mixture to separate, curdle, or become lumpy. Water and oil do not mix well, and this incompatibility can ruin the finish, making it impossible to apply smoothly or achieve a durable coat.
How much tint should I add to polyurethane?
When using specialized polyurethane tints or compatible dyes, start with a very small amount. A general guideline is to add tint gradually until you achieve your desired color. Always test on a scrap piece first.
Too much tint can affect the polyurethane’s clarity and curing properties.
Can I use alcohol-based wood dye in polyurethane?
Alcohol-based dyes are generally not mixed directly into polyurethane. Dyes are typically applied first, and then a clear polyurethane topcoat is applied over the dry dye. Always check the dye and polyurethane manufacturer’s recommendations before mixing any products.
Will mixing stain change the polyurethane’s finish (e.g., gloss, satin)?
Adding colorants, especially pigments from stains, can sometimes affect the sheen of the polyurethane. It may make a gloss finish appear more like a satin or even a matte finish. Specialized tints are designed to minimize this impact, but it’s good to test your mixture.
Is a tinted polyurethane finish less durable than clear polyurethane?
If tinted using appropriate methods (specialized tints or dyes), a tinted polyurethane finish can be just as durable as a clear one. However, if you improperly mix standard stain, the pigments can interfere with the polyurethane’s curing, making the finish less durable and more prone to damage.
Final Thoughts on Tinting Your Wood Finish
Achieving a custom wood color is exciting. You want your project to look just right. While the idea of mixing stain into polyurethane is tempting, it’s usually best avoided.
The risks of a poor finish are too high.
Instead, explore the many proven methods available. Use specialized tints, wood dyes, or pre-tinted polyurethanes. These products are designed to work.
They give you beautiful, durable results. Your project deserves a finish that lasts.