Woodworking Projects for Teens: 10 Real Skill-Builders
The best woodworking projects for teens sit in the gap between a kid’s birdhouse kit and an adult’s weekend furniture build — real tools, real measuring, and a finished piece worth showing off, without needing a fully stocked shop. Below are 10 projects sized for a teenager’s skill level and supervision needs, from a one-hour phone stand to a full weekend outdoor chair, plus the tool and safety guidance parents and shop teachers actually need before handing over a drill.
Quick Answer
Good teen woodworking projects use real tools — a cordless drill, miter box or circular saw, clamps — but stay small enough to finish in one sitting. Start with a floating shelf or phone stand, work up to a cutting board or planter box, and save multi-joint builds like an Adirondack chair for a teen with a few finished projects behind them and an adult supervising any power tool cut.
What Makes a Project Right for a Teen’s Skill Level
Teens sit in an awkward middle ground. They’re past the glue-and-popsicle-stick stage covered in our woodworking projects for kids guide, but most haven’t built up the shop time an adult hobbyist has. A project that’s right for a teen usually has three things going for it: it uses at least one real tool (a drill, a miter box, maybe a circular saw), it can be finished in a single afternoon or one weekend, and it produces something the teen actually wants — a phone stand, a skateboard rack, a chair for their room — not just a practice cut.
If a school project is the goal rather than a hobby build, see our easy wood projects for students list instead — it’s built around materials and timelines that fit a class period. For general technique — joinery, measuring, wood movement — our woodworking projects and tips guide covers the fundamentals every skill level needs.
10 Woodworking Projects for Teens
These are ordered roughly by difficulty, from a one-hour beginner build to a full weekend project. Pick based on tool access and how much direct supervision is realistic, not just age — a 13-year-old who has done a few builds can often handle more than a 17-year-old picking up a drill for the first time.
1. Floating Wall Shelf with Hidden Brackets
A single board mounted on concealed floating-shelf hardware looks like it’s magic-mounted to the wall. It’s a genuinely useful first project because every step transfers to bigger builds later.
- What it teaches: finding studs, using a level, and basic load-bearing sense (why the bracket has to go into a stud, not just drywall)
- Difficulty & time: beginner, 1–2 hours
- Tools & materials: a 1×8 or 1×10 board, a hidden floating-shelf bracket kit, a cordless drill, stud finder, level, and sandpaper — see our guide on finding and building into wall studs for the mounting part
- Safety note: low-risk — a drill and a level, no blades involved. A teen can do this one solo once shown how to set the drill’s clutch.
2. Edge-Grain Cutting Board
Gluing up strips of hardwood into a cutting board is the project that teaches flat, square, and food-safe all at once — and it’s something the whole family will actually use.
- What it teaches: gluing and clamping pressure, sanding through the grits, and food-safe finishing
- Difficulty & time: beginner-intermediate, a few hours plus overnight glue cure
- Tools & materials: hardwood strips (maple or walnut), wood glue, bar clamps, a random-orbital sander, and food-safe mineral oil or board butter — check our wood finishing guide for which finishes are actually food-safe
- Safety note: if an adult squares up the strips on a table saw or jointer first, a teen can safely handle every remaining step — gluing, clamping, sanding, and finishing — without power tools.
3. Adjustable Phone & Tablet Stand
A small stand with an angled slot to prop up a phone during homework or a video call is fast, cheap, and genuinely useful on a desk.
- What it teaches: angle cutting and measuring a slot to a specific width (kerf width matters here)
- Difficulty & time: beginner, 1–2 hours
- Tools & materials: a scrap piece of hardwood, a miter box or miter saw, sandpaper, and wood finish
- Safety note: the hand miter box version needs no supervision; if a power miter saw is used instead, an adult should make the angled cuts or supervise directly.
4. Skateboard or Longboard Wall Display Rack
A wall-mounted rack that holds a deck horizontally (or vertically, truck-side out) turns a skateboard into room decor when it’s not in use — a genuinely popular teen build.
- What it teaches: dowel-fit joinery, spacing layout math, and wall-mount hardware selection
- Difficulty & time: intermediate, 2–3 hours
- Tools & materials: pine or plywood, wooden dowels or peg hooks, a cordless drill, stud finder, and wood finish or paint
- Safety note: standard drill safety applies; check hardware weight ratings before mounting so the rack can’t pull out of the wall.
5. Passive Wooden Phone Speaker
A solid block of wood with a carved channel and a slot for a phone acoustically amplifies the speaker — no batteries, no electronics, just shaped wood. It’s the most STEM-flavored build on this list.
- What it teaches: how acoustic horns amplify sound (real physics, not just woodworking), precise measuring, and carving or routing a curved channel
- Difficulty & time: intermediate, 2–3 hours
- Tools & materials: a solid hardwood block, a coping saw or rotary tool for the channel, sandpaper, and wood finish
- Safety note: a rotary tool or scroll saw needs direct adult supervision; the channel can also be carved by hand with chisels for a lower-risk version.
6. Compartment Desk Organizer & Charging Dock
A multi-slot organizer with a cutout channel for a charging cable keeps a desk from turning into a tangle of cords — a project a teen will actually use every day.
- What it teaches: box joinery, measuring multiple compartments to fit specific items, and planning a cable-routing cutout before cutting
- Difficulty & time: intermediate, half a day
- Tools & materials: plywood or 1×4 boards, wood glue, a pocket-hole jig, a cordless drill, sandpaper, and finish
- Safety note: standard drill and glue-up safety; no blades required if boards are pre-cut to size at the store.
7. DIY Wooden Chess & Checkerboard
Gluing up alternating strips of light and dark wood into an 8×8 grid is as much a math exercise as a woodworking one — every square has to land the exact same size or the pattern breaks.
- What it teaches: precision layout, grain-direction planning, and the geometry of dividing a board into equal squares
- Difficulty & time: intermediate, half a day plus glue cure
- Tools & materials: two contrasting wood species (maple and walnut are classic), a table saw or miter box for strips, wood glue, clamps, a sander, and finish
- Safety note: ripping strips on a table saw is an adult job; a teen can handle every step after the strips are cut — arranging the pattern, gluing, sanding, and finishing.
8. Cedar Garden Planter Box
A simple butt-joint box scaled up for the garden or patio is a great first outdoor build — and one that has to survive weather, which raises the stakes on finishing correctly.
- What it teaches: outdoor-rated joinery, weatherproofing and finishing for exterior use, and basic power-tool cutting
- Difficulty & time: intermediate, 2–4 hours
- Tools & materials: cedar boards (naturally rot-resistant), a circular saw, exterior wood screws, a cordless drill, and an exterior finish — see our guides on waterproofing the inside of a planter box and choosing wood for outdoor furniture
- Safety note: circular saw cuts need direct adult supervision — this is not a solo power-tool project for most teens.
9. Simplified Adirondack-Style Outdoor Chair
The biggest build on this list. An Adirondack chair has angled seat slats, curved arms, and enough individual pieces that it forces real project planning — a cut list, a build order, and patience.
- What it teaches: angled cuts, assembling multiple joints in sequence, and planning a multi-day project from a cut list
- Difficulty & time: advanced (for this list), a full weekend
- Tools & materials: cedar or pine boards, a circular saw, a cordless drill, exterior screws, wood glue, clamps, and an exterior finish
- Safety note: significant power-tool use throughout — an adult should be present for every cut, not just checking in periodically. This is the project to save for a teen with several finished builds behind them.
10. Wall-Mounted Coat & Cap Rack with Dowel Pegs
A board with a row of angled dowel pegs makes a simple, good-looking rack for coats, backpacks, or baseball caps — and it’s an easy one to give as a gift.
- What it teaches: drilling straight, evenly spaced holes and glue-in dowel joinery
- Difficulty & time: beginner, 1–2 hours
- Tools & materials: a 1×4 or 1×6 board, wooden shaker pegs or dowels, a cordless drill with a matching bit, wood glue, and finish
- Safety note: low-risk; the main skill is drilling straight holes at a consistent angle, which is good practice for later projects.
Tools and Safety for Teen Woodworkers
Most of the risk in teen woodworking comes from power tools, not hand tools — and most of the value comes from learning to use both correctly. Here’s how to think about which tools fit which stage.
Which Tools Fit Which Stage
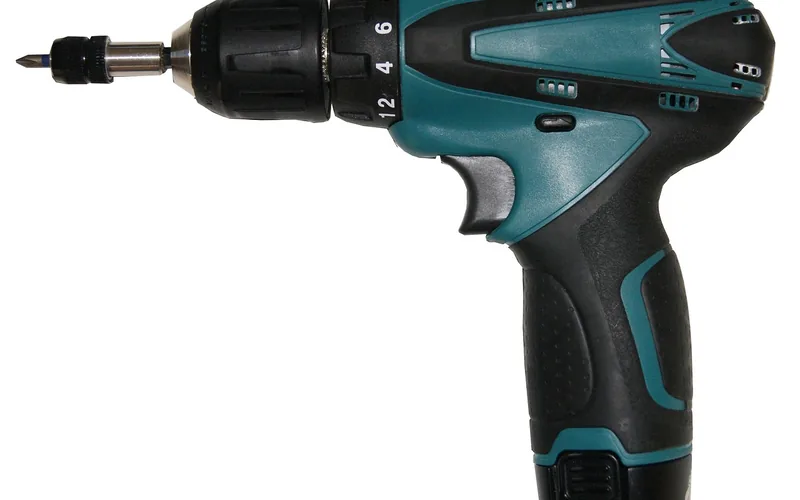
Start with hand tools: a hand saw, miter box, hammer, screwdriver, clamps, and sandpaper build real skill with low injury risk. Holding the workpiece steady matters as much as the tool in hand — a simple shop-built woodworking vise gives a teen a safer, hands-free grip for sawing and chiseling than clamps alone. A cordless drill/driver is usually the first power tool worth introducing — it has none of the kickback risk of a saw and is useful in almost every project above. Circular saws, miter saws, table saws, and rotary tools are a different category entirely and should stay adult-operated or adult-supervised until a teen has demonstrated consistent care with lower-risk tools first. For a full rundown of what each saw type is actually for, see our woodworking tools and saws guide.
Supervision Guidelines for Power Tools
“Supervision” means different things for different tools. For a drill, that can mean showing the technique once and checking in periodically. For a circular saw, table saw, or miter saw, it means an adult is present and watching for every single cut — not just present in the room. Most emergency-room woodworking injuries in teens involve a blade tool used without anyone else present, not a hand tool. If a project above calls for a circular saw or table saw and no adult is available, swap in the hand-tool alternative (a miter box instead of a miter saw, hand-cut strips instead of a table saw) rather than skipping supervision.
Personal Protective Equipment
Safety glasses are non-negotiable for any cutting, sanding, or drilling — sawdust and wood chips are the most common minor injury, and they’re the easiest to prevent. Hearing protection matters for anything with a motor (sanders, saws, routers). Snug-fitting clothes and tied-back hair keep loose fabric away from spinning bits and blades; skip gloves around drills and saws specifically, since loose glove fabric can catch in a bit or blade in a way bare hands won’t.
A Solid Starter Drill for Teen Projects
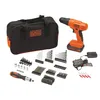
BLACK+DECKER 20V MAX POWERCONNECT Cordless Drill Driver Kit
A cordless drill/driver is the one power tool that shows up in almost every project on this list — this kit bundles a full bit and socket set so there’s nothing extra to buy for most beginner builds.
- Best for: a teen’s first power tool — low kickback risk, adjustable clutch to prevent stripped screws
- Why we picked it: a recognizable brand with widely available replacement batteries and bits, and a clutch setting that’s forgiving for a first-time user
- Main drawback: it’s a drill/driver, not an impact driver — fine for the projects above, but not built for driving long deck screws all day
Shop Class, STEM, and Why Woodworking Sticks With Teens
A lot of what makes these projects work as woodworking also makes them work as informal STEM practice. Cutting a chessboard grid into equal squares is fraction and division practice with a visible result. Shaping a passive speaker’s sound channel is acoustics, not just carving. Planning a cut list for an Adirondack chair is project management in miniature — sequencing, materials estimating, and catching mistakes before they’re expensive.
That overlap is exactly why shop classes still exist in a lot of high schools, and why a teen who’s already had shop class will move through the list above faster than one starting from zero. Either way, the skills transfer: a teen who can measure accurately, read a tape measure to a sixteenth of an inch, and follow a multi-step build sequence has a head start whether they stick with woodworking as a hobby or just need to hang a shelf someday.
Frequently Asked Questions
What age can teens start woodworking?
Most teens can start hand-tool woodworking — saws, hammers, sandpaper, clamps — around age 12–13 with basic instruction. Power tools like drills typically follow once a teen has shown consistent care with hand tools, and blade tools like circular saws or table saws are usually reserved for older teens working directly alongside an adult.
Do teens need supervision with power tools?
Yes, for anything with a blade. A cordless drill can often be used with periodic check-ins once a teen knows the basics, but circular saws, table saws, miter saws, and routers need an adult physically present for every cut, not just nearby. If supervision isn’t available for a specific tool, swap in the hand-tool version of that step instead.
What’s a good first woodworking project for a teenager?
A floating wall shelf or a phone stand are the easiest starting points — both use basic tools, take under two hours, and don’t require any blade tools. They also teach measuring and finishing skills that carry into every later project.
What tools should a teen woodworker own first?
A hand saw, a miter box, a cordless drill/driver, a set of clamps, sandpaper in a few grits, and safety glasses cover most beginner projects. A circular saw is a reasonable next step once a teen is comfortable with the basics and has adult supervision available.
Can woodworking count as a school or shop class project?
Yes — several projects above, especially the chessboard, the desk organizer, and the planter box, work well as shop class or STEM-fair projects since they involve measurable skills like geometry, joinery, and material planning that translate to a rubric or write-up.
How much does it cost to start woodworking as a teen?
The beginner projects on this list — the shelf, phone stand, or coat rack — can each be built for under $20 in materials if a family already owns basic hand tools. A starter cordless drill kit is the main upfront cost, typically $30–80, and covers nearly every project on this list going forward.
Conclusion
The right woodworking project for a teen isn’t about age so much as tool access and supervision — a floating shelf and a phone stand are safe solo builds, while a planter box or Adirondack chair needs an adult at the saw. Start at the top of this list and work down as skills and confidence build. For younger siblings, our woodworking projects for kids guide covers simpler, lower-tool builds, and for a school assignment specifically, easy wood projects for students is built around class-period timelines. Whichever project comes first, the tools and safety habits built here carry straight into every future build.
Sponsored / affiliate links. As an Amazon Associate I earn from qualifying purchases. I may earn additional commission from eligible campaigns.