Gorilla Glue vs Liquid Nails: Essential Choice
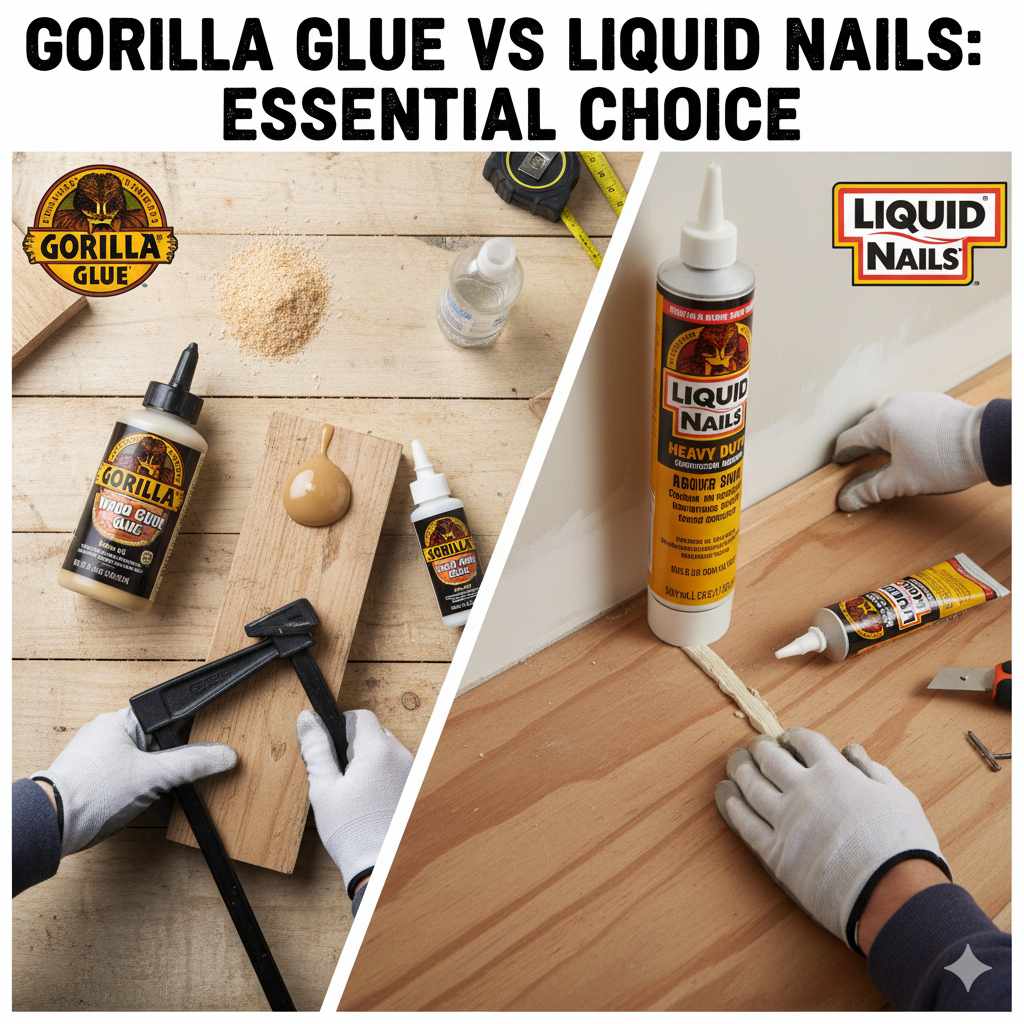
When choosing between Gorilla Glue and Liquid Nails for your DIY projects, understand that Gorilla Glue offers superior industrial strength for challenging bonds, expanding as it cures, while Liquid Nails is a versatile construction adhesive ideal for general-purpose bonding, offering a more controlled, gap-filling application.
Hey there, DIY friends! As a seasoned woodworker, I know how a good bond can make or break a project. You’re staring at two popular glues: Gorilla Glue and Liquid Nails. Which one do you pick? It’s a common question, and the wrong choice can lead to wobbly shelves or finishes that don’t last. Don’t worry, we’ll break down these two powerhouses so you can confidently choose the right glue for your job, ensuring a strong, lasting hold every time. Let’s dive in and make sure your next project is a solid success!
Gorilla Glue vs. Liquid Nails: Understanding the Key Differences
When you’re heading to the hardware store for adhesives, you’ll quickly notice two familiar names: Gorilla Glue and Liquid Nails. Both are designed to stick things together, but they aren’t interchangeable. Thinking of them as specialized tools in your toolbox will help you make the best choice for your needs. Let’s get a clear picture of what each one brings to the table.
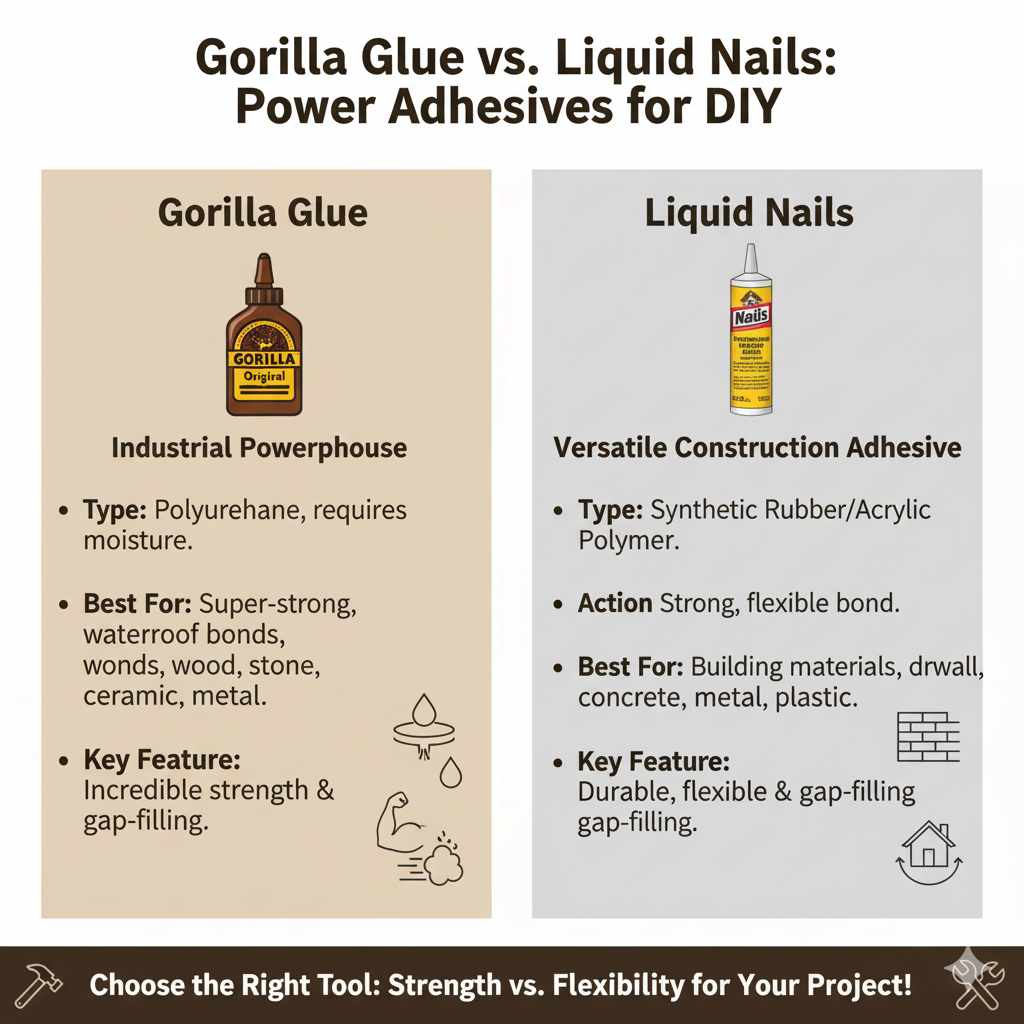
Gorilla Glue: The Industrial Powerhouse
Gorilla Glue has earned its reputation as a super-strong adhesive. It’s known for its incredible holding power, making it a go-to for repairs and projects where a robust bond is absolutely critical. What sets it apart is its unique foaming action as it cures.
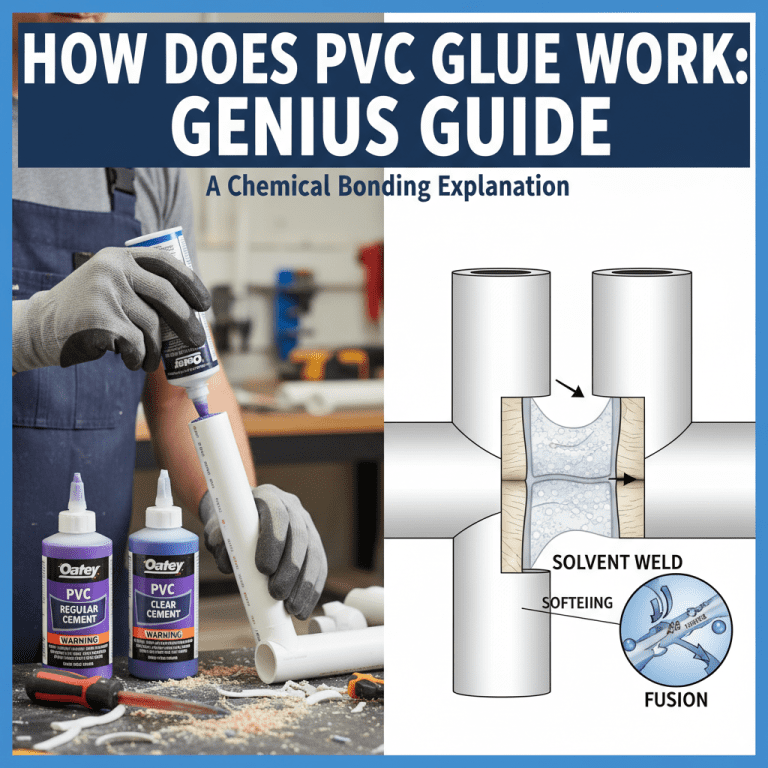
How it Works: Gorilla Glue is a polyurethane-based adhesive. When exposed to moisture in the air (or in the materials you’re bonding), it expands and foams. This expansion allows it to penetrate porous surfaces, creating an incredibly strong mechanical bond.
Key Characteristics:
Incredibly strong bond.
Waterproof and weather-resistant once cured.
Expands to fill gaps.
Requires moisture to cure, meaning it works best with slightly damp surfaces.
Can be messy due to expansion; clamping is often necessary.
Liquid Nails: The Versatile Construction Adhesive
Liquid Nails is a brand that offers a range of construction adhesives, but typically when people say “Liquid Nails,” they’re referring to their common multi-purpose adhesive. These are designed for a wide variety of building and home repair tasks, offering a strong, flexible bond that can handle movement and temperature changes.
How it Works: Most Liquid Nails products are based on synthetic rubber or acrylic polymers. They are designed to adhere to a broad spectrum of building materials and provide a durable, long-lasting bond.
Key Characteristics:
Excellent adhesion to many surfaces like wood, drywall, concrete, metal, and plastic.
Flexible bond that can withstand movement and vibrations.
Typically designed for gap-filling and bridging minor irregularities.
Dries to a more controlled state compared to Gorilla Glue.
Available in various formulations for specific applications (e.g., exterior, subflooring).
When to Choose Gorilla Glue
Gorilla Glue is your “heavy-duty” champ. If you need a bond that can withstand serious stress, extreme conditions, or a situation where you can’t afford for something to come apart, Gorilla Glue is likely your best bet.
Ideal Applications for Gorilla Glue:
Bridging Gaps and Irregularities: Its foaming action is fantastic for filling small gaps between uneven surfaces, ensuring a solid connection.
High-Stress Repairs: Fixing broken furniture legs, damaged tool handles, or other items subjected to significant force.
Outdoor Projects: Its waterproof nature makes it suitable for outdoor furniture, small garden structures, or repairs exposed to the elements.
Bonding Dissimilar Materials: It can adhere well to wood, metal, ceramics, stone, and more, though proper surface preparation is key.
When Strength is Paramount: Any project where the structural integridad of the bond directly impacts safety or functionality.
Things to Consider with Gorilla Glue:
Messiness: Because it expands significantly, always have clamps ready to hold your pieces together tightly while it cures. Extra glue that foams out can be difficult to clean up once hardened.
Surface Moisture: For optimal bonding, surfaces should ideally be slightly damp. Overly wet or completely dry surfaces might not cure as effectively.
Clamping Time: You’ll need to clamp your project for a good duration (check the product’s instructions, often 2-24 hours) to allow the glue to cure properly and prevent joint separation during expansion.
Not for all Plastics: Some plastics, like polyethylene or PTFE (Teflon), are notoriously difficult to glue, and even Gorilla Glue may struggle.
When to Choose Liquid Nails
Liquid Nails shines in general construction and home improvement tasks. It’s the reliable workhorse you can reach for when you need a strong, flexible, and forgiving adhesive that’s easier to work with in most common scenarios.
Ideal Applications for Liquid Nails:
General Woodworking: Assembling cabinets, attaching trim, installing molding, or project assembly where extreme stress isn’t the primary concern.
Subflooring and Decking: Many Liquid Nails formulations are specifically designed for these applications, providing a stiff, squeak-free bond.
Drywall Installation: Attaching drywall to studs for a secure, gap-free finish.
Ceramic Tile and Countertops: Adhering tiles, backsplashes, or laminate countertops.
Outdoor Trim and Siding: Many exterior-grade Liquid Nails products are perfect for weather-resistant bonding of building elements.
When a Controlled Bond is Needed: If you want minimal expansion and a more predictable application, Liquid Nails is the way to go.
Things to Consider with Liquid Nails:
Less Gap Filling (compared to Gorilla Glue): While it fills minor gaps, it won’t expand to bridge large voids like Gorilla Glue. Ensure your surfaces are relatively flush for the best results.
Cure Time: While it sets up relatively quickly, full cure for maximum strength can take longer than some other adhesives, and it’s less affected by moisture in the air.
Flexibility: While a strength for some applications, if you need an absolutely rigid, unmoving bond for extreme structural integrity, Gorilla Glue might be preferred.
Specific Formulations: Be sure to choose the right Liquid Nails product for your specific materials and environment. There are many varieties!
A Look at Key Features: Gorilla Glue vs. Liquid Nails
To help visualize the strengths and weaknesses, let’s put Gorilla Glue and Liquid Nails head-to-head on some important features.
| Feature | Gorilla Glue | Liquid Nails |
|---|---|---|
| Primary Material Base | Polyurethane | Synthetic Rubber / Acrylic Polymers |
| Bond Strength | Extremely High / Industrial | High / Very Good |
| Expansion/Foaming | Significant, penetrates porous surfaces | Minimal to None, controlled |
| Gap Filling Ability | Excellent | Good for minor irregularities |
| Water Resistance | Excellent (Waterproof once cured) | Varies by product; many are water-resistant or waterproof |
| Flexibility After Curing | Generally rigid | More flexible, can handle some movement |
| Surface Moisture Requirement | Light moisture helps cure | Generally applied to dry or clean surfaces |
| Ease of Use / Cleanup | Can be messy due to expansion; requires careful handling and clamping. Cleanup is harder once cured. | Easier to control application; cleanup is typically easier with solvents when wet. |
| Typical Applications | Heavy-duty repairs, structural bonds, outdoor projects, wood to metal, stone. | Construction, subflooring, drywall, trim, molding, general home repair, bonding common building materials. |
| Cure Time | Can take 24+ hours for full strength; initial bond forms in hours. | Sets quickly, but full strength can take 24-72 hours. |
Step-by-Step Guide: Choosing and Using Your Adhesive
Picking the right glue is the first step. The second is using it effectively. Here’s a simple guide to help you through the process, whether you choose Gorilla Glue or Liquid Nails.
Step 1: Assess Your Project Needs
Before you even grab a tube, think about what you’re doing:
What materials are you bonding? Wood to wood? Metal to plastic? Brick to drywall?
What kind of stress will the bond endure? Will it be structural, like a shelf supporting weight, or decorative, like attaching trim?
What are the environmental conditions? Will it be indoors, outdoors, exposed to moisture, heat, or cold?
How important is gap filling? Are the surfaces perfectly flat or a bit uneven?
Step 2: Select Your Adhesive
Based on your assessment:
For ultimate strength, tough repairs, outdoor use, or bonding uneven surfaces: Reach for Gorilla Glue. Remember to have clamps handy!
For general construction, assembly, trim work, drywall, or when a controlled, flexible bond is needed: Opt for Liquid Nails. Check the specific product for your material type.
Step 3: Prepare Your Surfaces
This is crucial for any adhesive!
Clean: Dust, dirt, grease, and old adhesive will weaken the bond. Wipe down all surfaces.
Dry: Most glues require dry surfaces. Wipe away any moisture unless the product specifically requires it (like some Gorilla Glues).
Sand (if needed): For very smooth or non-porous surfaces (like some plastics or varnished wood), a light sanding can create a better profile for the glue to grip. Clean off any dust from sanding.
Step 4: Apply the Adhesive
Gorilla Glue: Apply a bead of glue to one surface. If the surfaces are dry, slightly dampen one surface with a mist of water. Be economical – it expands a lot!
Liquid Nails: Apply a continuous bead (or dots, depending on the project) to one surface. You can often apply it where you want to join the pieces directly.
Step 5: Assemble and Clamp
Press Together: Firmly press the two surfaces together.
Align: Make sure your pieces are perfectly aligned before the glue starts to set.
Clamp: This is where clamping is super important, especially for Gorilla Glue. Use clamps, screws, or even heavy objects to hold the pieces tightly together while the glue cures. For Liquid Nails, clamping might be recommended but often isn’t as critical as for Gorilla Glue unless significant weight or pressure is involved.
Clean Up Excess (Wet): Wipe away any excess glue that squeezes out while it’s still wet. This is much easier than trying to scrape hardened glue later. For Gorilla Glue, you might need a damp cloth, for Liquid Nails, sometimes a solvent (check the product instructions) works best.
Step 6: Allow to Cure
Read the Label: Always follow the specific curing times recommended on the product packaging. This can range from a few hours to 24-72 hours for full strength.
Don’t Rush: Resist the urge to stress the bond before it’s fully cured.
Remove Clamps: Once fully cured, remove your clamps and admire your strong, lasting bond!
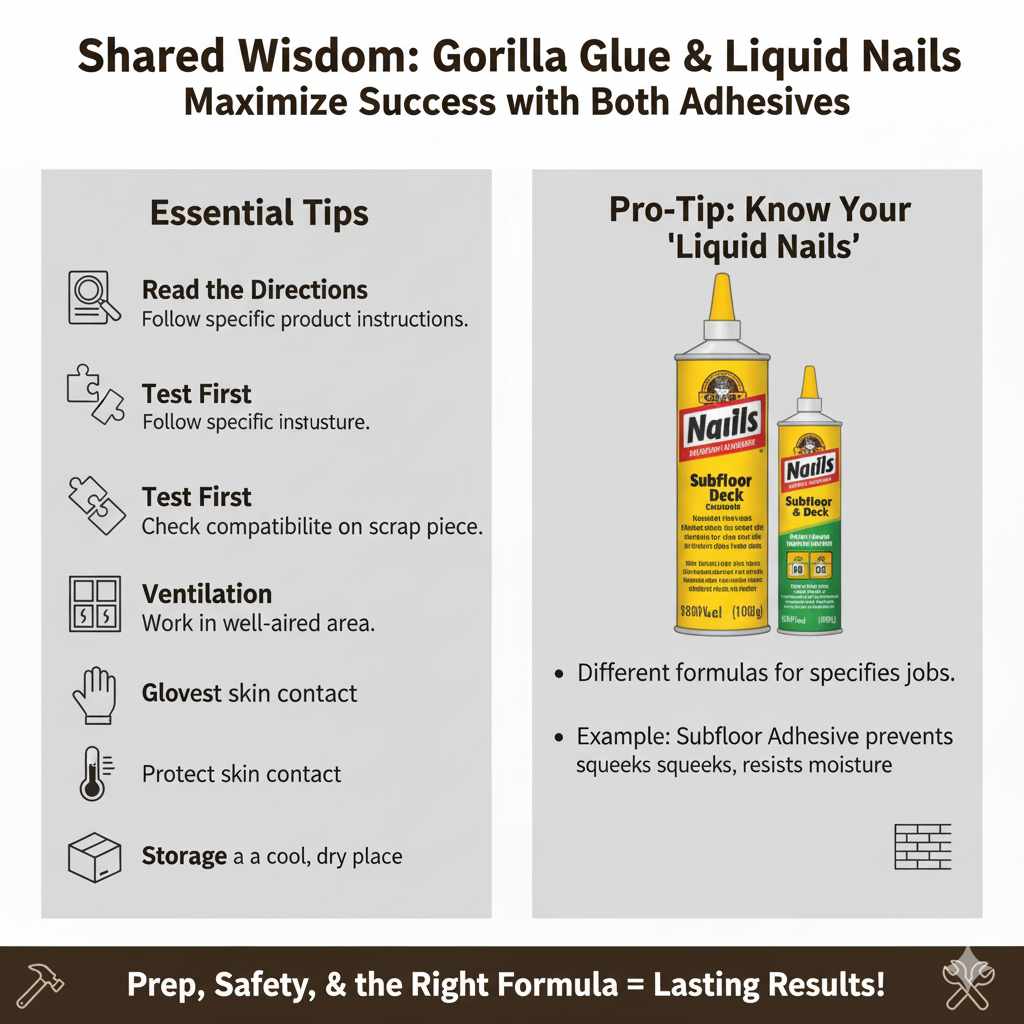
Tips for Success with Both Adhesives
Ventilation: Always use adhesives in a well-ventilated area.
Gloves: Wear gloves to protect your skin.
Test First: If you’re unsure how an adhesive will perform on a particular material, test it on a scrap piece first.
Storage: Store adhesives in a cool, dry place according to the manufacturer’s instructions.
Read the Directions: Seriously, every product is slightly different. The instructions on the bottle or tube are your best friend! For instance, understanding the different types of Liquid Nails is key, as they have specific uses, like the Liquid Nails Subfloor and Deck Adhesive designed to prevent squeaks and resist moisture degradation.
Frequently Asked Questions (FAQ)
Q1: Can I use Gorilla Glue or Liquid Nails for plumbing repairs?
For most plumbing, it’s best to use specialized plumbing epoxies or repair kits designed for water pressure and specific pipe materials. While some Gorilla Glue or Liquid Nails products might offer water resistance once cured, they are generally not formulated or tested for the constant water pressure and temperature fluctuations common in plumbing systems. Using the wrong adhesive can lead to leaks and further damage. Always check with plumbing codes and manufacturer recommendations for specific applications.
Q2: Is one glue better for outdoor projects?
Both brands offer products specifically designed for outdoor use. Gorilla Glue’s original formula cures to be waterproof and weather-resistant, making it a strong contender for outdoor repairs. However, Liquid Nails also has specific exterior-grade adhesives formulated for weather resistance and durability against the elements. The best choice often depends on the specific materials you are bonding and the type of exposure. Always look for products labeled “exterior,” “weatherproof,” or “waterproof.”
Q3: Can Gorilla Glue be used on foam board?
Yes, but very carefully! The original Gorilla Glue can damage or melt some types of foam due to its strong chemical reaction and expansion. It’s highly recommended to use Gorilla Glue’s specially formulated “Gorilla Clear Grip” or another adhesive specifically designed for foam, like a spray adhesive or a DAP brand craft glue. Always test on an inconspicuous area first.
Q4: How do I remove Gorilla Glue or Liquid Nails if I make a mistake?
Removal depends on whether the adhesive is wet or cured. If wet, acetone (nail polish remover) can often dissolve both. For cured Gorilla Glue, you might need to carefully chip or sand it away, as it forms a very hard bond. Cured Liquid Nails can sometimes be softened with heat (carefully!) or removed by sanding or scraping. Always consult the product’s safety data sheet or manufacturer’s website for specific removal instructions, and wear appropriate safety gear.
Q5: Can I paint or stain over Gorilla Glue or Liquid Nails?
Generally, yes. Most Gorilla Glue and Liquid Nails products can be painted or stained once fully cured. However, it’s always a good idea to check the product labeling. Some colored glues might show through lighter stains. For the best finish, particularly with stains, you want to ensure the excess glue is completely removed and the surrounding material is properly prepped. For Gorilla Glue, the cured surface can sometimes be rough or have a slightly glossy appearance. Light sanding might be needed for a smooth finish before painting or staining.
Q6: Is one stronger than the other for wood-to-wood joints?
For sheer bonding strength on wood-to-wood joints, especially if there are small gaps, untreated wood, or if the joint will be under significant stress, original Gorilla Glue often provides a superior industrial-level bond. Its polyurethane formula penetrates wood fibers and expands to fill voids, creating a very robust connection. Liquid Nails is still very strong for wood-to-wood, but it’s generally considered a more general-purpose construction adhesive. For critical structural joints where maximum, rigid strength is paramount, Gorilla Glue might hold the edge, provided it’s clamped properly.