How Do You Care For Engineered Wood Floors The Right Way?
Caring for engineered wood floors involves simple, consistent cleaning and smart protection strategies. Gentle sweeping or vacuuming, damp (not wet) mopping with approved cleaners, and preventing scratches from furniture or pets are key to their longevity.
Understanding Your Engineered Wood Floors
So, what exactly are engineered wood floors? They look like solid wood, but they’re built differently. Think of them as a strong sandwich. The top layer is real hardwood, the part you see and feel. This is often called the wear layer.
Underneath that top layer are several other layers, usually made from plywood or high-density fiberboard (HDF). These layers run in different directions. This cross-grain construction makes the floor very stable. It’s less likely to warp or expand when the weather changes compared to solid wood.
This smart design means you get the beauty of real wood with better performance in many home environments. But it also means they need a specific kind of care to protect that precious top layer. It’s not quite as tough as tile, but it’s certainly more forgiving than carpet!
My Own Engineered Wood Floor Scare
I remember when my first engineered wood floors were installed. They were gorgeous, a rich walnut tone that made my living room feel so much cozier. I felt proud showing them off. Then came the toddler and the spilled juice incident. It was a sticky, red mess spreading fast.
My mind immediately went to panic. Was this it? Was my beautiful floor ruined forever? I grabbed the first cleaner I could find under the sink, a strong all-purpose spray. I scrubbed with all my might, worried about damaging the finish. It felt like a race against time, and I was sure I was losing.
After I cleaned up the juice, I noticed a faint dull spot where I’d scrubbed the hardest. That’s when I realized that using the wrong cleaner could be just as bad as the spill itself. It was a tough lesson, but it taught me the real importance of knowing how to care for these floors properly.
The Anatomy of Engineered Wood
Think of it like this:
- Top Layer: Real hardwood (oak, maple, walnut, etc.). This is the visible beauty.
- Middle Layers: Cross-banded plywood or HDF. These add strength and stability.
- Bottom Layer: Often a balancing veneer for added stability.
This layered structure is why they handle moisture changes better than solid wood.
Daily Habits for a Healthy Floor
The best way to care for your engineered wood floors is through simple, consistent habits. You don’t need fancy tools or complicated steps. It’s mostly about preventing problems before they start.
First, keep them clean from daily grit. Dust, sand, and small stones are like tiny sandpaper. They get ground into the floor with every step. This dulls the finish over time and can even cause tiny scratches you might not see at first.
So, a quick sweep or vacuum is your best friend. Use a soft-bristle brush attachment on your vacuum. Avoid beater bars, as they can scratch the wood surface. This simple step removes the abrasive particles.
Quick Scan: Daily Floor Care
| Action | Why it Helps |
|---|---|
| Sweep or Vacuum Daily | Removes grit that scratches and dulls the finish. |
| Use Doormats | Catches dirt and moisture before it enters. |
| Wipe Spills Immediately | Prevents liquids from soaking into seams or damaging the finish. |
Doormats are also super helpful. Place them at all entrances to your home. One outside to catch the worst dirt and one inside to get anything the first one missed. It’s an easy way to create a barrier.
And always, always wipe up spills right away. Even water left too long can seep into the seams and cause issues. A soft cloth is usually all you need for quick cleanups. This simple act saves you from bigger problems later.
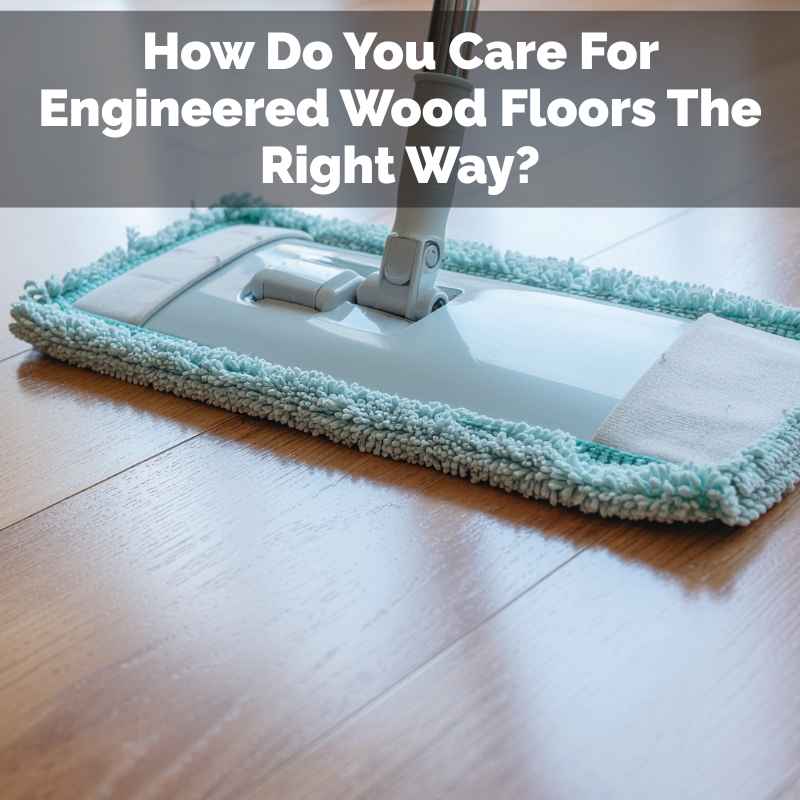
The Right Way to Mop Engineered Wood
Mopping is where many people worry they might do damage. The biggest rule for engineered wood floors is: Never soak them. Water is the enemy of wood floors if it sits too long or gets into the wrong places.
You want a damp mop, not a wet one. Think of it as the mop being barely moist, not dripping. This means wringing out your mop very, very well. If you see puddles after mopping, you’re using too much water.
What kind of cleaner should you use? This is crucial. Avoid harsh chemicals. Many general floor cleaners or sprays can strip away the protective finish over time. They might also leave a residue that makes the floor look dull or sticky.
Mop Smarter, Not Wetter
What to use:
- Wood Floor Cleaner: Look for one specifically made for engineered wood or polyurethane-finished floors.
- pH-Neutral Cleaner: A mild, pH-neutral soap mixed with water can work. Check your floor’s warranty first.
- Water Only: For light cleaning, often just a damp mop with plain water is enough.
What to avoid:
- Ammonia-based cleaners
- Bleach
- Oil soaps
- Wax or silicone-based polishes
- Steam mops (usually too hot and wet)
When in doubt, check your manufacturer’s recommendations. They know their product best. Many brands offer their own cleaning solutions that are guaranteed to be safe. Using the right product ensures you’re cleaning, not damaging.
The mopping process should be: spray a small amount of cleaner onto your damp mop (or directly onto the floor if the cleaner instructions say so), then mop a small section. Work in small areas so the floor doesn’t sit wet for long. Dry any excess moisture with a clean, dry cloth if needed.
Protecting Your Floors from Scratches and Dents
This is where you can really make a difference in how long your floors look good. Scratches and dents are the most common complaints about wood floors. Luckily, they’re also the easiest to prevent with a little thought.
Furniture is a big culprit. When you slide chairs or tables, they can leave long, ugly marks. The fix is simple: use felt pads. These are inexpensive and easy to stick onto the bottom of furniture legs. Check them often, though, because they can wear out or collect dirt and become abrasive themselves.
For heavy furniture, like pianos or large sofas, consider furniture coasters or cups. These spread the weight over a larger area, reducing the chance of dents. When moving furniture, it’s always best to lift, not drag. If you can’t lift, use furniture sliders designed for wood floors.
Preventing Scratches: Key Strategies
Furniture Protection:
- Felt Pads: Apply to all chair and table legs. Replace when worn.
- Furniture Coasters: Use for heavy items.
- Lift, Don’t Drag: Always lift when moving furniture.
Footwear:
- No High Heels: The thin heels can leave dents.
- Shoe-Free Zone: Consider asking people to remove shoes at the door.
Pets:
- Trim Nails: Keep pet nails short and smooth.
- Protective Mats: Use mats under food/water bowls.
Pets are another factor. Dogs’ nails can scratch floors. Keeping their nails trimmed and smooth is a great help. If you have cats, make sure they have scratching posts so they don’t use your floor as a substitute! Also, consider placing mats under pet food and water bowls to catch spills.
Think about your own shoes too. High heels, especially stilettos, can leave dents in softer wood floors. Grit stuck in the soles of any shoe can scratch. Making your home a shoe-free zone is one of the easiest and most effective ways to protect your floors.
Dealing with Spills and Stains
As I learned, spills happen. The key is how quickly you react. For most common liquid spills like water, juice, or soda, blot them up immediately with a clean, dry cloth. Don’t rub, as that can spread the spill or push it deeper.
If a spill has dried or left a mark, you might need a slightly more focused approach. For sticky residues, a damp cloth with a tiny bit of your recommended wood floor cleaner is usually enough. Wipe the area gently.
What about tougher stains, like ink or pet accidents? These can be tricky. For ink, try blotting with a cloth dampened with rubbing alcohol. Test this in an inconspicuous spot first to make sure it doesn’t harm the finish.
Stain Removal: First Aid
General Spills:
- Blot immediately with a soft cloth.
- Wipe with a damp cloth and approved cleaner if needed.
Grease/Oil:
- Try a small amount of mild dish soap on a damp cloth.
- Rinse with a clean, damp cloth.
Ink:
- Dampen a cloth with rubbing alcohol (test first!).
- Blot gently.
Pet Accidents:
- Clean up solids immediately.
- Blot liquid thoroughly.
- Use an enzymatic cleaner designed for pet stains to neutralize odors.
For pet accidents, it’s vital to clean them thoroughly and use an enzymatic cleaner. These cleaners break down the organic matter that causes odor, preventing your pet from being drawn back to the same spot. Ensure the cleaner is safe for wood floors.
If a stain is really deep or you’re unsure, it’s better to consult a professional floor cleaner. Trying aggressive methods could make the problem worse. Your goal is to remove the stain without damaging the wood’s finish or the wood itself.
Avoiding Moisture Damage
Moisture is the biggest threat to engineered wood floors. While they are more stable than solid wood, they are not waterproof. Standing water or excessive humidity can cause the layers to separate, the wood to swell, or the finish to peel.
This means paying attention to areas where water is common. Kitchens, bathrooms, and laundry rooms need extra care. Ensure appliances like refrigerators with ice makers have their water lines checked regularly for leaks. In bathrooms, ensure proper ventilation to reduce humidity.
What about plants? Plant pots can trap water against the floor. It’s best to keep plants on raised stands or in waterproof trays that are emptied regularly. A spill from a watering can can quickly become a problem if left sitting.
Moisture Control Checklist
Indoors:
- Humidity: Maintain indoor humidity levels between 30% and 50%. Use a humidifier or dehumidifier as needed.
- Appliances: Check refrigerator water lines and washing machine hoses for leaks.
- Potted Plants: Use waterproof trays or stands. Empty trays regularly.
- Spills: Clean up any liquid spill immediately.
Outdoors:
- Entryways: Use mats to trap moisture from shoes.
- Window Wells: Ensure they drain properly to prevent water seeping inside.
- Foundation: Check for any foundation cracks that might allow water in.
Maintaining consistent indoor humidity is also important. Wood can expand and contract with changes in humidity. A range of 30% to 50% is generally recommended by flooring experts. A hygrometer can help you monitor this.
If you live in a very humid climate, a dehumidifier might be necessary. In dry climates, a humidifier can help prevent the wood from shrinking too much. This consistency protects the floor’s structure and its finish.
When to Call the Professionals
Sometimes, even with the best care, your floors might need professional attention. There are signs to look for that suggest it’s time to bring in an expert.
If you notice significant deep scratches or gouges that you can’t buff out, it might be time. Also, if the finish is peeling or looks patchy in large areas, it suggests the protective layer is failing.
Warping or cupping – where the edges of the planks curl up or down – is a serious sign of moisture damage or improper installation. This often requires professional assessment and repair, and sometimes even replacement of boards.
Signs Your Floors Need a Pro
Surface Issues:
- Deep scratches or gouges.
- Peeling or worn-out finish.
- Persistent dull spots that don’t clean up.
Structural Issues:
- Warping or cupping of planks.
- Gaps between planks that are widening.
- Loose boards that move when walked on.
Severe Stains:
- Stains that don’t lift with gentle cleaning.
- Discoloration from past water damage.
If you have widespread staining or discoloration, a professional can often sand and refinish the floor. This can bring it back to looking almost new. However, the thickness of the wear layer on engineered wood limits how many times this can be done.
Don’t try to tackle major repairs yourself unless you have specific experience with wood flooring. Incorrect sanding or refinishing can permanently damage the floor. A good flooring contractor can assess the damage and recommend the best course of action.
What About Polishing or Refinishing?
There’s often confusion about polishing versus refinishing. Polishing is usually meant for floors with a factory-applied finish, like polyurethane. It’s designed to add a bit of shine and might fill in very minor scratches. However, many modern engineered floors have a matte or satin finish that isn’t meant to be polished to a high sheen.
Some “polishes” or “restorers” can actually build up on the surface over time, creating a hazy or sticky layer. This is difficult to remove and can dull the floor’s appearance. Always check the product label and your floor manufacturer’s advice before using any kind of polish.
Refinishing is a much more intensive process. It involves sanding down the top layer of the wood to remove scratches and wear, and then applying a new protective coating. For engineered wood, this is only possible if the wear layer is thick enough.
Polishing vs. Refinishing
Polishing (or Refreshing):
- Goal: Add shine, minor scratch repair.
- Frequency: As needed, sparingly.
- Caution: Can build up if not suitable for your floor’s finish.
Refinishing:
- Goal: Remove deep scratches, wear, and apply new finish.
- Frequency: Rarely, only when needed.
- Requirement: Needs a thick enough wear layer on engineered wood.
- Process: Involves sanding.
Many engineered wood floors today have very thin wear layers (as little as 2-3 millimeters). If your wear layer is too thin, sanding can go through to the middle layers, which is irreversible damage. Always find out the thickness of your wear layer before considering refinishing.
If you do need to refinish, choose a professional who has specific experience with engineered wood. They’ll know how to assess the wear layer and use the appropriate techniques. For most homeowners, focusing on proper cleaning and protection will extend the life of their floors well beyond refinishing.
Understanding Different Finishes
The finish on your engineered wood floor plays a big role in how you should care for it. The most common finish today is polyurethane, which is a durable, protective coating.
Polyurethane finishes can be water-based or oil-based. Water-based finishes are typically lower in VOCs (volatile organic compounds) and dry faster. Oil-based finishes tend to be a bit harder but have stronger odors during application.
Within polyurethane, there are different sheen levels: matte, satin, semi-gloss, and high-gloss. Matte and satin finishes hide minor scratches and dirt better than glossier finishes. High-gloss finishes show every fingerprint and scratch.
Common Floor Finishes
Polyurethane (Most Common):
- Water-Based: Low VOCs, quick drying, good durability.
- Oil-Based: Harder finish, stronger odor during application.
Sheen Levels:
- Matte: Least reflective, hides imperfections well.
- Satin: Slight sheen, good balance of appearance and durability.
- Semi-Gloss: More reflective, shows more wear.
- High-Gloss: Very reflective, shows everything.
Other (Less Common on New Floors):
- Wax: Requires regular reapplication, not very durable.
- Oil Finish: Soaks into the wood, requires frequent re-oiling, feels more natural but is less protected.
Older floors might have wax or oil finishes. These require different maintenance. Wax finishes need to be buffed and waxed periodically. Oil finishes need regular reapplication of oil. If your floor has one of these, it’s crucial to use products specifically for that type of finish.
For most engineered wood floors installed in the last 10-15 years, you’re almost certainly dealing with a polyurethane finish. This finish is very forgiving with proper care. The key is to use cleaners that won’t break it down.
When Is It Okay to Let Them Get a Little Dirty?
This sounds counterintuitive, right? But it’s about finding a balance. You don’t need to be on your hands and knees scrubbing every single day. Over-cleaning, especially with the wrong products, can be more damaging than letting a little dust sit.
If your floors look good, and there’s no visible grit or grime, a light sweep or dust mop might be enough for a few days. The goal is to remove the particles that cause wear and tear. If they aren’t there, you can hold off on the deeper clean.
Focus your more thorough cleaning, like damp mopping, on high-traffic areas or after specific events like parties or heavy cooking. For example, if you’ve had guests over and the floor has seen more foot traffic than usual, that’s a good time for a proper mopping.
Cleaning Cadence: Finding the Sweet Spot
Daily/Every Other Day:
- Quick sweep or dust mop in main areas.
- Blot any visible spills.
Weekly (or as needed):
- Damp mop with approved cleaner, focusing on high traffic zones.
- Vacuum edges and corners thoroughly.
Monthly (or for deeper clean):
- Full damp mop of all areas.
- Check and clean doormats.
It’s also important to consider the season. In winter, salt and sand tracked in from outside are particularly abrasive. You might need to sweep or vacuum more often during these months. In summer, dust can be a bigger issue.
Trust your eyes and your feel. If the floor feels gritty, it needs cleaning. If it looks clean and smooth, you can likely wait another day or two. This smart approach preserves the finish and saves you time.
Quick Fixes and Maintenance Tips
Let’s recap some of the most important quick tips to keep your floors looking their best.
Felt Pads are Non-Negotiable: I can’t stress this enough. Put them on everything with legs. Check them regularly and replace them when they look worn or dirty. This simple step prevents countless scratches.
Wipe, Don’t Scrub: For spills, the goal is to lift the liquid. Scrubbing can push it into the wood grain or damage the finish. Use a clean cloth and blot.
Engineered Wood Care: Top Tips
1. Protect Legs: Always use felt pads on furniture.
Right Cleaner is Vital: Stick to cleaners specifically recommended for engineered wood with a polyurethane finish. If you’re unsure, plain water on a damp mop is often the safest bet.
Humidity Control: Even if you don’t think it’s a problem, consider getting a small hygrometer to monitor your home’s humidity. This simple device can help you catch issues early.
Know Your Wear Layer: If you ever consider refinishing, find out how thick your floor’s wear layer is. This information is critical for deciding if refinishing is even an option.

Frequently Asked Questions
Can I use a steam mop on my engineered wood floors?
Most manufacturers advise against using steam mops on engineered wood floors. The high heat and moisture can penetrate the wood layers, causing damage like warping, delamination (separation of layers), or finish damage. A damp mop is a much safer choice.
What’s the best way to clean sticky spots?
For sticky spots, use a soft cloth dampened with a small amount of your recommended wood floor cleaner. Gently wipe the area. You may need to repeat this a couple of times. Avoid harsh scrubbing. For very stubborn stickiness, test a tiny bit of mineral spirits on an hidden area first, then wipe with a damp cloth.
How often should I deep clean or mop my engineered wood floors?
This depends on traffic and how dirty they get. For most homes, a damp mop once a week or every two weeks is sufficient. High-traffic areas might need more frequent attention. Always sweep or dust mop daily to remove grit.
Can I use furniture polish on my engineered wood floors?
Generally, no. Many furniture polishes contain silicones or waxes that can build up on the polyurethane finish, making it dull, slippery, or difficult to clean later. Stick to cleaners specifically designed for wood floors. If you want to add a bit of shine, look for a wood floor refresher product, but use it sparingly and ensure it’s compatible with your finish.
My floors look dull. What can I do?
Dullness is often caused by a buildup of dirt or residue from improper cleaning products. First, try a thorough cleaning with a recommended wood floor cleaner to remove any residue. If the dullness persists, it might be wear on the protective finish itself. In that case, a professional assessment might be needed to see if a refresher product or a light refinishing is appropriate.
How do I protect my floors from pet claws?
Keep your pet’s nails trimmed short and smooth. For dogs, consider using booties or paw protectors, especially during active play. Regularly sweep or vacuum to remove any stray hairs or debris that could trap moisture or dirt. While engineered wood is durable, deep scratches from claws can still occur, so prevention is key.
Caring for Your Floors: A Final Thought
Taking care of your engineered wood floors isn’t about being perfect; it’s about being consistent and mindful. You’ve invested in a beautiful flooring choice, and with the right approach, you can keep them looking stunning for many years to come.
Remember the simple rules: gentle cleaning, minimal moisture, and protection from scratches. By incorporating these habits, you’re not just cleaning your floors, you’re preserving the warmth and value they bring to your home. Enjoy your beautiful floors!