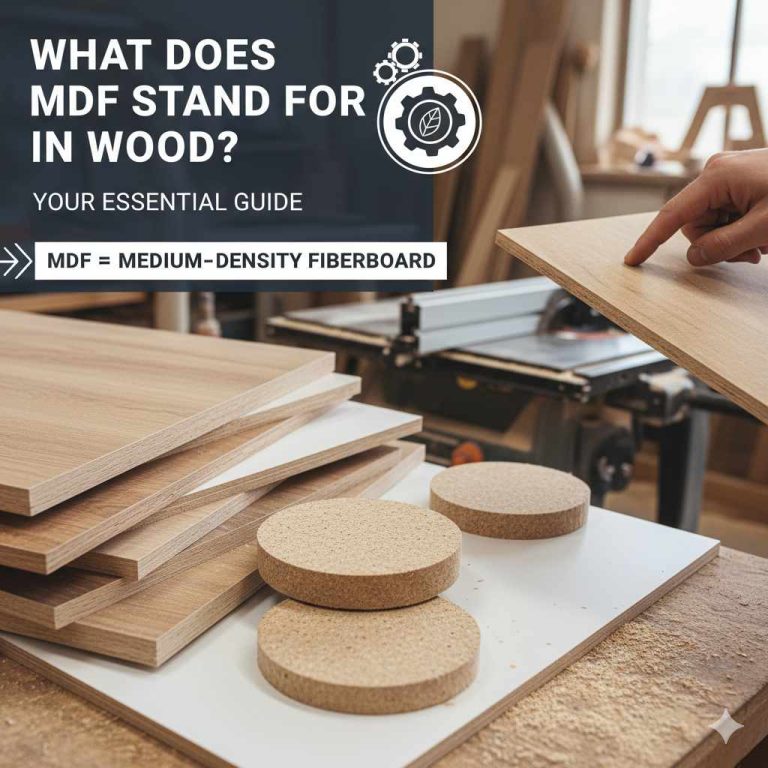
How Do You Paint MDF Board? Proven Guide
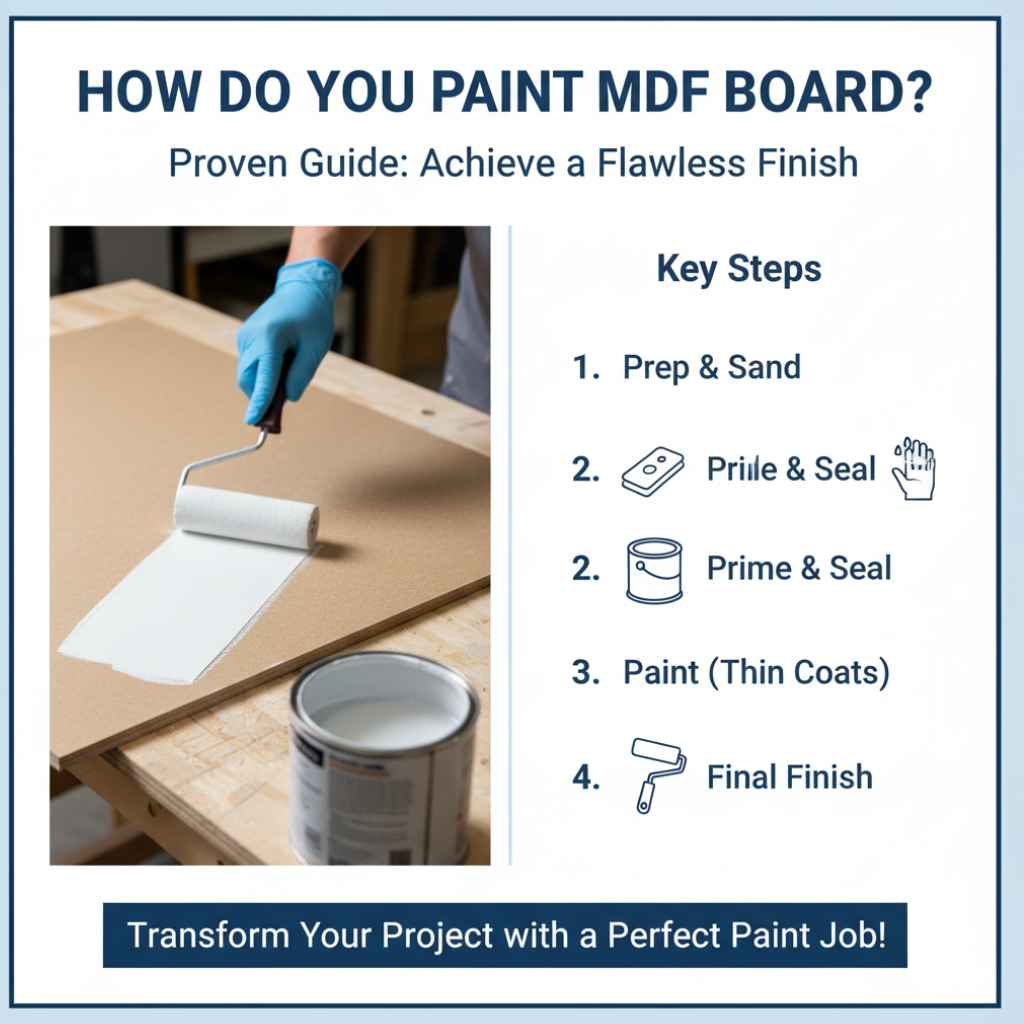
To paint MDF board effectively, start with proper sanding and priming to create a smooth, durable surface. Use a high-quality primer specifically for MDF, followed by two to three thin coats of your chosen paint, sanding lightly between coats. This process ensures a professional, long-lasting finish accessible for any DIYer.
MDF, or Medium-Density Fiberboard, is a fantastic material for furniture, cabinets, and decorative projects. It’s smooth, consistent, and budget-friendly. But when it comes to painting, many beginners hit a snag. MDF can be thirsty, meaning paint can soak in unevenly, leaving a patchy, unprofessional look. Don’t worry! With the right steps, you can achieve a beautiful, factory-finished look on your MDF projects. This guide will walk you through everything you need to know, making painting MDF simple and rewarding.
We’ll cover the essential preparation, the best types of paint and primer, and easy-to-follow steps to get that smooth, flawless finish you’re dreaming of. Let’s get your project looking its absolute best!
Why Painting MDF Can Be Tricky (And How to Fix It!)
MDF is made from wood fibers, glue, and wax, pressed together under high pressure and heat. This process creates a dense, uniform board. Unlike solid wood, MDF doesn’t have a natural grain to soak up paint. Instead, its porous nature, especially on the cut edges, can aggressively absorb paint, leading to:
- Uneven absorption: Some areas might look dull and dry while others are shiny.
- Swelling: Excessive moisture from paint can cause the MDF fibers to expand, leading to a bumpy surface.
- Poor adhesion: Without proper preparation, paint might peel or chip later on.
The good news is that all these issues are completely preventable! The key lies in preparation and using the right products. Think of it like preparing a canvas before painting a masterpiece – it makes all the difference.
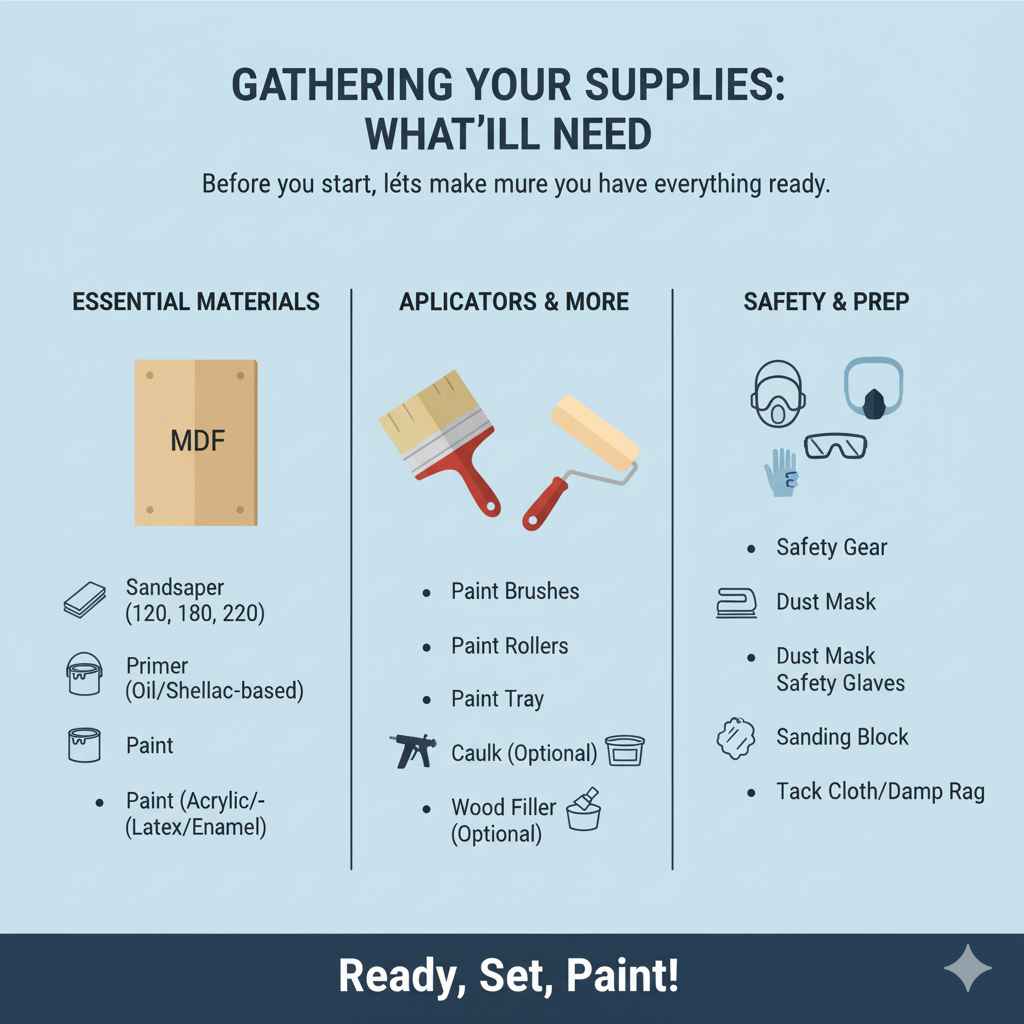
Gathering Your Supplies: What You’ll Need
Before you start, let’s make sure you have everything ready. Having all your tools and materials on hand will make the painting process smooth sailing.
Essential Tools and Materials:
- MDF Board: Your prepared project piece.
- Sandpaper: An assortment of grits (e.g., 120, 180, 220).
- Sanding Block or Orbital Sander: For even sanding.
- Tack Cloth or Damp Rag: For removing dust.
- Primer: High-quality, oil-based or shellac-based primer is highly recommended for MDF.
- Paint: Water-based acrylic, latex, or enamel paints work well.
- Paint Brushes: Good quality synthetic or natural bristle brushes.
- Paint Rollers: Foam rollers or small, high-density nap rollers.
- Paint Tray or Bucket.
- Caulk (optional): For filling small gaps or seams if needed.
- Wood Filler (optional): For any dents or imperfections.
- Safety Gear: Dust mask, safety glasses, gloves.
Step-by-Step Guide: How to Paint MDF Board Like a Pro
Follow these steps to transform your plain MDF board into a beautifully painted piece.
Step 1: Prepare and Clean Your MDF Board
This is arguably the most crucial step. A clean, smooth surface is the foundation for a great paint job.
- Inspect your MDF: Check for any rough patches, dents, or imperfections. If you find any, use a small amount of wood filler to fill them. Let it dry completely according to the manufacturer’s instructions, and then sand it smooth.
- Sand the surface: Use medium-grit sandpaper (around 120-180 grit) to lightly sand the entire surface of the MDF. This helps to remove any factory coating and creates a better surface for the primer to adhere to. Be gentle; you don’t want to gouge the material.
- Sand the edges: Cut edges of MDF can be very rough. Sand them smooth with the same grit sandpaper.
- Clean thoroughly: After sanding, there will be a lot of dust. Use a tack cloth or a slightly damp microfiber cloth to wipe down the entire piece, removing all dust particles. Make sure the surface is completely dry before moving on.
Step 2: Apply a High-Quality Primer
Primer is your secret weapon for painting MDF. It seals the porous surface, prevents excessive paint absorption, and provides a uniform base for your topcoat. For MDF, an oil-based or shellac-based primer is generally best. These are excellent at sealing the wood fibers and preventing “bleed-through” if there are any resins in the MDF.
- Choose the right primer: Look for primers specifically designed for hard-to-paint surfaces or MDF. Examples include Zinsser B-I-N Shellac-Based Primer or Kilz Original Oil-Based Primer. You can find more information on choosing the right primer from resources like Popular Mechanics’ guide to primers.
- Application: Apply a thin, even coat of primer using a brush or roller. Pay special attention to the cut edges, ensuring they are fully covered. Avoid applying it too thick, as this can cause the MDF to swell.
- Drying time: Allow the primer to dry completely according to the manufacturer’s instructions. This is vital for a good bond.
Step 3: Lightly Sand the Primed Surface
Once the primer is dry, you’ll likely notice that the MDF fibers have puffed up slightly, or there might be a few imperfections. A light sanding now will make your final paint job incredibly smooth.
- Use fine-grit sandpaper: Take your fine-grit sandpaper (220-grit is usually good) and lightly sand the entire primed surface. The goal here is just to knock down any raised fibers or imperfections, not to remove the primer.
- Clean again: Use your tack cloth or damp rag to remove all sanding dust. Ensure the surface is perfectly clean and dry.
Step 4: Apply Your Paint Coats
Now for the fun part – applying your chosen paint color!
- Choose your paint: Water-based acrylic or latex paints are easy to clean up and come in a vast array of colors and finishes. For a durable, enamel-like finish, consider a quality cabinet or trim paint. For best results, use a paint specifically designed for furniture or trim.
- First coat: Apply your first thin, even coat of paint. Use a good quality brush for edges and detailed areas, and a foam roller or small nap roller for the larger flat surfaces. Aim for even coverage, but don’t try to get full opacity in one go.
- Drying: Allow the first coat to dry completely. Check the paint can for recommended drying times – these can vary significantly.
- Second coat and beyond: Once dry, lightly sand any rough spots or dust nibs with your 220-grit sandpaper. Clean off the dust. Apply a second thin coat of paint. You might need a third coat for full, opaque coverage, especially with lighter colors over a darker primer or vice-versa. Always sand and clean between coats.
Step 5: Finishing Touches and Curing
Once you’ve applied your final coat of paint, resist the urge to handle the piece too roughly too soon.
- Allow to cure: Paint often feels dry to the touch within a few hours, but it takes much longer to fully “cure” and harden. This curing process can take several days to a few weeks, depending on the type of paint. During this time, be gentle with your painted MDF to avoid nicks or scratches. For more detailed information on paint curing times, you can refer to resources from paint manufacturers often found on websites like InspectAPedia.com (which often discusses building materials and finishes).
- Final inspection: Once cured, inspect your work. You should have a smooth, professional-looking finish that’s ready for use!
Tips for an Even Smoother Finish
Want to take your MDF painting to the next level? Here are a few extra tips:
- Spray painting: For the absolute smoothest finish, especially on intricate projects, consider spray painting. This requires a spray gun, proper ventilation, and practice, but the results can be stunning. Always follow safety guidelines when spray painting.
- Use a paint specifically for MDF: Some manufacturers offer paints formulated to work well with MDF, often containing additives to improve adhesion and reduce porosity.
- Work in a dust-free environment: Dust is the enemy of a smooth paint finish. If possible, paint in a clean room or a dust-controlled booth, especially for the final coats.
- Consider a paint sprayer attachment for your drill: For smaller projects or touch-ups, there are drill-powered paint sprayers that can offer a more even application than brushes or rollers.
Types of Paint and Primer for MDF Explained
Choosing the right primer and paint is crucial for a successful MDF project. Here’s a breakdown of what works best:
Primers:
Your goal with primer is to seal the MDF and create a uniform surface. The best primers for MDF are often oil-based or shellac-based because of their superior sealing properties.
| Primer Type | Pros | Cons | Best For |
|---|---|---|---|
| Shellac-Based Primer (e.g., Zinsser B-I-N) | Excellent sealing properties, blocks stains and odors, dries very quickly, works well on raw wood and MDF. | Strong odor, requires mineral spirits for cleanup, can be more expensive. | Raw MDF, projects needing strong stain blocking, quick drying times. |
| Oil-Based Primer (e.g., Kilz Original, Zinsser Cover Stain) | Good sealing and bonding, provides a durable finish, effective at blocking most stains. | Strong odor, requires mineral spirits for cleanup, longer drying times than shellac, can yellow over time. | General MDF projects, better adhesion on smooth surfaces, blocking wood tannins. |
| Water-Based Primer (Latex/Acrylic) | Low odor, easy cleanup with soap and water, readily available in low-VOC options. | Less effective at sealing porous MDF compared to oil/shellac, may require more coats, can raise wood fibers more. | Lightly sealed MDF, situations where odor is a major concern and stain blocking isn’t critical. Often requires extra sanding. |
Paints:
Once primed, MDF can take a variety of paints. The key is applying them in thin, even coats and allowing proper drying and curing time.
| Paint Type | Pros | Cons | Best For |
|---|---|---|---|
| Acrylic/Latex Paint | Wide range of colors, easy cleanup, low odor, good for most DIY applications. | Can be prone to chipping if not properly primed and prepped, may require more coats for full coverage on MDF. | Cabinets, furniture, decorative items where durability is moderate and ease of use is high. |
| Enamel Paint (Water-Based or Oil-Based) | Durable, hard-wearing finish, resistant to moisture and scuffs, provides a smoother look. | Oil-based enamel has strong odors and requires mineral spirits for cleanup; water-based enamels are easier to use but may not be as tough as oil-based. | High-traffic areas like cabinet doors, furniture, trim work where a hard, glossy finish is desired. |
| Cabinet & Trim Paint | Specifically formulated for durability and a smooth finish on furniture and trim. Often a type of enamel. | Can be more expensive than standard latex paints. | Kitchen cabinets, built-in shelving, trim – anywhere a very smooth, durable, and washable surface is needed. |
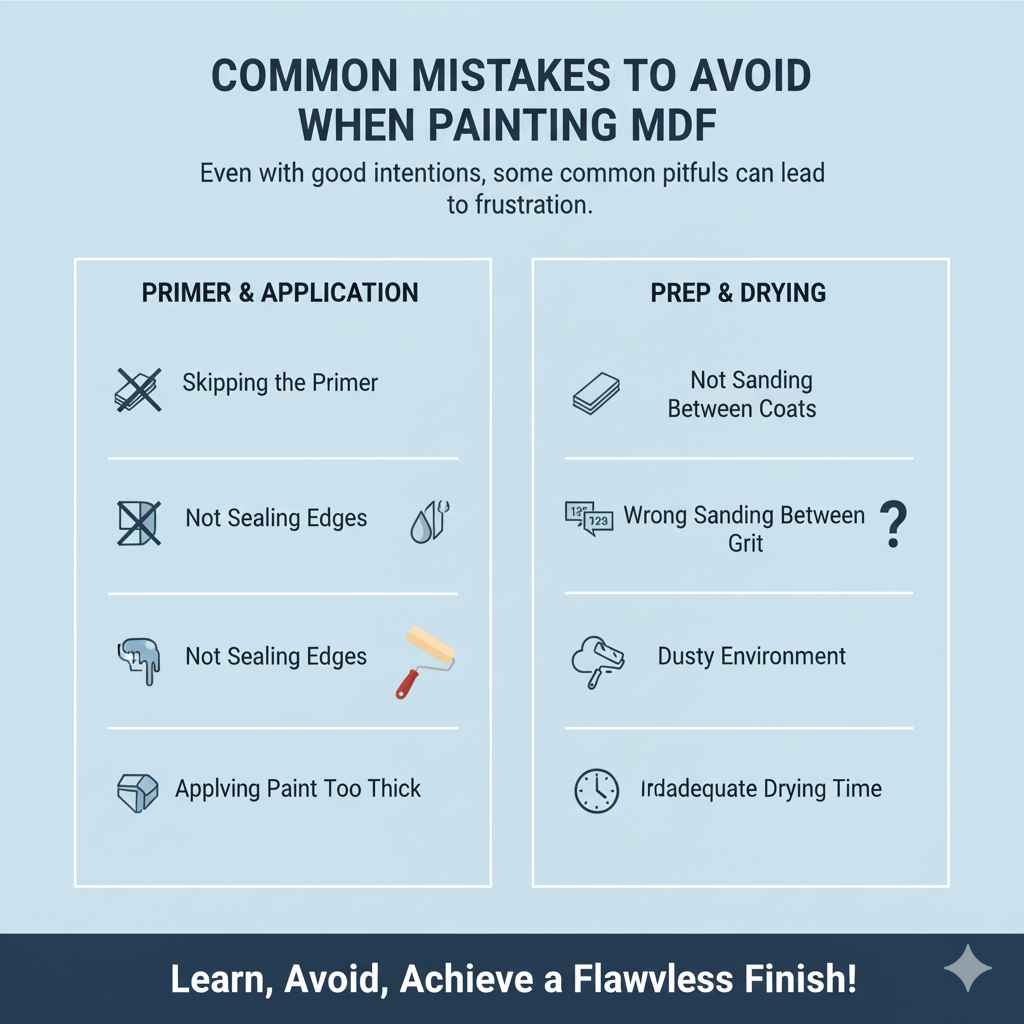
Common Mistakes to Avoid When Painting MDF
Even with good intentions, some common pitfalls can lead to frustration. Here’s what to watch out for:
- Skipping the primer: This is the number one mistake! Underrated but essential for MDF.
- Not sealing the edges: Cut edges are super thirsty. They need extra attention with primer.
- Applying paint too thick: This can lead to drips, brush marks, and potential swelling of the MDF.
- Not sanding between coats: This is key for that super-smooth, professional feel.
- Using the wrong sandpaper grit: Too coarse can scratch, too fine might not smooth enough.
- Painting in a dusty environment: Dust particles landing on wet paint are hard to remove.
- Not allowing adequate drying and curing time: This can lead to premature damage to your finish.
Frequently Asked Questions About Painting MDF Board
Here are some common questions beginners have about painting MDF:
Q1: Does MDF need to be sanded before painting?
Yes, it’s highly recommended. Lightly sanding the surface with 120-180 grit sandpaper helps to remove any factory coating and creates a better surface for the primer to adhere to. Edges especially benefit from sanding to smooth them out.
Q2: What is the best primer for MDF?
For MDF, high-quality oil-based or shellac-based primers are the most effective. They seal the porous material exceptionally well, preventing uneven paint absorption and potential swelling. Shellac-based primers dry the fastest and offer excellent stain blocking.
Q3: Can I use regular latex paint on MDF?
Yes, you can, but it’s crucial to prime the MDF thoroughly first with a suitable primer. Regular latex paint may soak into untreated MDF unevenly. Using a good primer will ensure your latex paint lays down smoothly and produces an even finish.
Q4: How many coats of paint do I need for MDF?
Typically, two to three thin coats of paint are needed for MDF. The number of coats depends on the paint color, its opacity, and how well the primer sealed the surface. Always allow each coat to dry fully and sand lightly between coats for the best results.
Q5: My MDF swelled after painting. What did I do wrong?
MDF can swell if it absorbs too much moisture. This usually happens if the primer didn’t seal the surface adequately, or if paint was applied too thickly. Ensure you use a good sealing primer (oil or shellac-based), apply paint in thin coats, and allow proper drying time between each layer.
Q6: Should I use a brush or roller for MDF?
A combination works best. Use a good quality synthetic brush for edges and any detailed areas. For larger flat surfaces, a foam roller or a small, high-density nap roller will provide a smoother, more even finish with fewer visible brush marks.
Q7: Can I paint MDF outdoors?
While you can paint MDF outdoors, it’s generally not recommended, especially for the final coats. Outdoor environments can be dusty, and temperature or humidity fluctuations can affect drying and curing times, potentially compromising the finish. If you must paint outdoors, choose a calm, dry day and do your best to create a clean workspace.
Conclusion
Painting MDF board doesn’t have to be a daunting task. By understanding its unique properties and following a few key steps – thorough preparation, using the right primer, and applying paint in thin, even coats – you can achieve a professional-looking finish that will make your projects shine. Remember, patience and attention to detail are your best tools. Each step, from the initial sanding to the final curing, contributes to a durable and beautiful result. So grab your supplies, follow this guide, and confidently transform your MDF projects into something you can be truly proud of. Happy painting!