How Does Gorilla Glue Work: Genius Adhesive Secrets
Gorilla Glue works through a unique chemical reaction with moisture. When exposed to humidity, it expands and foams, creating an incredibly strong bond that fills gaps and adheres to a variety of materials. It’s a remarkably versatile adhesive for DIY projects.
Have you ever stared at a broken item, wondering if it’s truly beyond repair? Maybe a favorite chair leg snapped, or a treasured ceramic piece shattered. You reach for glue, hoping for a miracle, but sometimes even strong glues let you down. That’s where Gorilla Glue steps in, often hailed as a DIY superhero. But how does this powerful adhesive actually work its magic? It’s not just sticky stuff; there’s some clever science behind its incredible strength.
Understanding the “how” behind your tools and supplies is key to becoming a better crafter. It’s about knowing what you’re working with and why it performs the way it does. This knowledge helps you make smarter choices for your projects, leading to more durable and beautiful results. We’re going to break down the genius behind Gorilla Glue, making it super simple to understand.
No more frustration with flimsy fixes! By the end of this guide, you’ll know exactly what makes Gorilla Glue so effective and how to use it like a pro for all your repair and building adventures. Let’s dive into the secrets of this amazing adhesive!
The Science Behind the Strength: How Does Gorilla Glue Work?
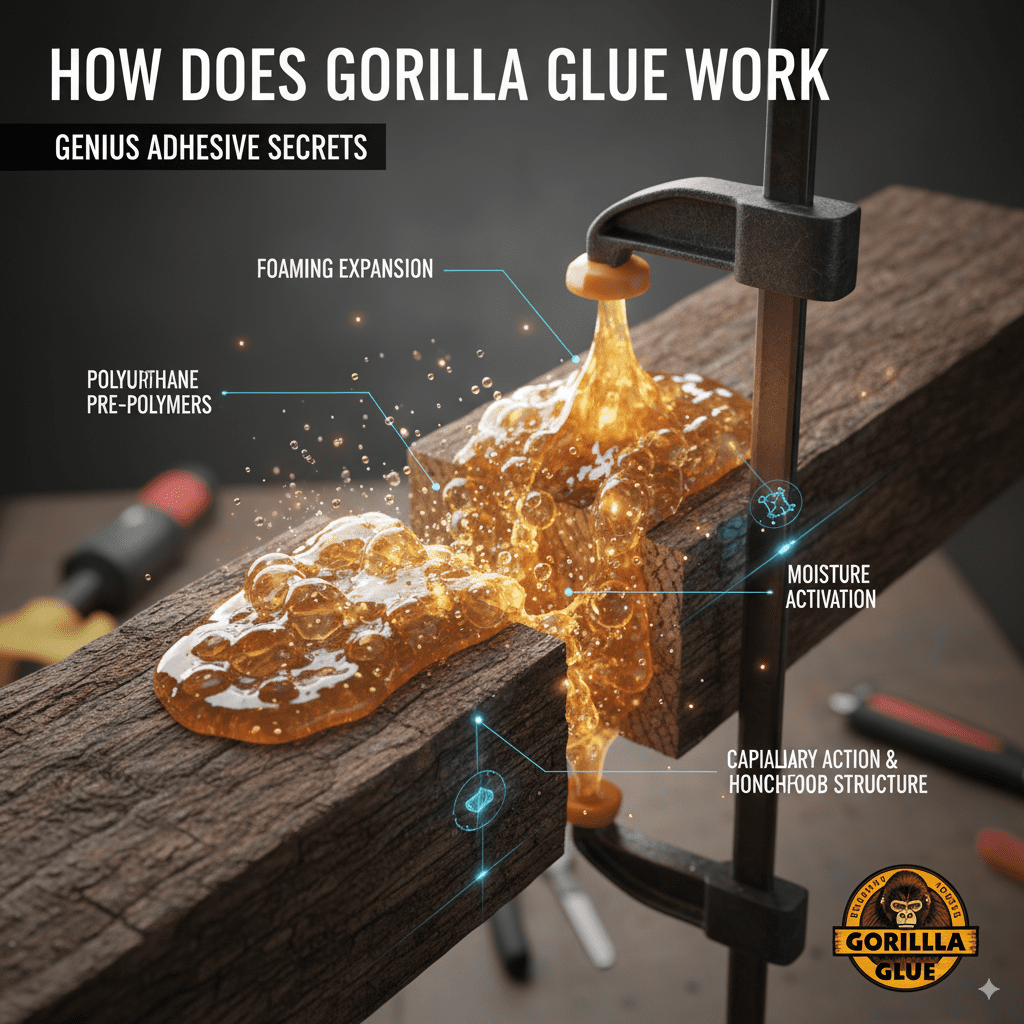
At its core, Gorilla Glue is a type of polyurethane adhesive. That might sound complicated, but think of it as a special liquid that changes its form when it meets moisture, transforming into a super-strong solid. This isn’t your everyday white school glue or even a standard wood glue. It relies on a chemical reaction to create its legendary bond.
Polyurethane: The Magic Ingredient
Gorilla Glue’s main ingredient is a polymer called polyurethane. When it’s in liquid form inside the bottle, it’s stable. However, when it comes into contact with water molecules – even just the humidity in the air – a chemical reaction called polymerization begins. This reaction causes the liquid to harden and expand.
The Role of Moisture
This is the key secret: moisture. Gorilla Glue is designed to react with water. When you apply it to a surface, it’s the tiny water particles present in the air or on the material itself that kickstart the hardening process. As the glue absorbs moisture, it undergoes a change. It starts to form a dense, cross-linked structure that is incredibly tough and durable.
Expansion and Foam
A defining characteristic of Gorilla Glue is its expansion. As the polymerization happens, the glue releases carbon dioxide gas. This gas gets trapped within the hardening polyurethane, creating a foamy structure. This foam allows the glue to expand into nooks and crannies, filling gaps and providing a more complete bond, even on uneven surfaces. It’s this expansion that gives it its tenacious grip.
Bonding to Different Materials
The chemical nature of polyurethane allows it to bond effectively with a wide range of materials. It can create strong adhesion to wood, stone, metal, ceramic, foam, glass, and even some plastics. It works by forming chemical bonds and physical interlocking with the surface it’s applied to. For more information on different types of adhesives and their properties, resources like the National Institute of Standards and Technology (NIST) offer valuable insights into material science.

Applying Gorilla Glue: A Step-by-Step Guide for Beginners
Now that you know the science, let’s get practical! Using Gorilla Glue is straightforward, but there are a few tips to make sure you get the best results and avoid any sticky situations. Safety first, always!
Preparation is Key
Before you even open the bottle, make sure your workspace is ready. You’ll want good ventilation because the fumes can be strong. It’s also wise to protect your surfaces with newspaper or a drop cloth. Gorilla Glue sticks to everything, so preventing accidental drips is much easier than cleaning them up!
Materials & Tools You’ll Need:
- Your Gorilla Glue product
- The items to be bonded
- Damp cloth or sponge (for activating certain types)
- Masking tape or clamps
- Gloves (highly recommended!)
- Safety glasses
- Paper towels or old rags
- Sandpaper (optional, for roughing surfaces)
- Rubbing alcohol or acetone (for cleanup, if needed, before it dries)
Step 1: Clean the Surfaces
Ensure the surfaces you want to join are clean, dry, and free from dust, dirt, oil, or grease. Any contaminants can weaken the bond. For some materials, lightly sanding them to create a slightly rougher texture can improve adhesion.
Step 2: Apply a Small Amount of Glue
This is important: use Gorilla Glue sparingly! Because it expands, a little goes a long way. Apply a thin, even bead of glue to one of the surfaces. Do not spread it around like other glues.
Step 3: Lightly Dampen One Surface (Optional, but Recommended for Many Materials)
For many applications, especially with porous materials like wood or ceramic, lightly misting one of the surfaces with water can help initiate the foaming and bonding process faster. Use a damp cloth or a spray bottle with a fine mist. Be careful not to make it soaking wet; just a light application is needed. Check the specific product instructions, as this step might vary.
Step 4: Join the Surfaces and Clamp/Tape
Carefully press the two surfaces together. Hold them firmly for about 30-60 seconds. Then, use masking tape or clamps to hold the pieces securely in place while the glue cures. This is crucial because the expansion can shift pieces if they aren’t held still.
Step 5: Wipe Away Excess Glue (Immediately!)
The moment you join the pieces, you’ll see some glue start to expand. While still wet, carefully wipe away any excess glue that squeezes out with a dry paper towel or rag. Once it starts to foam and cure, it becomes very difficult to remove.
Step 6: Allow Full Cure Time
Gorilla Glue needs time to cure fully. While it might feel dry to the touch much sooner, the strongest bond develops over 24 hours. For maximum strength, avoid putting stress on the joint until the full cure time has passed. Check the product packaging for specific cure times.
Step 7: Trim Any Dried Foam
After the glue has fully cured, you’ll likely see hardened foam in some areas. You can carefully trim this away with a craft knife or sand it down if you need a smoother finish.
Gorilla Glue vs. Other Adhesives: What Makes It Unique?
There are many types of glues out there, each with its own strengths. Gorilla Glue stands out because of its unique mechanism and versatility. Let’s compare it briefly.
Super Glue (Cyanoacrylate): This works by reacting with a moisture film. It’s fast-acting and great for small, non-porous items but doesn’t expand and is brittle. It’s ideal for quick fixes where Gap filling isn’t needed.
Wood Glue (PVA): Typically PVA-based (Polyvinyl Acetate), wood glue is water-based and activates when applied to porous surfaces like wood. It creates a strong bond for wood-to-wood applications but doesn’t expand and isn’t ideal for non-porous materials.
Epoxy: This is a two-part adhesive that reacts chemically when mixed. It forms a very strong, rigid bond and is excellent for filling gaps and bonding dissimilar materials but requires precise mixing and has a limited working time.
Gorilla Glue (Polyurethane): Its key differentiators are its expansion, moisture activation, and ability to bond a wide variety of materials. This makes it perfect for tasks where you need a strong, gap-filling bond and aren’t working with only wood-to-wood joints.
When to Use Gorilla Glue (and When to Choose Something Else)
Gorilla Glue is a fantastic all-around adhesive, but it shines brightest in certain situations. Knowing these will help you pick the right tool for the job.
Gorilla Glue is Great For:
- Woodworking Repairs: Fixing broken furniture, chair legs, cabinet doors, or even some structural wood repairs where expansion is beneficial.
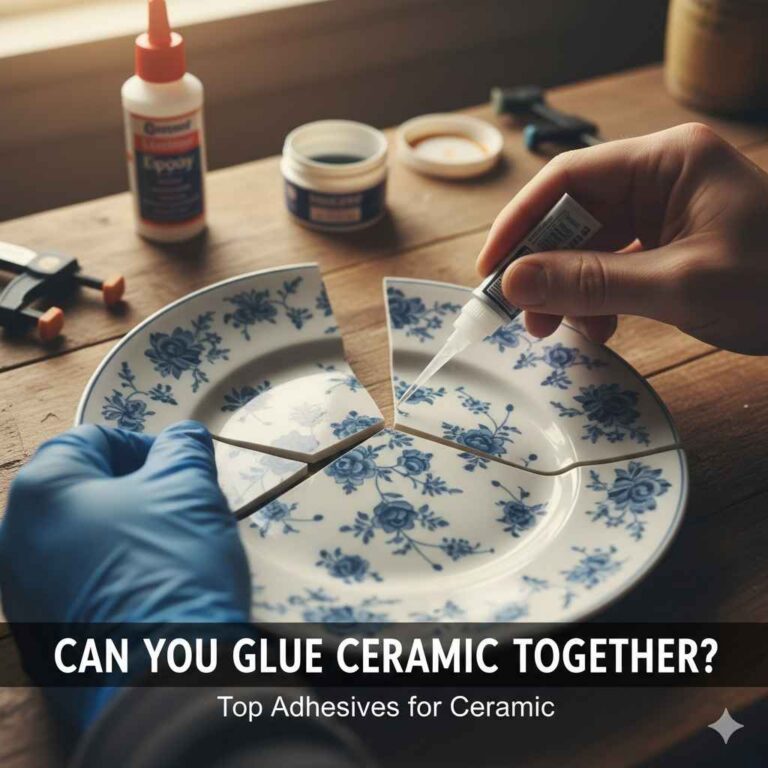
- Ceramics and Stone: Repairing broken pottery, garden ornaments, or cracked tiles. Its gap-filling ability is a big plus here.
- Metal and Glass: Bonding metal parts or repairing glass items (though specialized glass glues might offer better clarity).
- Outdoor Projects: Its strength and durability make it suitable for items that might be exposed to the elements.
- Projects Requiring Gap Filling: When surfaces aren’t perfectly flush, the expansion can create a stronger hold.
When Another Glue Might Be Better:
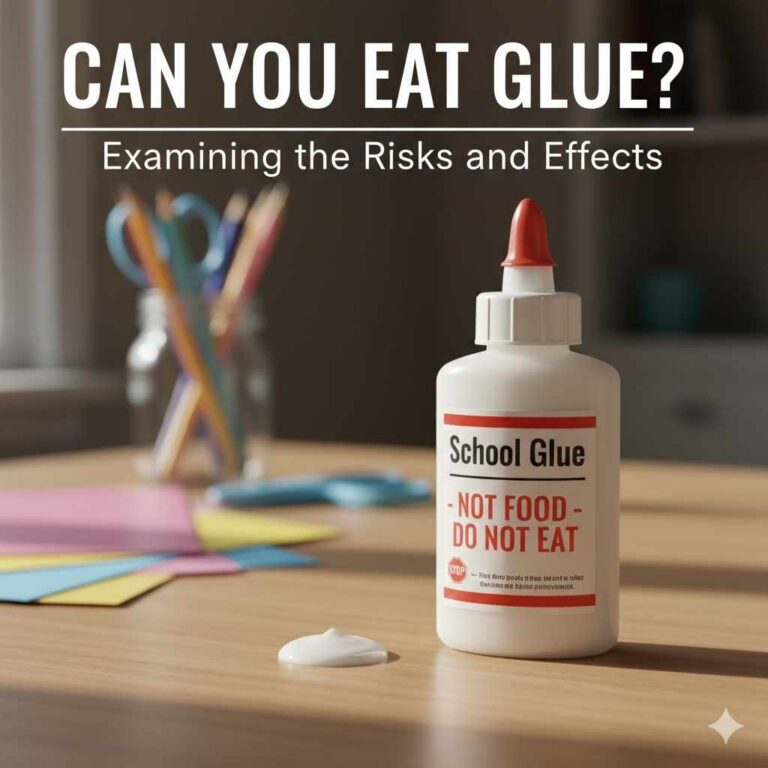
- Food Contact Surfaces: Most Gorilla Glues are NOT food safe once cured. Look for specific food-grade adhesives for items that will touch food. The FDA provides guidelines on food contact substances.
- Clear Bonds on Glass: While it bonds glass, it dries to an opaque, foamy color. For invisible repairs on glass, a clear cyanoacrylate or a specialized glass adhesive is better.
- Flexible Projects: Gorilla Glue creates a rigid bond. For items that need to remain flexible, like certain fabrics or rubber, a flexible adhesive is required.
- Delicate Crafts: For very fine, detailed craft work, super glues offer precision without expansion.
- Large Surface Areas Needing an Invisible Bond: Its expansion can be messy and visible on large, smooth surfaces where a clean, flush look is desired.
Gorilla Glue Product Types
Gorilla Glue offers several variations of their popular adhesive, each with slightly different properties:
| Product Type | Key Features | Best For |
|---|---|---|
| Original Gorilla Glue | Moisture activated, expands significantly, strong bond, opaque color. | Wood, stone, metal, ceramic, foam, glass, porous materials. |
| Gorilla Glue Gel | Thicker consistency, less expansion, controlled application. | Vertical surfaces, overhead applications, materials where less spread is desired. |
| Gorilla Super Glue (various formulas) | Fast-acting, no expansion, various strengths (e.g., Plastic Bonding, Micro-Tip). | Quick repairs on non-porous items, plastic, rubber, metal, wood where speed and precision are needed. |
| Gorilla Construction Adhesive | Heavy-duty, high strength, gap-filling, flexible once cured. | Subfloors, countertops, framing, larger construction/DIY projects. |
Tips for Safe and Effective Use
Working with any adhesive requires care. Gorilla Glue is powerful, so a few extra precautions go a long way.
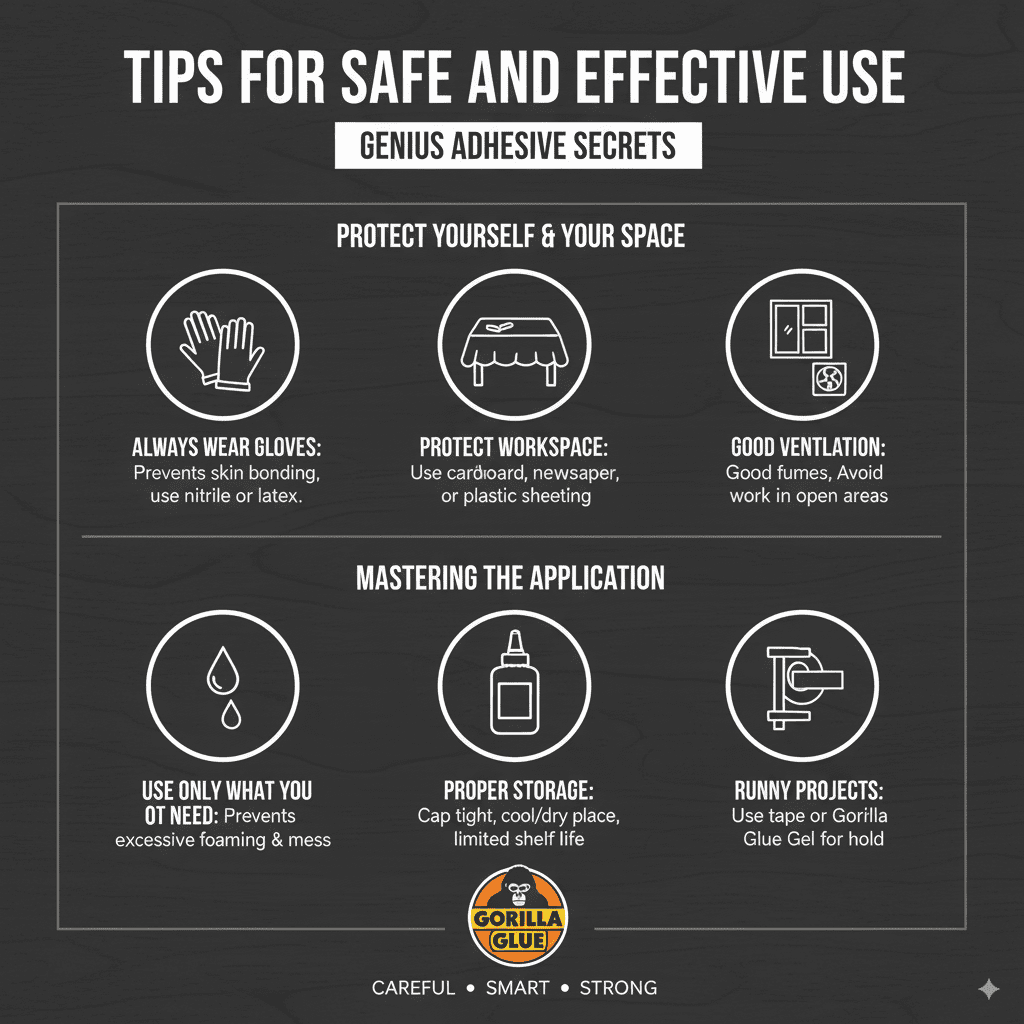
Always Wear Gloves
Gorilla Glue can bond skin very quickly and firmly. Nitrile or latex gloves are a must. If you do get it on your skin, do not try to force the skin apart. Soak in warm, soapy water and gently rub or peel. For stubborn bits, rubbing alcohol may help.
Protect Your Workspace
As mentioned, Gorilla Glue expands and is very difficult to remove once cured. Newspaper, cardboard, or plastic sheeting are essential for protecting your table or floor.
Ensure Good Ventilation
The adhesive fumes can be irritating. Work in a well-ventilated area, especially when using large amounts or in confined spaces.
Use Only What You Need
Remember the expansion! Applying too much glue will lead to excessive foaming, making a mess and potentially weakening the bond if there’s too much material between the surfaces.
Storage Matters
Keep the cap on tightly and store Gorilla Glue in a cool, dry place. Most Gorilla Glue products have a limited shelf life once opened.
Dealing with Runny Projects
If you’re working on a project that can’t be clamped flat, like a chair leg or a picture frame, consider using Gorilla Glue Gel or a bit of tape to temporarily hold pieces in place before the clamp can be applied. You can also use painter’s tape to hold things in position.
Frequently Asked Questions About Gorilla Glue
Here are some common questions beginners have:
Q1: How long does it take for Gorilla Glue to dry?
A1: The initial bond forms in about 1-2 hours, but for the strongest hold, allow a full 24 hours for complete curing. The exact time can vary depending on humidity, temperature, and the amount of glue used.
Q2: Can I use Gorilla Glue for repairs on items that will be in contact with food?
A2: No, original Gorilla Glue is not food safe. It can release fumes and is not intended for direct food contact. Always check product labels and look for specially certified food-safe adhesives for such applications.
Q3: My Gorilla Glue expanded too much and made a mess. How do I clean it up?
A3: If the glue is still wet, wipe it up immediately with a dry cloth or paper towel. If it has started to cure, you can try carefully scraping away the excess. For stubborn, cured glue, a little rubbing alcohol or acetone might help dissolve it, but test in an inconspicuous area first. Once fully cured, it’s very durable, and trimming the foam is often the best solution.
Q4: Can I paint or stain over Gorilla Glue?
A4: Yes, once fully cured, you can often paint or stain over Gorilla Glue. However, the cured glue will not absorb stain like natural wood, so you may have a slight difference in finish. Light sanding can help paint adhere better.
Q5: What is the difference between original Gorilla Glue and Gorilla Glue Gel?
A5: Original Gorilla Glue is thinner and expands more, making it great for filling gaps but requiring a firmer hold during curing. Gorilla Glue Gel is thicker, expands less, and is easier to control, making it suitable for vertical surfaces, overhead applications, and projects where less spread is desired.
Q6: Will Gorilla Glue work on plastic?
A6: Original Gorilla Glue can bond certain types of plastic, but it’s not ideal for all plastics, especially very smooth or waxy ones. For most plastic repairs, Gorilla Super Glue (specifically their Plastic Bonding formula, which includes an activator) is a more reliable choice.
Q7: How should I store opened Gorilla Glue?
A7: To get the most life out of your opened Gorilla Glue, wipe the nozzle clean of any excess glue, screw the cap on tightly, and store it upright in a cool, dry place, often in its original packaging or a plastic bag to prevent moisture exposure.
Conclusion: Your Go-To Adhesive for Tough Jobs
So, there you have it! The “magic” behind Gorilla Glue isn’t magic at all, but rather clever chemistry. By understanding how its polyurethane formula reacts with moisture to expand and form a super-strong, durable bond, you can use it with confidence. Whether you’re tackling a wobbly chair, a chipped garden gnome, or a DIY project that demands serious staying power, Gorilla Glue is a reliable ally.
Remember the key steps: clean surfaces, apply sparingly, consider a light mist of water for that moisture activation, hold securely while it cures, and always prioritize safety by wearing gloves and ensuring good ventilation. With these insights, you’re well-equipped to harness the genius of this incredible adhesive.
Don’t let broken items or structural challenges hold you back. With Gorilla Glue in your toolbox and this guide in mind, you’re ready to make repairs that last and create with confidence. Happy crafting, and may your bonds be strong!