How Does Hot Glue Work: Proven Science
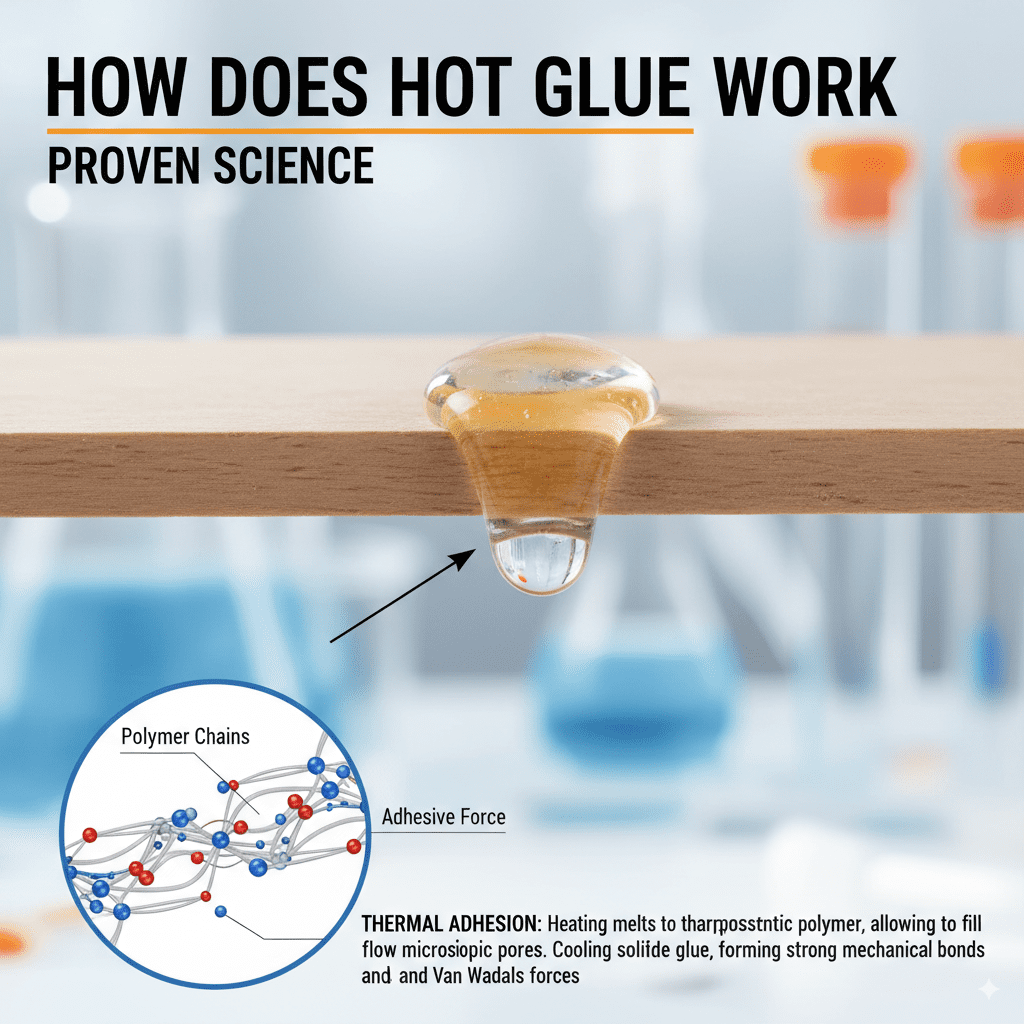
Fast Answer: Hot glue works by melting a solid adhesive stick until it becomes a liquid, which then flows into gaps. As it cools, it solidifies, creating a strong bond by physically holding surfaces together and filling microscopic imperfections. It’s a simple process of melting and solidifying.
Ever grabbed a hot glue gun for a quick fix or a craft project, only to wonder how that gooey stuff suddenly becomes so strong? You’re not alone! Many of us use hot glue all the time, but the science behind its sticking power is often a mystery. It can feel a bit like magic, but I promise, it’s all practical science that we can easily understand. This quick guide will demystify how hot glue works, so you can use it with even more confidence. Let’s dive into the simple, yet effective, science of hot glue!
Understanding Hot Glue: More Than Just Melted Plastic
At its core, hot glue is a thermoplastic. This fancy term simply means it’s a type of plastic that becomes soft and pliable when heated and solidifies when cooled. Think of it like ice: it’s solid, then it melts into water, and then freezes back into ice. Hot glue sticks work in a very similar way, but instead of water, we have a specialized adhesive.
When you load a glue stick into your hot glue gun and heat it up, the gun’s heating element works its magic. It gently raises the temperature of the glue stick until it melts into a molten, liquid state. This molten glue is then ready to be applied to your project. The real bonding action begins as the molten glue cools down.
Upon cooling, the liquid glue turns solid again. This solidification is what creates the bond. It’s not like a chemical reaction glue (like some super glues) that actually forms new chemical bonds. Instead, hot glue relies on physical adhesion. The melted glue flows into tiny cracks and imperfections on the surfaces being joined. As it cools and hardens, it physically locks those surfaces together. It’s this physical interlocking and the cooling contraction that gives hot glue its surprising strength.
The Science Behind the Stick: Thermal Transition
The key principle behind how hot glue works is called a thermal transition. This is the point at which a material changes its physical state or properties due to a change in temperature. For hot glue, this means the transition from a solid stick to a liquid adhesive and back to a solid, bonded state.
A hot glue stick isn’t just pure plastic. It’s a carefully engineered mixture of polymers, resins, tackifiers, and other additives. These ingredients are chosen to give the glue specific properties:
- Polymers: These are the long-chain molecules that form the backbone of the glue. Common polymers include ethylene vinyl acetate (EVA), polyethylene, or polyamides, depending on the glue’s intended use.
- Resins: These help the glue stick to various surfaces and improve its adhesion.
- Tackifiers: These are sticky substances that enhance the initial grab of the glue, helping it bond quickly.
- Waxes and Fillers: These can control the viscosity (how thick or thin the glue is), drying time, and overall strength.
When the hot glue gun heats up, it reaches a temperature typically between 250°F and 375°F (120°C to 190°C), depending on the type of glue stick and gun. At these temperatures, the polymers and other components soften and flow. The molten glue then possesses capillary action, allowing it to be drawn into the microscopic pores and unevenness of the materials it’s applied to. Think of spreading butter on a piece of toast – it fills all the little nooks and crannies.
As the glue cools, the polymers re-align themselves, and the material solidifies. This process creates a physical bond. The glue essentially shrinks slightly as it cools, which helps pull the two surfaces together, increasing the bond strength. This cooling and re-solidification is known as crystallization or vitrification, depending on the specific polymer used. The speed of this process is crucial; too fast, and the glue might not have time to properly adhere, too slow, and it might remain gummy.
The Role of a Hot Glue Gun
While the glue stick is the adhesive material, the hot glue gun is the tool that makes the magic happen. Its design is quite simple but ingenious:
A typical hot glue gun has a few key components:
- Heating Element: Usually a ceramic or metal resistor that generates heat when electricity passes through it.
- Thermostat: Controls the temperature to keep it within a specific range to melt the glue without burning it.
- Nozzle: The tip where the molten glue exits. It’s often made of metal to withstand high temperatures.
- Trigger Mechanism: Pushes the glue stick forward into the heating chamber.
- Glue Stick Feed: This is where you insert the solid glue stick.
- Power Cord: Supplies electricity to the heating element.
When you plug in the gun, the heating element heats up. The trigger you squeeze pushes the solid glue stick into this heated area. Imagine a lever slowly pushing a block past a campfire; it starts to soften. As it moves further into the heated chamber, it melts completely. The molten glue then travels to the nozzle, ready to be dispensed.
The temperature control is essential. If the gun gets too hot, it can burn the glue, giving off fumes and reducing its adhesive quality. If it’s not hot enough, the glue won’t melt properly, leading to a weak bond or clogs. This precise temperature control allows the polymers to reach their optimal melting point for effective adhesion.
Types of Hot Glue Sticks
Did you know there’s more than one kind of hot glue stick? The science of how they work remains the same – melting and solidifying – but the ingredients vary to suit different tasks. This variation affects things like bonding strength, flexibility, and temperature resistance. Here’s a look at some common types:
| Type of Glue Stick | Key Ingredients/Properties | Best Uses | Considerations |
|---|---|---|---|
| All-Purpose (Standard) | Typically EVA-based polymers. Melts at medium temperatures (around 350°F/175°C). Good general adhesion. | Crafts, DIY projects, paper, light wood, fabric. | Can become brittle when cold and soften when very hot. |
| High-Temp | Often uses stronger polymers like polyamide or has higher concentrations of certain resins. Melts at higher temperatures (around 375°F/190°C). Forms a very strong, durable bond. | Woodworking, stronger plastics, metals, fabrics that need a robust bond. | Requires a high-temperature glue gun. Can be too hot for delicate materials. |
| Low-Temp | Melts at lower temperatures (around 250°F/120°C). Less viscous when melted. | Delicate materials like foam, balloons, silk flowers, children’s crafts. | Bond might not be as strong or heat-resistant as high-temp glues. |
| Craft (Low-Melt) | Similar to low-temp, designed for comfort and safety with lower heat. Good for paper, fabric, and light crafts. | General crafting, school projects, scrapbooking. | Not suitable for heavy-duty applications. |
| Specialty (e.g., Flexible, Wood-Specific) | Formulated with additives for specific needs, like flexibility or enhanced wood bonding. | Projects requiring joints that can flex, or when gluing untreated wood. | May require specific glue guns or gun types. Check product labels. |
The choice of glue stick directly impacts how well your project holds up. For woodworking beginners, an all-purpose or a wood-specific high-temperature glue stick can be excellent starting points. Always check the packaging for recommended applications and the type of glue gun required.
The Bonding Process: Step-by-Step
Let’s walk through how to use a hot glue gun effectively and understand the science in action during each step:
- Preparation: Gather your materials. Ensure the surfaces you’re joining are clean, dry, and free of dust or grease. This might involve a quick wipe-down. Dirty surfaces can prevent proper adhesion.
- Heat Up the Gun: Plug in your glue gun and insert a glue stick. Allow it ample time to heat up—usually 5-10 minutes. This ensures the glue stick is fully melted and ready to flow smoothly. This step is crucial for the thermal transition to occur properly.
- Test the Flow: Once heated, gently squeeze the trigger to dispense a small amount of glue onto a scrap piece of material. This checks that the glue is molten and applying evenly. It also clears the nozzle of any cooled glue from a previous session.
- Apply the Glue: Hold the glue gun nozzle close to the surface (but not touching it, to avoid damage). Apply a thin, even bead of molten glue. Don’t over-apply, as excess glue can squeeze out and look messy. The liquid glue is now in contact with the materials.
- Join the Surfaces: Immediately after applying the glue, press the two pieces together firmly. You typically have about 10-30 seconds before the glue starts to cool and solidify significantly. This is your working window.
- Hold or Clamp: Keep the pieces pressed together for about 30-60 seconds. For critical joints, you might use clamps or tape to hold them in place while the glue fully cools and hardens. During this time, the thermal transition is happening: the liquid adhesive is cooling, solidifying, and engaging with surface imperfections to create the bond.
- Curing: While hot glue bonds quickly, it continues to reach its maximum strength over a longer period, often a few hours or up to 24 hours. This is when the polymers fully settle and the bond reaches full durability.
Understanding this process empowers you to work smarter. For example, knowing you have a limited working window means you should have both pieces ready to go before you apply the glue.
Factors Affecting Hot Glue Strength
Several elements can influence how strong a hot glue bond becomes. Being aware of these helps you achieve the best results:
- Surface Preparation: As mentioned, clean surfaces are key. Oils, dust, or moisture can create a barrier, preventing the glue from making good contact.
- Temperature:
- Glue Temperature: The gun must reach the correct temperature for the specific glue stick. Too low, and it won’t flow well; too high, and it can degrade.
- Ambient Temperature: A very cold environment can cause the glue to cool down too quickly, potentially creating a weaker bond because it doesn’t have time to flow into surface irregularities. Conversely, extreme heat can keep the glue from solidifying properly.
- Glue Stick Type: Using the right glue stick for the job is crucial. All-purpose sticks are fine for paper, but for wood or metal, a high-temperature or specialty wood glue stick will offer superior adhesion.
- Application Technique: Applying a consistent, appropriately sized bead of glue ensures good contact. Too little, and you won’t have enough to span the gap; too much, and it can reduce the overall structural integrity of the joint.
- Cooling Time: Allowing adequate time for the glue to cool completely is vital. For projects where strength is paramount, waiting the full curing time is recommended before putting stress on the bond.
- Material Type: Hot glue adheres best to porous materials like wood, fabric, and paper because it can penetrate their surfaces. It also works on many plastics and metals, but the smoothness of these materials means the bond relies heavily on the glue’s ability to conform to microscopic texture.
For woodworking, understanding the porous nature of wood is beneficial. Hot glue can seep into the wood grain, creating a more mechanical interlock once cooled. For more information on adhesives used in woodworking, the Forest Products Laboratory offers in-depth resources.
When to Use Hot Glue (and When Not To!)
Hot glue is a fantastic tool for many situations, but it’s not a one-size-fits-all solution. Here’s a guide to help you decide:
Great for Projects Like:
- Quick Repairs: For non-structural fixes on items like fabric, upholstery, or some plastics.
- Crafts and Hobbies: Ideal for scrapbooking, model building, floral arrangements, and general DIY crafts.
- Temporary Fixturing: Holding small pieces in place while you use screws, nails, or stronger adhesives.
- Attaching Embellishments: Gluing beads, glitter, fabric patches, or decorative elements.
- Sealing and Insulating: Used for light sealing around small gaps or insulating wires in electronics projects (ensure proper safety guidelines are followed).
Best Avoided For:
- Structural Loads: Hot glue is not designed to bear significant weight or stress. It can fail under sustained pressure, especially in fluctuating temperatures.
- High-Heat Environments: If your project will be exposed to direct sunlight in a car, near a heat source, or in a warm room, the glue can soften and fail.
- Food-Contact Surfaces: Most hot glues are not food-safe. Always check the packaging.
- Projects Requiring Long-Term Flexibility: While some specialty glues are flexible, standard hot glue can become brittle over time, especially with temperature changes.
- Critical Joints in Woodworking: For the main structural joints of furniture or load-bearing wooden structures, traditional wood glues (like PVA or epoxy) are far more reliable and durable. The American Woodworking Association outlines best practices for wood joinery which often exclude hot glue for primary bonds.
Knowing these limitations means you can choose the most appropriate adhesive for your project, ensuring durability and safety.
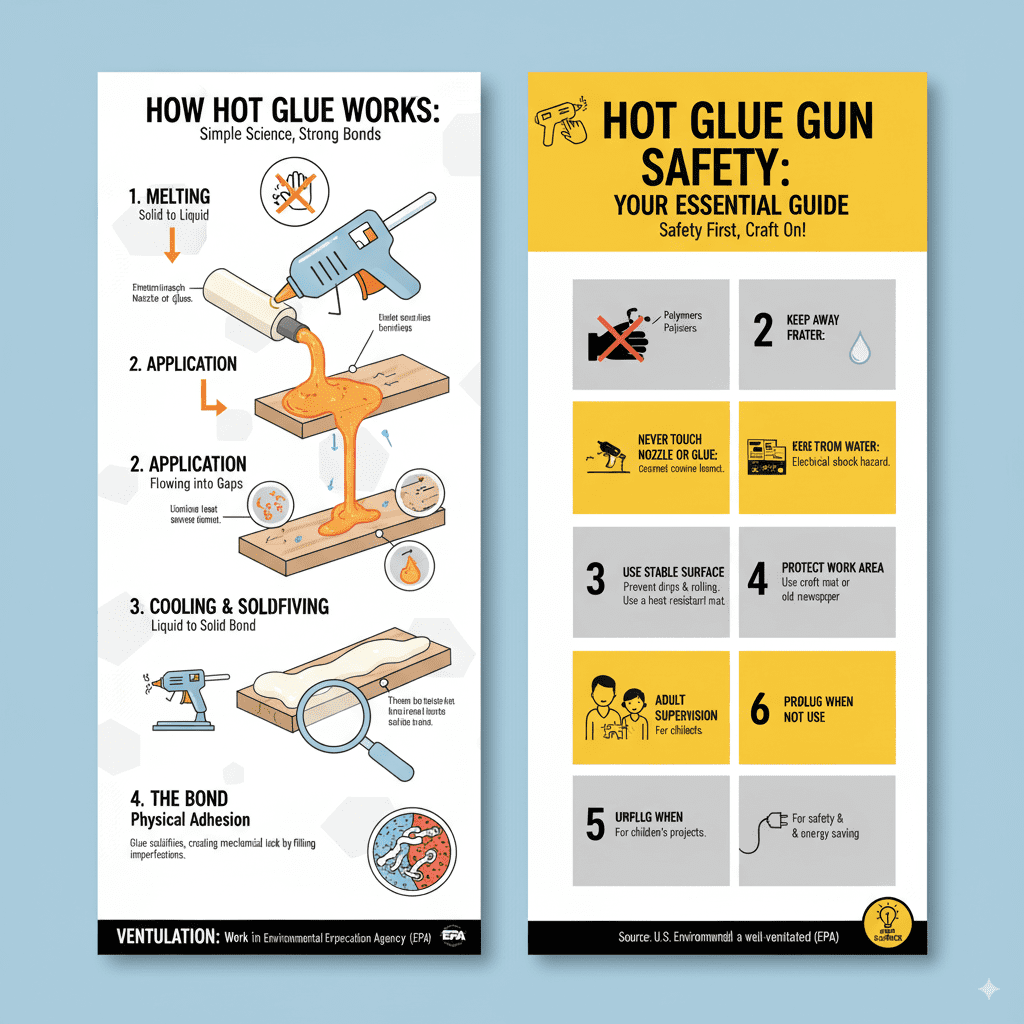
Safety First with Your Hot Glue Gun
As your friendly woodworking mentor, safety is always my top priority. Hot glue guns get hot, so a few simple safety tips go a long way:
- Never Touch the Nozzle or Molten Glue: This is the golden rule. The nozzle and the melted glue are extremely hot and can cause severe burns.
- Keep Away from Water: Like most electrical devices, keep your glue gun and electrical cord away from water to prevent shocks.
- Use a Stable Surface: Always place the hot glue gun on its stand or a heat-resistant surface when not in use. Never lay it on its side where it could roll or drip hot glue onto something flammable.
- Protect Your Work Area: Use a craft mat or old newspapers to protect your table from stray drips.
- Adult Supervision: If children are involved in a project, ensure they have close adult supervision, especially when handling the glue gun.
- Unplug When Not In Use: For safety and energy saving, unplug the glue gun when you’re finished or if you’re going to be away from it for an extended period.
- Ventilation: While most modern glues have low VOCs (Volatile Organic Compounds), it’s good practice to work in a well-ventilated area, especially if you notice any strong odors. The U.S. Environmental Protection Agency (EPA) provides valuable information on VOCs and indoor air quality.
Following these simple steps ensures that your crafting and DIY projects are not only successful but also safe.
Frequently Asked Questions About Hot Glue
Let’s address some common questions beginners have about hot glue:
Can hot glue permanently bond wood?
For simple crafts or temporary hold, yes. However, for structural woodworking projects that will bear weight or stress, it’s not recommended. Traditional wood glues like PVA, epoxy, or polyurethane adhesives offer much stronger, more durable, and water-resistant bonds for wood.
How long does hot glue take to dry?
Hot glue “sets” or solidifies very quickly, usually within 15-60 seconds of application. However, it takes longer to reach its maximum bond strength, often several hours or up to 24 hours, depending on the glue type and environmental conditions.
Is hot glue waterproof?
Most standard hot glues are not waterproof. They can soften and lose their bond if exposed to significant moisture or water over time. Specialty waterproof hot glues exist, but they are less common than standard types.