How Hard Is It To Refinish Wood Floors? Honest Breakdown
Refinishing wood floors yourself is challenging but achievable for most DIYers with patience and the right approach. It demands significant physical effort, careful tool handling, and attention to detail across several stages, from sanding to final sealing.
The Big What Refinishing Wood Floors Really Means
Refinishing wood floors means bringing old, worn-out wood back to life. It’s more than just a quick coat of paint or varnish. It involves removing the old finish completely.
Then, you smooth the wood surface. After that, you apply a new stain and protective coating. This process can transform a room.
It makes dated or damaged floors look brand new.
The main goal is to erase years of wear and tear. Scratches, scuffs, and faded color all disappear. This brings out the natural beauty of the wood underneath.
It’s a way to update your home without replacing the entire floor. It can add significant value and appeal.
My First Time Tackling Floor Refinishing: A True Story
I remember staring at my living room floor. It was a mess. Years of kids, pets, and sliding furniture had taken their toll.
The old polyurethane was dull and scratched everywhere. I had seen “DIY floor refinishing” posts online. They made it look so simple.
So, I decided to try it myself one summer. I rented the big, scary-looking drum sander. The smell of sawdust hit me like a wall the moment I started.
It was overwhelming. I felt a knot of doubt in my stomach.
Dust was everywhere, despite my best efforts with tarps. The noise of the sander was deafening. I remember thinking, “What have I gotten myself into?” It was a humbling experience.
The sheer physical effort was immense. My arms ached for days. But seeing that first patch of fresh, clean wood emerge from under the old finish was a powerful moment.
It gave me the push I needed to keep going.
Refinishing vs. Rekeying: A Quick Look
Refinishing floors means sanding down the top layer to remove old finishes and damage. Then you apply new stain and a protective top coat. This is a major DIY or professional job.
Rekeying refers to changing the internal pins of a lock cylinder so an old key no longer works. A new key is then used. This is for security, not for home improvement.
The Nitty-Gritty: Steps Involved in Refinishing Wood Floors
Refinishing floors is a multi-step process. Each step is important. Skipping a step can lead to a poor finish.
It’s crucial to understand each part.
Step 1: Clearing the Space
First, you must empty the room. Move all furniture, rugs, and decorations. This means everything.
Even small items need to go. You need a completely clear space to work. This takes time and planning.
It’s a good excuse to declutter!
Cover any built-in items like cabinets or fireplaces. Use plastic sheeting and painter’s tape. This protects them from dust.
Make sure to seal gaps well. Dust is very fine and gets everywhere.
Step 2: Cleaning the Floors
After emptying the room, clean the floors thoroughly. Sweep up all loose dirt and debris. Then, use a damp mop.
Use a wood floor cleaner recommended for your type of wood. Make sure the floor is completely dry before moving on. Any remaining dirt can be trapped in the new finish.
Check for any old nails or staples. Hammer them down below the wood surface. If they stick out, they can damage your sanding equipment.
This is a detail you don’t want to miss.
Step 3: The Sanding Process
This is the most physically demanding part. You’ll need a floor sander. A drum sander is common for large areas.
An edge sander is needed for borders and corners. A detail sander or sanding blocks are for tight spots.
You start with coarse-grit sandpaper. This removes the old finish. For example, use 36 or 60 grit.
Then, you move to a medium grit. This smooths the wood. Try 80 or 100 grit.
Finally, you use a fine grit. This makes the wood surface very smooth. Use 120 or 150 grit.
Always sand with the grain of the wood.
Work in even passes. Overlap your sanding lines slightly. This ensures you don’t miss spots.
Sanding creates a lot of dust. Wear a good dust mask. Use a shop vacuum to collect dust as you go.
Keep the room well-ventilated. Open windows if the weather allows.
Sanding Grit Progression Explained
- Coarse Grit (36-60): Removes old finish, deep scratches, and stains. This is the heavy lifter.
- Medium Grit (80-100): Smooths out marks left by the coarse grit. Prepares the surface for final sanding.
- Fine Grit (120-150): Creates a very smooth surface, ready for stain and finish. This is the finishing touch of sanding.
Step 4: Vacuuming and Tack Cloths
After all sanding is done, you must remove all dust. Vacuum the floors thoroughly. Pay close attention to edges and corners.
Use a shop vacuum with a brush attachment. Then, use tack cloths. These are sticky cloths that pick up fine dust particles.
Wipe down the entire floor.
This step is critical. Any remaining dust will show in the new finish. It can make the floor look bumpy or speckled.
Take your time here. It’s worth the effort for a smooth final look.
Step 5: Staining the Floor (Optional)
If you want to change the wood’s color, this is the time. Choose your stain color carefully. Test it on a scrap piece of wood or an inconspicuous area.
Apply the stain with a clean cloth or applicator. Work in sections. Wipe off excess stain after a few minutes.
The longer you leave the stain on, the darker it gets. Follow the manufacturer’s instructions. Allow the stain to dry completely.
This can take 24 hours or more. Proper drying is important before the next step.
Step 6: Applying the Top Coat (Polyurethane or Sealer)
This step protects your newly refinished floor. Polyurethane is common. It comes in oil-based and water-based formulas.
Oil-based is more durable but has strong fumes and longer drying times. Water-based dries faster and has less odor.
Apply the first coat thinly and evenly. Use a high-quality brush or applicator. Work with the wood grain.
Avoid puddles. Let the first coat dry completely. Lightly sand between coats with very fine sandpaper (180-220 grit).
This helps the next coat adhere better. Clean off dust again with a tack cloth.
Apply two or three more coats. Each coat adds protection and shine. Allow the final coat to cure for the recommended time.
This can take several days to a week. Avoid heavy traffic on the floor during this time. Full cure means the finish is fully hardened.
Quick Scan: Refinishing Tool Checklist
- Sanding Machines: Drum sander, edge sander, orbital sander (optional).
- Sandpaper: Various grits (36, 60, 80, 100, 120, 150, 180, 220).
- Vacuum: Shop vac with attachments.
- Dust Control: Dust masks, plastic sheeting, painter’s tape.
- Application Tools: Natural bristle brushes, lambswool applicator, foam applicator.
- Cleaning Supplies: Broom, mop, wood floor cleaner, tack cloths.
- Safety Gear: Safety glasses, gloves, ear protection.
The Reality of DIY: What Makes Refinishing Hard?
Many people underestimate the effort involved. It’s not just about having the tools. It’s about the physical toll and the learning curve.
Here’s what makes it tough.
Physical Exertion is Intense
Sanding floors is hard work. Pushing a drum sander is like pushing a heavy mower. It requires strength and stamina.
You’re also bending and reaching a lot. This can lead to sore muscles and fatigue. Many DIYers find they are much more tired than they expected.
The dust is also a factor. Even with good ventilation, dust gets everywhere. It can be uncomfortable to breathe and see.
You’ll be covered in it yourself. This makes the job less pleasant.
Learning Curve for Sanding
Sanding takes practice. It’s easy to make mistakes. If you sand too deep in one spot, you can damage the wood.
If you don’t overlap passes correctly, you’ll see lines. Uneven sanding leads to an uneven finish. The edge sander is tricky too.
It’s easy to gouge the wood.
Getting the grit progression right is important. Starting with too fine a grit won’t remove the old finish. Starting too coarse can damage the wood.
You need to learn how the machines behave.
Dust Management is a Constant Battle
Dust is the enemy of a good finish. Even the best vacuums and dust collection systems aren’t perfect. You’ll spend a lot of time cleaning.
You need to clean up after every sanding pass. Then, you need to clean again before staining. And again before applying the top coat.
This constant cleaning adds time. It also requires diligence. If you rush this part, your finished floor will show it.
You might see tiny bumps or specks. This can be very frustrating after all your hard work.
Contrast: Refinishing Myth vs. Reality
Myth: It’s just like painting walls. You can do it in a weekend.
Reality: Refinishing takes several days, often a full week or more. It requires multiple stages of sanding, cleaning, and coating. Each stage needs drying time.
Myth: You can use any sander you have.
Reality: Specialized floor sanders are needed for large areas. Standard orbital sanders won’t work well for the heavy-duty job of removing old finishes.
Myth: Dust collection is easy.
Reality: Dust is a major issue. You need good ventilation, masks, and thorough cleaning at every step. Professional machines have better dust collection, but DIY rentals are often messy.
Timing and Patience Are Key
Each step needs adequate drying and curing time. Stains need to dry. Polyurethane coats need to dry between applications.
Then, the final coat needs to cure before heavy use. This means you can’t rush the process. If you try to speed things up, you risk damaging the finish.
You might get peeling or soft spots.
You need to be patient. This isn’t a weekend project for most people. It requires dedicating a significant block of time.
You also need to be patient with yourself as you learn the techniques.
When Is It Worth Doing Yourself?
Despite the challenges, DIY refinishing can be very rewarding. It saves money compared to hiring professionals. The satisfaction of a job well done is immense.
But it’s not for everyone. Consider these points.
Your Floor’s Condition
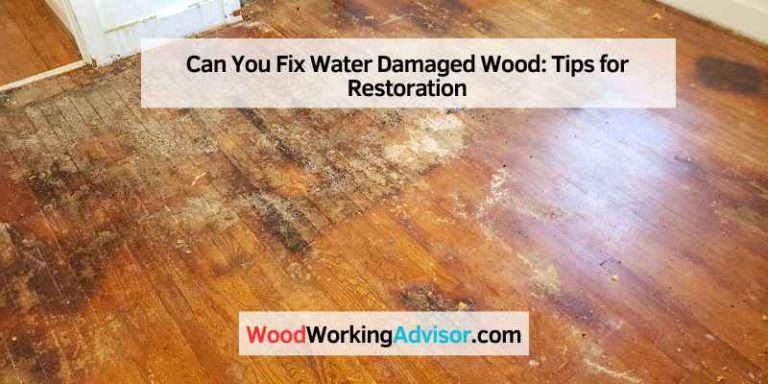
If your floors are in decent shape, DIY is more feasible. Minor scratches and faded finishes are good candidates. If your floors have deep gouges, water damage, or missing pieces, it gets much harder.
Professionals have tools and skills for major repairs.
Also, consider the type of wood. Softwoods like pine scratch more easily. Hardwoods like oak are more durable and forgiving.
Exotic woods may require special care.
Your Skill Level and Willingness to Learn
Are you comfortable with power tools? Do you enjoy hands-on projects? Are you willing to read instructions and watch tutorials?
If yes, you have a good chance of success. If you are intimidated by power tools or hate detailed work, it might be too much.
Remember, mistakes can happen. You need to be willing to learn from them. The reward is a beautiful floor and a learned skill.
Your Available Time and Energy
Do you have a week or more free to dedicate to this project? Do you have the physical stamina for demanding work? If you have a very busy schedule or physical limitations, hiring a pro is likely a better choice.
This project requires commitment.
Think about your living situation. Can you live without access to the room for several days? Are you okay with a dusty environment temporarily?
DIY vs. Pro: Cost Comparison (Estimates)
| Task | DIY Cost | Professional Cost |
| Materials (Sandpaper, Stain, Poly) | $200 – $500 | Included |
| Tool Rental (Sander, etc.) | $150 – $300 | Included |
| Labor (DIY time, Pro fee) | Your time (significant!) | $1,500 – $4,000+ (depending on room size) |
| Total Estimated Cost | $350 – $800 + Your Labor | $1,700 – $4,500+ |
Note: These are general estimates and vary by location and floor size.
What This Means for Your Home Project
Understanding the difficulty helps you plan. It’s not an impossible task. But it’s a serious undertaking.
For many, the saving of money makes it worthwhile. For others, the time and effort outweigh the savings. There are also safety considerations.
When it’s normal to consider DIY: You have a moderate budget. You have a flexible schedule. You enjoy challenging projects.
Your floors have normal wear and tear. You are patient and detail-oriented.
When to worry and maybe hire a pro: You have very limited time. Your floors have significant damage (water stains, deep gouges). You are not comfortable with power tools.
You want a perfect, flawless finish every single time. You have respiratory issues that dust might aggravate.
Simple checks: Look closely at your existing floor. Are the scratches surface-level or deep? Are there any warped boards?
Does the existing finish look like it’s peeling or bubbled up? These are clues to the floor’s condition.
Tips for a Smoother Refinishing Experience
If you decide to go for it, these tips can help. They come from experience and can make the process less daunting.
- Rent quality equipment. Don’t skimp on the sander. Better machines are easier to use and do a better job.
- Watch videos. See how professionals use the sanders and apply the finish. Visual learning is powerful here.
- Test everything first. Test your stain on a hidden spot. Test your sanding technique. This prevents costly mistakes.
- Work in good lighting. You need to see every scratch and imperfection.
- Ventilate constantly. Open windows and use fans to move air.
- Wear protective gear. Always use a mask, safety glasses, and ear protection.
- Take breaks. Don’t try to do too much at once. Pace yourself.
- Don’t rush drying times. Patience here saves headaches later.
- Clean, clean, clean. Dust is your biggest enemy.
Observational Flow: A Typical Refinishing Week
Day 1-2: Clear room, deep clean, assess floor, minor repairs (nail filling).
Day 3-4: Sanding. Coarse grit, then medium grit. Lots of dust and effort.
Day 5: Fine grit sanding, thorough vacuuming, tack cloth wipe-down.
Day 6: Staining (if desired). Apply, wipe excess, wait for drying.
Day 7: Apply first coat of finish. Wait for drying.
Day 8: Lightly sand between coats, clean, apply second coat of finish. Wait.
Day 9: Apply third coat of finish. Wait.
Day 10+: Light use after 24-48 hours. Full cure can take up to 7 days. No heavy furniture for a week or two.
Frequently Asked Questions About Refinishing Wood Floors
How long does it take to refinish a room of wood floors?
For a typical room, expect it to take at least 5-7 days. This includes clearing the room, sanding, cleaning, staining (optional), and applying multiple coats of finish, with drying time in between.
Can I refinish my hardwood floors without a big drum sander?
You can use a good orbital floor sander for less wear. However, for heavily damaged floors or to remove tough finishes, a drum sander is often necessary. Renting one is usually the best option for a DIYer.
How much dust does sanding floors create?
Sanding creates a lot of fine dust. Even with dust containment, some dust will escape. Wearing a high-quality dust mask and using good ventilation is essential.
What is the easiest finish to apply for DIYers?
Water-based polyurethanes are generally easier for DIYers. They have less odor, dry faster, and are easier to clean up than oil-based finishes. They also tend to have fewer application marks.
Can I refinish floors with pets or kids around?
It’s best to have the area completely clear and the floors fully cured before reintroducing pets or children. The fumes can be harmful, and the finish needs time to harden. Plan to do this when you can dedicate the space.
How do I know if my floors are too old or damaged to refinish?
If the wood is worn too thin (less than 1/16 inch of wood above the tongue and groove), has extensive water damage, or is severely warped, it may not be safe or effective to refinish. Also, if the wood is rotten or has deep insect damage, it might need replacement.
Final Thoughts on Your Refinishing Journey
Refinishing wood floors is a challenging but very doable DIY project. It demands your time, effort, and attention. The payoff is beautiful, revitalized floors.
Weigh the difficulty against your skills and schedule. With careful planning and patience, you can achieve stunning results.