How To Care For Wood Furniture And Keep It Looking New
Got cloudy marks too? See how to remove white spots from wood furniture with simple home fixes.
Bringing an old piece back? See how to restore wood step by step.
aragraph”>Wood furniture adds warmth and beauty to any home. But over time, it can lose its shine. Scratches, dust, and dryness can make even the finest pieces look tired.It feels frustrating when your lovely table or chair starts to show its age. You might wonder if you did something wrong or if it’s just impossible to keep wood looking its best. But don’t worry!
With a little know-how, you can revive your furniture and keep it looking like new for years. This guide will show you easy ways to do just that.
Caring for wood furniture involves regular cleaning, proper protection from damage, and knowing when to seek more advanced help. Simple, consistent habits can keep your wood pieces beautiful and well-preserved, preventing common issues like dryness, scratches, and stains.
Understanding Your Wood Furniture
Wood furniture is more than just an object. It’s alive, in a way. Wood is a natural material.
It can expand and contract with changes in heat and humidity. This is normal. Different types of wood have different needs.
For example, solid wood furniture is different from furniture with veneers.
Solid wood means the piece is made from a single type of wood. Veneers are thin slices of wood glued onto a core material. The core might be particleboard or plywood.
Understanding this difference is key to proper care. Solid wood is usually more durable. Veneered furniture can be more sensitive to moisture and deep scratches.
Knowing the finish is also important. Most wood furniture has a protective finish. This could be lacquer, varnish, shellac, or oil.
The finish is what gives the wood its sheen. It also protects the wood from daily wear and tear. If you’re unsure about your furniture’s type or finish, a quick check of the manufacturer’s details or a discreet look underneath a drawer can help.
Sometimes, a small, hidden spot can reveal the raw wood underneath, giving you a clue.

The Importance of Gentle Cleaning
Regular cleaning is the first step to keeping wood furniture looking new. But how you clean matters a lot. Harsh chemicals or abrasive materials can damage the finish.
They can strip away the protective layer. This leaves the wood exposed and vulnerable. Many people think scrubbing harder cleans better.
But with wood, gentle is always best.
The goal of cleaning is to remove dust, dirt, and grime. These things can dull the finish over time. They can also act like fine sandpaper under a dusting cloth.
So, consistent, soft dusting is your best friend. Think of it as a daily polish. It keeps the surface clear and ready to show off its natural beauty.
Avoid using all-purpose cleaners directly on the wood. Many contain ingredients that can harm the finish. For instance, ammonia or alcohol can cloud or even strip certain finishes.
Always test a new cleaner in an inconspicuous spot first. This ensures it won’t cause damage. A little caution goes a long way in protecting your investment.
Mastering the Dusting Technique
Dusting seems simple, right? Just grab a cloth and wipe. But there’s a right way and a wrong way for wood furniture.
The wrong way can cause scratches. The right way helps maintain the shine. My grandmother always told me to dust with the grain of the wood.
This simple tip makes a big difference. It means wiping in the same direction the wood’s natural lines run.
For everyday dusting, a soft, lint-free cloth is ideal. Microfiber cloths are excellent. They trap dust particles well.
They are also very gentle on the finish. Avoid using feather dusters. They often just move dust around.
Sometimes, they can even scratch surfaces if there’s grit on them.
If you notice dust clinging, slightly dampen your cloth. Use plain water or a wood-specific cleaner. Wring out the cloth very well.
You want it just barely damp, not wet. Too much moisture is bad for wood. It can lead to water spots or damage the finish.
After dusting, you can use a dry part of the cloth to buff the surface gently. This brings back the shine.
Dusting Dos and Don’ts
- Do: Use a soft microfiber cloth.
- Do: Dust with the wood grain.
- Do: Use a slightly damp cloth for stubborn dust.
- Do: Buff after dusting for shine.
- Don’t: Use feather dusters.
- Don’t: Use harsh chemical cleaners directly.
- Don’t: Soak the cloth; wring it out well.
- Don’t: Scrub aggressively.
Effective Wood Furniture Cleaning Methods
Beyond dusting, your wood furniture will need a deeper clean now and then. This is for removing grime that dusting can’t handle. Or maybe a sticky spill happened.
For these moments, simple solutions are often the best. You don’t need fancy products to get great results. What you need is the right approach.
A mild soap solution is a good starting point for many finishes. Mix a few drops of mild dish soap with warm water. Again, make sure your cloth is only slightly damp.
Wipe the surface gently. Then, immediately wipe it again with a clean, damp cloth (just water this time) to rinse. Finally, dry and buff with a soft, dry cloth.
This two-step cleaning and rinsing is important. It prevents soap residue from building up.
There are many specialized wood cleaners available. When choosing one, look for products made for your specific finish type. Read reviews.
And always test in a hidden spot. Some cleaners add a bit of polish. Others are just for cleaning.
Understand what the product does before you use it on your valuable furniture.
For tough spots, like dried-on food or sticky residue, you might need a bit more. A paste of baking soda and water can sometimes work. Apply it gently with a soft cloth.
Rub very lightly in a circular motion. Then, wipe it away with a damp cloth and dry thoroughly. Be cautious with this method.
Baking soda is slightly abrasive. Use it only when necessary and with extreme care.
Quick-Scan Cleaning Guide
| Problem | Solution | Caution |
|---|---|---|
| Everyday Dust | Soft microfiber cloth, dust with grain. | Avoid feather dusters. |
| Light Grime | Mild soap and water on damp cloth, rinse, dry. | Test cleaners first. |
| Sticky Spots | Gentle buffing with a wood cleaner or damp cloth. | Avoid harsh scrubbing. |
| Dried-on Food | Baking soda paste, gently rub, clean, dry. | Use very little pressure. |
Protecting Wood Furniture from Damage
Cleaning is one part of care. Protection is another. Wood furniture can be damaged by many things.
Heat, moisture, sunlight, and sharp objects are common culprits. Think about how you use your furniture. Are drinks often placed directly on the table?
Is the antique dresser in direct sunlight all day? Small changes can prevent big problems.
Coasters are your best friends for drinks. Trivets are essential for hot dishes. These simple items create a barrier.
They stop heat and moisture rings. Heat can dry out and crack the wood. Moisture can warp it or damage the finish, leaving white rings.
It’s a small habit, but it saves so much trouble.
Sunlight is a natural furniture killer. UV rays can fade the finish. They can also dry out the wood.
This makes it brittle. If your furniture sits in a sunny spot, consider using curtains or blinds. Rotate your furniture occasionally.
This helps ensure even exposure and fading. If fading is already a concern, you might need to address it later with refinishing.
Sharp objects are obvious enemies. Be mindful of keys, pet claws, jewelry, and even rough clothing. These can cause scratches.
Place rugs under high-traffic areas. Use placemats during meals. Be careful when moving items on and off the furniture.
A little awareness goes a long way.
Dealing with Scratches and Dings
Scratches happen. It’s almost inevitable with wood furniture. The good news is that many minor scratches can be fixed.
Or at least made much less noticeable. The method depends on the scratch’s depth and the furniture’s finish.
For very light surface scratches, sometimes just buffing with a soft cloth can help. If that doesn’t work, a furniture polish or wax can often fill in the tiny lines. Rub it in gently with a soft cloth.
Then buff it out. It’s like magic for superficial marks. The polish fills the tiny gap, making the scratch disappear.
For deeper scratches, you might need a touch-up product. Wood repair markers or crayons come in many colors. Choose a shade that matches your furniture as closely as possible.
Apply the marker or crayon to the scratch. Then, wipe away any excess with a clean cloth. Buffing afterward is key to blending it in.
A classic home remedy for scratches involves nuts. Specifically, walnuts or pecans. Rub the meat of the nut over the scratch.
The natural oils can help fill and disguise the mark. Gently rub it in. Then, wipe away any excess oil with a soft cloth.
This works best on darker woods. It’s a simple trick that often surprises people with its effectiveness.
For deep gouges that go into the wood itself, you might need wood filler. This is a more involved repair. You’ll need to color-match the filler.
Then, carefully apply it. Sand it smooth once dry. Finally, you’ll need to reapply the finish to that spot.
This is where expertise becomes more important. If you’re not comfortable, it’s best to call a professional.
Scratch Repair Quick Guide
- Tiny Scratches: Buff with a soft cloth, then use furniture polish or wax.
- Light Scratches: Use wood repair markers or crayons. Match color closely.
- Deeper Scratches (Dark Wood): Try rubbing a walnut or pecan over the scratch.
- Deep Gouges: May require wood filler and refinishing. Consider a professional.
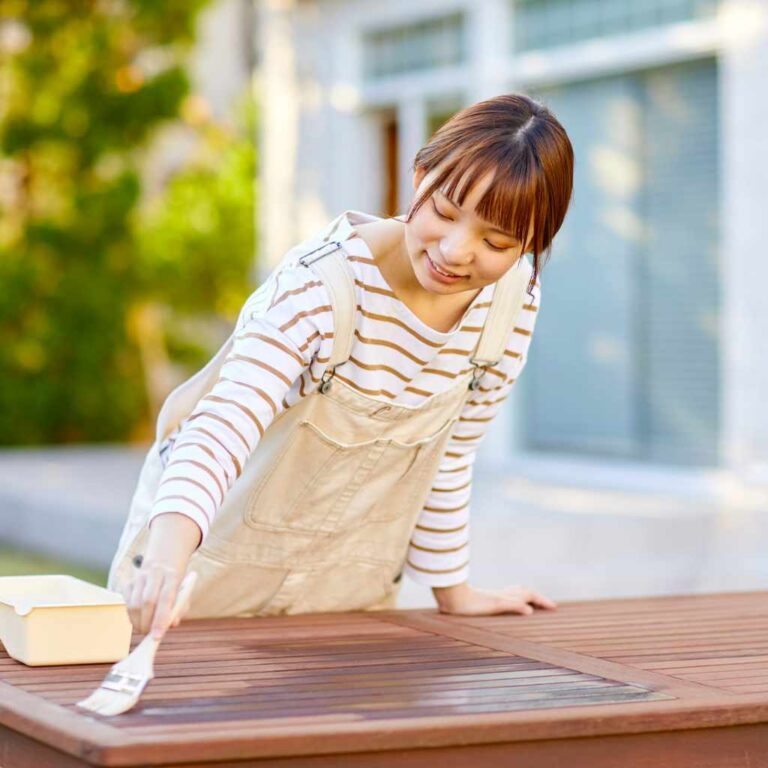
When to Use Wood Polish or Wax
Wood polish and wax are often used interchangeably. But they serve slightly different purposes. And applying them correctly makes a big difference.
Polishes often contain silicones or oils. They can temporarily fill in minor imperfections. They also add a nice shine.
Waxes, like beeswax or carnauba wax, provide a more durable protective layer.
Polishes are great for quick touch-ups. They can bring back the luster to a dull finish. Apply a small amount to a soft cloth.
Rub it onto the furniture in a thin, even layer. Then, buff it with a clean cloth until it shines. Over-polishing can build up residue.
So, use it sparingly, perhaps once or twice a year.
Waxes offer better protection against moisture and minor scratches. They create a barrier. If you choose to wax, make sure the furniture is clean and dry first.
Apply the wax in a thin layer using a soft cloth. Work in the direction of the wood grain. Let it dry to a haze.
Then, buff it with a clean, dry cloth to a soft sheen. A good wax finish can last for months.
Be careful not to over-wax. Too much wax can build up. It can become sticky.
This attracts more dust. It can also make future cleaning or refinishing difficult. If you’re unsure, start with a polish.
For ongoing protection, a good quality wax applied a few times a year is often ideal. Always check the manufacturer’s recommendations for your specific furniture.
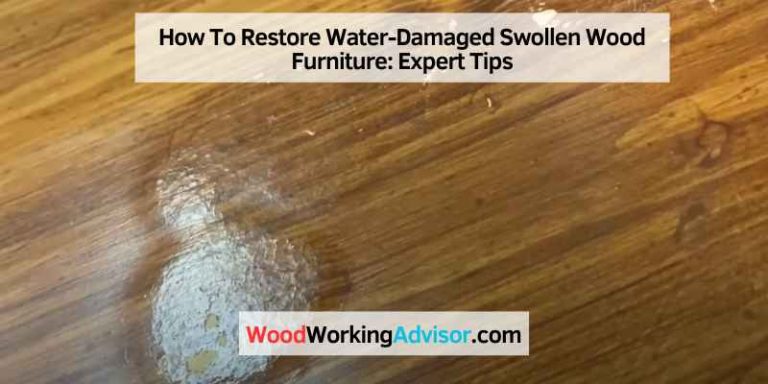
Battling Moisture and Heat Damage
Moisture and heat are two of wood’s biggest enemies. Water rings from glasses are a common annoyance. They are caused by trapped moisture.
Heat from hot items can dry out the wood and crack the finish.
For fresh water rings, act quickly. Sometimes, a hairdryer on a low setting can help. Hold it several inches away from the spot.
Move it constantly. Don’t overheat one area. The gentle heat can help the trapped moisture evaporate.
Follow this by buffing with a soft cloth.
For stubborn water rings, you might try a paste of toothpaste and baking soda. Use plain white toothpaste, not gel. Mix them to a paste.
Apply it gently to the ring with a soft cloth. Rub in the direction of the grain. Wipe it away with a damp cloth.
Then dry and buff. Test this in an unseen area first. Some finishes can be sensitive.
Dealing with heat damage often involves trying to restore the finish. If the finish is just whitened, the toothpaste trick might work. If the wood itself is darkened or scorched, it’s a more serious problem.
This often requires sanding and refinishing the affected area. Preventing heat damage with coasters and trivets is much easier than repairing it.
Moisture & Heat: Prevention is Key
- Use Coasters: For all cold or room-temperature drinks.
- Use Trivets: For hot dishes, pots, and pans.
- Wipe Spills Immediately: Don’t let liquids sit.
- Control Humidity: Avoid placing furniture near humidifiers or dehumidifiers.
- Avoid Direct Heat: Keep furniture away from radiators, fireplaces, and direct hot sun.
The Role of Humidity Control
Humidity plays a huge role in how wood furniture behaves. Very dry air can cause wood to shrink. This can lead to cracks and loosened joints.
Very humid air can cause wood to swell. This can make doors or drawers stick. Maintaining a consistent humidity level is beneficial.
In most American homes, indoor humidity levels can fluctuate a lot. This is especially true between seasons. Using a humidifier in dry winter months can help.
Using a dehumidifier in damp summer months can also be beneficial. The ideal humidity range for wood furniture is typically between 40% and 60%.
Placing furniture near heating vents or air conditioners can create dry spots. Similarly, bathrooms or kitchens with high humidity can be problematic for nearby wood pieces. Pay attention to where your furniture is located.
Make adjustments to humidity levels if you notice changes in the wood.
If you have very old or antique wood furniture, it might be more sensitive. These pieces have likely been through many years of fluctuating conditions. They may have already expanded or contracted.
Be extra mindful of sudden changes in their environment. Consistent conditions help maintain their structural integrity and appearance.
Sunlight’s Subtle but Serious Impact
We often think of sunlight as healthy and cheerful. But for wood furniture, it can be destructive. Sunlight contains UV rays.
These rays break down the wood fibers and the finish. Over time, this causes fading. The color of the wood lightens.
It can also cause the finish to become brittle or chalky.
Imagine a beautiful antique desk. If one side constantly faces a sunny window, that side will likely look different. It might be lighter.
It might even have a different texture. This uneven aging is hard to reverse. The best approach is prevention.
If you have treasured pieces, position them away from direct sunlight. Use curtains, blinds, or shades. These block harmful UV rays.
If you can’t move the furniture, consider UV-filtering window films. These films let in light but block the damaging rays. It’s like giving your furniture its own personal sunscreen.
Rotating furniture can also help. Even furniture not in direct sun gets ambient light. Moving pieces around can help them age more evenly.
This ensures that wear and tear are distributed. It’s a simple strategy that preserves the overall look and value of your collection. If fading has already occurred, more advanced restoration might be needed.
Preventing Stains and Spills
Spills and stains are a common worry. Accidents happen, especially with kids and pets around. The key is to act fast.
The longer a substance sits on wood, the more likely it is to stain or damage the finish.
For liquid spills, blot them up immediately. Use a clean, absorbent cloth. Don’t rub.
Rubbing can spread the spill. It can also push it deeper into the wood grain or finish. Blotting lifts the liquid away.
Once the surface is mostly dry, you can wipe it with a slightly damp cloth. Then dry and buff.
For sticky spills, like juice or soda, you might need a bit more. A mild soap and water solution is usually effective. Clean the spot gently.
Rinse with a clean, damp cloth. Dry thoroughly. Always be sure to test any cleaning solution in an inconspicuous area first.
This ensures it won’t harm the finish.
Food stains can be tricky. Grease stains can be absorbed. Try sprinkling cornstarch or baking soda on the stain.
Let it sit for a few hours or overnight. This can draw the grease out. Then brush it away.
For colored stains, like from wine or ink, act fast. Sometimes, a wood cleaner can lift them. Other times, it may require professional attention.
Stain Response: Act Fast!
- Liquid Spills: Blot immediately with an absorbent cloth.
- Sticky Spills: Use mild soap and water, rinse, and dry.
- Grease Stains: Apply cornstarch or baking soda to absorb.
- Ink or Wine: Special wood cleaners may help. Test first.
- Persistent Stains: Consult a furniture restoration expert.
When to Call a Professional
While many wood furniture care tasks are DIY-friendly, some situations call for expert help. If you have valuable antiques or delicate pieces, it’s wise to err on the side of caution. Professionals have the tools, knowledge, and experience to handle complex issues.
When should you call them? Deep scratches that go into the wood. Significant water damage that has warped the wood.
Large areas of finish that have peeled or bubbled. Stains that you can’t remove with gentle methods. These are all signs that professional restoration might be needed.
Trying to fix these yourself could potentially cause more damage.
Restorers can also help with structural issues. Loose joints, wobbly legs, or damaged veneer can often be repaired. They can also expertly match finishes.
This is crucial for making repairs blend in seamlessly. Their goal is to preserve the piece’s integrity and beauty.
Before hiring someone, do your research. Ask for recommendations. Look for professionals with experience in the type of furniture you own.
Check reviews and ask to see examples of their work. A good restorer can bring your cherished furniture back to life. It’s an investment in preserving your family heirlooms.
Maintaining the Shine: Buffing Techniques
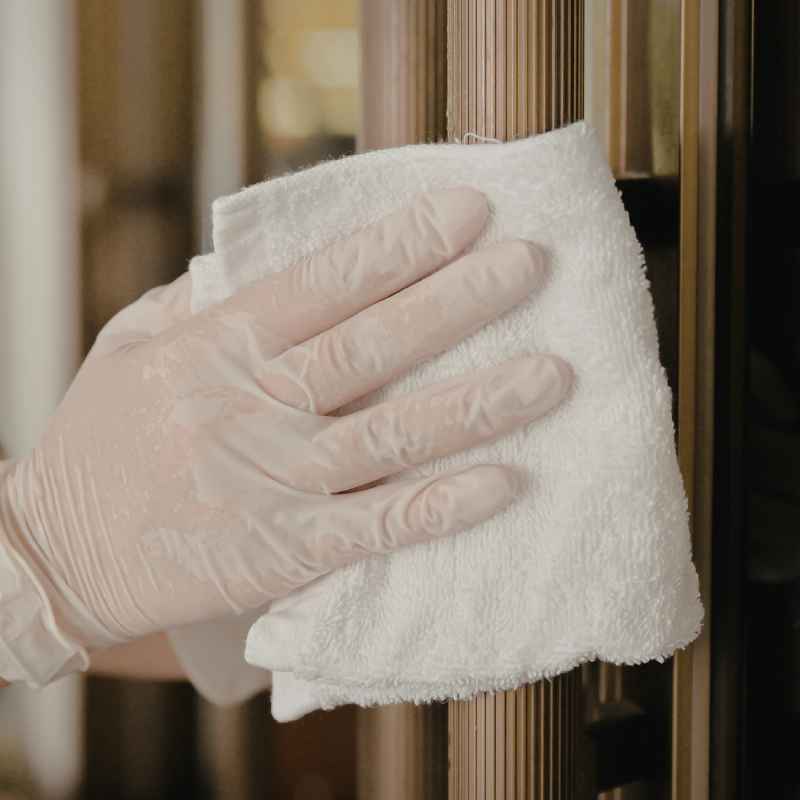
After cleaning or polishing, buffing is what brings out the final shine. It’s like the last flourish that makes your furniture gleam. The key to good buffing is using the right cloth and the right motion.
Use a clean, soft, dry cloth for buffing. A lint-free cloth is best. Microfiber cloths work very well.
Some people use old cotton t-shirts, which can also be effective if they are soft and lint-free.
Buff in a circular motion, or follow the grain of the wood. For most finishes, a gentle circular motion is effective. Work in small sections.
Apply light to moderate pressure. The goal is to create a gentle friction. This friction buffs the surface.
It also helps to spread any residual polish or wax evenly. This creates a smooth, lustrous finish.
Don’t press too hard. Excessive force can actually dull the finish. It can also create heat.
Let the cloth and the product do the work. If you’re using a polish or wax, you’ll notice the surface starting to gleam as you buff. It’s a satisfying process that shows the results of your care.
Regular buffing, even after just dusting, can help maintain that showroom look. It keeps the surface looking fresh and cared for. It prevents dullness from setting in.
Think of it as a final polish to your efforts. It truly makes a noticeable difference in the overall appearance of your wood furniture.
Restoring Old or Damaged Finishes
Sometimes, furniture is more than just dirty or slightly scratched. The finish itself might be worn out. It could be cracked, peeling, or faded.
Restoring a finish is a more involved process. It requires patience and careful work.
The first step is always to identify the original finish. This helps determine the best approach for restoration. If the finish is thick and glossy, it might be lacquer or varnish.
If it’s softer and more matte, it could be shellac or an oil finish.
For minor wear, like dullness or light scratches in the finish, you might be able to revive it. Special finish restorers exist. They can often breathe new life into tired finishes without complete stripping.
These products typically contain solvents and oils that can re-dissolve and re-level the existing finish.
If the finish is badly damaged, full stripping and refinishing might be necessary. This involves removing all old layers of finish. Then, you sand the wood smooth.
After that, you apply new coats of finish. This is a process that takes time and skill. It’s usually best left to professionals, especially for valuable pieces.
When refinishing, choose a finish that matches the original or suits the piece. Application is key. Multiple thin coats are better than one thick coat.
Sanding between coats is often required for a smooth finish. The end result can be stunning. It can make an old, neglected piece look brand new again.
Finish Restoration Levels
- Level 1: Refresh (Minor Wear)
Use finish restorers or polishes to revive dullness. - Level 2: Repair (Specific Damage)
Touch up minor scratches with markers or crayons. Address small water rings. - Level 3: Rejuvenate (Moderate Wear)
May involve re-waxing or using more intensive cleaners. - Level 4: Restore (Major Damage)
Requires stripping and refinishing. Often best done by professionals.
Caring for Different Wood Types
While general care principles apply to most wood furniture, some types of wood have unique needs. Understanding your wood can help you tailor your care routine.
Oak: Known for its strength and prominent grain. Oak is fairly durable. It holds up well to regular cleaning.
Its open grain can sometimes catch more dust, so regular dusting is important. Oil finishes are common and look great, but require periodic reapplication.
Maple: Maple is a hard wood with a fine, even grain. It has a smooth surface. It can be prone to yellowing over time, especially with light exposure.
Maple finishes are often smooth and can show scratches. Careful dusting and avoiding abrasive cleaners are key.
Cherry: Cherry wood darkens beautifully with age and light exposure. It develops a rich patina. However, it is softer than oak or maple.
It can be more susceptible to dents and scratches. Protect it from heat and moisture. Gentle cleaning is essential.
Mahogany: Often found in antique furniture, mahogany is prized for its beauty and stability. It has a fine, straight grain. Mahogany finishes can be delicate.
Avoid harsh chemicals. Regular dusting and a good quality wax will help maintain its luster.
Pine: Pine is a softer wood. It is more prone to dents, dings, and scratches. Pine furniture often has a more rustic look.
It can be finished in various ways. Be extra gentle when cleaning pine. Protective measures like felt pads under decorative items can help.
No matter the wood type, consistency is key. A regular, gentle care routine will keep your furniture looking its best. Always remember to test any new product on an inconspicuous spot first.
This is a golden rule for all wood care.
The Role of Experience in Furniture Care
I remember struggling with a beautiful old oak dining table I inherited. It looked dull, and I was so afraid of messing it up. I tried one of those “all-in-one” furniture sprays.
It left streaks and a weird, sticky film. I was so frustrated. That’s when I started digging deeper.
I learned about wood grain, finishes, and gentle cleaning.
One day, I noticed a faint water ring on the table. My heart sank. I remembered reading about using a hairdryer.
So, I cautiously tried it. I kept the heat low and the dryer moving. Slowly, wonderfully, the white ring faded.
It was a small victory, but it taught me so much about patience and the right technique. It wasn’t about brute force; it was about understanding the material.
Since then, I’ve learned to pay attention to how my furniture looks and feels. If a piece starts to look dry, I know it’s time for a light polish or wax. If a surface feels a bit gritty, it means it’s time for a gentle dusting.
It’s become a relaxing ritual. It connects me to the history of the piece and ensures it stays a beautiful part of my home.
Preventative Measures for Long-Term Beauty
The best way to keep wood furniture looking new is to prevent damage before it happens. Think of your furniture’s daily life. What are the potential hazards?
Addressing these proactively is far easier than fixing problems later.
Consider the placement of your furniture. Is it in a high-traffic area where it’s likely to get bumped? Is it near a heat source or a sunny window?
Small adjustments to placement can significantly reduce wear and tear.
Use protective pads. Felt pads under the legs of chairs and tables prevent scratches when they are moved. These are especially important on hard floors.
For items placed on the furniture, like vases or lamps, consider using small felt or cork pads underneath them. This protects the finish from scratches and heat marks.
Educate your household. If you have children or pets, teach them about respecting the furniture. Simple rules, like no eating on certain surfaces or keeping toys away from wood, can make a difference.
Consistent habits throughout the home are crucial for preserving the beauty of your wood pieces.
What This Means for Your Furniture
Knowing how to care for wood furniture means you can enjoy its beauty for much longer. It’s not about having perfect, untouched pieces. It’s about maintaining their character and function.
Gentle care ensures that the wood ages gracefully.
When it’s normal for furniture to look a little worn? It’s normal for wood to develop a patina over time. Minor scratches and fading from light exposure are signs of a well-loved piece.
These imperfections tell a story. They add character.
When should you worry? You should worry if you see significant damage. This includes deep gouges, large cracks, peeling finishes, or severe water damage.
These issues can compromise the furniture’s structural integrity and its appearance. If you notice these problems, it’s time to consider professional help or more involved restoration.
Simple checks can help you monitor your furniture’s condition. Run your hand over the surface. Does it feel dry or rough?
Look closely for any new scratches or dings. Check for any signs of moisture damage, like white rings or discoloration. Regular visual inspections are key to catching small issues before they become big ones.
Quick Tips for Everyday Wood Care
Here are some straightforward tips to incorporate into your daily routine:
- Dust daily with a soft, lint-free cloth.
- Wipe up spills immediately.
- Use coasters for drinks and trivets for hot items.
- Avoid placing furniture in direct sunlight or near heat vents.
- Periodically check for loose joints or hardware.
Frequently Asked Questions
What is the best way to clean wood furniture?
The best way to clean wood furniture is with a soft, lint-free cloth. Dust regularly with the grain. For deeper cleaning, use a mild soap and water solution on a slightly damp cloth. For teak-specific care, learn how to remove stains from teak furniture.
Always rinse with a clean, damp cloth and dry thoroughly. Test any cleaner in an inconspicuous spot first.
How often should I polish or wax my wood furniture?
You don’t need to polish or wax very often. Polishing once or twice a year is usually sufficient for most furniture. Waxing, which offers more protection, can be done a few times a year, perhaps every 3-6 months, depending on wear and the product used.
Over-polishing or waxing can cause buildup.
Can I use furniture polish on all types of wood finishes?
It’s best to use furniture polish specifically designed for wood. Avoid general household cleaners or abrasive products. Always test the polish in a hidden area first.
Some antique or delicate finishes may require specialized care, so it’s wise to research your furniture’s specific finish type.
What causes white rings on wood furniture, and how can I remove them?
White rings are usually caused by moisture trapped in the finish. They are common from glasses or hot items. For fresh rings, try gently heating the spot with a hairdryer on a low setting, moving it constantly.
For tougher rings, a paste of white toothpaste and baking soda can sometimes work. Always test these methods first.
How do I deal with scratches on my wood furniture?
For light surface scratches, furniture polish or wax may help fill them. For deeper scratches, wood repair markers or crayons in a matching color can be used. Rubbing a walnut or pecan over dark scratches can also help disguise them.
For very deep gouges, wood filler and refinishing may be needed.
Is it okay to put my wood furniture in direct sunlight?
No, it’s not recommended to put wood furniture in direct sunlight. UV rays from the sun can fade the finish and dry out the wood. This can lead to cracking and make the finish brittle.
Using curtains or blinds to block direct sun is the best way to protect your furniture.
Conclusion
Caring for your wood furniture doesn’t have to be complicated. By understanding its needs and using gentle, consistent methods, you can keep it looking beautiful. Regular dusting, mindful cleaning, and protection from heat, moisture, and sun are key.
A little effort now saves a lot of heartache later. Enjoy your beautifully maintained wood pieces!