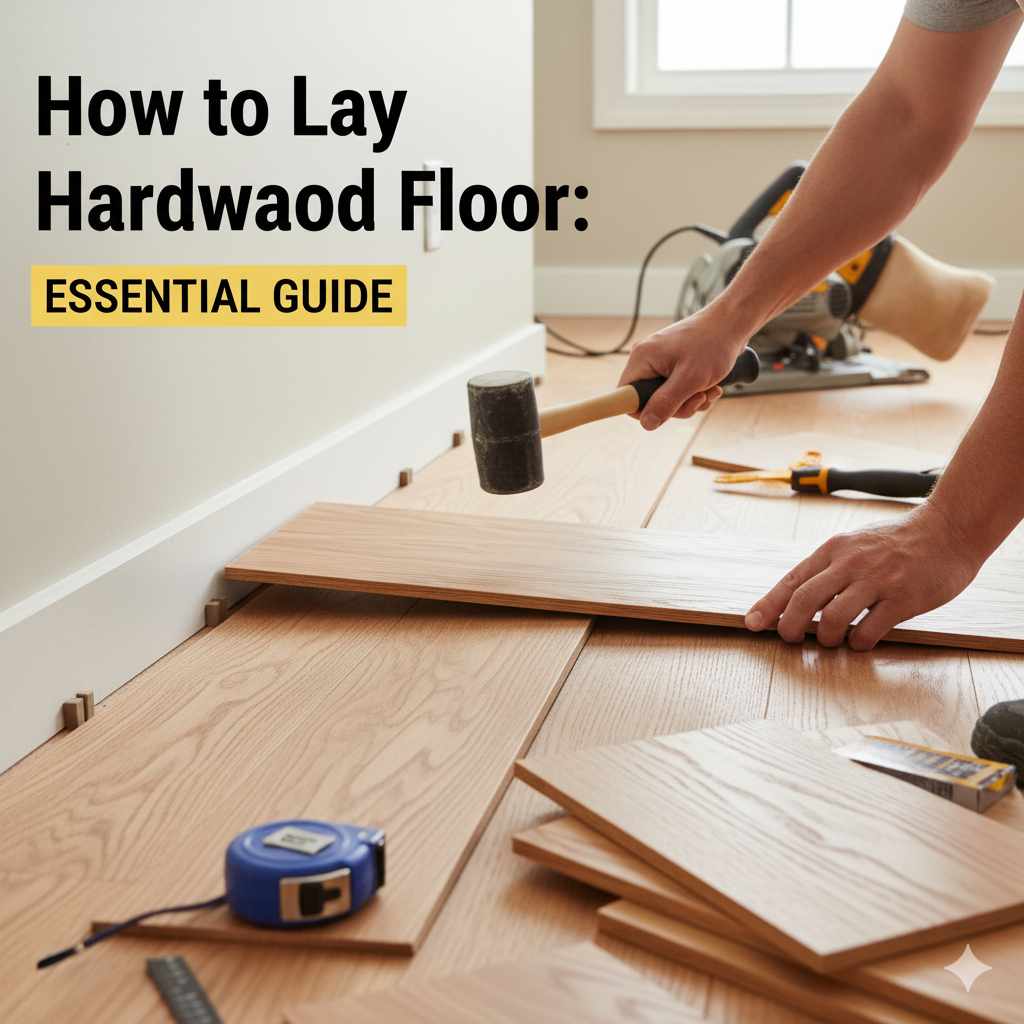
How Lay Hardwood Floor: Essential Guide
Mastering how to lay hardwood floor yourself is an achievable DIY project. This guide breaks down the process into simple, safe steps, from preparing your subfloor to the final nail. Get ready to transform your home with beautiful, durable hardwood floors.
Laying hardwood floors can seem like a big job, but it’s a rewarding DIY project that adds amazing value and beauty to your home. Many homeowners feel intimidated, wondering if they have the skills or the right tools. The good news is, with clear instructions and a little patience, you can absolutely lay your own hardwood floor successfully. We’ll walk through each step, making sure you feel confident and prepared. Let’s get your dream floor laid down!
Your Essential Guide to Laying Hardwood Floor
Hello, DIYers! Md Meraj here, your woodworking mentor. Today, we’re tackling a project that can truly elevate your home: laying hardwood floors. I’ve seen firsthand how a beautiful, natural wood floor can change the feel of a room. It’s warmer, more inviting, and lets your personal style shine through. Forget waiting for a professional; we’re going to break down this process so you can build that beautiful floor with your own two hands. We’ll cover everything you need to know, from picking the right wood to the final polish.
This guide is designed for beginners. We’ll keep things simple, focus on safety, and ensure you get a professional-looking result without the hefty price tag. Are you ready to build something lasting?
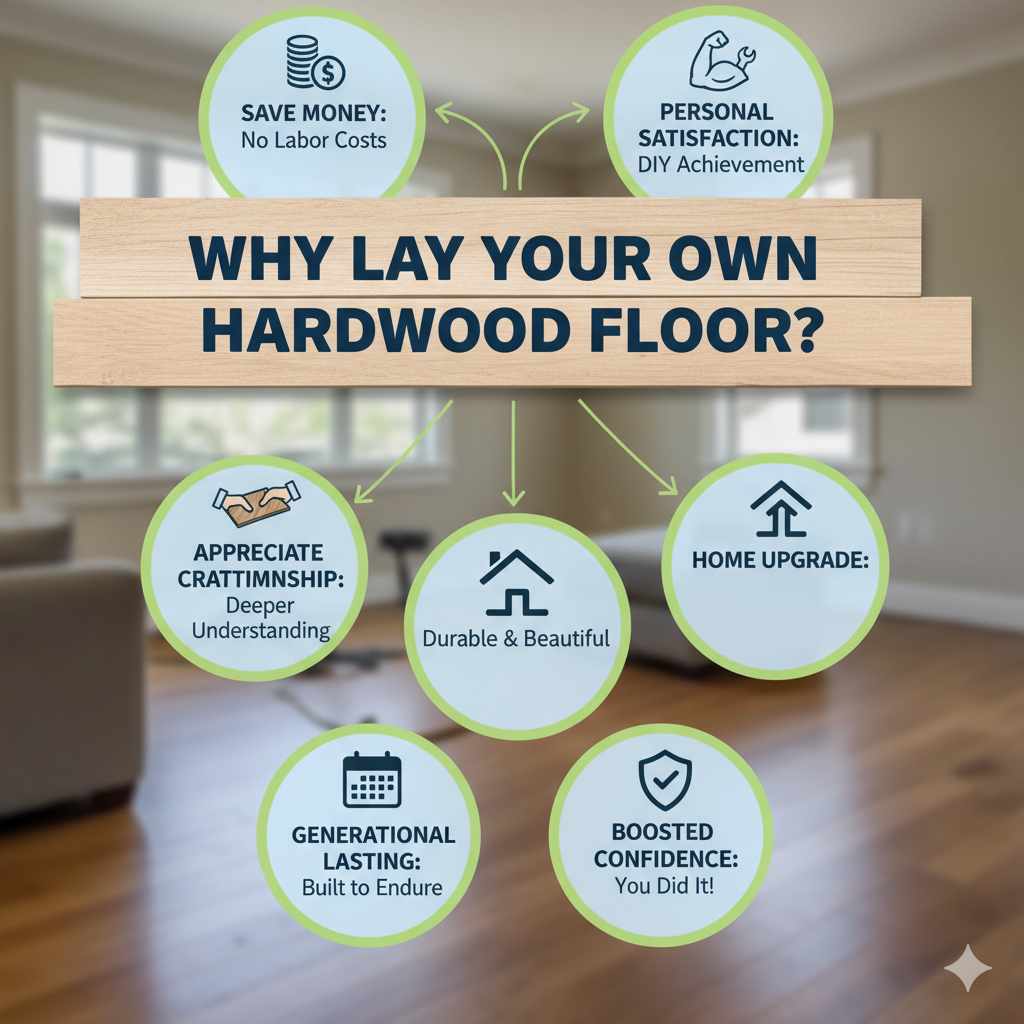
Why Lay Your Own Hardwood Floor?
There are many reasons to consider laying your own hardwood floor. It’s a fantastic way to save money, as labor costs can significantly increase the overall price of a flooring project. Beyond the savings, there’s immense satisfaction in completing a substantial home improvement with your own skills. You gain a deeper appreciation for craftsmanship, and your home gets a beautiful, durable upgrade that can last for generations. Plus, you’ll have the confidence of knowing you did it!
Understanding Your Hardwood Flooring Options
Before we start laying, let’s quickly look at the types of hardwood flooring you might encounter. Knowing these will help you choose the best fit for your home and your DIY skills.
Solid Hardwood vs. Engineered Hardwood
This is the first big decision. Both have their pros and cons:
- Solid Hardwood: This is the classic choice. Each plank is milled from a single piece of hardwood, like oak, maple, or cherry. It’s thick and can be sanded and refinished many times, meaning it can last a lifetime and even be passed down. However, solid hardwood is more sensitive to moisture and temperature changes.
- Engineered Hardwood: This type is constructed with layers of wood. The top layer is real hardwood veneer, while the core is made of plywood or high-density fiberboard. This construction makes it more stable and less prone to expanding or contracting with humidity. It can often be installed in areas where solid hardwood might not be ideal, like basements. It can also be sanded, but usually fewer times than solid wood.
Pre-finished vs. Site-finished
You’ll also choose between pre-finished and unfinished planks:
- Pre-finished: These planks come with the stain and protective coating already applied at the factory. This means less mess, no waiting for finishes to dry, and a quicker installation. It’s generally the preferred choice for DIYers.
- Site-finished: These planks are installed unfinished, then sanded, stained, and sealed right there on your floor. This allows for complete customization of color and finish, but it’s a much more involved process requiring specialized tools and good ventilation. For your first project, pre-finished is usually easier.
Tools and Materials You’ll Need
Gathering your tools before you begin is key to a smooth installation. Here’s a checklist to get you started:
Essential Tools:
- Tape Measure
- Pencil
- Safety Glasses
- Hammer
- Chisel
- Utility Knife
- Pry Bar
- Stud Finder
- Level (4-foot recommended)
- Miter Saw or Circular Saw (for cutting planks)
- Jigsaw (for cuts around obstacles)
- Flooring Nailer (rentable) or Cleat Nailer
- Air Compressor and Hose (if using a flooring nailer)
- Broom and Dustpan
- Vacuum Cleaner
- Chalk Line
- Optional: Moisture Meter
Materials:
- Hardwood Flooring Planks (calculate square footage + 10-15% for waste)
- Underlayment (felt or foam, check manufacturer recommendations)
- Moisture Barrier (if installing over concrete or in a damp area)
- Transition Strips (for doorways and where floor meets other materials)
- Finishing Nails or Staples (for baseboards)
- Optional: Wood Filler (for small gaps)
Make sure to check the specific installation instructions from your hardwood flooring manufacturer. They often have particular requirements for underlayment and installation methods.
Step-by-Step Guide: How to Lay Hardwood Floor
Now for the exciting part! Let’s break down the process into manageable steps. Remember, patience and careful measurement are your best friends here.
Step 1: Prepare Your Subfloor
A solid, clean, and level subfloor is critical for a successful hardwood installation. This is the foundation everything will sit on.
- Check for Levelness: Use your level to check the subfloor. Low spots can be filled with leveling compound, and high spots can be carefully sanded down. Aim for a tolerance of no more than 1/8 inch over a 6-foot span.
- Clean Thoroughly: Sweep and vacuum the subfloor to remove all dust, debris, and old adhesive. Any grit can cause damage to your new flooring or create an uneven surface.
- Inspect for Damage: Look for loose or squeaky boards, water damage, or rot. Repair or replace any damaged sections.
- Moisture Test: Especially important over concrete or in humid environments. Use a moisture meter to ensure the subfloor is dry enough. Wood expands and contracts with moisture, so a proper moisture reading is crucial. For concrete, a specific moisture barrier film may be required. Learn more about moisture testing for flooring from the Building Science Corporation.
- Install Underlayment (if needed): Many manufacturers require an underlayment to provide cushioning, sound dampening, and a vapor barrier. Lay it out according to the manufacturer’s instructions, overlapping seams as recommended.
Step 2: Plan Your Layout
Deciding how your planks will run will affect the look of the room. Generally, flooring should be laid parallel to the longest wall in the room and perpendicular to the floor joists for maximum stability.
- Determine Direction: For most rooms, lay the planks parallel to the main light source (like a window) or the longest wall. This creates a sense of spaciousness and hides seams effectively.
- Dry Fit a Few Rows: Lay out a few rows of planks in your starting wall without nailing them. This helps you visualize the pattern and ensure your last row won’t be too narrow (less than 2 inches is usually too thin to look good). If it is, you may need to rip (cut lengthwise) the first row wider to compensate.
- Mark Your Starting Wall: Use a chalk line to mark a straight line parallel to your starting wall. This line will guide your first row of planks.
Step 3: Acclimate Your Flooring
This is a crucial step often overlooked by beginners. Hardwood needs to adjust to the temperature and humidity of your home.
- Store Properly: Keep the unopened boxes of flooring in the room where they will be installed for at least 48-72 hours (or as recommended by the manufacturer).
- Keep Boxes Flat: Store the boxes flat on the subfloor, not on their ends.
- Maintain Room Conditions: Ensure your home’s heating, cooling, and humidity are at their normal living levels during acclimation and installation.
Step 4: Laying the First Row
The first row sets the tone for the entire floor. It needs to be perfectly straight.
Most hardwood flooring uses a tongue-and-groove system. The tongue fits into the groove of the next board. For the first row, you’ll typically remove the tongue side that will face the wall.
- Prepare First Planks: Take your first planks and use a hammer and chisel or a saw to carefully remove the tongue from the side that will be against the wall.
- Position the First Plank: Place the first plank with the grooved edge facing the wall and the tongue removed side against your chalk line. Leave a small expansion gap (about 1/2 to 3/4 inch) between the wall and the plank. This gap is essential to allow for natural expansion and contraction of the wood. You can use spacers to maintain this gap.
- Connect Subsequent Planks: Lay the next plank alongside the first, fitting its tongue into the groove. You may need to gently tap it into place with a tapping block and hammer to ensure a snug fit.
- Nail the First Row: Because you’ve removed the tongue facing the wall, you’ll need to nail through the face of the board (near the edge) into the subfloor. Use your flooring nailer or carefully hand-nail with finishing nails at a slight angle, or follow the manufacturer’s recommendation for blind-nailing through the groove. Nail about every 6-10 inches.
- Cut the Last Plank: For the last plank in the row, measure the remaining space, subtract your expansion gap, and cut the plank to fit. You might need to rip it lengthwise if the remaining space is narrow. Nail it in place.
Step 5: Laying Subsequent Rows
This is where the pattern starts to take shape. Staggering the end joints is crucial for both strength and aesthetics.
- Start with a Cut Piece: To stagger the joints, start your second row with a piece cut from the end of the last plank of the previous row, or even a shorter piece. The end joints of one row should not align with the end joints of the row next to it. A good rule of thumb is to have at least a 6-inch stagger.
- Connect and Nail: Fit the tongue of the new plank into the groove of the previous row. Angle your flooring nailer into the groove of the plank you are installing and fire the nail to secure it to the subfloor. Continue across the row, securing each plank.
- Use a Tapping Block: For very tight fits, place a tapping block against the edge of the plank and gently tap it with a hammer. This ensures a tight seam without damaging the edges of the wood.
- Continue Row by Row: Work your way across the room, ensuring each row is tightly fitted and properly nailed.
You’ll likely encounter doorways, vents, and other features that require careful cuts.
- Doorways: Undercut door casings before you start. This allows the flooring to slide underneath, providing a clean, professional finish. Use a handsaw or a door jamb saw for this.
- Vents: You’ll need to cut around vents. Measure carefully and use a jigsaw to make these cuts. Ensure the planks fit snugly around the vent opening, maintaining expansion gaps if needed.
- Awkward Cuts: For irregular shapes, you can make a template out of cardboard or paper, then transfer the pattern to the plank for cutting with a jigsaw or a band saw.
For a professional look, consult resources like This Old House for advanced techniques and tips on tricky corners.
Step 7: Laying the Last Row
The last row can be tricky because the wall might not be perfectly straight, and you’ll have limited space to maneuver.
- Measure Carefully: Measure the width needed for the last row, remembering to account for the expansion gap from the wall.
- Rip the Planks: You’ll likely need to rip (cut lengthwise) the planks for the last row to fit.
- Undercutting for Nailing: Since you can’t nail through the groove into the subfloor on the last row, you’ll need to nail through the face of the board (like the first row) or use a pull bar and hammer to pry the last row into place and nail it from the side into the tongue of the previous row. A pull bar is specifically designed for this purpose and is highly recommended.
- Access: Sometimes, you may need to angle the nailer or use a manual hammer and nail set to finish the last row.
Step 8: Finishing Touches
With the flooring laid, it’s time for the final details.
- Remove Spacers: Once all rows are laid, remove all the expansion gap spacers.
- Install Baseboards and Trim: Reinstall any removed baseboards or install new ones. Nail them into the wall studs, NOT into the floor. This allows the floor to expand and contract freely.
- Install Transition Strips: Place transition strips in doorways and at the ends of the floor run where it meets other flooring materials. Secure these according to their specific instructions, typically with nails or adhesive.
- Clean Up: Give your new floor a thorough sweep and vacuum to remove any sawdust or debris.
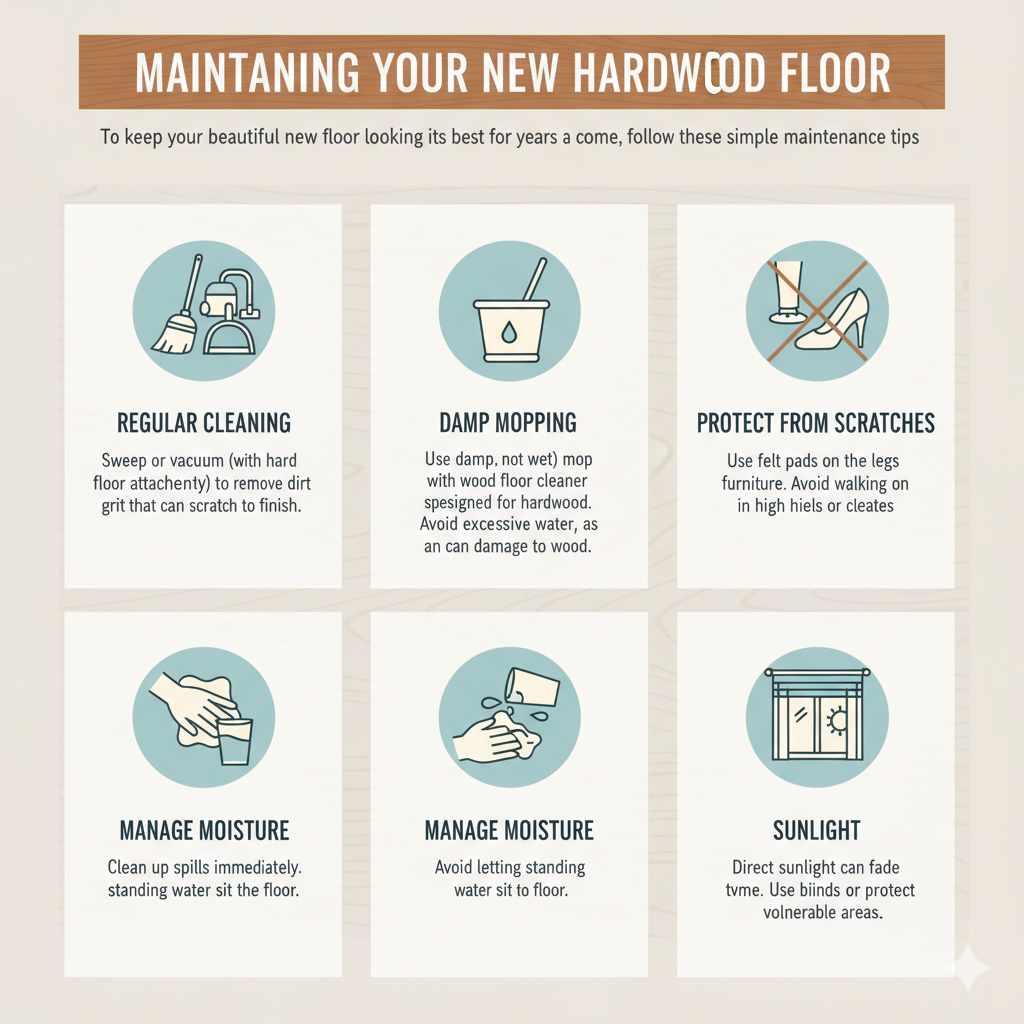
Maintaining Your New Hardwood Floor
To keep your beautiful new floor looking its best for years to come, follow these simple maintenance tips:
- Regular Cleaning: Sweep or vacuum (with a hard floor attachment) regularly to remove dirt and grit that can scratch the finish.
- Damp Mopping: Use a damp (not wet) mop with a wood floor cleaner specifically designed for hardwood. Avoid excessive water, as it can damage the wood.
- Protect from Scratches: Use felt pads on the legs of furniture. Avoid walking on the floor in high heels or cleats.
- Manage Moisture: Clean up spills immediately. Avoid letting standing water sit on the floor.
- Sunlight: Direct sunlight can fade wood over time. Use blinds or curtains to protect vulnerable areas.
FAQ: Laying Hardwood Floor
Q1: How long does it take to lay hardwood floors?
A: For a beginner, laying hardwood floors in an average-sized room (e.g., 12×15 feet) typically takes 2-3 days. This includes subfloor preparation, acclimation, installation, and finishing touches. Professionals can do it much faster, but this is a realistic timeframe for a DIYer.
Q2: Can I lay hardwood flooring over my existing floor?
A: It depends on the existing flooring. You can generally lay hardwood over a single layer of existing vinyl or linoleum that is well-adhered and not padded. You should NOT install hardwood over carpet, cork, or other soft surfaces. It’s also not recommended to lay hardwood over more than one existing floor layer.
Q3: Do I need a moisture barrier?
A: Yes, a moisture barrier is essential when installing hardwood floors over concrete subfloors or in basements or other areas prone to moisture. It prevents moisture from the subfloor from being absorbed by the wood, which can cause warping, cupping, or buckling. Always check your flooring manufacturer’s recommendations.
Q4: What is the best way to cut hardwood flooring planks?
A: A miter saw or a table saw is best for making clean crosscuts (across the width of the plank). For ripping (cutting lengthwise) or making irregular cuts around obstacles, a jigsaw or a circular saw with a fine-tooth blade is ideal. Always wear safety glasses when cutting.
Q5: How do I deal with expansion gaps?
A: Expansion gaps are small spaces left around the perimeter of the room (between the flooring and walls, cabinets, etc.) to allow the wood to expand and contract naturally with changes in temperature and humidity. A typical gap is about 1/2 to 3/4 inch. You can use small pieces of wood or plastic spacers to maintain this gap during installation.