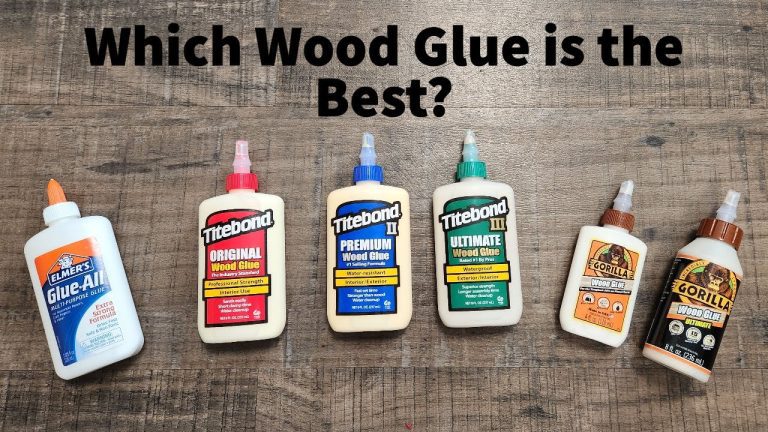
How Long to Leave Wood Glue Clamped: Proven Best Times
For most standard yellow or white wood glues (PVA), clamp your project for at least 30 to 60 minutes. Apply only light stress after clamping, as the glue needs a full 24 hours to cure completely and reach its maximum strength. Always check your specific glue bottle for the manufacturer’s recommendations.
Hello, fellow makers! I’m Md Meraj, and I’m here to help you turn your woodworking dreams into reality. One of the first questions I get from new woodworkers is about glue. You’ve carefully cut your pieces, applied the glue, and now comes the waiting game. But for how long? Clamp it for too little time, and your project falls apart. Too long, and maybe you feel you’re wasting precious workshop time.
It can feel confusing, but don’t worry. Getting this right is one of the easiest ways to ensure your projects are strong and last a lifetime. Today, we’re going to clear up all the confusion. We’ll cover exactly how long to clamp wood glue, why it’s so important, and the simple rules that guarantee a rock-solid bond every single time. Let’s build something great together!
Why Clamping Is Crucial for a Strong Glue Joint
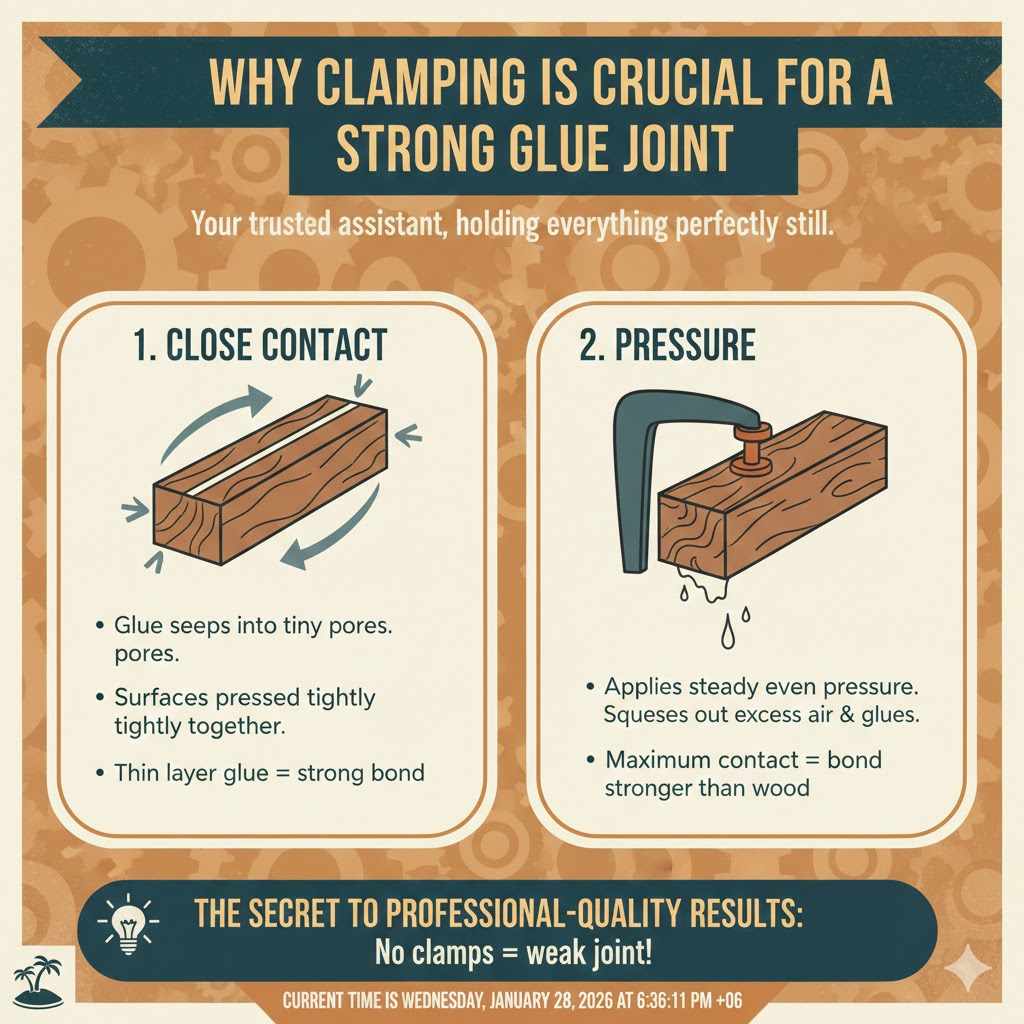
Before we get to the clock, let’s talk about why we use clamps in the first place. Think of clamps as your trusted assistant, holding everything perfectly still while the glue works its magic. When you apply wood glue, it needs two things to form a powerful bond: close contact and pressure.
- Close Contact: Wood glue works by seeping into the tiny pores of the wood fibers. For the best bond, the two surfaces need to be pressed tightly together, leaving only a very thin layer of glue between them. Too much glue creates a weak joint.
- Pressure: Clamps apply steady, even pressure that squeezes out excess air and extra glue. This ensures the wood surfaces are in maximum contact, allowing the glue to create a bond that is often stronger than the wood itself.
Without clamps, the wood pieces can shift, create gaps, or form a weak, unreliable joint. Proper clamping is not just a suggestion—it’s the secret to professional-quality results.
The Four Stages of Wood Glue Drying
Understanding how wood glue dries helps you know exactly what’s happening while your project is in clamps. The process isn’t instant; it happens in a few key stages. Let’s break it down in simple terms.
Stage 1: Open Time (The Working Window)
This is the short period right after you apply the glue but before it starts to get tacky. “Open time” is your window to get everything assembled. You can spread the glue, join the pieces, and make small adjustments to get the alignment just right. For most common wood glues like Titebond Original, you have about 5-10 minutes of open time. Work efficiently but don’t rush!
Stage 2: Initial Tack (The Grabbing Stage)
After the open time ends, the glue starts to “tack up.” It becomes sticky and begins to grab onto the wood fibers. At this point, you should not try to move or adjust the joint, as you will weaken the bond that is starting to form. This is when the clamps are doing their most important job: holding everything perfectly still.
Stage 3: Set Time (Handling Stage)
This is the moment we’ve been waiting for! Set time is the minimum amount of time the project needs to remain clamped. The glue has created a bond strong enough to hold the pieces together on its own without pressure. For most PVA glues (the common yellow and white kinds), this is usually around 30 to 60 minutes. After this time, you can safely remove the clamps. However, the joint is still fragile, so handle it with care!
Stage 4: Full Cure Time (Maximum Strength)
Curing is the final stage where the glue bond reaches its absolute maximum strength. During this time, the remaining moisture in the glue evaporates, and the chemical bond fully solidifies. While you can handle the project after the set time, you should wait for the full cure before putting any major stress on the joint. This includes sanding, cutting, routing, or using the project. The standard full cure time for most wood glues is 24 hours.
So, How Long Should You Clamp Wood Glue? The Simple Answer
Now that you understand the process, let’s get straight to the point. Here are the simple, proven timelines you can trust for your projects.
The General Rule: 30-60 Minutes for Most Projects
For most woodworking projects using standard PVA glue, you should leave the clamps on for 30 to 60 minutes. This is long enough for the glue to set properly. After an hour, you can safely remove the clamps and move on to the next step, as long as you handle the piece gently.
The Full Cure Rule: 24 Hours for Maximum Strength
Patience is a woodworker’s best friend. Even though you can remove clamps after an hour, the joint is not ready for heavy work. Always wait a full 24 hours before you sand, plane, or apply any significant stress to the glued joint. Waiting for the full cure ensures you get the strongest possible bond that will stand the test of time.
A Quick Reference Guide for Different Glue Types
Not all glues are the same! The type of glue you use will change your clamping time. Here is a handy table to help you out.
| Type of Wood Glue | Minimum Clamp Time | Full Cure Time | Best For |
|---|---|---|---|
| PVA (Yellow/White Glue) | 30 – 60 minutes | 24 hours | Most indoor wood projects, general joinery. |
| Polyurethane Glue | 45 – 60 minutes | 24 hours | Outdoor projects, oily woods, joining wood to other materials. |
| Epoxy | Varies (check label) – typically 2-4 hours | 24 – 72 hours | Filling gaps, structural repairs, high-strength bonding. |
| Cyanoacrylate (CA or “Super Glue”) | A few seconds (with activator) | A few hours | Small repairs, quick jigs, holding parts for clamping. |
| Hide Glue (Hot) | 60 – 90 minutes | 24 hours | Fine furniture making, instrument repair, antique restoration. |
Key Factors That Change Clamping Times
While the general rules are a great starting point, a few things can change how long you need to clamp. Being aware of them will make you a smarter woodworker.
Type of Wood Glue
As we saw in the table, the type of glue is the biggest factor. A fast-setting CA glue needs seconds, while a slow-curing epoxy might need hours. Always, always read the instructions on the glue bottle! The manufacturer provides the most accurate times for their specific product.
Wood Species
The type of wood you’re using can also have an impact.
- Porous Woods (like pine or poplar): These woods absorb the moisture from the glue more quickly, which can sometimes speed up the initial set time.
- Dense Woods (like oak or maple): These woods are less absorbent. The glue may take a little longer to set, so leaving it clamped for a full hour is a good idea.
Temperature and Humidity
Your workshop environment plays a huge role. Wood glues cure best in moderate conditions. According to a guide from the U.S. Forest Service, wood and adhesives are sensitive to environmental changes.
- Ideal Conditions: Room temperature (around 70°F or 21°C) with average humidity is perfect.
- Cold Temperatures: Cold slows down the chemical reaction in the glue, significantly increasing the clamping and curing time. If your shop is below 50°F (10°C), consider waiting longer or warming up the space.
- High Humidity: Excess moisture in the air can slow down the evaporation process, which means the glue takes longer to cure.
How Tightly the Joint Fits
A good, tight-fitting joint needs less clamp time. If your pieces fit together perfectly with no gaps, the glue only has to bond the two surfaces. If there are gaps, the glue also has to fill that space, which can take longer to cure and will result in a weaker joint. Always aim for clean, square cuts and tight joinery.
The Amount of Glue Used
It can be tempting to use a lot of glue, thinking more is better. But this is a common mistake! You only need a thin, even layer. If you apply too much, you’ll see excessive “squeeze-out” when you clamp. A thick layer of glue will take much longer to dry and can actually create a weaker bond. A small, even bead of squeeze-out along the joint is a good sign you’ve used the right amount.
A Step-by-Step Guide to Clamping Wood Glue Like a Pro
Ready to glue up your next project? Follow these simple steps for a perfect result every time.
- Prepare Your Wood Surfaces: Make sure the surfaces to be glued are clean, dry, and free of any dust, oil, or sawdust. A quick wipe with a clean cloth is usually enough.
- Apply a Thin, Even Layer of Glue: Apply a small bead of glue to one of the surfaces. Use a small brush, a silicone glue spreader, or even your finger (wear a glove!) to spread it into a consistent, thin layer that covers the entire surface.
- Join and Align Your Pieces: Press the two pieces of wood together. Gently slide them back and forth just a tiny bit to ensure the glue is evenly distributed between them. Get them into their final alignment.
- Apply Your Clamps: Position your clamps so they apply even pressure across the joint. For a long joint, use multiple clamps spaced a few inches apart. Don’t overtighten them! Just apply enough pressure to bring the joint tightly together and see a tiny, uniform bead of glue squeeze out.
- Check for Square: Use a square to make sure your project is, well, square! Clamps can sometimes pull a project out of alignment. Make any necessary adjustments before the glue starts to set.
- Clean Up Squeeze-Out: Use a damp rag to wipe away any excess wet glue. It’s much easier to clean it up now than to scrape or sand it off later once it’s dry.
- Wait the Right Amount of Time: Set a timer! For most projects, let it sit clamped for at least 30-60 minutes.
- Remove Clamps and Let it Cure: After the set time has passed, you can carefully remove the clamps. Find a safe spot for your project to rest, and let it sit undisturbed for the next 24 hours to fully cure.
Here are some common clamping mistakes and how you can avoid them to ensure a perfect glue-up.
| Common Mistake | The Problem It Causes | How to Fix It |
|---|---|---|
| Overtightening Clamps | Squeezes out too much glue, resulting in a “starved” and weak joint. Can also dent the wood. | Tighten clamps until the joint is snug and a small bead of glue appears. Use wood scraps (cauls) under the clamp heads to protect your project. |
| Using Too Few Clamps | Creates uneven pressure, leading to gaps in the joint and a weak bond. | Use enough clamps to distribute pressure evenly. A good rule of thumb is to place clamps every 8-12 inches. |
| Poor Clamp Placement | Can cause the project to bow or warp under pressure, ruining its alignment. | Alternate clamps on the top and bottom of your project to balance the pressure and keep everything flat. |
The Dangers of Removing Clamps Too Soon
I know it’s tempting to get back to work on your project, but removing clamps before the glue has properly set is a recipe for disaster. If you take them off too early, a few bad things can happen:
- Weak Joint: The bond won’t be strong enough to hold, and the joint could slowly pull apart over time, or fail completely under stress.
- Gaps and Misalignment: The pieces might shift or separate slightly before the glue is set, creating an ugly gap and ruining the fit of your project.
- Starting Over: If the joint fails, you’ll have to scrape off all the old, semi-cured glue and start the entire process over again. It’s much faster to just be patient the first time!
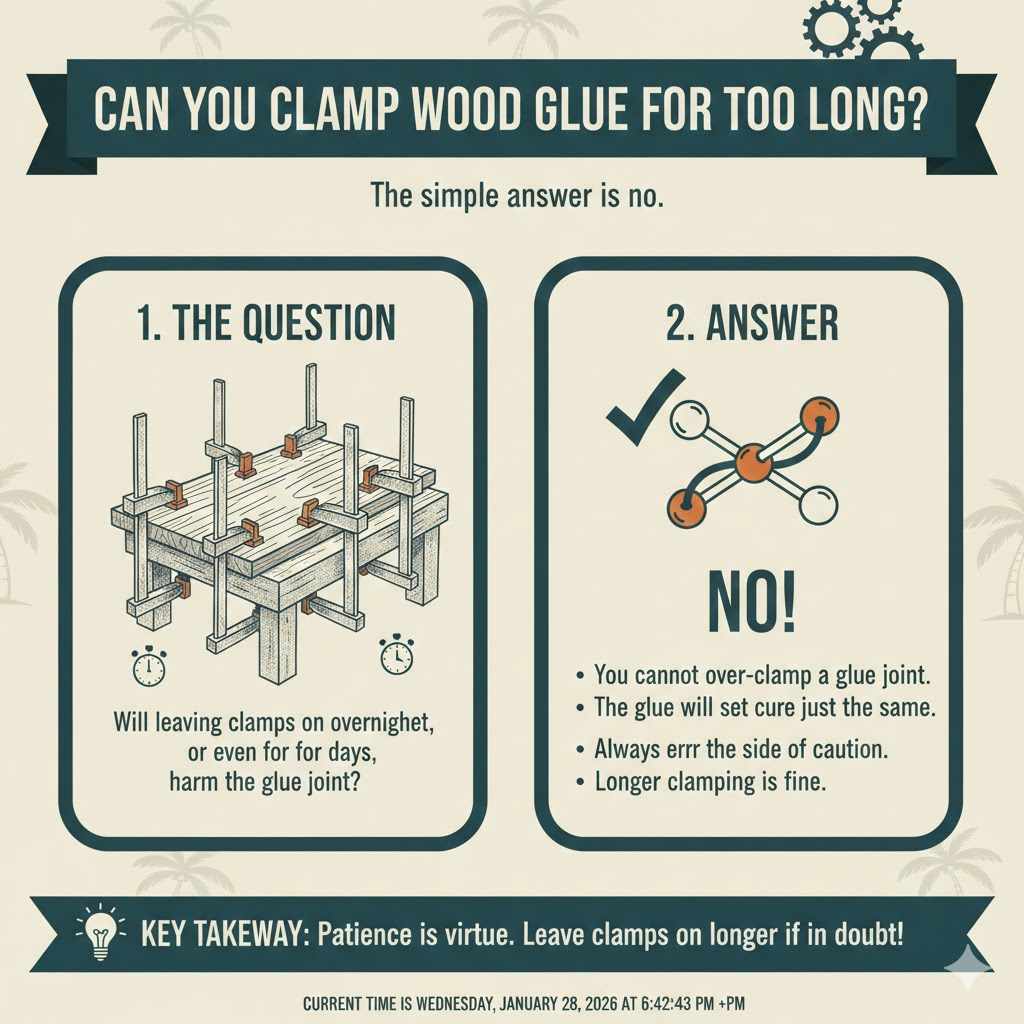
Can You Clamp Wood Glue for Too Long?
This is a great question I hear a lot. The simple answer is no. You cannot harm a glue joint by leaving it clamped for too long. Leaving your project clamped overnight, or even for a couple of days, is perfectly fine. The glue will set and cure just the same. So, if you’re ever in doubt, it’s always better to err on the side of caution and leave the clamps on a little longer than you think you need.
Frequently Asked Questions (FAQ)
What happens if I don’t clamp wood glue?
If you don’t use clamps, the wood surfaces will not be pressed together tightly. This results in a thick, weak layer of glue and an unreliable bond. The pieces can easily be pulled apart. Clamping is essential for creating a strong, long-lasting wood joint.
How tight should my clamps be?
Your clamps should be firm, but not excessively tight. The goal is to close the joint completely, applying enough pressure to see a very small, even bead of glue squeeze out along the seam. Overtightening will squeeze out too much glue and weaken the joint.
Can I speed up the wood glue drying time?
You can, but it’s often best not to. Using a fan to increase air circulation or working in a warm, dry room can help speed up the process. However, trying to speed it up too much with a heat gun or by placing it in direct sun can cause the glue to dry unevenly and create a weak bond. Patience is your best tool here.
How do I clean up squeezed-out glue?
The easiest way is to wipe it up with a damp cloth while the glue is still wet. If you wait for it to partially dry to a gel-like state, you can often scrape it off easily with a putty knife or chisel. It’s much harder to deal with once it’s fully hardened, as it can be difficult to sand and may interfere with your wood finish.
Does old wood glue work the same?
Not always. Wood glue has a shelf life, usually about one to two years. If your glue has become thick, lumpy, or discolored, it may not create a strong bond. It’s always best to use fresh glue for important projects. If you’re unsure, test it on some scrap wood first.
What’s the difference between “set time” and “cure time”?
Set time is the minimum time needed in clamps for the glue to hold the joint together on its own (usually 30-60 minutes). Cure time is the total time needed for the glue to reach its maximum strength (usually 24 hours). You can handle the project after it sets, but you shouldn’t put stress on it until it’s fully cured.
Conclusion: The Simple Path to Strong Joints
There you have it! The mystery of clamping time is solved. For the vast majority of your woodworking projects, just remember the two golden rules: clamp for at least 30-60 minutes, and let the glue fully cure for 24 hours before stressing the joint.
By understanding how glue works and being patient, you are guaranteeing that every piece you build will be strong, durable, and ready to last for generations. Clamping isn’t just a step in the process; it’s your assurance of quality craftsmanship. So take your time, follow these simple guidelines, and build with confidence. Your future projects will thank you for it!