How to Bend Veneer Without Cracking: A Step-by-Step Method
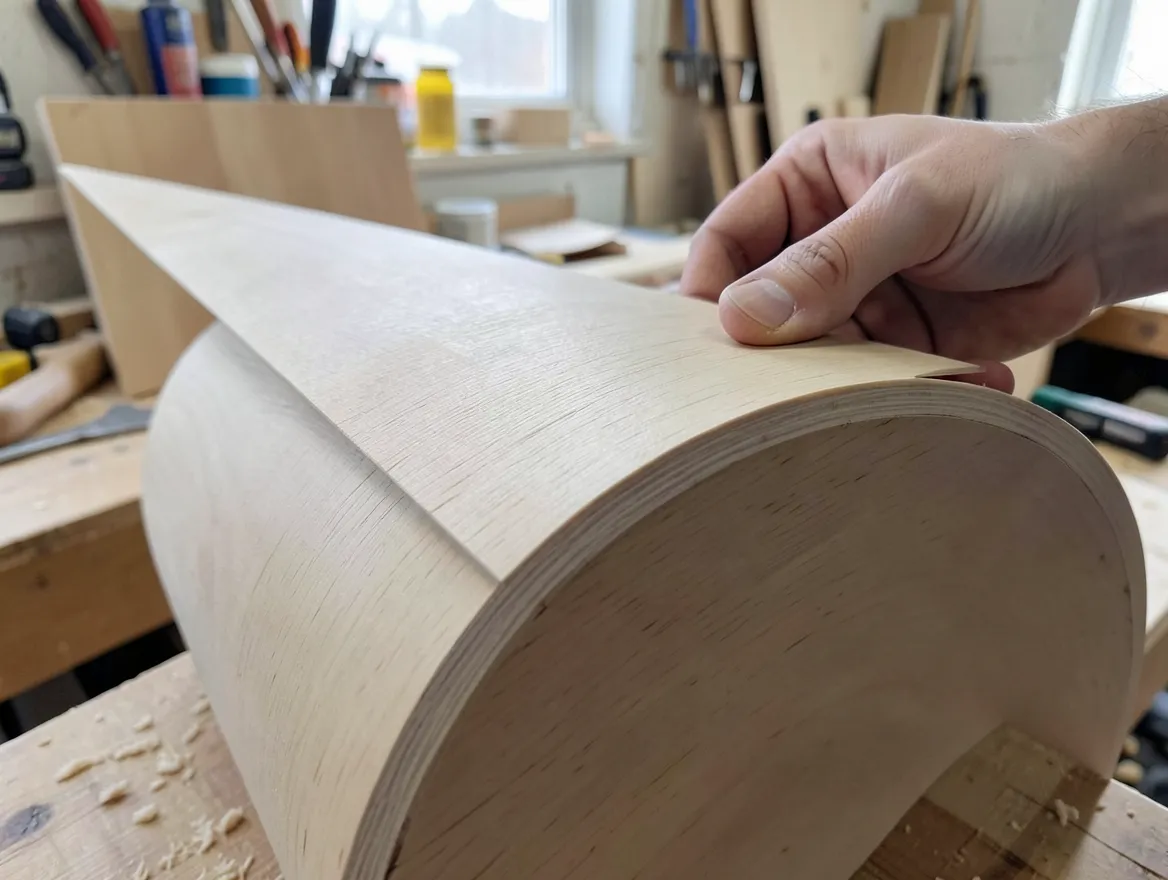
Veneer cracks when it’s bent dry or too fast — the fix is to soften the wood fibers first with a veneer softener or warm water, then bend it slowly around a form and let it dry clamped in place. A dedicated veneer softener works faster and more reliably than water alone on tight or compound curves.
If you’re also dealing with wood finish laminate, see our related guide on wood finish laminate.
Most veneer sold today is rotary-cut or plain-sliced to about 1/40 inch thick (some specialty veneer runs closer to 1/28 inch), and how well a given sheet bends depends heavily on which cut it is and which wood it came from. Rotary-cut veneer, peeled off a spinning log like unrolling a paper towel, follows the growth rings and tends to bend more forgivingly than plain-sliced veneer, which is cut straight through the log and can have grain running at an angle that fights a tight curve. Straight, tight-grained species — mahogany, walnut, cherry — generally bend more easily than ring-porous woods like oak, where the large early-wood pores create natural weak points that crack first under stress.
Introduction to Veneer Bending
Best Veneer Softener for Tight Bends
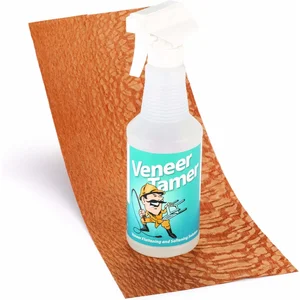 |
Sauer’s Veneer Softener/Tamer, Pint A dedicated softener gets veneer pliable in minutes instead of soaking it in water for hours.
|
Veneer cracks for one core reason: wood fiber is stiffest and most brittle when it’s dry, and bending forces the outside face of the curve to stretch while the inside face compresses. Dry wood has almost no give to absorb that stress, so it splits along the grain instead. Every method below — water, a dedicated softener, steam, or a vacuum press — works by temporarily softening the lignin that binds wood fibers together, giving the fibers room to slide past each other instead of tearing.
Choosing the Right Veneer
Raw (unbacked) veneer is the most common type and also the most prone to cracking, since there’s nothing behind it to distribute stress across the sheet. Paper-backed veneer has a thin paper layer laminated to the back, which adds just enough tensile strength to noticeably reduce cracking on curves — it’s the better choice if you’re new to bending veneer or working a tight radius. Phenolic-backed veneer goes a step further with a resin-impregnated backing that makes it strong enough for demanding curved panels, but it’s stiffer to work with and typically needs more heat or moisture to soften than raw or paper-backed sheets.
Inspect any sheet before buying or using it: hold it up to a light and look for hairline splits, especially near the edges, which will only get worse once you introduce bending stress. Buy more than your exact measurement calls for — even careful bending occasionally cracks a sheet, and matching color and grain pattern from a different batch later is far harder than cutting an extra piece from the same batch now.
Preparing the Veneer
For gentle curves, a damp cloth or light misting is often enough — apply it to both faces, let it sit for 5-10 minutes, and check flexibility by gently flexing a corner before committing to the full bend. For tighter curves or compound shapes (a curve that changes direction, like an S-curve), that mild dampening usually isn’t enough fiber-softening, which is where a dedicated veneer softener product earns its cost: it penetrates faster and more evenly than water alone, typically making even difficult veneer pliable within 10-15 minutes rather than the longer, less predictable soak times water requires for the same result.
Cut veneer to size before softening it, not after — wet veneer tears far more easily under a blade than dry veneer does, and clean, straight edges matter more once the sheet is already curved and harder to reposition. Use a sharp utility knife or veneer saw against a straightedge, and cut every piece slightly oversized; trimming a bent, dried piece down to its final size is far more forgiving than discovering it’s a hair short after the glue has set.
Essential Tools and Materials
At minimum you need a veneer saw or sharp utility knife, a bending form (a solid or built-up mold matching your target curve), and enough clamps or cauls to hold pressure evenly along the whole curve while it dries — uneven clamping pressure is one of the most common causes of a crack that appears well after the initial bend looked fine. A spray bottle for water or softener application, and a stack of clean rags for wiping excess moisture, round out the basic kit.
For gluing the bent veneer to its substrate, wood glue (PVA) works for flat-to-curved lamination with enough clamp time, while contact cement is faster for veneer being applied to a rigid curved form since it bonds on contact rather than needing clamp pressure for hours. If you’re planning to do more than one or two curved projects, a vacuum press is worth the investment — it applies uniform pressure across the entire curved surface at once, which is difficult to replicate with clamps alone on anything beyond a simple, gentle curve.
Bending Techniques
Steam bending uses heat and moisture together — wood’s lignin begins to soften noticeably around 140-180°F, and a steam box brings the whole sheet to that range evenly rather than just the surface, which is why it works on thicker or more stubborn veneer that water alone won’t fully soften. Steam a sheet for roughly 20-30 minutes per 1/4 inch of combined thickness as a starting point (thin single-sheet veneer needs far less than a thick built-up laminate), then move quickly — steamed wood starts stiffening again as it cools, so the form and clamps need to be ready before the veneer comes out of the box.
Vacuum press bending skips heat almost entirely and instead relies on even, sustained atmospheric pressure (roughly 13-14 PSI at sea level) pulling the veneer tight against a form inside a sealed bag. It’s slower to set up than steam but far more forgiving on complex or compound curves, since the pressure is genuinely uniform across the whole surface rather than concentrated wherever your clamps happen to sit. Cold press bending — glue, a rigid mold, and simple clamps, no steam or vacuum — is the simplest method for gentle, single-direction curves, but it’s a poor fit for anything tight or compound, where uneven clamp pressure reliably produces cracks right at the tightest point of the curve.
Avoiding Common Mistakes
Letting the veneer dry out partway through a bend is the single most common cause of a late crack — once it starts stiffening again mid-bend, forcing it the rest of the way is what splits it, even if the first half of the curve looked fine. Keep a spray bottle within reach and re-mist if you notice the sheet resisting more than it did a minute earlier.
Bending too fast is the second-biggest cause — wood fiber needs time to reorganize under stress, not just moisture, so even a properly softened sheet can crack if you force it around a tight radius in one motion instead of easing into the curve over 30-60 seconds. And uneven clamp pressure creates stress concentrations that crack exactly where the pressure is lightest, which is why a bending form with continuous contact along the whole curve (cauls, or a solid mold) outperforms a handful of point clamps every time. Always test a new technique or a new veneer batch on a scrap offcut first — the cost of a ruined test piece is nothing compared to cracking the good sheet you already cut to size.
Finishing and Maintenance
Let the bent veneer fully dry and cure in its form — typically 24-48 hours for glue-set curves, longer in humid conditions — before removing clamps and applying any finish. Apply finish in thin coats rather than one heavy one; a thick coat can pool unevenly on a curved surface and is more prone to cracking or alligatoring as it cures than several thin coats built up over time. Sand lightly with fine-grit paper (320 or higher) between coats, and go gently on curved sections — veneer this thin can sand through to the substrate in seconds if you’re not careful, especially at the tightest point of the bend where the material sits closest to its minimum thickness.
Once finished, treat curved veneer work the way you would any fine wood surface: keep it out of direct sunlight (UV fades and can embrittle the finish over time), dust with a dry or barely damp cloth rather than soaking it, and avoid setting heavy objects on curved sections, which put ongoing stress on a shape that’s already at its structural limit compared to flat veneer.
Advanced Tips From Experts
For a compound curve — one that bends in two directions at once, like a boat hull section or a curved chair back — combine methods rather than relying on one: soften with a dedicated veneer softener first, then finish the shaping over a heated form (a shop-built hot pipe or an iron on low heat) to lock in the second-direction curve while the fibers are still pliable. Trying to force a compound curve with cold water alone is where even experienced woodworkers see the highest crack rate.
On very tight radii, consider “backing” the veneer — laminating a second, thinner layer of veneer with its grain running perpendicular to the first before bending. The cross-grain layer resists splitting along the primary grain direction, which is the same cross-lamination principle that makes plywood far more crack-resistant than a solid board of the same thickness. It adds a step, but on a radius under a few inches, it’s often the difference between a clean bend and a wasted sheet.
Frequently Asked Questions
What is the best way to bend veneer?
For most home projects, a dedicated veneer softener followed by slow, steady bending around a form gives the most reliable results with the least specialized equipment. For tight or compound curves, steam bending or a vacuum press produces more consistent results since both apply heat and pressure more evenly than hand-clamping alone.
Can you bend veneer with water?
Yes, for gentle curves. Mist or dampen both faces and let it sit 5-10 minutes before bending. Water alone is usually not enough for tight or compound curves, where a dedicated softener or steam works faster and more reliably.
How long should veneer soak before bending?
A light water misting typically needs 5-10 minutes to soften enough for a gentle curve. A dedicated veneer softener usually gets the same sheet pliable in about 10-15 minutes, and works on tighter curves that water alone struggles with.
What tools are needed to bend veneer?
A sharp veneer saw or utility knife for cutting, a bending form matching your target curve, clamps or cauls for even pressure, and either water, a veneer softener, or a steam box for softening the fibers. A vacuum press is optional but valuable if you’re doing curved veneer work regularly.
Conclusion
The core rule behind every method here is the same: soften the fibers fully before you ask them to bend, then move slowly and keep pressure even until it’s dry. A quick water mist handles gentle curves, a dedicated softener or steam gets you through tight and compound ones, and a scrap test piece before the real cut is the cheapest insurance against a cracked sheet you already invested time cutting to size.
Sponsored / affiliate links. As an Amazon Associate I earn from qualifying purchases. I may earn additional commission from eligible campaigns.