How to Build a Music Stand Out of Wood: DIY Mastery
To build a music stand out of wood, gather materials like plywood, wood screws, and hinges. Follow a simple design that includes a base, adjustable height, and a music holder.
Creating your own music stand can be a rewarding project for musicians and DIY enthusiasts alike. A custom stand not only enhances your practice space but also allows for personalization. Building a wooden music stand provides stability and durability, ensuring it withstands regular use.
This project requires basic woodworking skills and tools, making it accessible for beginners. With the right materials and a straightforward plan, you can craft a functional and aesthetically pleasing stand that meets your needs. This guide will walk you through each step, from gathering materials to final assembly.
Introduction To DIY Woodworking For Musicians
Creating your own music stand can be a fun project. It allows musicians to express their creativity. Building something with your hands brings great satisfaction. A custom stand fits your needs perfectly.
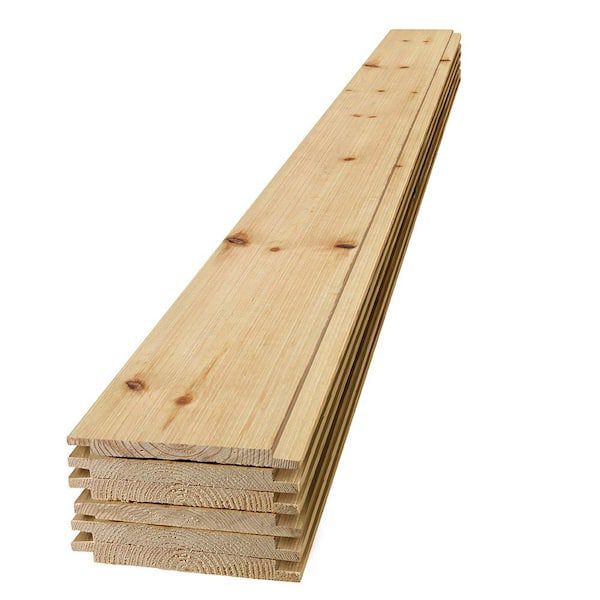
Essential tools include a saw, drill, and measuring tape. Use wood glue and screws for strong joints. Choose wood that is sturdy and easy to work with. Common choices are pine or plywood.
Gather materials like wood boards, sandpaper, and paint. Sanding the edges makes the stand safe to use. Paint or stain adds a personal touch to your stand.
Choosing The Right Wood
Choosing the right wood is key for a music stand. Durability and aesthetics matter greatly. Here are some types of wood suitable for your project:
| Type of Wood | Durability | Aesthetics |
|---|---|---|
| Oak | Very durable | Rich color and grain |
| Pine | Moderately durable | Light color, easy to paint |
| Maple | Strong and sturdy | Smooth finish, beautiful grain |
| Birch | Durable and hard | Light color, fine texture |
Choosing a wood type affects the stand’s look and longevity. Think about what fits your needs best.
Designing Your Music Stand
Start by sketching your music stand‘s design on paper. Use simple shapes and lines. Think about the height and width you need. A good design helps with stability and functionality.
Consider ergonomics for comfort while playing. The stand should be at a comfortable height. Make sure it is easy to adjust. An adjustable stand fits different players. This feature can improve your playing experience.
| Feature | Importance |
|---|---|
| Height Adjustment | Accommodates different players |
| Sturdy Base | Prevents tipping over |
| Lightweight Material | Easy to transport |
Preparing The Wood
Start by measuring the wood carefully. Use a tape measure to find the right lengths. Mark these lengths with a pencil for accuracy. Make sure all marks are clear.
Next, cut the wood along the marked lines. A saw works best for this task. Always keep your hands away from the blade for safety. After cutting, use sandpaper to smooth out rough edges. This will help prevent splinters.
Take your time while sanding. Focus on areas that feel sharp or uneven. The smoother the wood, the better it will look and feel.
Assembling The Base
Begin by cutting the wood into the right sizes. Use sturdy wood for the base. Lay the pieces flat on a clean surface. Make sure they fit tightly together.
Use strong wood glue to secure the pieces. Apply glue to all connecting edges. Clamp them together for better stability. Let the glue dry fully before moving on.
Drill pilot holes to prevent wood from splitting. Use screws to reinforce the connections. This will ensure a long-lasting music stand. Check that everything is even and sturdy.
Crafting The Stand And Rest
To shape the back support, use a piece of wood around 1 inch thick. Cut the wood to about 36 inches long. Angle the top of the back support for better comfort. Sand the edges to avoid splinters.
For the sheet holder, take another wood piece, about 24 inches wide. Cut it into a rectangle, making sure it’s sturdy. Attach it to the back support with screws. Ensure it can hold music sheets securely.
Use wood glue for extra strength. Allow time for the glue to dry completely. This will make your music stand very durable.
Adding Adjustable Components
Adjustable components make a music stand more useful. To incorporate height adjustment, use a sturdy locking mechanism. This allows users to set the stand at their desired height easily.
For a tilting mechanism, use a hinge that allows the top to tilt. This helps musicians find the best angle for their music sheets. Use screws to secure the hinge. Ensure it operates smoothly and holds the angle well.
Both features can enhance the overall experience. They provide comfort and ease of use for musicians of all ages.
Finishing Touches
Staining and sealing the wood enhances its beauty. Choose a stain that matches your style. Apply the stain evenly with a brush or cloth. Let it dry completely before sealing.
Sealing the wood protects it from damage. Use a clear sealant for a natural look. Apply multiple coats for better protection. Remember to sand lightly between coats.
Customizations can make your music stand unique. Consider adding personal engravings or designs. Use decorative hardware for an extra touch. Paint accents can also enhance the overall look.
Choose colors that reflect your personality. Bright colors can make the stand stand out. A natural finish can give a classic appearance. Experiment to find what suits you best.
Final Assembly And Testing
Begin by assembling all the parts of the music stand. Use wood glue and screws to attach each piece firmly. Ensure that the base is stable. The stand must not wobble when music is placed on it.
Test the height adjustments to check for smooth operation. Make sure the tray holds sheet music without bending. After assembly, check for any sharp edges. Sand down rough spots to prevent injuries.
Finally, place a few books or a heavy item on the stand. This will confirm the stability and functionality of your music stand. A well-built stand will support your music perfectly.
Care And Maintenance Tips
Regular cleaning keeps your music stand in top shape. Use a soft cloth to wipe dust. Avoid using harsh chemicals that may damage the wood.
For upkeep, check for loose screws and tighten them as needed. This helps maintain stability. If the wood starts to splinter, sand it lightly with fine-grit sandpaper.
Minor repairs can be done easily. For small scratches, use a wood touch-up marker. This hides imperfections and keeps the stand looking new.
Always keep the stand in a dry place. This prevents moisture damage. Treat the wood with a suitable finish once a year for protection.
Frequently Asked Questions
How Do I Choose Wood For A Music Stand?
Choosing the right wood is essential for durability and aesthetics. Popular choices include oak, maple, and pine. Oak is strong and visually appealing, while maple offers a smooth finish. Pine is lightweight and budget-friendly. Consider your skill level and intended use when selecting the best wood for your project.
What Tools Do I Need To Build A Music Stand?
Essential tools for building a music stand include a saw, drill, and measuring tape. You’ll also need sandpaper for smoothing edges and wood glue for assembly. A level ensures your stand is stable. Optional tools like clamps can help secure pieces while the glue dries, enhancing accuracy and finish.
Can I Customize My Wooden Music Stand?
Absolutely! Customizing your wooden music stand allows for personal expression. You can adjust its height, width, and design features to suit your preferences. Painting or staining the wood adds a unique touch. Consider adding compartments for sheet music or accessories to enhance functionality and style.
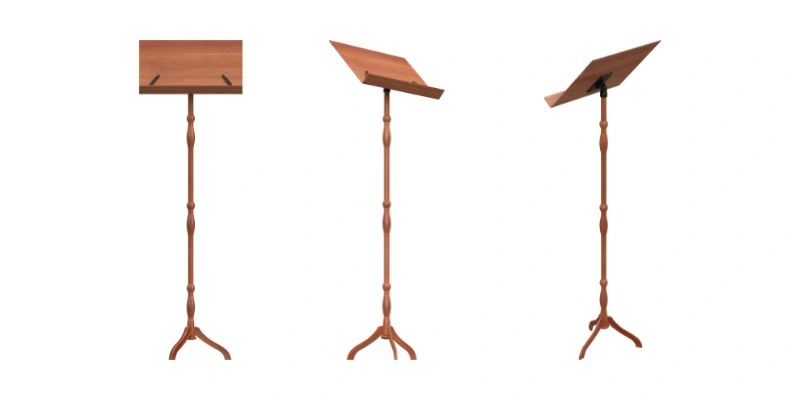
What Is The Best Design For A Music Stand?
The best design for a music stand combines stability and adjustability. A tripod base offers excellent support, while an adjustable height feature enhances comfort. A tilting music tray allows for optimal viewing angles. Simplicity in design often leads to greater functionality, making it easier to use and transport.
Conclusion
Building a wooden music stand is a rewarding project. It combines creativity with functionality. Follow the steps outlined, and you’ll create a sturdy, personalized stand. Not only will it enhance your practice space, but it also showcases your craftsmanship. Start your woodworking journey today and enjoy the benefits of your creation!