How to Build a Pergola on a Deck: Attachment, Cost & Permits
A pergola attaches to a deck through the deck’s structural joists — never through the floorboards alone — using at least two 1/2-inch by 6-inch lag screws per post. Skipping that step is the most common reason a DIY pergola works loose within a season. Most cities require a permit once the structure passes roughly 120 to 200 square feet. This guide covers the correct build order, exact hardware sizes, and 2026 cost ranges by material.
Before You Build: Location, Permits, and Load Capacity
Best Pergola Post Anchor Pick
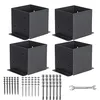
AXWHYS 6×6 Post Base Anchor (4-Pack)
Sized for standard 6×6 pergola posts — matches the post size most guides recommend for structural strength.
- Best for: deck-mounted or ground-set 6×6 pergola posts
- Why we picked it: 13-gauge steel and a full 4-post set matches most standard pergola kits
- Main drawback: too large for a lightweight 4×4-post kit
Compare more post anchor options
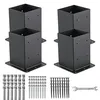 Option 1 AXWHYS 4×4 Post Base (4-Pack)
|
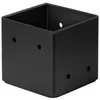 Option 2 8×8 Heavy-Duty Concrete Post Anchor
|
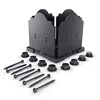 Option 3 OZCO Laredo Sunset Post Base Kit
|
As an Amazon Associate we earn from qualifying purchases.
Three decisions made before you cut any lumber determine whether the finished structure is legal, safe, and pleasant to use: where it sits, whether it needs a permit, and whether the deck underneath can actually carry the load.
Picking the Right Spot
Walk the yard at different times of day before staking anything. The four factors that matter most for a combined DIY deck and pergola build:
- Sun and wind direction: orient the rafters to block the harshest afternoon sun without cutting off airflow entirely.
- Access: the structure should connect naturally to a door or path, not force a detour around the house.
- Ground conditions: low spots that collect water need drainage work or extra footing depth before framing starts.
- Sightlines: posts placed even a foot off can block a window or a view — mock up the corners with stakes and string first.
Permit Requirements by Structure Size
Rules vary by city, but three patterns hold in most jurisdictions. An open-top, freestanding pergola under roughly 120 to 200 square feet (the exact cutoff depends on your local code) is often permit-exempt. A pergola attached to the house almost always needs a permit, because it modifies the building envelope. And any pergola with a solid, water-shedding roof is treated like a patio cover and always requires one. If you’re bolting posts through the decking into the joists — the method covered below — many building departments classify that as a structural modification to the deck itself, which can trigger a permit even on a freestanding design. Call your local building or zoning office before you order lumber; a rejected inspection after the fact costs far more than the permit fee.
Checking Your Deck’s Load Capacity
An existing deck was engineered for foot traffic and furniture, not necessarily for a pergola’s dead weight plus wind and snow load on top of it. Most residential deck framing is built to a minimum 20 psf (pounds per square foot) live load, and a pergola with a solid or lattice roof adds real weight above that baseline. If your deck is more than a few years old, has joists spaced wider than 16 inches on center, or you’re adding a pergola heavier than a basic open-lattice kit, have a contractor or structural engineer check it before you drill a single hole. Reinforcing the joists or adding extra footings now is cheaper than a sagging deck later.
Materials and Tools You’ll Need
Gather everything before you start — running back to the hardware store mid-build usually means concrete or glue sets up before you’re ready for it.
| Material | Notes |
|---|---|
| Pressure-treated lumber for deck framing | Joists and beams sized to your span — check a deck calculator before ordering |
| Decking boards | Composite or pressure-treated, sized to the finished area |
| 6×6 posts (or 4×4 for a lightweight kit) | Cedar, redwood, or pressure-treated pine for the pergola structure |
| Concrete footings and mix | Only if posts are ground-set rather than deck-mounted |
| 1/2 in. x 6 in. galvanized lag screws with washers | Minimum two per post when bolting into deck joists |
| Post anchor brackets (post base kits) | Rated for the post size — spreads the load and keeps end grain off standing water |
| Deck framing screws or structural nails | For joist hangers and general framing connections |
Essential Tools
- Tape measure and a 4-foot level
- Power drill and driver bits
- Circular or miter saw
- Post hole digger (for ground-set posts)
- Socket wrench or impact driver for lag screws
- Chalk line for marking joist locations under the decking
The Right Way to Attach Pergola Posts to a Deck (Not the Floorboards)
This is the step that separates a pergola that survives a decade from one that racks loose after the first windstorm. The posts have to reach the deck’s structural framing — the joists and beams underneath — not just the thin decking boards on top. Decking boards, even thick composite ones, aren’t designed to carry a point load like a post base; they’ll split, or the fasteners will pull through, long before the structure fails.
Before the deck boards go down, mark where each pergola post will land and confirm a joist runs directly underneath — add a short blocking piece between joists if a post falls in a gap. Most builders then bolt a post anchor bracket through the decking and into that joist (or the rim beam) with two 1/2-inch by 6-inch galvanized lag screws and washers per post. If the deck is already finished, the same method works, just expect to drill through the decking board itself and hit the framing below.
Three attachment methods cover most decks:
| Method | Hardware | Best For |
|---|---|---|
| Lag screws direct to joist | 2x 1/2 in. x 6 in. galvanized lag screws + washers per post | New builds where post locations are marked before decking goes down |
| Post anchor bracket | Bracket rated to post size, bolted through decking into joist | Retrofitting a pergola onto a deck that’s already finished |
| Through-bolt to ledger/rim joist | Carriage bolts through the rim beam, per deck framing fastener guidance | Posts positioned at the deck’s outer edge |
Build Order: Deck Frame First, Then Pergola Posts
Build the deck’s structural frame first, then set and bolt the pergola posts into that framing — not the reverse. A freestanding pergola built first has nothing to anchor to; a deck built first gives you known joist locations to bolt into.
- Prepare the ground: clear debris, mark the deck perimeter with stakes and string, and level the base.
- Set footings and posts: dig holes to your local frost-line depth, set deck support posts, and pour concrete around them.
- Frame the deck: attach beams to the posts, then hang joists off the beams with joist hangers, checking level as you go.
- Mark pergola post locations: before decking boards go down, mark which joists will carry each pergola post.
- Lay the decking: install decking boards, leaving yourself a visual reference for the marked post locations.
- Set the pergola posts: bolt post anchor brackets through the decking into the marked joists with lag screws and washers.
- Attach the beams: connect the horizontal beams across the tops of the pergola posts with structural hardware.
- Install rafters and crossbeams: space rafters evenly across the beams, then add crossbeams perpendicular to them for the finished roof pattern.
- Add bracing: install 45-degree corner bracing between posts and beams for wind resistance.
This video walks through a full deck-and-pergola build using the same sequence:
Rafter Spacing and Roof Options
Rafters are typically spaced 16 to 24 inches apart on center — tighter spacing gives more shade, wider spacing lets more light through. For the roof itself, open lattice is the traditional pergola look and gives the least amount of light control; louvered or slatted panels add adjustable shade; and a solid, water-shedding roof gives full weather protection but usually pushes the project into patio-cover permit territory (see the permit section above). Composite decking underfoot pairs well with any of the three and needs far less maintenance than wood.
How Much Does It Cost to Build a Deck With a Pergola in 2026?
Combined deck-and-pergola projects typically land in one of three tiers, depending on size and materials. See our full deck cost breakdown for size-by-size numbers on the decking portion alone.
| Project Type | Typical Cost | Notes |
|---|---|---|
| Pressure-treated deck + basic pergola kit | $3,000 – $10,000 | Standard-size deck, aluminum or pine pergola kit |
| Composite deck + cedar or redwood pergola | $10,000 – $18,000 | 200 sq ft covered deck, upgraded materials |
| Premium hardwood deck + custom pergola | $18,000 – $25,000+ | Large multi-level design, premium railing, custom pergola roof |
Deck materials alone run roughly $21 to $60 per square foot depending on decking type, while a pergola adds another $20 to $60 per square foot depending on whether it’s aluminum, pressure-treated pine, cedar, or redwood. Labor, permits, and any deck reinforcement needed to carry the pergola’s load are the biggest variables between the low and high end of each tier.
Maintenance: Keeping It Solid for Years
Sweep debris off both the deck and the pergola regularly — trapped leaves and dirt hold moisture against the wood and are one of the most common causes of early rot and staining. Pressure wash once a year to clear grime, then apply a protective sealant while the wood is clean and dry. Check the hardware during that same yearly pass: loosened lag screws at the post bases are the first sign a connection needs attention.
“The single fastest way to loosen a deck-mounted pergola is under-sizing the lag screws. Two 1/2-inch by 6-inch lag screws per post, driven into solid joist material, consistently outperform four smaller screws driven into a single 2x rim board — the extra screw count doesn’t make up for thinner shanks and shallower bite.”
If you notice rot, insect damage, or a board that flexes underfoot, replace the affected section rather than patching over it — wood that’s already compromised won’t hold fasteners reliably.
Common Mistakes to Avoid
- Bolting posts to decking boards instead of joists. The single most common structural mistake — decking boards aren’t rated to carry a post’s point load.
- Skipping the permit check. An unpermitted attached structure can complicate a home sale and, in some cities, force a teardown.
- Undersized footings. Footings dug too shallow for the local frost line will heave and throw the whole structure out of level over a winter.
- Building the pergola before the deck frame exists. Without known joist locations to bolt into, you’re left guessing or retrofitting later.
- Ignoring snow and wind load in cold climates. A lattice roof with gaps of 4 inches or more resists snow bridging better than a tight slat pattern in heavy-snow regions.
Frequently Asked Questions
Can You Attach a Pergola to an Existing Deck?
Yes. Bolt post anchor brackets through the decking into the joists below using lag screws rated for the post size, and confirm the existing deck framing can carry the added weight before you start.
Do You Need a Permit to Build a Pergola on a Deck?
Often, yes — especially if it’s attached to the house, has a solid roof, or exceeds your city’s size threshold (commonly 120 to 200 square feet for a freestanding, open-top structure). Rules vary by jurisdiction, so check with your local building department before you build.
Can Your Deck Actually Support a Pergola’s Weight?
Most residential decks are built to a 20 psf minimum live load, which covers a standard pergola in most cases, but older decks or heavier roof designs may need reinforcement. Have a contractor or structural engineer verify it before attaching posts, especially on a deck more than a few years old.
Should You Build the Deck or the Pergola First?
Build the deck’s structural frame first. Mark the pergola post locations against the joists before laying the decking boards, then set and bolt the posts into that known framing. Building the pergola first leaves you without a structure to anchor it to.
How Much Does It Cost to Build a Deck With a Pergola?
Typically $3,000 to $25,000 or more, depending on size and materials. A pressure-treated deck with a basic pergola kit starts around $3,000–$10,000, while a large composite or hardwood deck with a custom cedar or redwood pergola can run $18,000–$25,000+.
How Far Apart Should Pergola Rafters Be Spaced?
Typically 16 to 24 inches apart on center. Tighter spacing blocks more sun; wider spacing lets more light through while still defining the structure overhead.
Conclusion
A deck and pergola built together come down to three things done right: a deck frame built (or verified) to carry the extra load, posts bolted into the joists rather than the floorboards, and a permit check before the first hole is dug. Get those three right and the rest — rafters, roof style, finishing touches — is mostly a matter of preference.
Sponsored / affiliate links. As an Amazon Associate I earn from qualifying purchases. I may earn additional commission from eligible campaigns.