How To Charge A Hyper Tough Drill Battery: Step-By-Step
This guide will walk you through everything you need to know. We’ll cover the simple steps, some important safety tips, and what to do if things seem a bit off. Let’s get your Hyper Tough drill back in action.
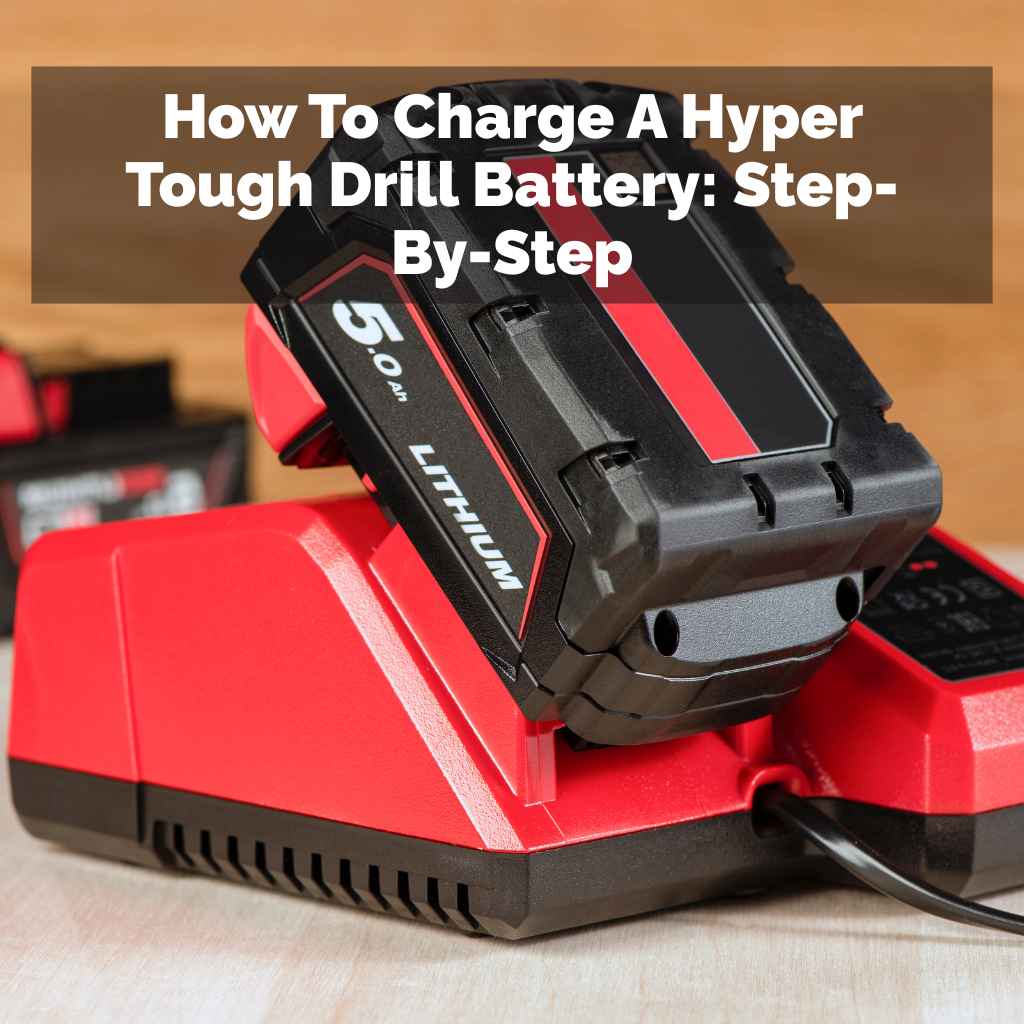
To charge a Hyper Tough drill battery, always use the charger that came with your drill. Connect the battery to the charger, ensuring it clicks securely. Plug the charger into a working electrical outlet. The charger will indicate when charging begins and when it’s complete, usually with lights. Always refer to your specific drill model’s manual for exact details.
Understanding Your Hyper Tough Drill Battery Charger
When you first get a Hyper Tough drill, it comes with a system. This system includes the drill itself, a battery pack, and a charging unit. These pieces are designed to work together. Think of them as a team. The charger is the coach, making sure the battery player is always ready for the game. It sends the right amount of power to the battery.
Hyper Tough typically uses battery chargers that are specific to their drill models. This is important. You can’t just use any charger. Using the wrong charger can be bad. It might not charge the battery at all. Worse, it could damage the battery. It might even be unsafe. Always look for the brand name and model number on both the battery and the charger.
Most Hyper Tough chargers will have indicator lights. These lights are like a dashboard for your battery. They tell you what’s happening. A light might show that the charger is plugged in. Another light might turn on when the battery is charging. A third light often signals that the battery is fully charged and ready to go. Some might even blink to show a problem.
The charger also helps manage the charging process. It controls the flow of electricity. This prevents the battery from overcharging. Overcharging can hurt battery life. It can make the battery too hot. Modern chargers are smart. They stop sending power when the battery is full. This is a key safety feature. It ensures your battery stays healthy for longer use.

Step-by-Step Guide to Charging Your Battery
Let’s break down the actual charging process. It’s quite simple when you have the right tools. The goal is to make it easy and safe for everyone. Here’s how you do it, step by step.
Step 1: Gather Your Equipment
First, you need the correct items. You’ll need your Hyper Tough drill battery. Make sure it’s the one that came with your drill, or a compatible replacement. You also need the matching Hyper Tough battery charger. Lastly, you need a working electrical outlet.
Step 2: Prepare the Charging Area
Find a good spot for charging. It should be a dry place. Keep it away from water or dampness. Batteries and water don’t mix well. Also, pick a spot that’s not too hot or too cold. Extreme temperatures can affect charging. A stable, flat surface is best.
Step 3: Connect the Battery to the Charger
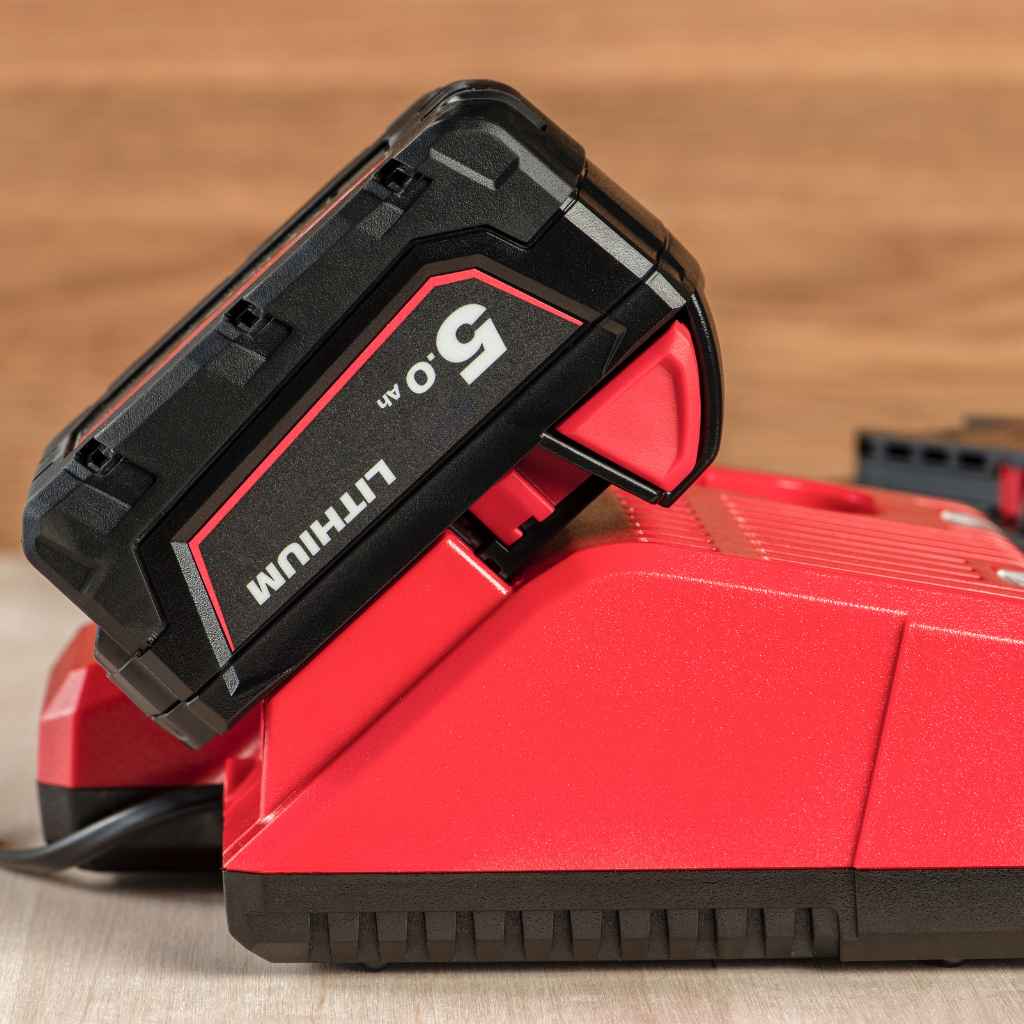
Take your Hyper Tough battery. Look at the charger base. There will be a slot or connector designed for the battery. Align the battery with the charger’s contacts. You should feel or hear a slight click. This means the battery is seated properly. It’s like putting a puzzle piece in place. Make sure it feels secure. A loose connection means no charge.
Quick Battery Connection Check
Visual Check: Look to see if the battery is flush against the charger. No gaps should be visible.
Tactile Check: Gently try to wiggle the battery. It should not move easily. A secure fit is crucial.
Step 4: Plug the Charger into the Outlet
Now, find your charger’s power cord. Plug it into a wall outlet. Use an outlet that you know works. You can test it with a lamp if you’re unsure. Make sure the outlet is easily accessible but out of the way. You don’t want to trip over the cord.
As soon as you plug it in, the charger’s lights should come on. This usually means it’s ready. It might show a power light. It might also show a light indicating it’s ready to charge. This is a good sign. It means power is getting to the charger.
Step 5: Observe the Charging Indicator Lights
This is where you get feedback. Your Hyper Tough charger has lights for a reason. They are your signals. Check your charger’s manual for what each light means. But generally, you’ll see:
- Charging Light: This light usually stays solid or blinks while the battery is taking in power.
- Full Charge Light: This light comes on when the battery is done charging. It might be a different color or a steady light.
- Error Light: If something is wrong, a light might flash red or amber. This needs attention.
Be patient. Charging takes time. The time depends on the battery’s size and how dead it is. Smaller batteries charge faster than larger ones. A battery that’s almost empty will take longer than one that’s just a little low.
Step 6: Remove the Battery When Fully Charged
Once the “fully charged” indicator light comes on, your battery is ready. Don’t leave it on the charger for too long after it’s full. While modern chargers have safeguards, it’s still best practice to remove it. Prolonged charging can still stress the battery over time.
To remove the battery, you might need to press a release button. This button is usually on the sides or back of the battery pack. Once released, gently slide the battery off the charger. It should come off easily. Then, your battery is ready to power your Hyper Tough drill.
Fast Facts About Charging
Charge Time: Varies by battery capacity and charger model.
Ideal Temperature: Room temperature is best for charging.
First Charge: Often, the battery may not be fully charged out of the box. Charge it first.
Safety First: Important Considerations
Safety is non-negotiable when dealing with power tools and batteries. Lithium-ion batteries, common in many drills, can be dangerous if mishandled. Hyper Tough, like other brands, builds in safety features. But user care is still vital. Let’s cover the key safety points.
Use Only the Manufacturer’s Charger
I cannot stress this enough. Always use the charger that came with your Hyper Tough drill. Or, use an official replacement charger from Hyper Tough. Third-party chargers might seem like a good deal. They might promise faster charging. But they could provide the wrong voltage or current. This can cause overheating. It can damage the battery cells. In rare cases, it can lead to fire.
Avoid Extreme Temperatures
Batteries are sensitive to temperature. Charging in very cold conditions can damage the battery. It can permanently reduce its capacity. Charging in very hot conditions is also bad. It can cause overheating. This can be a fire risk. It also degrades the battery faster. Always charge your Hyper Tough battery at room temperature. That’s between 65°F and 75°F (18°C to 24°C) ideally.
Keep the Charger and Battery Clean
Dirt and debris can cause problems. Dust can get into the charger’s vents. It can clog them up. This can lead to overheating. It can also interfere with the electrical contacts. This stops the battery from charging properly. Clean the battery contacts and the charger port gently. Use a dry, soft cloth. Sometimes a cotton swab can help with tight spots. Do this only when the charger is unplugged.
Inspect for Damage
Before you charge, take a quick look. Check the battery pack for cracks or damage. Look at the charger cord and plug. If you see any frayed wires, cracks, or signs of damage, do not use it. Stop using it immediately. Damaged equipment is a safety hazard. Contact Hyper Tough support for a replacement.
Never Charge a Damaged Battery
This is part of the inspection. If your battery looks swollen, is leaking, or smells strange, it’s damaged. Do not attempt to charge it. Damaged lithium-ion batteries can be very dangerous. They can leak toxic chemicals or even catch fire. Dispose of damaged batteries properly. Check your local recycling center for guidance.
Don’t Leave Charging Unattended (Especially Older Models)
While modern chargers have safety shutoffs, it’s good practice to be aware. I usually don’t leave any battery charging overnight or when I’m not home. This is especially true for older chargers or if you have any doubts about the equipment. Just keep an eye on it. You can easily check the lights.
Contrast: Safe vs. Unsafe Charging Practices
| Safe Practice | Unsafe Practice |
|---|---|
| Using the original Hyper Tough charger. | Using a generic or universal charger. |
| Charging in a well-ventilated room at room temperature. | Charging in a hot car or freezing garage. |
| Inspecting battery and charger for damage before use. | Charging a battery that is cracked or leaking. |
| Removing battery once charging is complete. | Leaving battery on charger for days after it’s full. |
Maintaining Your Hyper Tough Batteries for Longevity
Charging is a big part of battery care. But there are other things you can do. These help your Hyper Tough batteries last as long as possible. They ensure they perform well every time you need them.
Don’t Let Batteries Die Completely Every Time
Modern lithium-ion batteries don’t suffer from the “memory effect” like older battery types. This means you don’t have to wait until they’re fully depleted before charging. In fact, it can be better for them. Charging them more frequently, even for short periods, can help maintain their health. It avoids deep discharge cycles.
Store Batteries Properly
If you have multiple batteries, you’ll store some. Store them in a cool, dry place. A temperature between 40°F and 80°F (4°C to 27°C) is good. Avoid storing them in direct sunlight or in a hot car trunk. If you plan to store a battery for a long time (months), it’s best to charge it to about 50-60%. This helps preserve its capacity over extended periods.
Avoid Extreme Usage
Pushing your drill to its absolute limit for extended periods can stress the battery. If you have a big job, consider swapping batteries. This gives each battery a rest. It also prevents the battery from getting overly hot during heavy use.
Clean the Contacts Regularly
I mentioned this for charging safety, but it’s also for longevity. Battery contacts can corrode or get dirty. This leads to poor power transfer. Use a clean, dry cloth or a pencil eraser (gently!) to clean the metal contacts on both the battery and the drill. Do this every few months or if you notice performance issues.
Battery Care Checklist
Monthly: Inspect battery for damage. Clean contacts.
Regularly: Charge when needed, don’t wait for a full discharge.
Storage: Store in cool, dry place at ~50% charge for long periods.
Usage: Avoid extreme heat or deep discharges for best life.
Troubleshooting Common Charging Issues
Sometimes, things don’t go as planned. Your Hyper Tough battery might not be charging. Or maybe the lights are doing something strange. Don’t panic. Most common issues have simple solutions. Let’s look at what might be happening.
Problem: Battery Not Charging at All
Possible Cause 1: Loose Connection. Double-check that the battery is clicked securely into the charger. Try removing it and reattaching it. Listen for that click. Make sure it’s seated all the way.
Possible Cause 2: Power Issue. Is the charger plugged in? Is the outlet working? Test the outlet with another device. Check if the charger’s power cord is damaged.
Possible Cause 3: Dirty Contacts. Clean the metal contacts on both the battery and the charger. Use a dry cloth. Ensure there’s no debris blocking the connection.
Possible Cause 4: Battery or Charger Failure. If you’ve tried everything else, the battery or charger might be faulty. If you have another compatible battery, try charging that one. If it charges, your original battery is likely the issue. If another battery also doesn’t charge, the charger might be broken.
Problem: Charger Lights Blinking or Showing an Error
Possible Cause 1: Overheating. The battery or charger might be too hot. Remove the battery from the charger. Let them both cool down for at least 30 minutes. Then try again.
Possible Cause 2: Battery Fault. The blinking lights could indicate a problem with the battery itself. This might be due to age, damage, or internal issues. Check the manual for specific error codes.
Possible Cause 3: Wrong Battery Type. Make sure you are using a battery that is designed for your Hyper Tough charger. Using an incompatible battery can cause error signals.
Possible Cause 4: Charger Fault. In rare cases, the charger itself might be malfunctioning. If multiple batteries show the same error, the charger is likely the culprit.
Problem: Battery Charges Very Slowly or Doesn’t Hold a Charge
Possible Cause 1: Battery Age. Batteries have a lifespan. Over time, their capacity decreases. If your battery is several years old and used frequently, it might just be worn out. It won’t hold a charge like it used to.
Possible Cause 2: Deep Discharge. If the battery was completely drained and left that way for a long time, its performance might be affected.
Possible Cause 3: Internal Damage. Internal cells within the battery might be damaged. This reduces its ability to accept and hold a charge. This is often not repairable.
When to Call for Help
If you’ve tried these basic troubleshooting steps and your Hyper Tough battery still won’t charge or work correctly, it’s time to seek further assistance. Contact Hyper Tough customer support. They can provide specific advice for your model. They can also arrange for repairs or replacements if your equipment is under warranty.
What This Means for Your DIY Projects
Understanding how to charge your Hyper Tough drill battery is more than just a technicality. It directly impacts your ability to get projects done. Imagine this: you’re halfway through hanging shelves. Your drill dies. You reach for your spare, but it’s also dead. Now your project is stalled. This is why proper charging matters.
A well-charged battery means reliable power. It means you can complete tasks without interruption. For a DIYer, this saves time and frustration. It allows you to focus on the building, not the battery. For a professional, downtime costs money. Having batteries that are always ready keeps the job moving.
Furthermore, taking care of your batteries means saving money in the long run. Batteries are a significant part of the cost of a cordless tool. By following these charging and maintenance tips, you extend their life. You delay the need to buy expensive replacements. This is a smart investment in your tools and your projects.
It also contributes to a safer workspace. Knowing how to handle batteries correctly reduces risks. You’re less likely to encounter overheating or other hazards. This peace of mind is invaluable when you’re working.
Frequently Asked Questions About Charging Hyper Tough Drill Batteries
How long does it typically take to charge a Hyper Tough drill battery?
Charge times vary depending on the battery’s capacity (Ah rating) and the charger’s power output. A common range is 1 to 3 hours for a full charge. Always check your specific charger and battery manual for estimates.
Can I use a charger from a different brand with my Hyper Tough battery?
No, it is strongly advised against. Always use the charger that came with your Hyper Tough drill or an official Hyper Tough replacement. Using a different brand’s charger can damage the battery or pose a safety risk.
Is it bad to leave the battery on the charger overnight?
Modern chargers have safeguards to prevent overcharging and will stop charging once full. However, it’s generally best practice to remove the battery once it’s fully charged. Leaving it on continuously might slightly reduce its long-term lifespan.
What do the different colored lights on my Hyper Tough charger mean?
The meaning of lights varies by model. Typically, a solid red or blinking red light indicates charging, while a solid green or another color light signifies a full charge. An amber or flashing light might indicate an error or overheating. Consult your charger’s manual for specific light codes.
My Hyper Tough battery won’t hold a charge. What could be wrong?
This usually means the battery is old and has reached the end of its life cycle, or it has internal damage. If the battery is relatively new, check for damaged contacts or try a different charger to rule out a charger issue. If it’s still not holding a charge, it likely needs to be replaced.
Can I charge my Hyper Tough battery in cold weather?
Charging lithium-ion batteries in very cold temperatures (below freezing) can permanently damage them. It’s best to let the battery warm up to room temperature (around 65-75°F or 18-24°C) before attempting to charge it.
Conclusion
Keeping your Hyper Tough drill ready for action comes down to caring for its battery. By following these simple steps, you ensure a safe and effective charge every time. Remember to use the right charger, mind the temperatures, and keep things clean. This attention to detail will pay off. Your battery will last longer. Your drill will perform better. You’ll get more done, with less worry. Happy building!