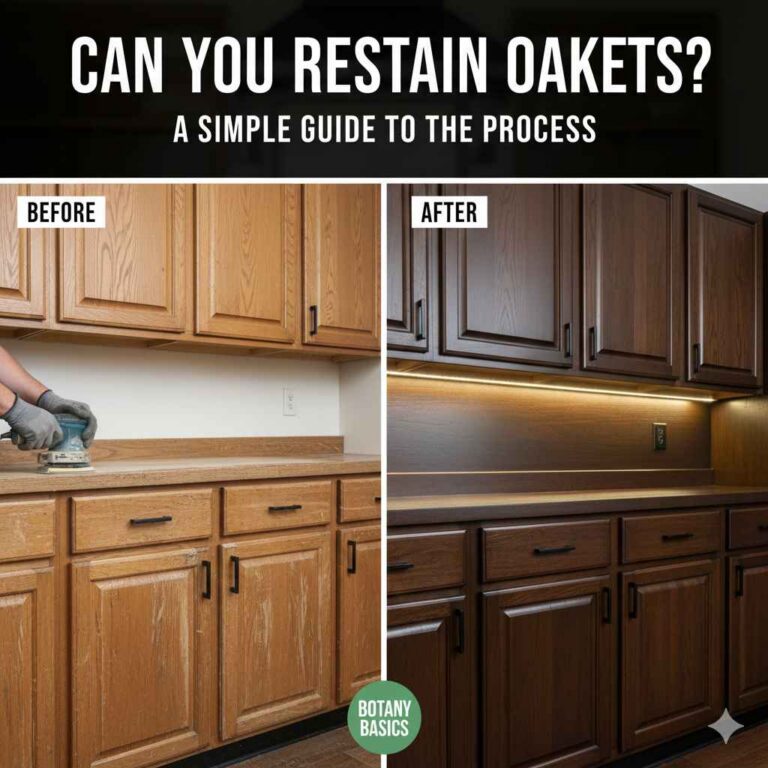
How To Clean Oak Kitchen Cabinets Without Stripping Finish
Oak kitchen cabinets are a beautiful choice. They bring warmth and style to any home. But, like all kitchen surfaces, they can get dirty.
Grease splatters, food spills, and everyday dust can build up. You want to clean them well. You also want to protect their lovely finish.
This can feel like a tricky balance. Many cleaning products are too harsh. They can damage the cabinet’s protective coating.
This means you might end up with faded spots or a dull appearance. It’s frustrating when you just want clean, shiny cabinets. This guide will show you safe, effective ways to clean your oak cabinets.
You will learn how to keep them looking great for years. We will focus on methods that clean thoroughly without harming the finish.
Regular, gentle cleaning is key for oak kitchen cabinets. Use mild solutions like dish soap and water or vinegar and water. Always wipe with a soft cloth and dry thoroughly.
Avoid abrasive cleaners or harsh chemicals that can strip the finish. Test any cleaner in an inconspicuous spot first.
Understanding Oak Cabinets and Their Finishes
Oak is a hardwood. It’s known for its strength and beautiful grain patterns. This makes it a popular choice for cabinets.
But oak is also a porous wood. This means it can absorb liquids. The finish on your oak cabinets is very important.
It acts as a barrier. This barrier protects the wood from moisture and stains. It also gives the cabinets their shine and color.
Common finishes include polyurethane, lacquer, and varnish. These finishes can be damaged by certain cleaning agents. Knowing your cabinet’s finish helps you choose the right cleaning method.
Many oak cabinets have a semi-gloss or satin finish. This type of finish is durable but not invincible. It can be scratched by rough materials.
It can also be dulled by strong solvents or too much heat. The grain of oak can also trap dirt. This means you often need to wipe with the grain.
This helps to lift dirt from the natural lines of the wood. If you’re not sure about your cabinet’s finish, a good rule is to start with the mildest cleaner possible. This is always the safest approach.
It prevents accidental damage before you even see a problem.
Why Gentle Cleaning is Crucial for Oak
Harsh cleaners can strip the finish from your oak cabinets. This is a common mistake. Think of the finish like a protective skin for your cabinets.
When this skin is gone, the bare wood is exposed. This makes it vulnerable. It can stain more easily.
It can also dry out and crack over time. Ammonia-based cleaners, for example, can break down the finish. So can bleach or abrasive powders.
Even strong degreasers not made for wood finishes can cause harm. You might see dull patches. Or worse, the finish might start to peel.
This is why understanding what’s safe is so important.
The goal is to remove dirt and grease. You want to do this without compromising the cabinet’s look and feel. Gentle methods preserve the integrity of the finish.
This means your cabinets will look better for longer. It also means you avoid costly refinishing jobs down the line. Most everyday kitchen grime can be handled with simple, safe solutions.
It’s about using the right tool for the job. And for oak cabinets, that tool is usually something mild and well-tested.
My Own Kitchen Cabinet Mishap
I remember one evening, quite late. I was cleaning my kitchen after a big family dinner. The counters were a mess.
The sink was full. I decided to tackle the cabinets next. I saw a bottle of all-purpose cleaner under the sink.
It smelled fresh and promised to cut through grease. I sprayed it liberally on my oak cabinet doors. I wiped them down with a paper towel.
At first, they looked clean. But the next morning, I noticed something wrong. A few spots looked dull.
One door had a faint white mark where I had sprayed the most. Panic set in. I had just started to strip the finish.
It was a hard lesson learned. I spent the next few days researching gentle cleaning methods. I felt terrible that I had hurt my beautiful cabinets.
That experience made me realize how important it is to know what you’re using. It’s not just about making things look clean. It’s about caring for the materials.
Since then, I’ve become an expert in gentle cabinet care. I learned that a little patience and the right supplies go a long way. It saved me from a much bigger problem.
Now, I always test cleaners first. And I stick to what I know works safely for oak.
Cabinet Cleaning Myth vs. Reality
Myth: Stronger cleaners mean cleaner cabinets.
Reality: Harsh chemicals can damage the cabinet finish, leading to dullness or peeling. Gentle cleaners are usually enough and safer.
Myth: You need special, expensive cleaners for oak.
Reality: Many common household items are effective and safe for oak cabinets.
Myth: Wiping a spill immediately prevents all stains.
Reality: While prompt wiping helps, some liquids can still soak in and stain porous wood if the finish is compromised.
The Best Gentle Cleaning Solutions for Oak
There are several safe and effective cleaning solutions you can use. These are common items you probably already have at home. They get the job done without harming your cabinets.
Always start with the mildest option and work your way up if needed. But most of the time, mild is all you need.
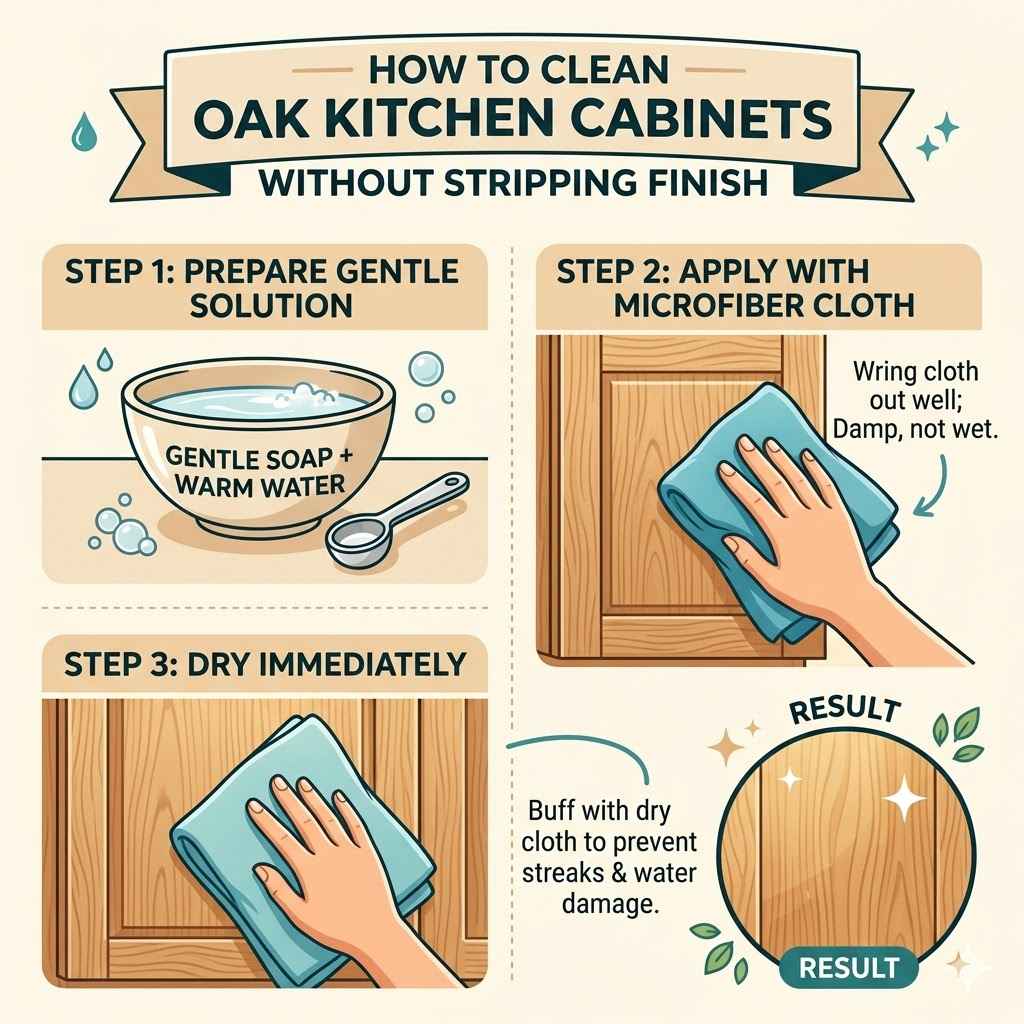
1. Mild Dish Soap and Warm Water: This is often the best first step. It’s excellent for cutting through everyday grease.
Mix a few drops of mild dish soap into a bowl of warm water. Dampen a soft cloth in the solution. Wring it out well.
You want the cloth damp, not dripping wet. Wipe down the cabinet surfaces. Pay attention to areas with grease buildup.
Then, use a separate clean, damp cloth to rinse away any soap residue. Finally, dry the cabinets completely with a clean, soft towel. This prevents water spots.
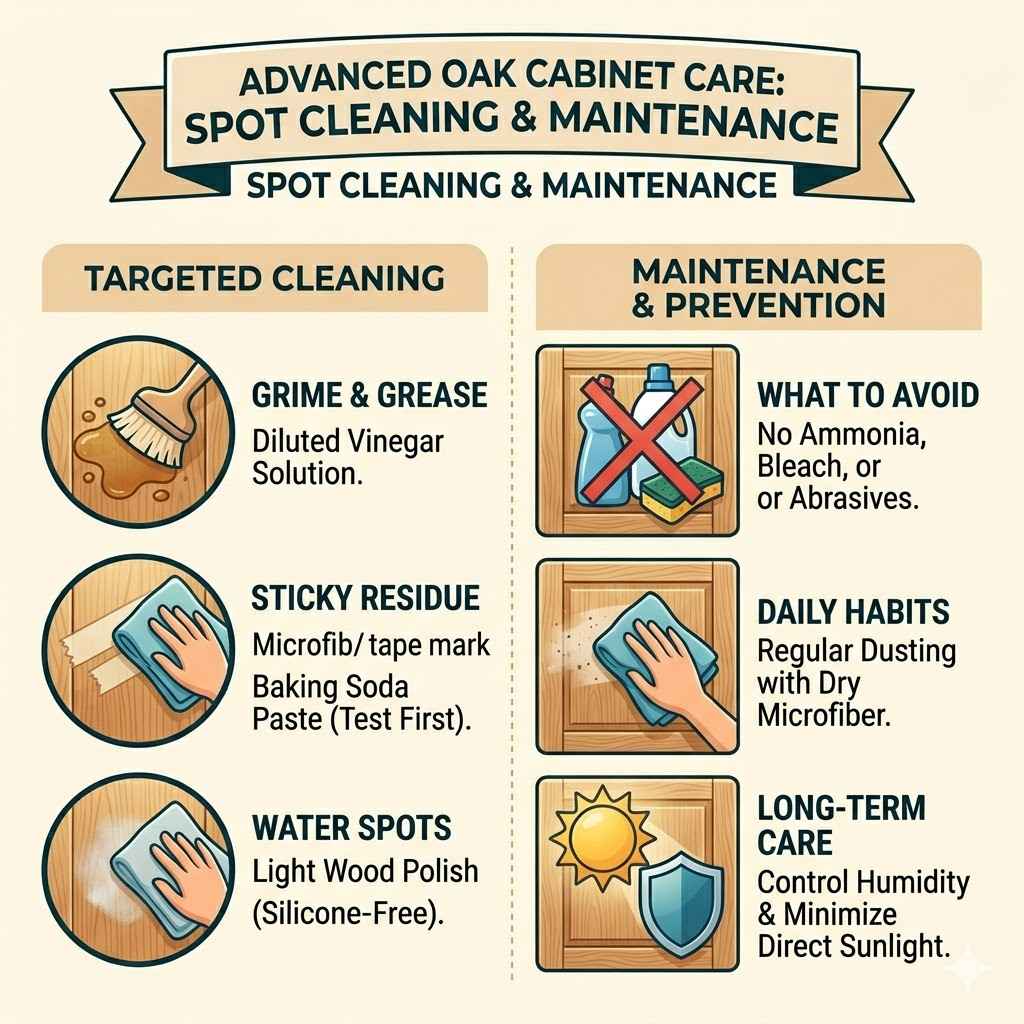
2. White Vinegar and Water Solution: Vinegar is a natural degreaser. It’s also a mild disinfectant.
Mix equal parts white vinegar and water in a spray bottle. Lightly spray this mixture onto a soft cloth. Again, make sure the cloth is just damp.
Wipe the cabinets. Vinegar can have a strong smell. But it dissipates quickly.
This solution is great for tougher grease spots or general cleaning. Always rinse with a damp cloth afterward. And always dry thoroughly.
Some people worry about the acidity of vinegar. However, when diluted and used quickly, it is generally safe for most modern cabinet finishes. If you have a very old or delicate finish, test it first.
3. Specialized Wood Cabinet Cleaners: If you prefer a product made specifically for cabinets, choose wisely. Look for cleaners labeled “safe for finished wood” or “for kitchen cabinets.” Read the labels carefully.
Avoid products with harsh chemicals like ammonia or bleach. Many reputable brands offer gentle wood cleaners. These can be very effective.
They are often formulated to clean and sometimes even add a bit of shine. Always follow the product instructions. And test in an inconspicuous area.
4. Baking Soda Paste (for tough spots): For stubborn, stuck-on grime or minor marks, a baking soda paste can help. Mix baking soda with a little water to form a thick paste.
Apply this paste gently to the spot with a soft cloth. Do not scrub hard. Let it sit for a minute or two.
Then, wipe it away with a damp cloth. Rinse thoroughly and dry. Use this method sparingly and with extreme caution.
Baking soda is mildly abrasive. Overuse can dull the finish. It’s best for very localized, tough spots.
How to Clean Oak Kitchen Cabinets: Step-by-Step
Cleaning your oak cabinets doesn’t have to be complicated. Following these simple steps will help you achieve clean, beautiful cabinets. Remember, gentle is the key word here.
Patience will give you the best results.
Step 1: Clear the Area: Remove everything from the cabinet doors and drawers you plan to clean. This includes knobs, handles, and any decorative items. This gives you full access.
It also prevents items from getting wet or dirty.
Step 2: Dust First: Use a dry, soft microfiber cloth to dust all cabinet surfaces. This removes loose dirt and debris. If you skip this step, dust can turn into mud when you add liquid.
Wipe in the direction of the wood grain. This is important for oak’s natural look.
Step 3: Prepare Your Cleaning Solution: Choose your mild cleaning solution. A good starting point is a few drops of dish soap in warm water. Or, use a diluted white vinegar and water mix.
Have a separate bowl of clean water for rinsing. And a soft, dry towel for drying.
Step 4: Dampen Your Cloth: Dip a clean, soft cloth into your cleaning solution. Wring it out thoroughly. The cloth should be damp, not wet.
Excess water can damage wood. It can seep into seams and cause swelling or warping.
Step 5: Wipe Down Cabinets: Gently wipe down the cabinet doors and drawer fronts. Work in small sections. Follow the direction of the wood grain.
For greasy areas, you might need to wipe a few times. Don’t scrub forcefully. Apply steady, gentle pressure.
This method is usually enough to lift most grime.
Step 6: Rinse Thoroughly: Use a separate, clean cloth dampened with plain water. Wipe down the cabinets again. This removes any soap or vinegar residue.
Residue can attract more dirt. Or it can dull the finish over time. Make sure this cloth is also well wrung out.
Step 7: Dry Immediately: This is a critical step. Use a clean, soft, dry towel to wipe the cabinets dry. Buff them gently.
This prevents water spots. It also protects the wood from moisture. Ensure all surfaces are completely dry before you put anything back.
Step 8: Clean Hardware: While you’re at it, clean your cabinet knobs and pulls. Use a solution appropriate for their material (e.g., brass cleaner for brass, soap and water for stainless steel). Dry them thoroughly before reattaching.
Quick Cabinet Cleaning Checklist
- Clear cabinets
- Dust surfaces
- Mix mild solution
- Dampen, don’t soak cloth
- Wipe with grain
- Rinse cloth
- Dry thoroughly
- Clean hardware
Dealing with Grease Buildup
Kitchens are notorious for grease. Cooking, especially frying or sautéing, releases grease particles into the air. These particles settle on every surface, including your cabinets.
They can create a sticky, dull film. This film is not just unsightly; it can attract more dirt and dust. It makes cleaning more challenging.
Regular cleaning helps prevent major buildup. But sometimes, you’ll encounter stubborn grease.
For light grease, the mild dish soap and warm water solution often does the trick. The soap works to break down the grease. You might need to go over the area a couple of times.
If the grease is heavy, the diluted white vinegar solution can be more effective. Vinegar’s acidity helps to cut through the stickiness. For very stubborn spots, you might consider a commercial wood cabinet cleaner specifically designed for grease.
Always follow the product instructions. And remember to test it on a hidden area first. Never use harsh chemicals like oven cleaner or ammonia.
These will damage the finish.
After cleaning grease, it’s always a good idea to give the area a final wipe with a clean, damp cloth. This ensures all the degreasing agent is removed. Then, dry the cabinets completely.
A final buff with a dry microfiber cloth can restore shine and remove any streaks. Consistent, gentle cleaning is the best defense against heavy grease buildup. It’s easier to maintain than to remove years of accumulation.
Grease Removal Tips
- Dish Soap Method: A few drops of mild dish soap in warm water. Wipe, rinse, and dry.
- Vinegar Power: Equal parts white vinegar and water. Spray on cloth, wipe, rinse, and dry.
- Commercial Cleaners: Choose products labeled for wood cabinets and grease. Test first.
- Gentle Rubbing: Use soft cloths. Avoid scrubbing vigorously.
- Wipe and Dry: Always rinse and dry completely to prevent residue and moisture damage.
Tackling Stains and Scuffs on Oak
Accidents happen. A spill can leave a mark. A misplaced item can cause a scuff.
Oak cabinets, especially lighter shades, can show these imperfections. The key is to address them promptly and gently. For most fresh spills, wiping them up immediately with a damp cloth is enough.
If a stain has set in, it can be trickier.
For water spots or light rings, sometimes just wiping with a dry cloth can help. If the mark persists, try a very slightly damp cloth. For minor scuffs, you might try a pencil eraser.
Gently rub the eraser over the scuff mark. Be careful not to press too hard. For tougher stains, like food dyes or darker marks, you can try the baking soda paste method mentioned earlier.
Remember to use it sparingly and with a light touch. Always test any method on an unseen area first.
If you have a deep scratch, that’s a different issue. Most cleaning methods won’t fix scratches. You might need furniture repair kits or professional help.
For water stains that have penetrated the finish, it can be very difficult to remove without professional refinishing. This highlights the importance of the protective finish. Keeping your finish in good condition through gentle cleaning helps prevent these deeper issues.
Think of stain removal as a last resort for stubborn spots, not a primary cleaning method.
Cleaning Different Types of Oak Finishes
Oak cabinets can have various finishes. The most common are:
- Polyurethane: This is a durable, clear finish. It’s common on modern cabinets. It provides good protection against moisture and wear. Most gentle cleaning methods are safe for polyurethane.
- Lacquer: This finish dries quickly and can provide a smooth, glossy look. It can be more sensitive to chemicals and heat than polyurethane. Use caution with strong solvents.
- Varnish: Similar to polyurethane, varnish offers good protection. It can be oil-based or water-based. The cleaning approach is generally the same as for polyurethane.
- Oil Finishes/Natural Oils: Some older or specialty oak cabinets might have an oil finish. These finishes penetrate the wood rather than sitting on top. They offer a more natural look. They require specific wood oil products for cleaning and re-oiling. If you have this type, consult a specialist or use products designed for oiled wood.
For most standard finishes (polyurethane, lacquer, varnish), the methods described here – mild dish soap, diluted vinegar, and specialized wood cleaners – are safe and effective. The biggest risk is using something too harsh that strips the finish. If you are unsure of your cabinet’s finish, always start with the mildest cleaner (dish soap and water) and test in an inconspicuous spot first.
This is the best way to protect your investment.
Finish Sensitivity Guide (General)
Most Tolerant: Polyurethane, Modern Varnishes
Moderate Care: Lacquer
Special Care Needed: Oil Finishes, Wax Finishes
Always Test First: Unknown or older finishes.
Real-World Scenarios and What to Do
Let’s look at some common kitchen scenarios involving oak cabinets and how to handle them.
Scenario 1: Sticky Drawer Glides. You pull out a drawer, and it sticks. The glides might have accumulated dust and grease. Sometimes, cleaning the visible parts of the glide helps.
But if the sticking persists, it might need lubrication. A dry lubricant like graphite powder or a silicone spray can help. For the wood around the drawer, a damp cloth with mild soap is usually enough.
Ensure you dry the wood well afterward.
Scenario 2: Smudges Near the Stove. The cabinets around your stove are often the greasiest. This is due to cooking fumes. You might notice a film.
Use your vinegar and water solution. Or a dedicated wood cabinet degreaser. Spray it onto a cloth, not directly onto the cabinets.
Wipe gently. You might need to do this regularly. Cleaning these areas weekly can prevent heavy buildup.
This makes the job much easier each time.
Scenario 3: Fingerprints on Drawer Fronts. Little fingerprints are a common sight on kitchen cabinets. They are usually easy to remove. A slightly damp microfiber cloth is often all you need.
Wipe the area. Then dry it with a clean part of the cloth or a second dry cloth. This prevents streaks.
For older smudges, use the mild dish soap solution. Then rinse and dry.
Scenario 4: Water Rings from Cups. Sometimes, a wet cup left on a cabinet can leave a faint ring. This is often just surface moisture. Try drying it thoroughly with a soft cloth.
If it’s a bit more stubborn, a very, very slightly damp cloth might help lift it. Be sure to dry it completely. If the ring looks like it has penetrated the finish, it may require professional attention.
What This Means for Your Cabinets
Understanding how to clean your oak cabinets means you can maintain their beauty. It means avoiding damage that costs time and money to fix. It also means your kitchen will look cleaner and feel more inviting.
When cleaning is easy and effective, you’re more likely to do it regularly. This keeps your cabinets in top shape.
When it’s normal: A light dusting of everyday grime is normal. Small, occasional smudges are also normal. A bit of grease near the stove is expected.
These are all signs of a well-used, loved kitchen.
When to worry: You should worry if you see significant dulling of the finish. Peeling or flaking finish is a clear sign of damage. Deep scratches or dents require attention.
If a stain doesn’t come out with gentle methods, it might be a sign the finish is compromised.
Simple checks: Regularly run your hand over the cabinets. Do they feel sticky? Do they feel overly dry or rough?
Visually inspect them for changes in color or sheen. A quick check can catch problems early. Early detection makes fixing issues much simpler.
Quick Tips for Cabinet Maintenance
Beyond cleaning, a few simple habits can keep your oak cabinets looking great:
- Wipe Spills Immediately: Don’t let spills sit. A quick wipe can prevent stains.
- Avoid Harsh Chemicals: Never use abrasive cleaners, bleach, or ammonia. Stick to mild solutions.
- Use the Right Cloths: Always use soft microfiber cloths. Avoid paper towels for wiping wet surfaces, as they can break down.
- Don’t Over-Wet: Damp, not wet, is the rule. Excess moisture is the enemy of wood finishes.
- Clean Hardware Regularly: This keeps the whole cabinet looking fresh.
- Maintain a Consistent Schedule: A quick wipe-down weekly can prevent major cleaning needs.
- Consider Protective Mats: For areas prone to spills or heavy use, consider a small mat.
Your Cabinet Care Action Plan
Daily: Quick wipe of high-touch areas (around handles).
Weekly: Dust all cabinets. Spot clean any visible smudges or grease.
Monthly: Deeper clean with mild soap and water or diluted vinegar for any buildup.
As Needed: Address specific stains or scuffs with gentle methods.
Frequent Questions About Cleaning Oak Cabinets
Can I use furniture polish on my oak cabinets?
Furniture polish can be effective for adding shine and a protective layer. However, choose a polish specifically for wood furniture. Avoid aerosol polishes, which can contain silicones that build up over time.
Always test in an inconspicuous spot first. Some people prefer to avoid polishes altogether and rely on a good buffing with a dry cloth after cleaning.
How do I get water spots off my oak cabinets?
For fresh water spots, try wiping with a dry, soft cloth. If that doesn’t work, use a slightly damp cloth and then dry immediately. If the spots are old or have damaged the finish, they can be difficult to remove without refinishing.
Avoid using harsh chemicals, as they can worsen the problem.
What if my cabinets have a matte finish?
Matte finishes can be more challenging. They show smudges and fingerprints easily. They also don’t hide imperfections as well as glossier finishes.
Use the gentlest methods. Always wipe with the grain. And dry very thoroughly to avoid creating streaks or a shiny spot where you cleaned.
A very light dusting with a dry microfiber cloth is often best.
Can I use a magic eraser on oak cabinets?
Magic Erasers are abrasive. While they can remove tough marks, they can also strip the finish from oak cabinets. It’s best to avoid them.
If you have a very stubborn mark, try the baking soda paste method first. If you decide to use a Magic Eraser, use it very gently and only on the affected spot, testing in an unseen area first. Be prepared for potential finish damage.
How often should I deep clean my oak cabinets?
A deep clean is usually only needed every few months, or as needed. This depends on your cooking habits and kitchen use. If you cook a lot of fried foods, you might need to clean more often.
For most households, a weekly wipe-down and a monthly gentle wash are sufficient to prevent major buildup.
My cabinets feel rough. What can I do?
Roughness often indicates the finish is dry or damaged. If it’s minor, a good cleaning followed by a light buffing with a dry microfiber cloth might help. For more significant roughness, you might need to consider a wood conditioner or reapplication of a cabinet finish.
Always test any wood conditioner in an inconspicuous area first.
Conclusion and Final Thoughts
Keeping your oak kitchen cabinets clean and beautiful is achievable. It’s all about understanding their needs. Gentle, consistent care is far more effective than harsh scrubbing.
By using mild cleaning solutions and soft cloths, you protect the finish. This ensures your cabinets remain a focal point of your kitchen for years to come. Remember to test any new cleaner in a hidden spot.
And always dry thoroughly after cleaning. Enjoy your sparkling oak cabinets!