How to Cut a Tetrahedron From Wood: The Exact Angles
A wooden tetrahedron is four equilateral triangles, but the saw setting is not 60 degrees. Every edge needs a 54.74 degree blade tilt so that neighboring faces meet at the true dihedral angle of 70.53 degrees. This guide gives the exact angles, an edge-length table, a step-by-step cutting order, and the safety rules that matter most when the pieces are small and the bevels are steep.
The Angles You Need for a Tetrahedron
Best Bevel Angle Checker
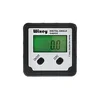 |
Wixey Digital Angle Gauge for Table Saw and Miter Saw, Magnetic ($33.99) A magnetic digital gauge that reads to 0.1 degrees, so you can set the odd 54.74 degree blade tilt this project needs instead of trusting a stock tilt scale.
|
A regular tetrahedron has four equilateral faces, six equal edges, and four corners. Two different angles matter in the shop. The face angle is 60 degrees, because every face is an equilateral triangle. The dihedral angle is the angle between two faces where they meet, and it is 70.53 degrees, from arccos(1/3). The blade bevel that produces that joint is half of what is left over: (180 minus 70.53) divided by 2 equals 54.74 degrees.
| Angle | Value | Where you use it |
|---|---|---|
| Face corner angle | 60.00 degrees | Layout of each triangle; a 30 degree miter setting cuts a 60 degree corner |
| Dihedral angle (between faces) | 70.53 degrees (arccos 1/3) | What the glued joint must measure |
| Blade bevel for each edge | 54.74 degrees from vertical | Saw tilt, also equal to arctan of the square root of 2 |
| Same bevel measured from the table | 35.26 degrees | Useful for jigs and cradles |
| Wrong answer: 45 degree bevel | Faces meet at 90 degrees | 19.47 degrees too open, a wide gap on every seam |
Check the math yourself with the corner-of-a-cube trick. A tetrahedron fits inside a cube by joining four of the eight cube corners, and its face normals point along (1,1,1), (1,-1,-1), (-1,1,-1) and (-1,-1,1). The dot product of any two of those, divided by 3, is minus one third, so the outward normals are 109.47 degrees apart and the faces meet at 180 minus 109.47, which is 70.53 degrees.
Myth Check: 60 Degrees Is Not the Cut Angle
The most common mistake is to see four equilateral triangles and set the saw to 30 or 60 degrees. That 60 is the corner of the triangle, drawn flat on the board. It says nothing about how the edges have to be beveled. If each face edge is beveled by an angle B, two faces meet at 180 minus 2B, so a 45 degree bevel gives a square 90 degree corner and a 30 degree bevel gives a 120 degree corner. Only B = 54.74 degrees gives 70.53.
Small errors add up too. If both faces at a seam are off by half a degree, the joint is a full degree wrong, which opens a gap of about 0.013 inch across 3/4 inch stock (0.75 times the tangent of 1 degree). That is already visible under a clear finish, and a tetrahedron has six seams that all have to close at once. Read the blade tilt on a 0.1 degree gauge rather than the saw’s built-in scale.
Edge Length, Stock Width, and How Thick Wood Shrinks the Inside
Because the edges are beveled, the outer triangle on the show face is bigger than the inner triangle on the back face. Each bevel moves the edge inward by the stock thickness times the square root of 2, so the inside edge is shorter than the outside edge by about 4.9 times the thickness. The table below is calculated for 3/4 inch stock, where the outside edge is the length measured on the show face.
| Outside edge | Triangle height (minimum strip width) | Inside edge, 3/4 in stock | Overall height of the finished shape |
|---|---|---|---|
| 4 in | 3.46 in | 0.33 in (almost closed) | 3.27 in |
| 6 in | 5.20 in | 2.33 in | 4.90 in |
| 8 in | 6.93 in | 4.33 in | 6.53 in |
| 10 in | 8.66 in | 6.33 in | 8.16 in |
| 12 in | 10.39 in | 8.33 in | 9.80 in |
The formulas: triangle height is 0.866 times the edge, overall height is 0.8165 times the edge, and inside edge equals outside edge minus 4.90 times the stock thickness. For half inch stock the reduction is 2.45 inches per side instead of 3.67. Run your own numbers before you buy wood.
Materials and Tools
- Wood: a stable hardwood such as poplar, maple, or cherry cuts a cleaner bevel and shows fewer chipped points than soft pine. Choose 1/2 to 3/4 inch stock, planed flat. If you want to compare stock types first, see our plywood vs solid wood guide.
- Saw: a table saw or a compound miter saw that can hold 54.74 degrees, or a cradle jig if yours cannot (see below).
- Angle gauge: a digital gauge that reads to 0.1 degree.
- Layout: a sharp pencil, a combination square, and a marking gauge.
- Glue-up: wood glue and painter’s tape or packing tape. Bar clamps do not help here.
- Safety: eye protection, hearing protection, a push stick, and a dust mask.
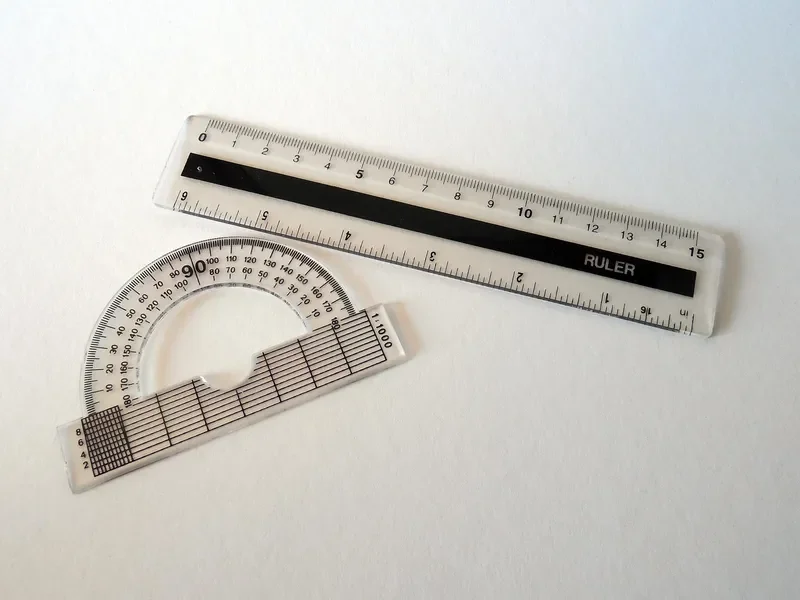
Our guide to the top-rated compound miter saws is a starting point for comparing models, and how to use a miter saw protractor shows how to confirm a saw’s bevel scale is honest.
Can Your Saw Actually Reach 54.74 Degrees?
This is the part most tutorials skip. A bevel of 54.74 degrees is steeper than a 45 degree stop, and many table saws and miter saws are marked only up to roughly 45 to 48 degrees of tilt. Check your own manual before you plan the project.
- Saw reaches 54.74 degrees: use the strip method below with the blade tilted directly, and confirm the tilt with a digital gauge.
- Saw stops short of it: hold each board in a tilted cradle. With the blade vertical, the board’s face must lean 54.74 degrees from the table, which is 35.26 degrees from vertical, so the vertical cut plane lands 35.26 degrees off the face. Build the cradle, set it with your gauge, and prove it on scrap.
Whichever route you take, do not force a 45 degree setting and hope the gap is small. It will not be.
Step-by-Step: Cutting Four Triangles From a Strip
The safest way to make four small triangles is to cut them from one long strip, not from four separate small blanks. A long strip keeps your hands far from the blade, and the triangles come out identical.
- Pick the outside edge. Use the table above to choose an edge length and check that the triangle height fits your stock width, with a little extra for kerf.
- Mill the strip. Plane it flat and rip it to the triangle height. Cut it long enough for all four triangles, plus a few extra inches for test pieces.
- Set the blade to 54.74 degrees. Tilt it with the saw’s scale, then confirm with the digital gauge. Zero the gauge on the table first.
- Bevel the long edges. Rip one edge with the wide face up, then spin the board end for end and rip the other edge with the same setting. Both edges should leave the sharp point on the show face, so the show face is the wide face of the strip.
- Cut the slanted ends. Each triangle needs slanted crosscuts that are 60 degrees to the base. Set the miter to 30 degrees and keep the bevel at 54.74 degrees, and flip the strip between cuts so the triangles alternate up and down and share the strip.
- Make two test triangles first. Join two scrap triangles along an edge with tape and check that the joint looks like a wedge of about 70 degrees.
- Cut all four faces. Mark the show side of each face, and keep the offcuts, since they are useful for testing the glue-up setup.
If you would rather learn the flat-triangle layout before tilting a blade, our guide to cutting a triangle in wood is a good warm-up.
Cutting Small Triangles Safely
Small pieces are where saw injuries happen, and a steep bevel makes them worse because a small piece can be kicked back or pinched between the blade and the fence. Follow these habits every time.
- Never hold a small triangle in your fingers while it goes past the blade. Cut from the long strip and keep the free piece on the outfeed side.
- Use a push stick or push block for the last few inches, and keep both hands outside the blade path. Our table saw push stick guide shows several designs.
- On a miter saw, clamp the strip. Never reach across the blade to steady the offcut, and wait for the blade to stop before lifting the saw head.
- With the blade tilted, know which way it leans and keep your body out of the line where a kicked-back piece would travel.
- Use a zero-clearance insert so the thin points of the triangles do not drop into the throat opening.
- Do not run a bevel setup you have not tested. Prove the setting on scrap with the guard in place.
Wear eye and hearing protection for every cut, and use dust extraction. Fine hardwood dust is a respiratory irritant.
The Solid Alternative: Cutting a Tetrahedron Out of a Cube
If you want a solid tetrahedron rather than a hollow shell, start with a cube. Joining four of the cube’s eight corners gives a regular tetrahedron whose edge is the cube’s side times the square root of 2. The four removed pieces are corner pyramids, and the tetrahedron that is left has exactly one third of the cube’s volume, so two thirds of your wood becomes waste. Each cut plane runs through three corners and is tilted 54.74 degrees from every cube face it touches, the same number as before.
| Cube side | Tetrahedron edge | Solid volume kept |
|---|---|---|
| 3 in | 4.24 in | 9.0 cubic in (one third of 27) |
| 4 in | 5.66 in | 21.3 cubic in (one third of 64) |
| 5 in | 7.07 in | 41.7 cubic in (one third of 125) |
The four corner cuts are tilted in two directions at once, so hold the cube in a cradle jig set with your angle gauge. Mark the three corner points on each cut face, connect them, and cut slightly outside the lines. Then plane or sand to the line with the piece supported.
Gluing and Assembly
A tetrahedron has no parallel faces, so bar clamps have nothing to grip. Use tape instead.
- Lay one triangle on the bench, show side down, with three more triangles butted against its edges to make a flat net.
- Run painter’s tape across all three seams on the outside faces. The tape becomes the hinge.
- Spread glue along every beveled edge with a small brush.
- Fold the three outer triangles up until their free edges meet at the top point.
- Add tape or a strap around the shape to hold it, and wipe off squeeze-out with a damp rag.
- Let the glue set overnight before you remove the tape.
Long-grain-to-long-grain joints hold best, but some of the slanted edges will be end grain, so use a slightly generous amount of glue. If a seam opens, fill it with a sliver of matching wood rather than filler.
Finishing
Sand before you assemble as far as you can, since the faces are much easier to reach flat. After glue-up, ease the six edges and four points lightly with a sanding block so the sharp points do not chip. Then apply oil or a clear coat, and keep finish out of the inside seams.
Tetrahedron Cutting FAQ
What angle do you cut to make a wooden tetrahedron?
Tilt the saw blade 54.74 degrees from vertical, which is the same as 35.26 degrees from the table, on every edge of every triangular face. That makes each pair of faces meet at the tetrahedron’s true dihedral angle of 70.53 degrees. The three corners of each face stay at 60 degrees.
Can I cut a tetrahedron with a 45 degree miter saw setting?
No. Two faces with 45 degree bevels meet at 90 degrees, which is 19.47 degrees too open for a tetrahedron. You would get a wide wedge-shaped gap along every seam, so a 45 degree stop will not work.
Why can’t my table saw or miter saw reach 54.74 degrees?
Many saws are marked only to about 45 to 48 degrees of tilt, so a 54.74 degree setting is out of range. Cut the edges with the workpiece held in a tilted cradle jig instead, set the cradle with an angle gauge, and check the result on scrap first.
What is the easiest way to glue a tetrahedron together?
Lay the four triangles out as a flat net with tape across the outside seams, put glue on the beveled edges, then fold the net closed and let the tape act as the hinge and the clamp. A tetrahedron has no parallel faces, so ordinary bar clamps have nothing to grip.
How thick should the wood be for a hollow wooden tetrahedron?
Three quarter inch stock is comfortable for edges of about 8 inches or more. On thick stock the inside triangle shrinks fast, by about 4.9 times the thickness per side, so a 4 inch edge in 3/4 inch wood leaves almost no cavity.
Bottom Line
Cut every face edge at a 54.74 degree blade tilt and every face corner at 60 degrees, and the four triangles close into a tetrahedron with 70.53 degree seams. If your saw cannot tilt that far, use a cradle jig rather than a 45 degree shortcut. Cut from a long strip, test on scrap, and tape the glue-up.
Sponsored / affiliate links. As an Amazon Associate I earn from qualifying purchases. I may earn additional commission from eligible campaigns.