How to Cut a Triangle in Wood: Exact Saw Angles by Type
To cut a triangle in wood, work out each corner angle first, because a miter saw scale reads from square: the setting is 90 minus the corner angle, so an equilateral triangle needs 30 degrees, not 60. A 45-45-90 triangle uses 45. This guide gives the setting for each triangle type, a zero-waste strip method, and a way to cut any triangle from three side lengths.
Tools for Cutting a Triangle in Wood
Best Triangle Layout Pick
 |
SWANSON Tool Co S0101 7 Inch Speed Square A rigid aluminum triangle with a 90 degree fence edge, a 45 degree mark and a degree scale, so you can scribe triangle layout lines and check a miter saw setting against your pencil line.
|
A miter saw is the easiest tool for triangles because the angle is set on a scale and every cut repeats. A table saw with a miter gauge or a crosscut sled (see our sled guide) does the same job on wider stock. A fine-tooth handsaw and a miter box also work for one-off pieces. Add a tape measure, a sharp pencil, clamps, eye and ear protection, and a piece of scrap the same thickness for test cuts.
A speed square or combination square marks your layout. For fractional angles a digital gauge is more accurate, and it is what we recommend for the steeper bevels in our wooden tetrahedron guide.
Why the Saw Setting Is Not the Corner Angle
The most common mistake is dialing the saw to the triangle’s corner angle. A miter saw scale measures how far the blade has swung away from a square cut. At 0 the blade is square to the fence, so a cut at setting S leaves a corner of 90 minus S on the piece when the straight edge sits against the fence. That is why an equilateral triangle, with 60 degree corners, needs a setting of 30. Our page on cutting a 60 degree angle on a miter saw covers saws that cannot reach their marked stops.
You almost never need a setting above 45 degrees, because a cut that makes an angle A with one edge of a rectangular blank makes 90 minus A with the perpendicular edge. Put whichever edge gives the smaller setting against the fence. If the setting you calculated is beyond your saw’s range, turn the blank a quarter turn and use 90 minus that number.
| Triangle type | Corner angles | Miter setting | Board width needed |
|---|---|---|---|
| Equilateral | 60, 60, 60 | 30 degrees for every cut | 0.866 x side length |
| Right isosceles (45-45-90) | 45, 45, 90 | 45 degrees | 0.5 x hypotenuse |
| 30-60-90 right triangle | 30, 60, 90 | 30 degrees, with the short edge against the fence | Short leg, which is 0.5 x hypotenuse (rectangle method below) |
| 3-4-5 right triangle | 36.87, 53.13, 90 | 53.13 and 36.87, or 36.87 and 53.13 from the square end | 2.4 x the unit (height above the 5 side) |
The 3-4-5 row is a good check on the math: a 3, 4 and 5 unit triangle has a 90 degree corner because 3 squared plus 4 squared equals 5 squared, and its two acute corners are 36.87 and 53.13 degrees. We use the same ratio to square large layouts in our guide to making a right triangle from wood with the 3-4-5 method.
The Zero-Waste Strip Method for Equilateral and Right Isosceles Triangles
Most guides mark one triangle on a wide board and cut around it, which wastes the corners. If you need several matching triangles, cut them from one straight strip instead. Every cut is a line across the strip at the same angle, so each cut becomes the edge of two neighbouring triangles and nothing is thrown away except the saw kerf.
The geometry is simple. On a strip of width w, cuts that lean at a base angle of 60 degrees give equilateral triangles with a side of 1.1547 times w. Cuts that lean at 45 degrees give right isosceles triangles with a hypotenuse of 2 times w and legs of 1.4142 times w. In both cases the triangle height equals the strip width. The table gives finished sizes for standard lumber widths.
| Strip width (actual) | Typical board | Equilateral side (60 degree lean) | Right isosceles legs (45 degree lean) | Right isosceles hypotenuse |
|---|---|---|---|---|
| 1-1/2 in | 1×2, or the narrow face of a 2×4 | 1.73 in | 2.12 in | 3.00 in |
| 2-1/2 in | 1×3 | 2.89 in | 3.54 in | 5.00 in |
| 3-1/2 in | 1×4, or the wide face of a 2×4 | 4.04 in | 4.95 in | 7.00 in |
| 5-1/2 in | 1×6 or 2×6 | 6.35 in | 7.78 in | 11.00 in |
| 7-1/4 in | 1×8 | 8.37 in | 10.25 in | 14.50 in |
How to cut the strip
- Prepare the strip: Rip or plane it to a constant width with two straight, parallel edges, and measure the width w in several places.
- Calculate the spacing: Multiply w by 1.1547 for equilateral triangles, or by 2 for right isosceles triangles. That is the distance between marks along one edge.
- Cut the first lean: Set the miter saw to 30 degrees for equilateral (45 for right isosceles) and cut a clean starting end. Mark the spacing from the long point of that cut along the same edge.
- Cut the parallel lines: Cut on the waste side of each mark with the same setting. This turns the strip into parallelograms; in the equilateral case each is a rhombus with 60 and 120 degree corners.
- Split each piece on the diagonal: Swing the saw to the same setting on the opposite side and cut each parallelogram from one obtuse corner to the other. Each cut yields two matching triangles.
- Test on scrap first: Cut one triangle and make six equilateral copies to lay around a point; they should close into a hexagon with no gap. If they do not, adjust the setting by a fraction of a degree.
The kerf of a full-kerf blade is about 1/8 inch, so each cut removes a little material. Mark every line and cut on its waste side, and expect finished triangles to run slightly smaller than the table. If pieces must match a template exactly, cut them oversize and trim.
How to Cut a 30-60-90 Triangle
A 30-60-90 triangle is half of an equilateral triangle, with sides in the ratio 1 to 1.732 to 2. The simplest way to cut one is from a rectangle. Square a blank to the short leg by 1.732 times the short leg; the diagonal of that rectangle creates a 30 degree corner and a 60 degree corner.
To keep the miter saw at a reachable setting, stand the rectangle with its short edge against the fence. The diagonal then makes a 60 degree angle with that edge, so the saw setting is 90 minus 60, or 30 degrees. For a 3-1/2 inch wide blank the long leg is 6.06 inches and the hypotenuse is 7 inches. Cut along the diagonal and you get two mirror-image triangles.
How to Cut Any Triangle When You Know the Three Sides
Many projects call for a triangle that is neither equilateral nor right-angled, such as a gusset, a shelf bracket or a tabletop section. If you know the three side lengths a, b and c, the law of cosines gives each angle: the cosine of the angle opposite side a equals (b squared plus c squared minus a squared) divided by 2bc. Use a calculator, or our wood triangle calculator for right triangles.
Worked example: a triangle with sides of 4, 5 and 6 inches. The angle opposite the 4 inch side is 41.41 degrees, the angle opposite the 5 inch side is 55.77 degrees, and the angle opposite the 6 inch side is 82.82 degrees. They total 180.00 degrees, which confirms the calculation. Lay the 6 inch side along the blank’s edge. The corners at its ends are 41.41 and 55.77 degrees, so the miter settings are 48.59 and 34.23 degrees from that edge, or 41.41 and 55.77 degrees if you reference the square end of the blank. Choose the option that stays inside your saw’s range.
| Side lengths | Angles, opposite each side in order | Sum |
|---|---|---|
| 3, 4, 5 | 36.87, 53.13, 90.00 | 180.00 |
| 4, 5, 6 | 41.41, 55.77, 82.82 | 180.00 |
| 5, 6, 7 | 44.42, 57.12, 78.46 | 180.00 |
| 6, 6, 6 | 60.00, 60.00, 60.00 | 180.00 |
Make sure the blank is wide enough: the height of the triangle above its longest side is twice its area divided by that side. For the 4, 5, 6 triangle that is about 3.31 inches, so a 3-1/2 inch board works with only 3/16 inch to spare. If the two shorter sides add up to less than the longest, the sides cannot form a triangle, and no saw setting will fix that.
Cutting Small Triangles Safely
Triangles create sharp offcuts and small pieces that are easy to lose control of near a spinning blade. Clamp the blank to the fence or table whenever the saw allows it, keep your hands clear of the blade path, and let the blade stop completely before lifting a piece. On a table saw, use a push block or a crosscut sled rather than a bare miter gauge for narrow pieces, and never let the offcut become trapped between the blade and the fence.
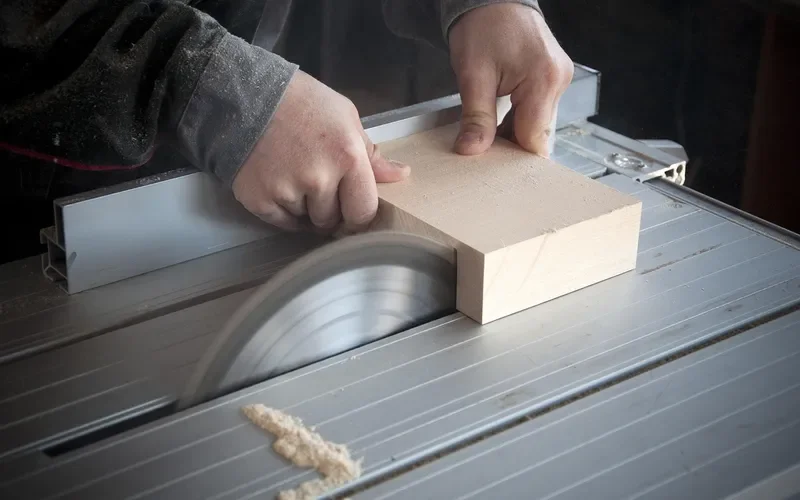
Wear safety glasses and hearing protection, and a dust mask when you are sanding or cutting MDF or plywood. For more on table saw setups for miter and bevel work, see how to cut angles on a table saw.
Fixing Gaps, Tearout and Uneven Sides
- Gaps where triangles meet: A gap along one side usually means the setting is off by a fraction of a degree. Check the saw against a reliable square or angle gauge, adjust, and recut a scrap piece.
- Sides of different length: If your equilateral triangles have uneven sides, the strip is not a constant width or the marks were measured from different edges. Always measure the spacing from the long point on the same edge.
- Splintered corners: Put masking tape over the line before you cut, use a sharp fine-tooth blade, and support the offcut, or use a zero-clearance insert on a table saw.
- Cuts that drift off the line: Push the blank into the fence with steady pressure, let the blade reach full speed, and lower the saw slowly through the piece.
For other angle setups, our miter saw angle chart lists common settings, and how to cut angles with a miter saw explains miter versus bevel cuts. If you plan to join triangles into a polygon, see cutting a hexagon out of wood.
Sanding, Test-Fitting and Finishing
Dry-fit the triangles before you glue or finish anything. Lay them on a flat surface and look for light between the edges. Sand each edge flat with a sanding block held against a flat surface rather than rounding it by hand, since a rounded edge opens a gap along the joint. Ease the sharp corners lightly, then apply the finish of your choice in thin coats and let each coat dry fully before recoating.
Going beyond flat shapes: our guide to cutting triangular wood strips covers long triangular sections cut along the length of a board, and the wooden tetrahedron guide shows how four triangles become a solid with a 54.74 degree bevel.
Frequently Asked Questions
What angle do I set the miter saw to for an equilateral triangle?
Set the miter saw to 30 degrees. Every corner of an equilateral triangle is 60 degrees, and the saw scale reads from square, so the setting is 90 minus 60. Cut with the blank’s straight edge against the fence, and mirror the setting for the opposite cut.
How do I cut a triangle from a board with no miter saw?
Mark the triangle on the blank with a square and a pencil, clamp the board, and saw each line with a fine-tooth handsaw, cutting on the waste side of the line. A miter box handles 45 degree cuts, and you can plane or sand each edge to the line afterward.
How wide does the board need to be?
The board must be at least as wide as the triangle’s height, measured from the longest side to the opposite corner. An equilateral triangle needs a board 0.866 times its side length. A 4 inch side needs about 3.46 inches, so a board 3-1/2 inches wide barely works.
How do I cut a triangle when I only know the three side lengths?
Use the law of cosines to turn the side lengths into angles: the cosine of an angle equals the sum of the squares of its two adjacent sides minus the square of the opposite side, all divided by twice the product of the adjacent sides. Then set each cut to 90 minus the angle, or to the angle itself if you reference the perpendicular edge.
Conclusion
To cut a triangle in wood accurately, calculate the corner angles first, convert them to saw settings with 90 minus the angle, and pick a blank at least as wide as the triangle is tall. Use the strip method when you need several matching triangles, and test on scrap before you cut good wood.
Sponsored / affiliate links. As an Amazon Associate I earn from qualifying purchases. I may earn additional commission from eligible campaigns.